For 1990-2009 cars only
Removal Procedure
- Remove the automatic transaxle assembly. Refer to Transmission Replacement.
- Remove the engine mounting bracket.
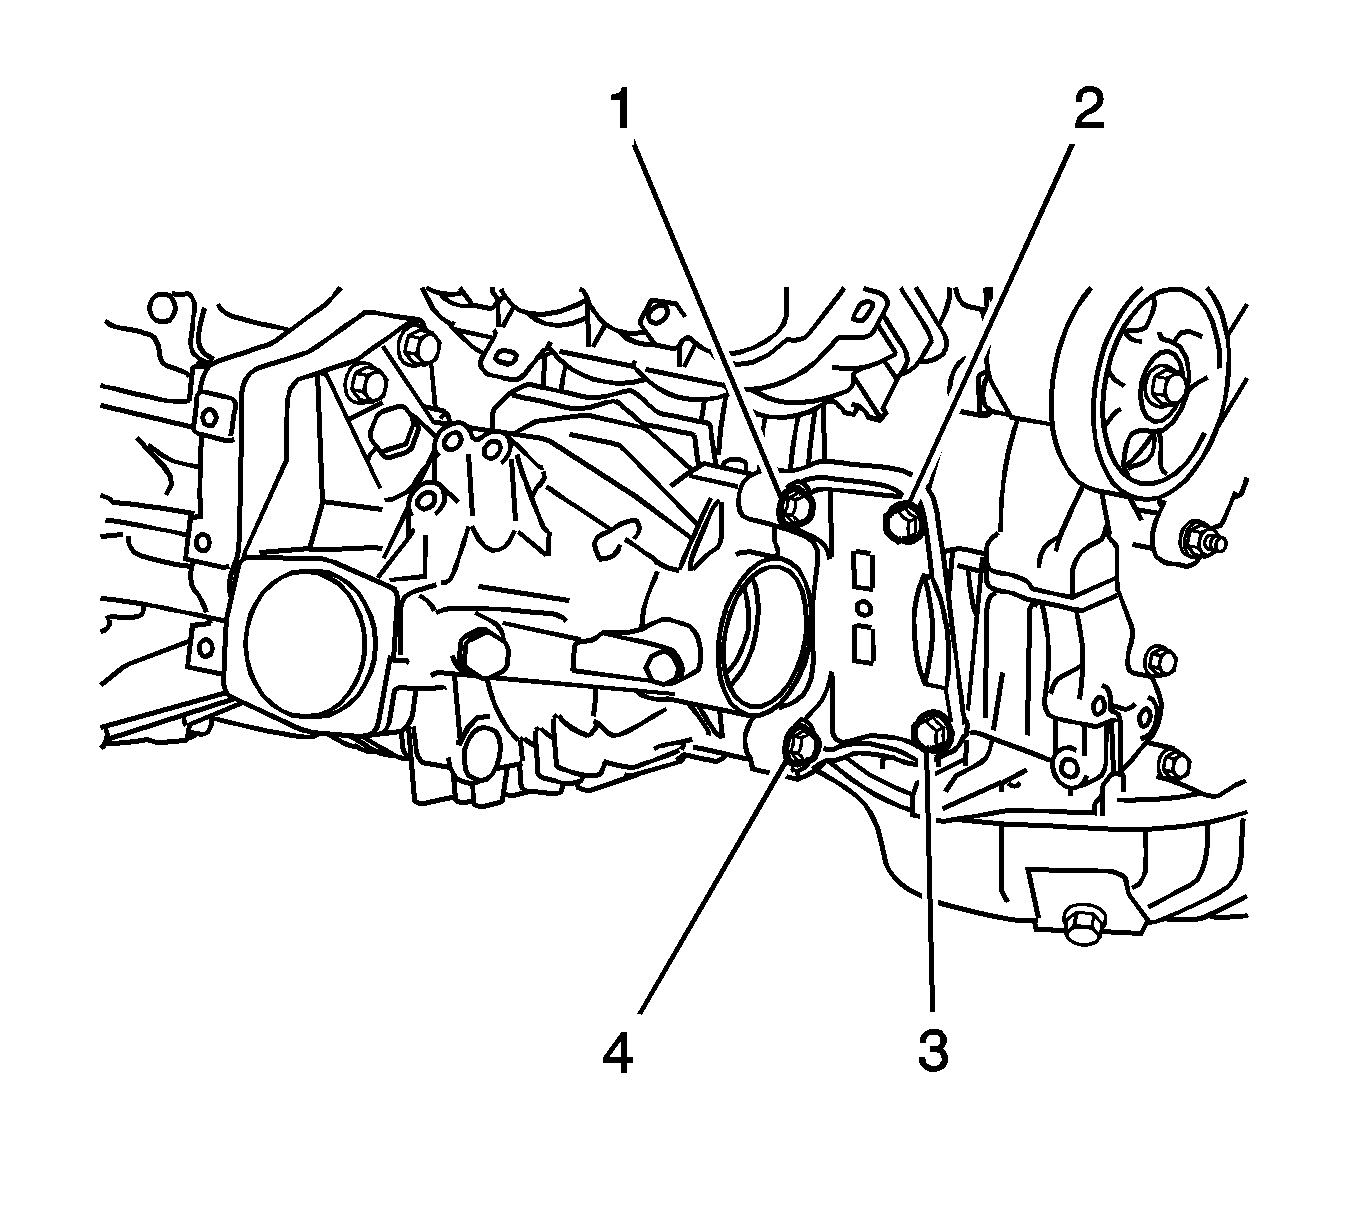
- Remove the bolts (1, 2, 3, 4) and the transfer stiffener plate.
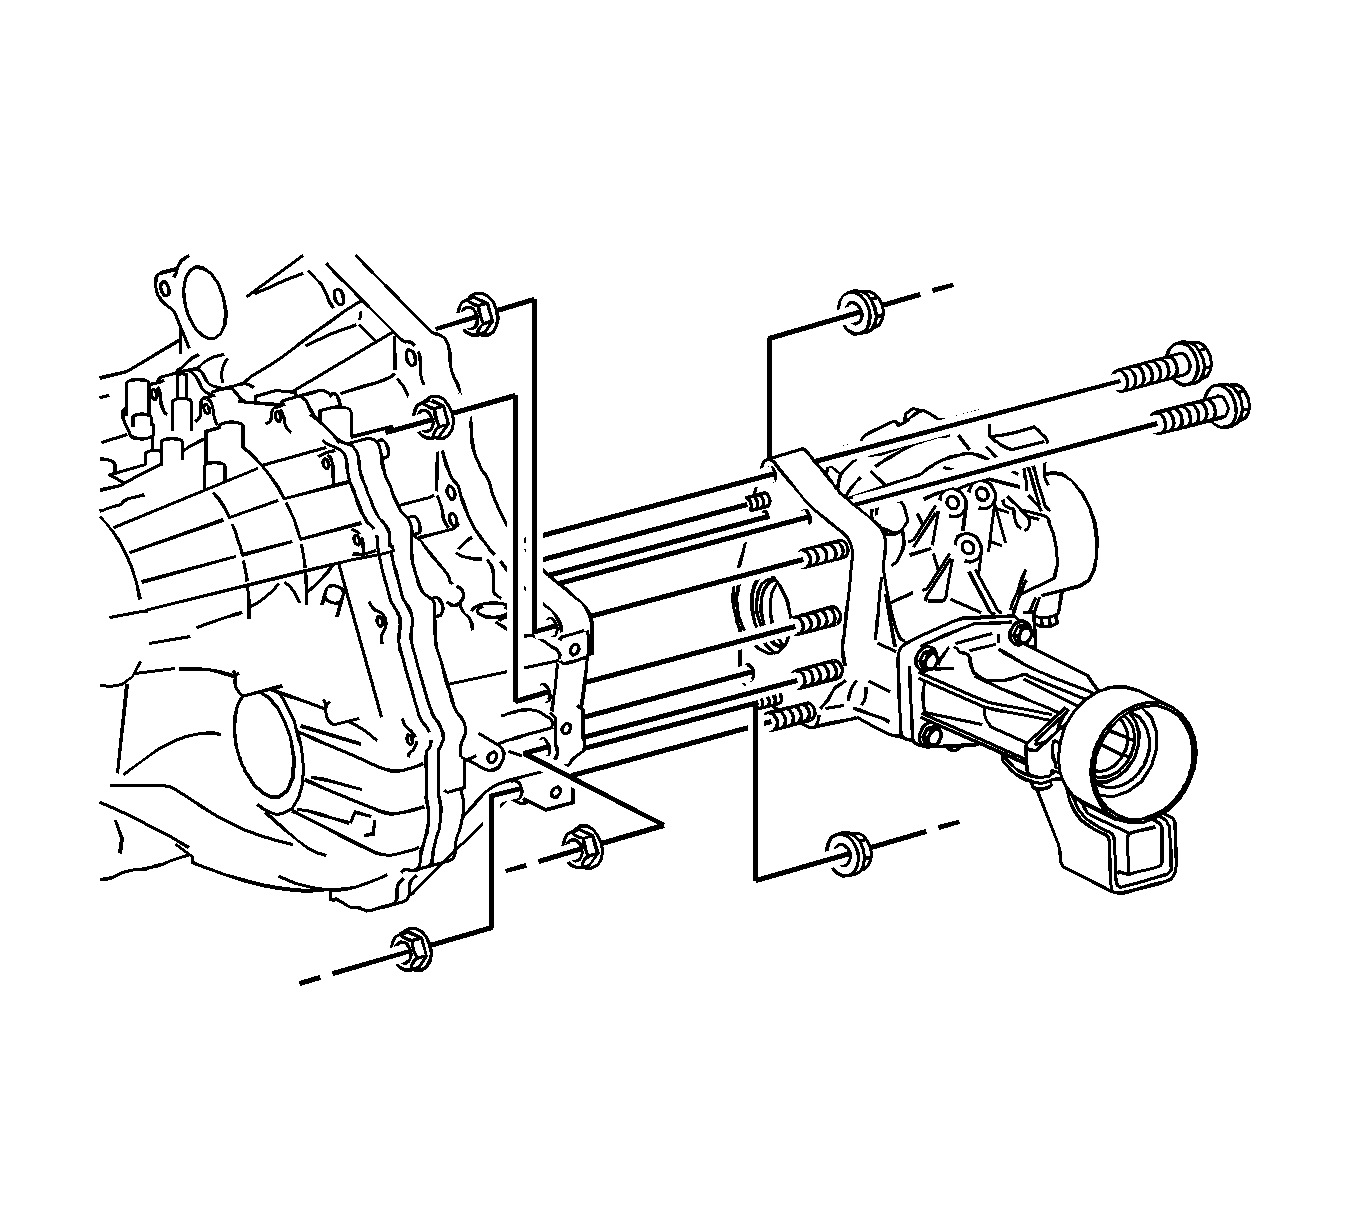
- Remove the bolts and nuts.
- Using a plastic hammer, remove the transfer assembly from the transaxle assembly.


Note:
• Remove the transfer assembly from the transaxle assembly without tilting it. • When removing the transfer assembly, do not hold the oil seal parts on both sides of the assembly.
Installation Procedure
- Install the transfer assembly with the bolts and nuts to the transaxle assembly and tighten to 69 N·m (51 lb ft).
- Install the transfer assembly to the transaxle assembly horizontally.
- Install the transfer stiffener plate with the bolts and tighten to 34 N·m (25 lb ft).
- Install the engine mounting bracket.
- Install the automatic transaxle assembly. Refer to Transmission Replacement.
Caution: Refer to Fastener Caution in the Preface section.

