For 1990-2009 cars only
Oil Pan Installation Upper
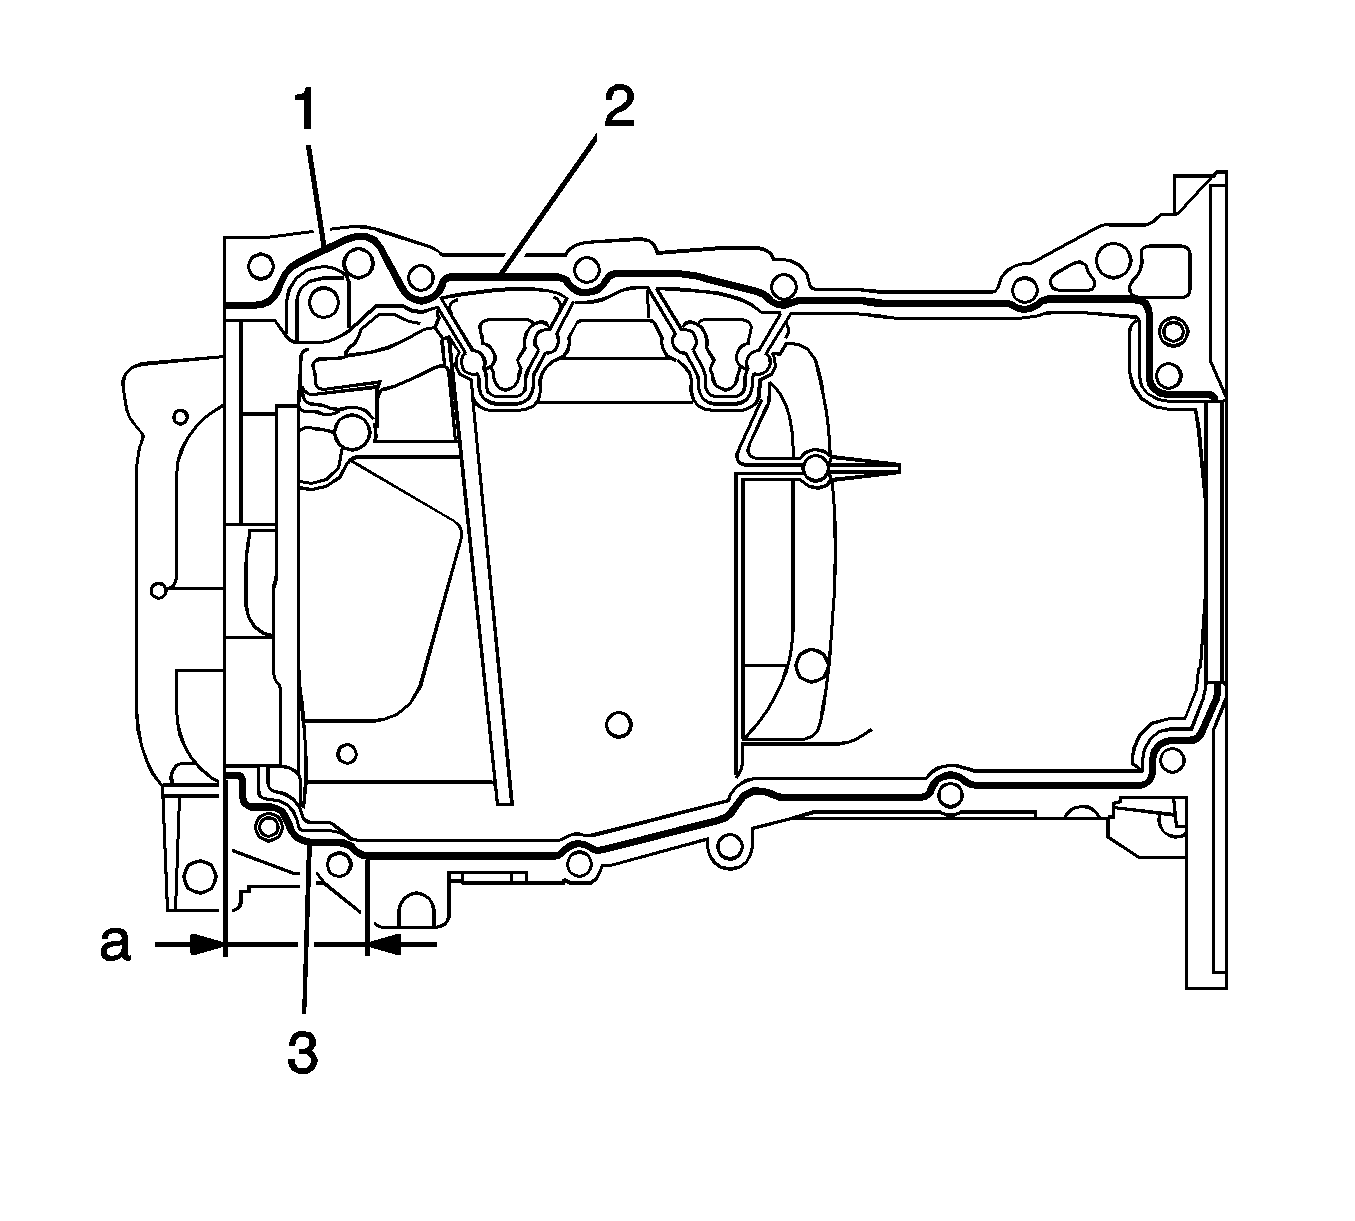
- Apply Three Bond 1207B or equivalent, in a continuous bead (diameter: 2.5 mm (0.098 in)) to the places shown (1, 2, 3).
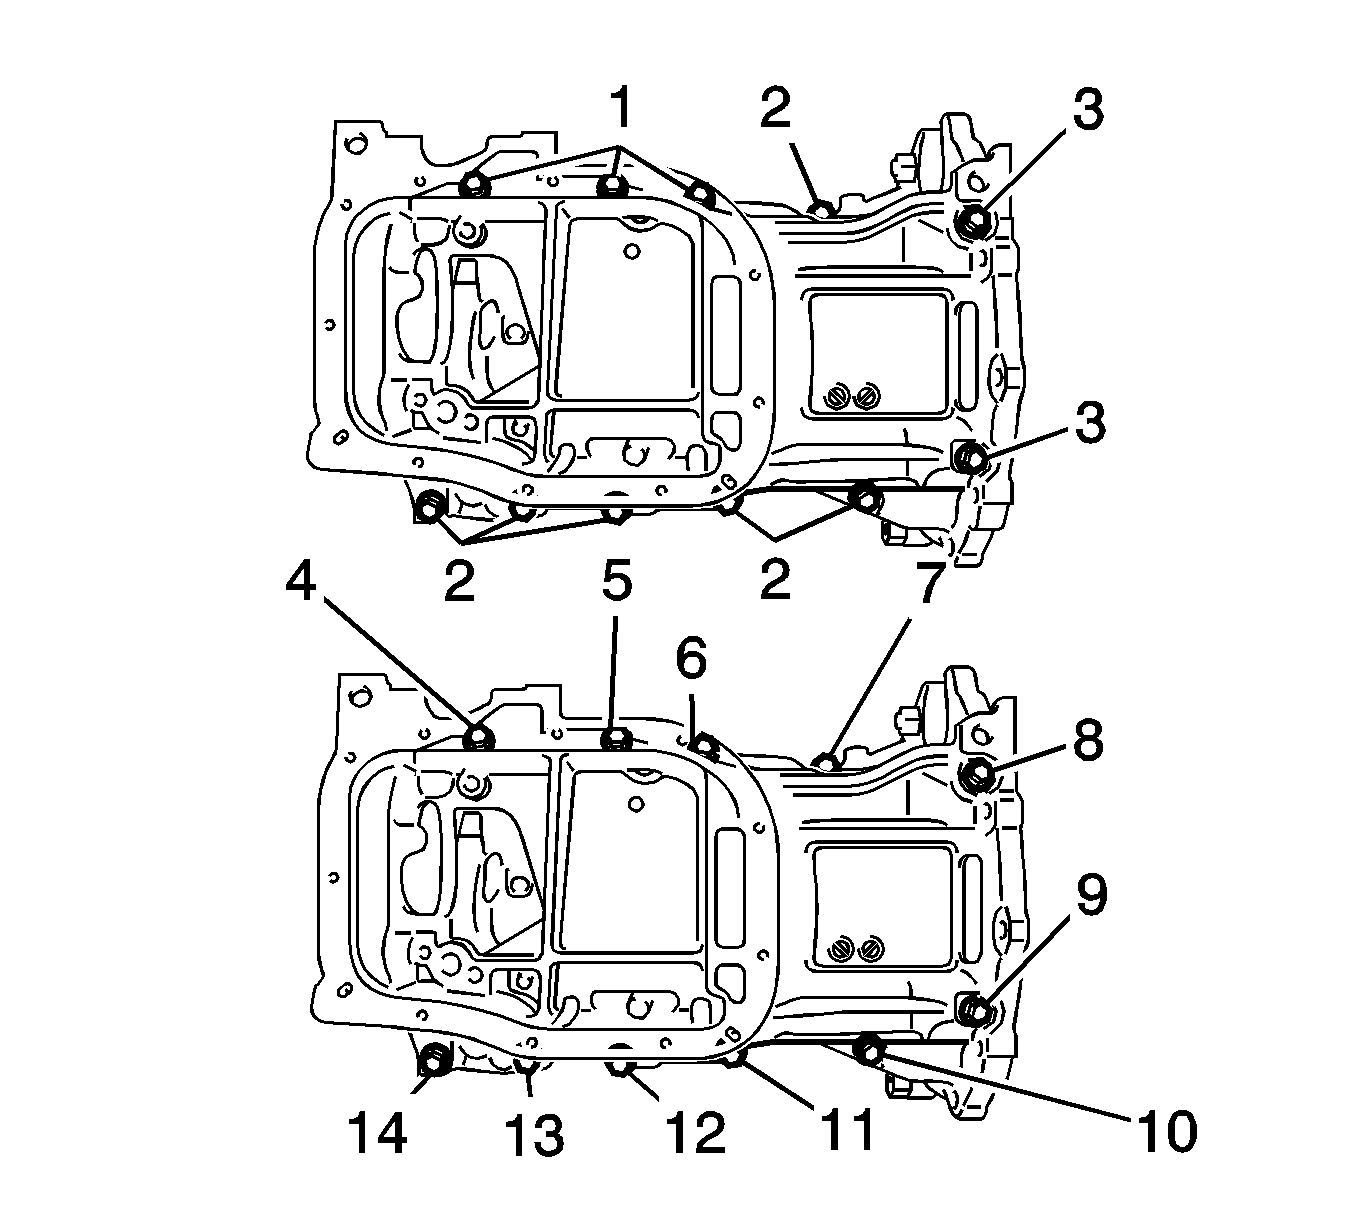
- Install the stiffening crankcase with the 11 bolts (4-14) and tighten to 21 N·m (16 lb ft).
- Check the torque for bolts 1 and 2 and tighten to 21 N·m(16 lb ft).
- Wipe off any excess seal packing with a clean piece of cloth.
Note:
• Remove any oil from the contact surface. • Install the crankcase within 3 minutes after applying seal packing. • Do not start the engine for at least 2 hours after installing the stiffening crankcase.
Caution: Refer to Fastener Caution in the Preface section.
Oil Pan Installation Lower
- Remove any old sealing material and be careful not to drop any oil on the contact surfaces of the cylinder block and oil pan.
- Apply a continuous bead of sealant (1), diameter (a): 4.0 mm (0.157 in), as shown in the illustration, Three Bond 1217B, or equivalent, GM part number 12378521 (Canadian part number 88901148).
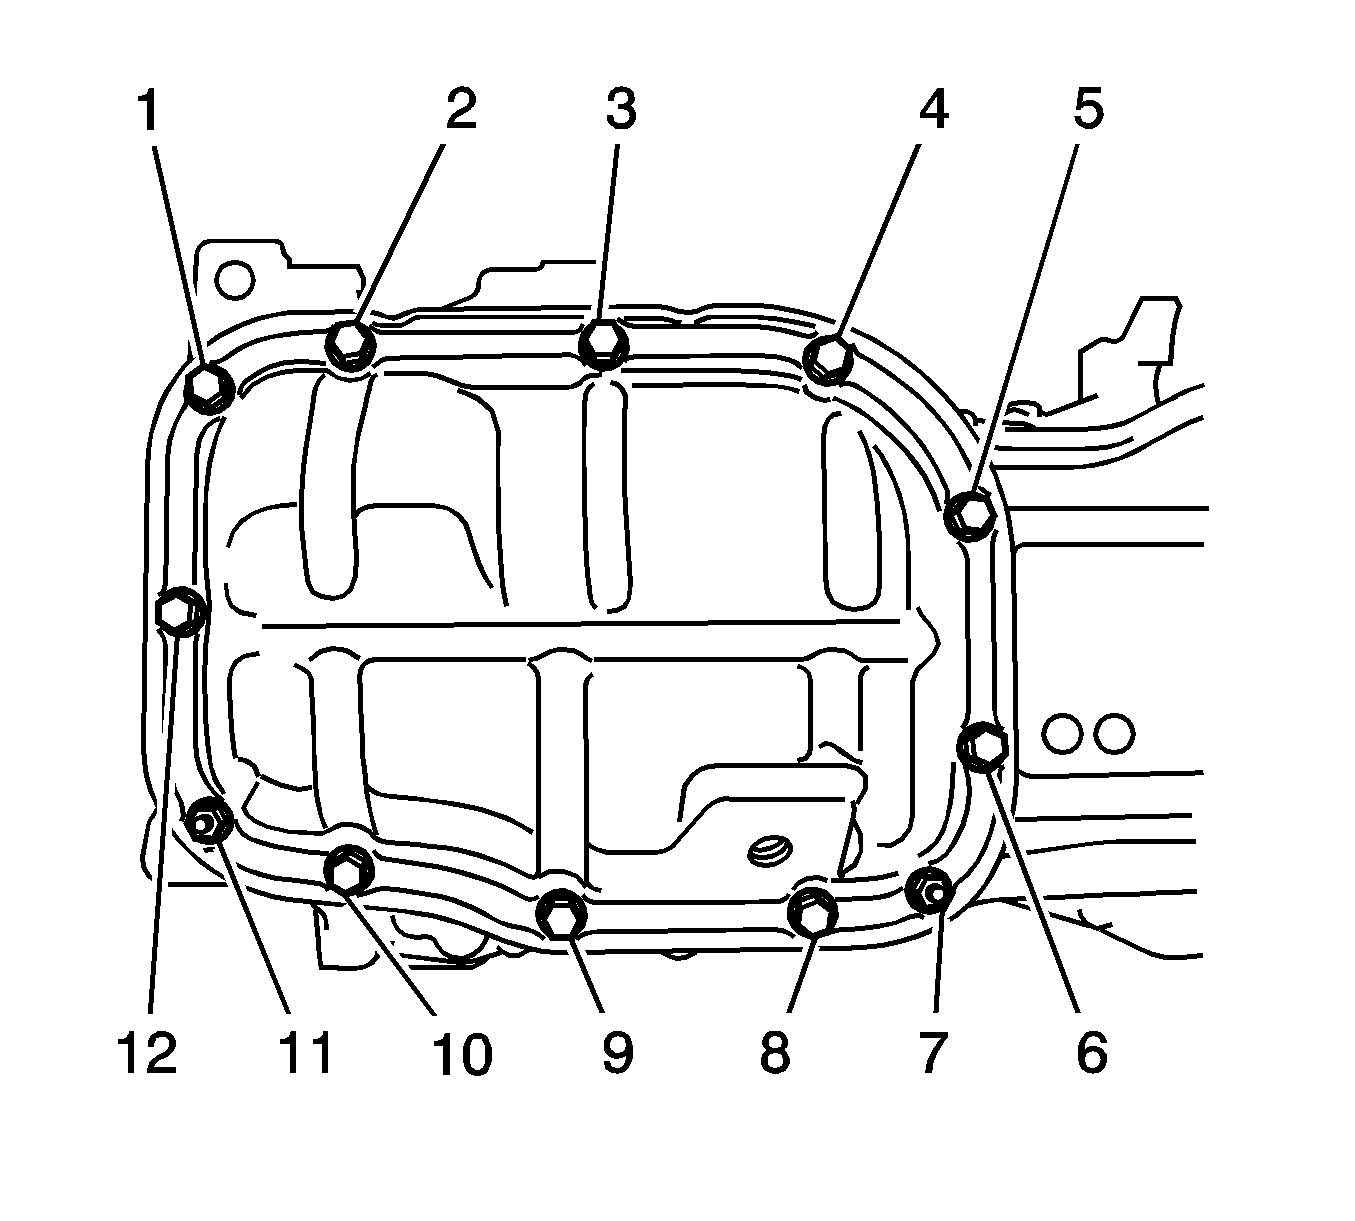
- Install the oil pan with the 10 bolts (1-6, 8-10, 12) and 2 nuts (7, 11) and tighten to 10 N·m (7 lb ft).
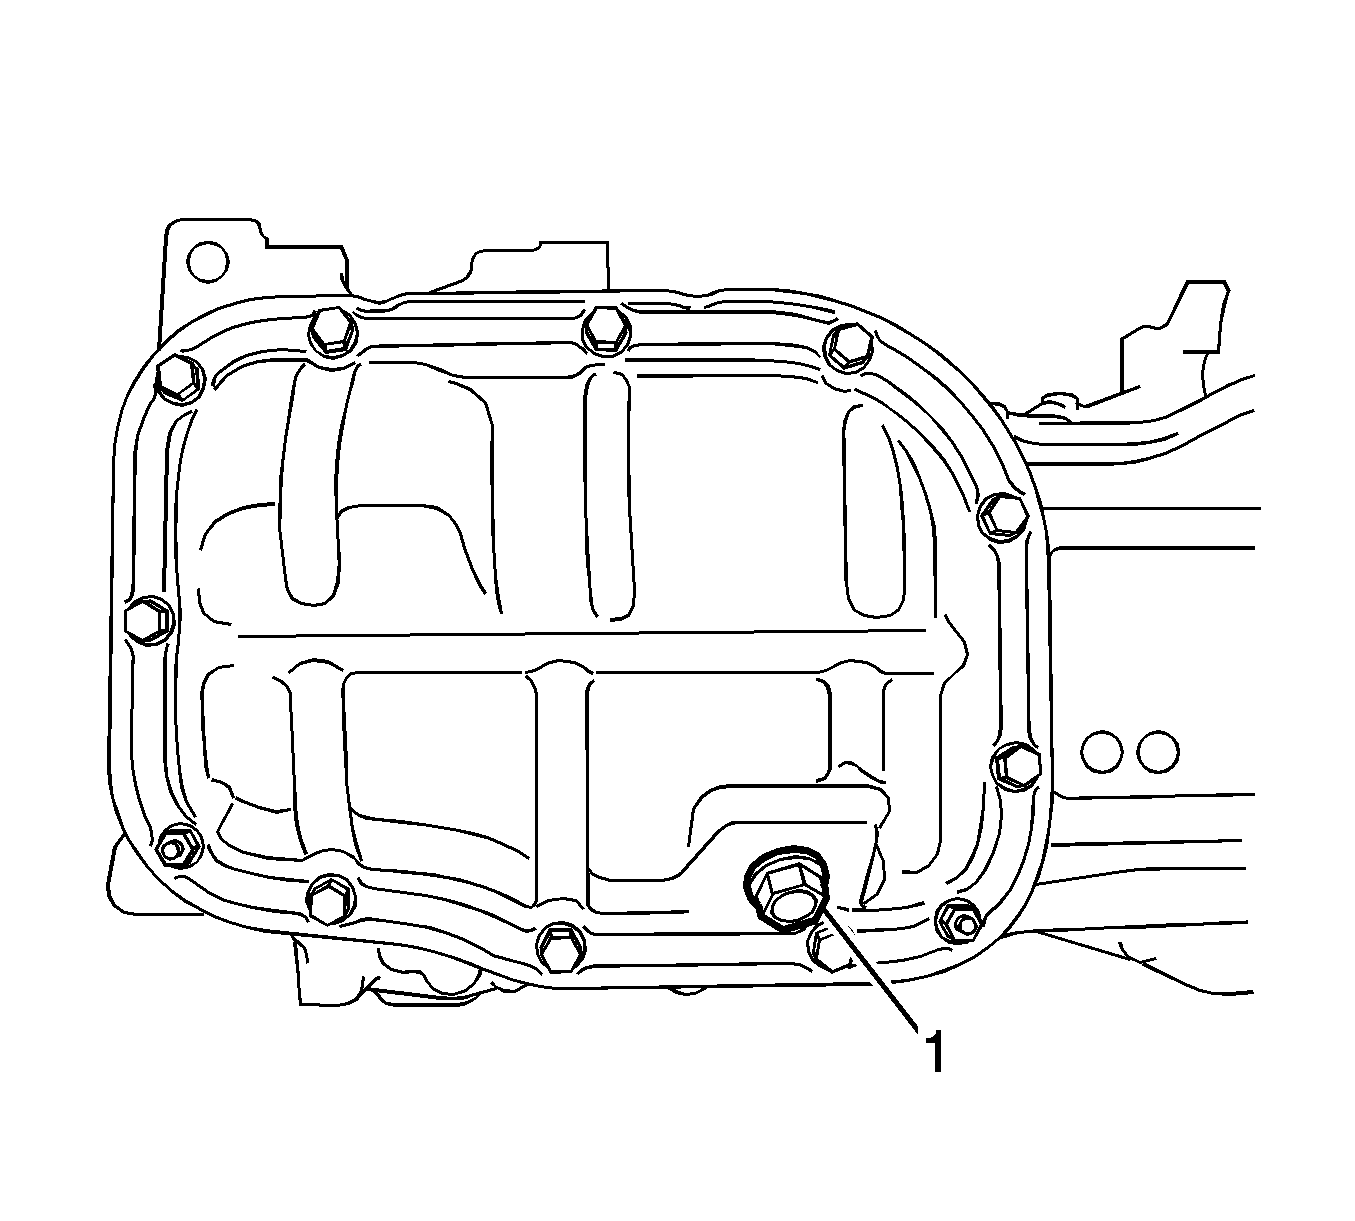
- Install a new gasket and the oil pan drain plug (1) and tighten to 37 N·m (27 lb ft).
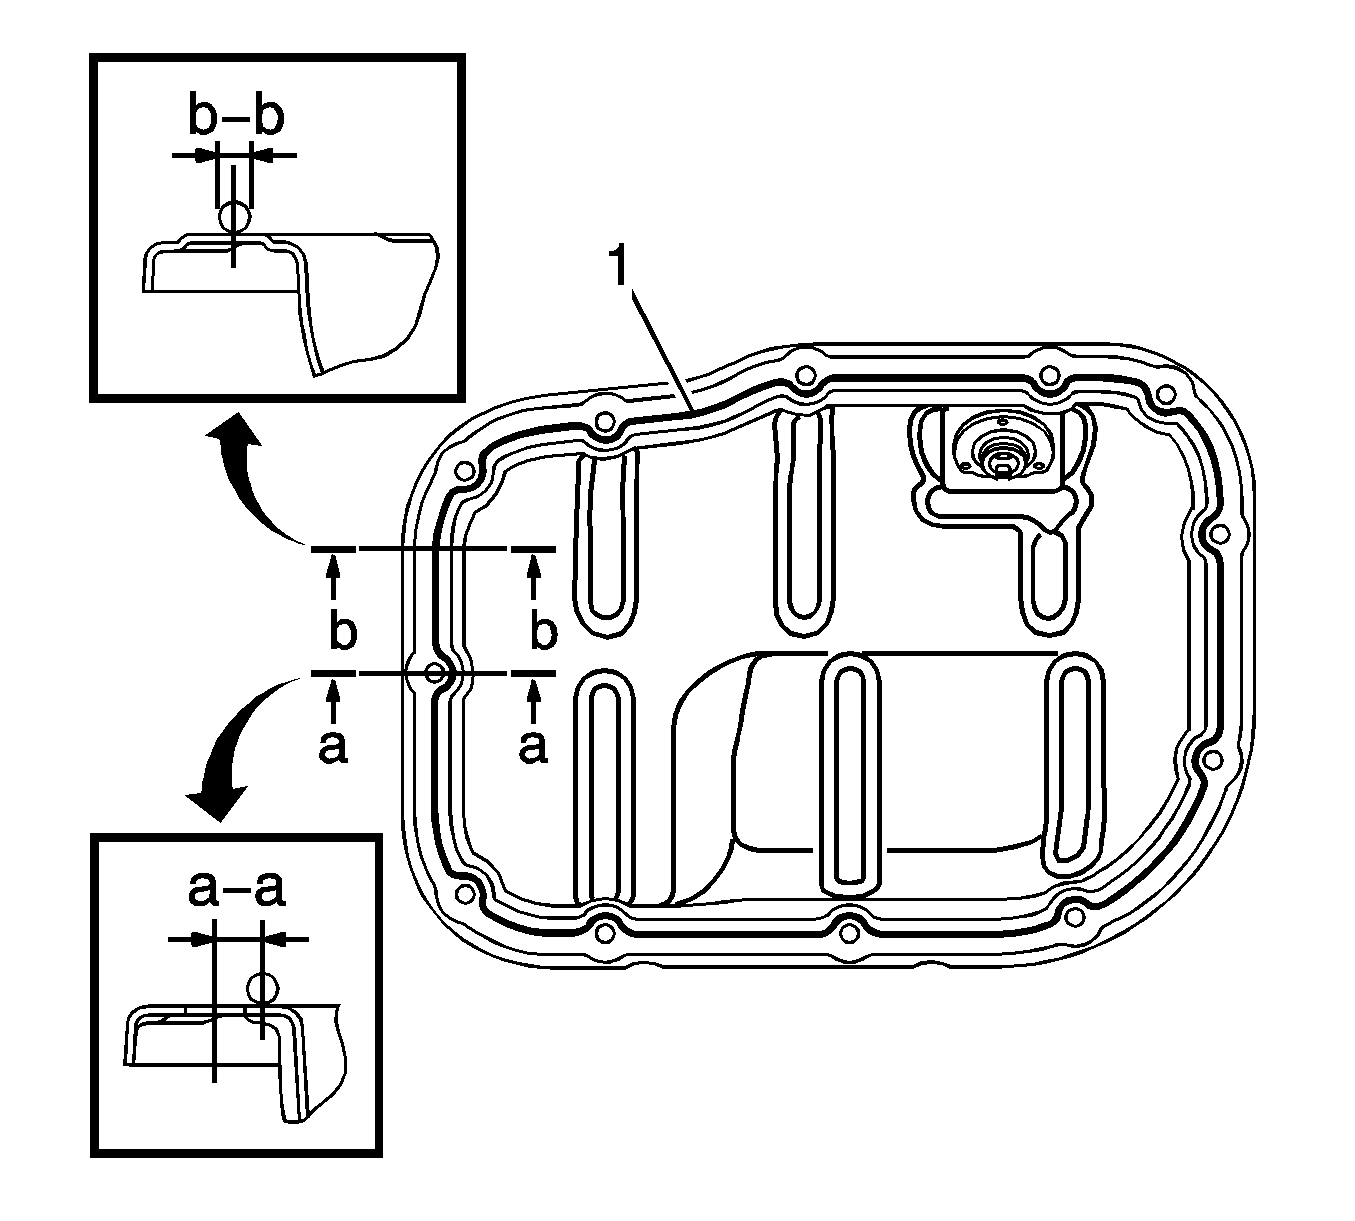
Note:
• Remove any oil from the contact surfaces. • Install the oil pan within 3 minutes after applying sealant. • Do not start the engine for at least 2 hours after installing the oil pan.
Caution: Refer to Fastener Caution in the Preface section.
