For 1990-2009 cars only
Exhaust Manifold Replacement 2.4L
Removal Procedure
- Disconnect the cable from the negative battery terminal. Refer to Battery Negative Cable Disconnection and Connection
- Remove the right hand engine under cover.
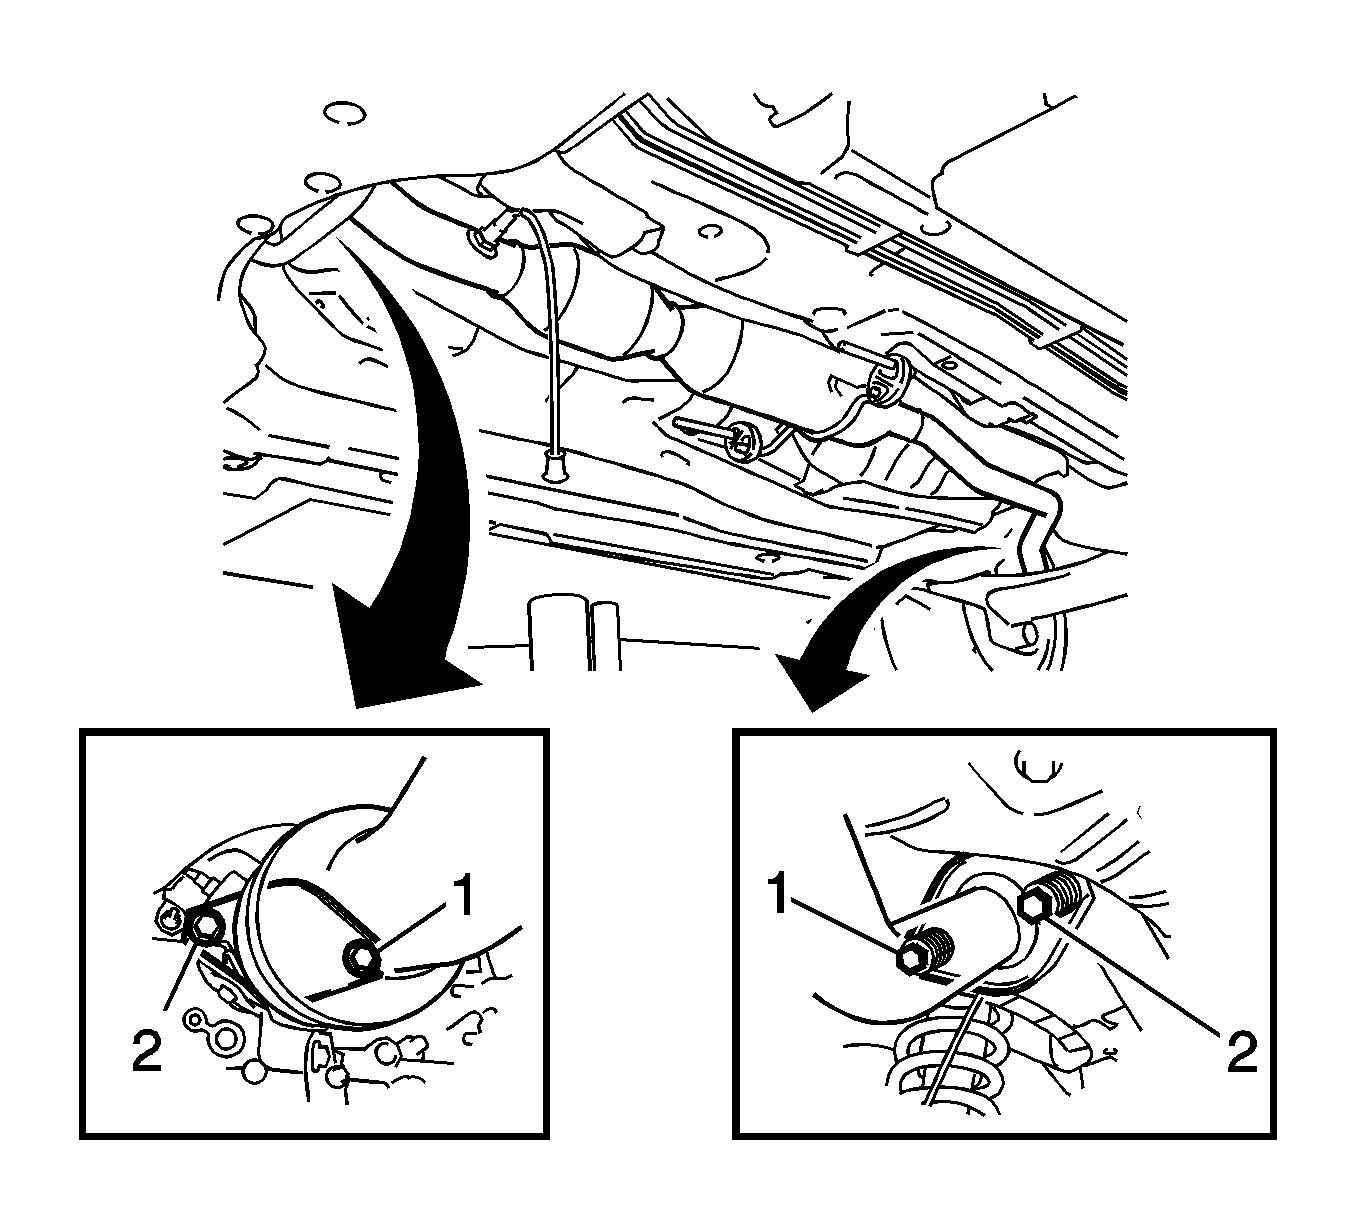
- Disconnect the front exhaust pipe assembly.
- Disconnect the heated oxygen sensor connector.
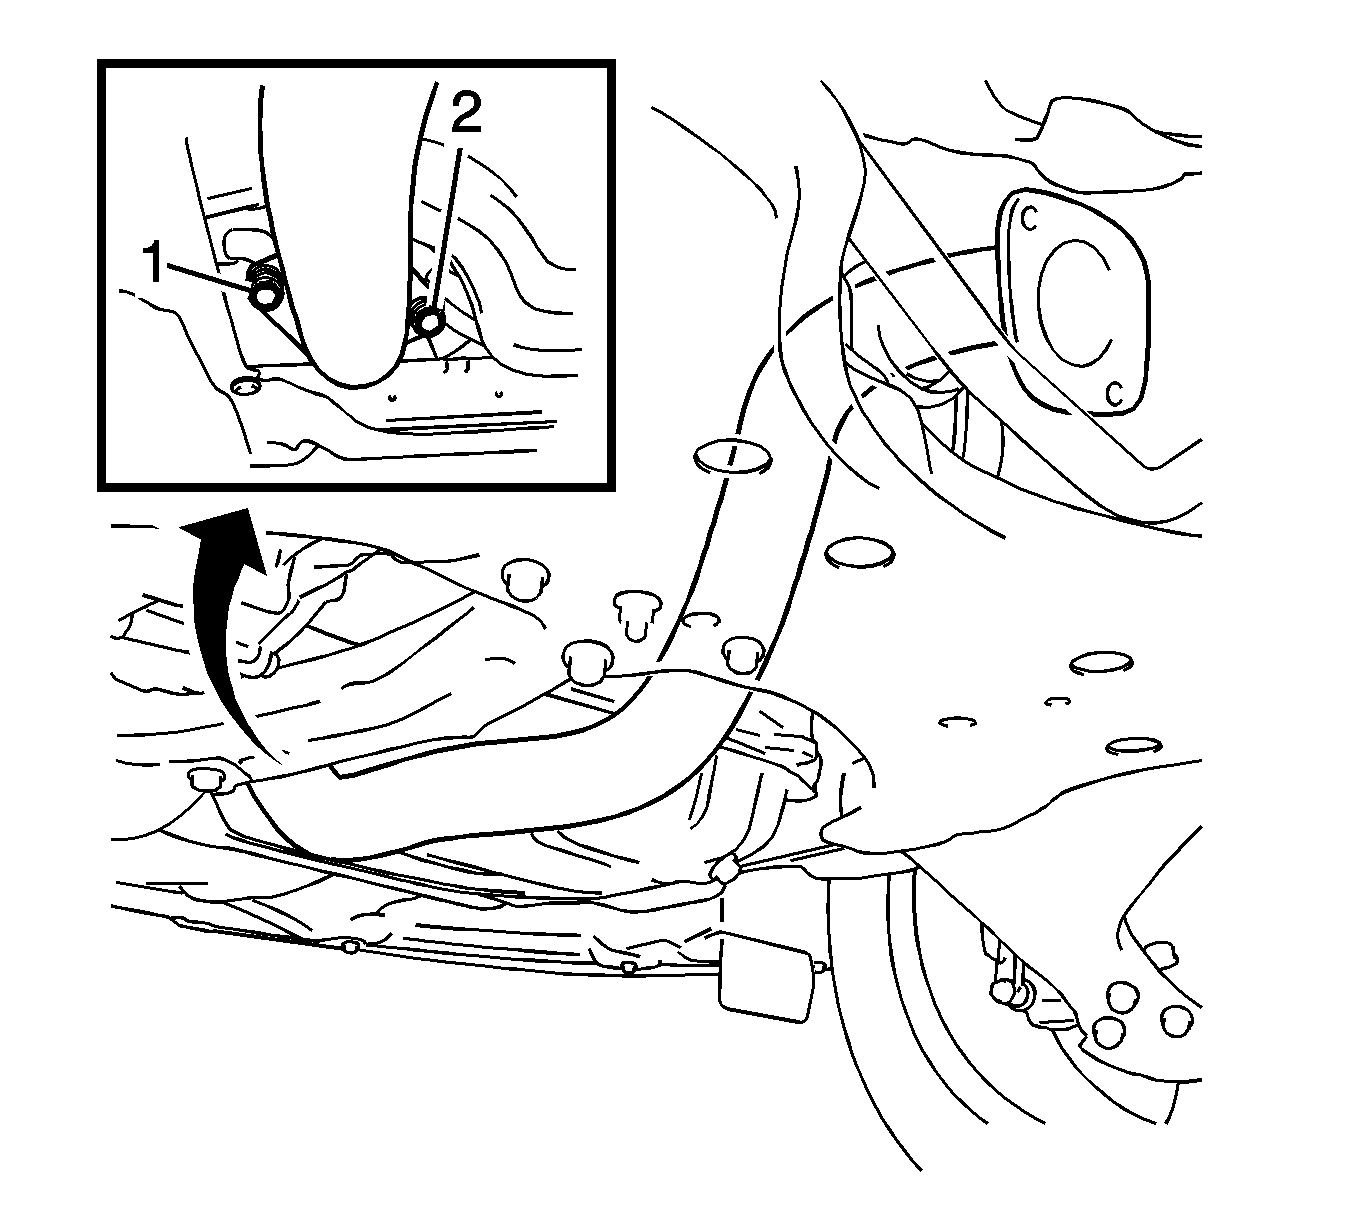
- Remove the 2 bolts (1), 2 compression springs and the front exhaust pipe assembly.
- Remove the gasket from the exhaust manifold.
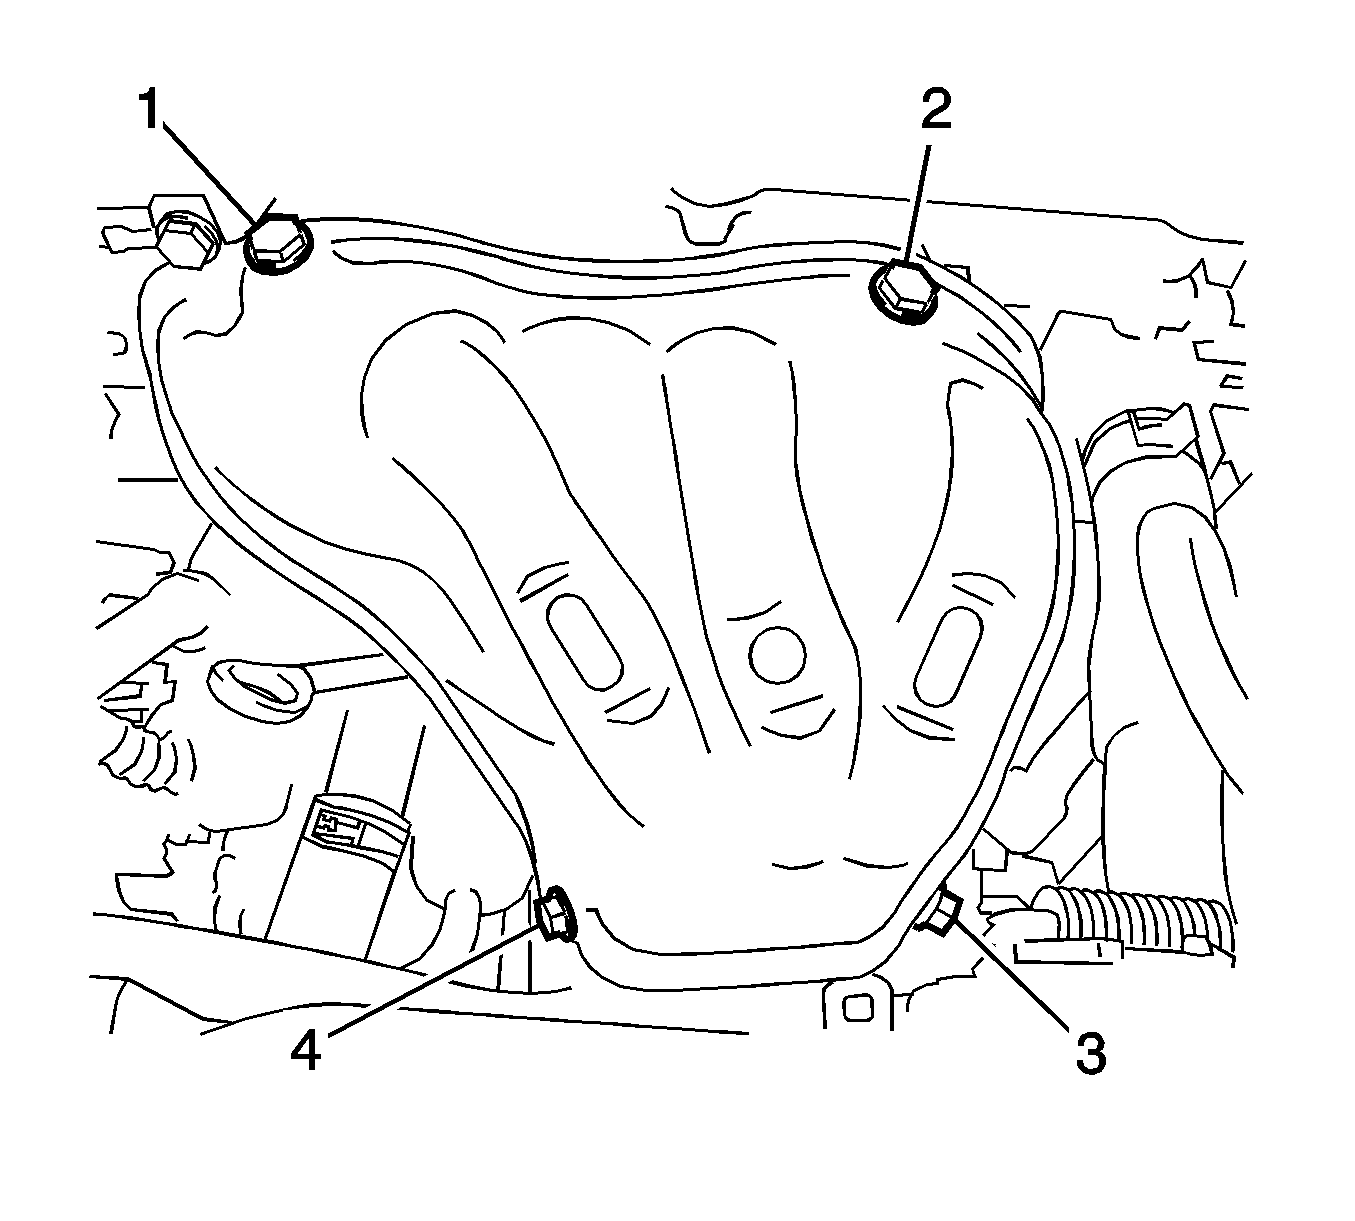
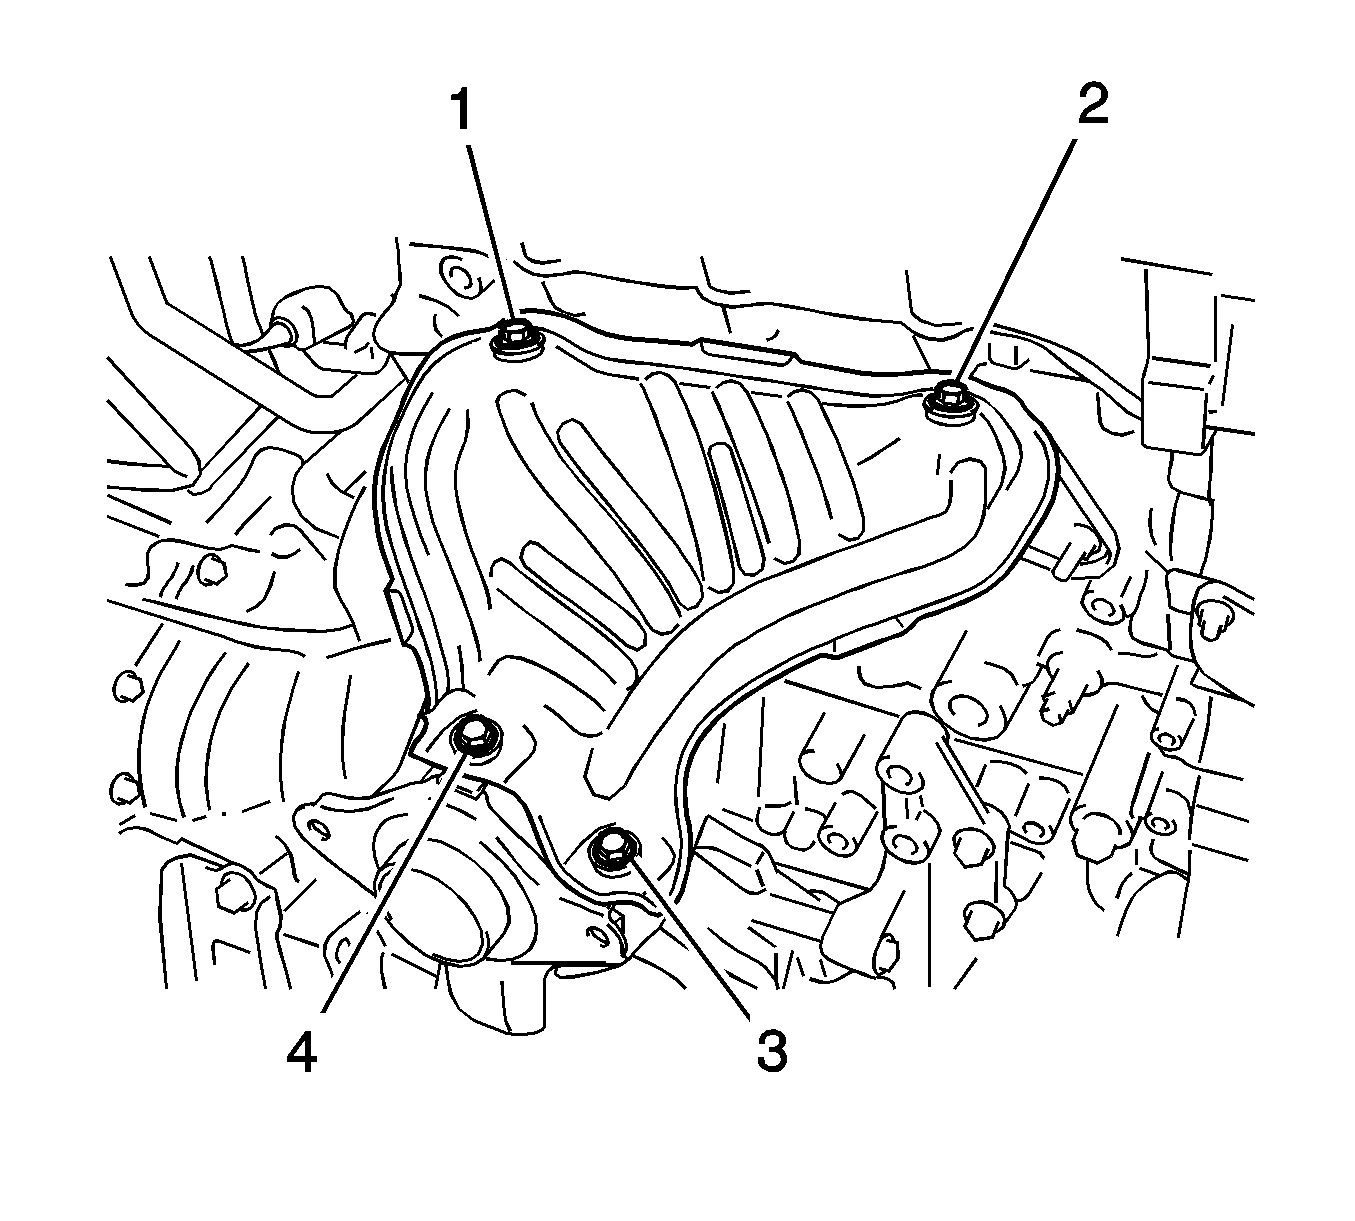
- Remove the 4 bolts (1, 2, 3, 4) and the exhaust manifold heat insulator.
- Remove the air fuel ratio sensor.
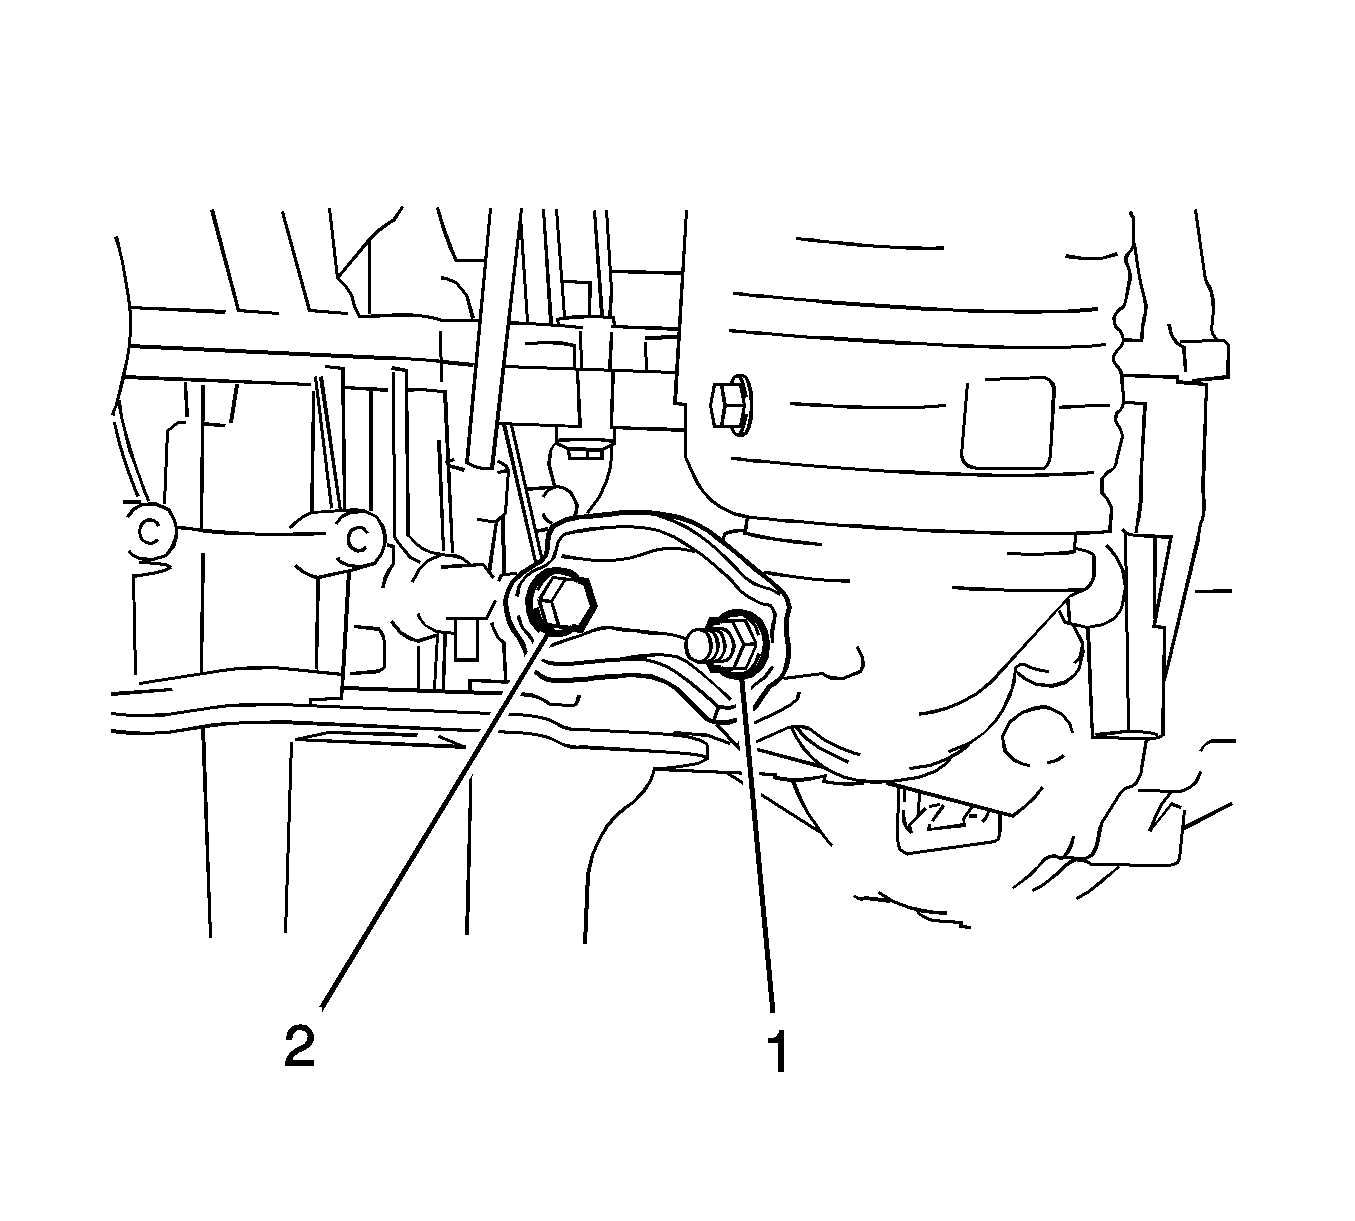
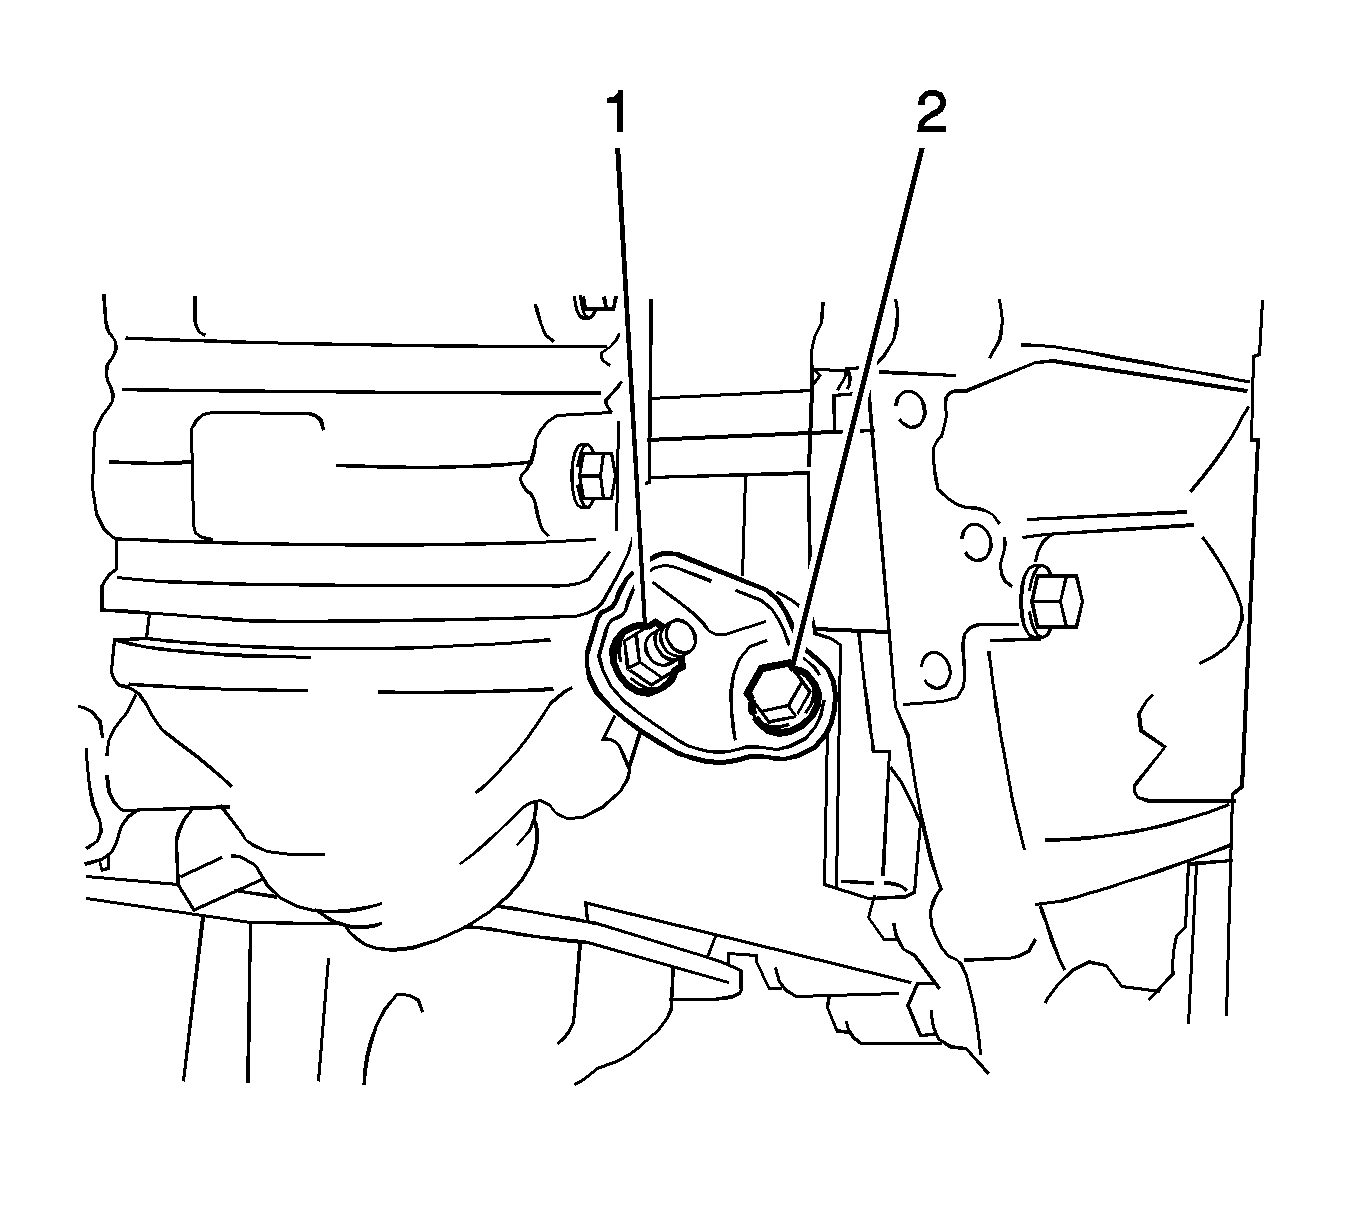
- Remove the bolt (2), nut (1) and manifold support bracket.
- Remove the bolt (2), nut (1) and the manifold support bracket.
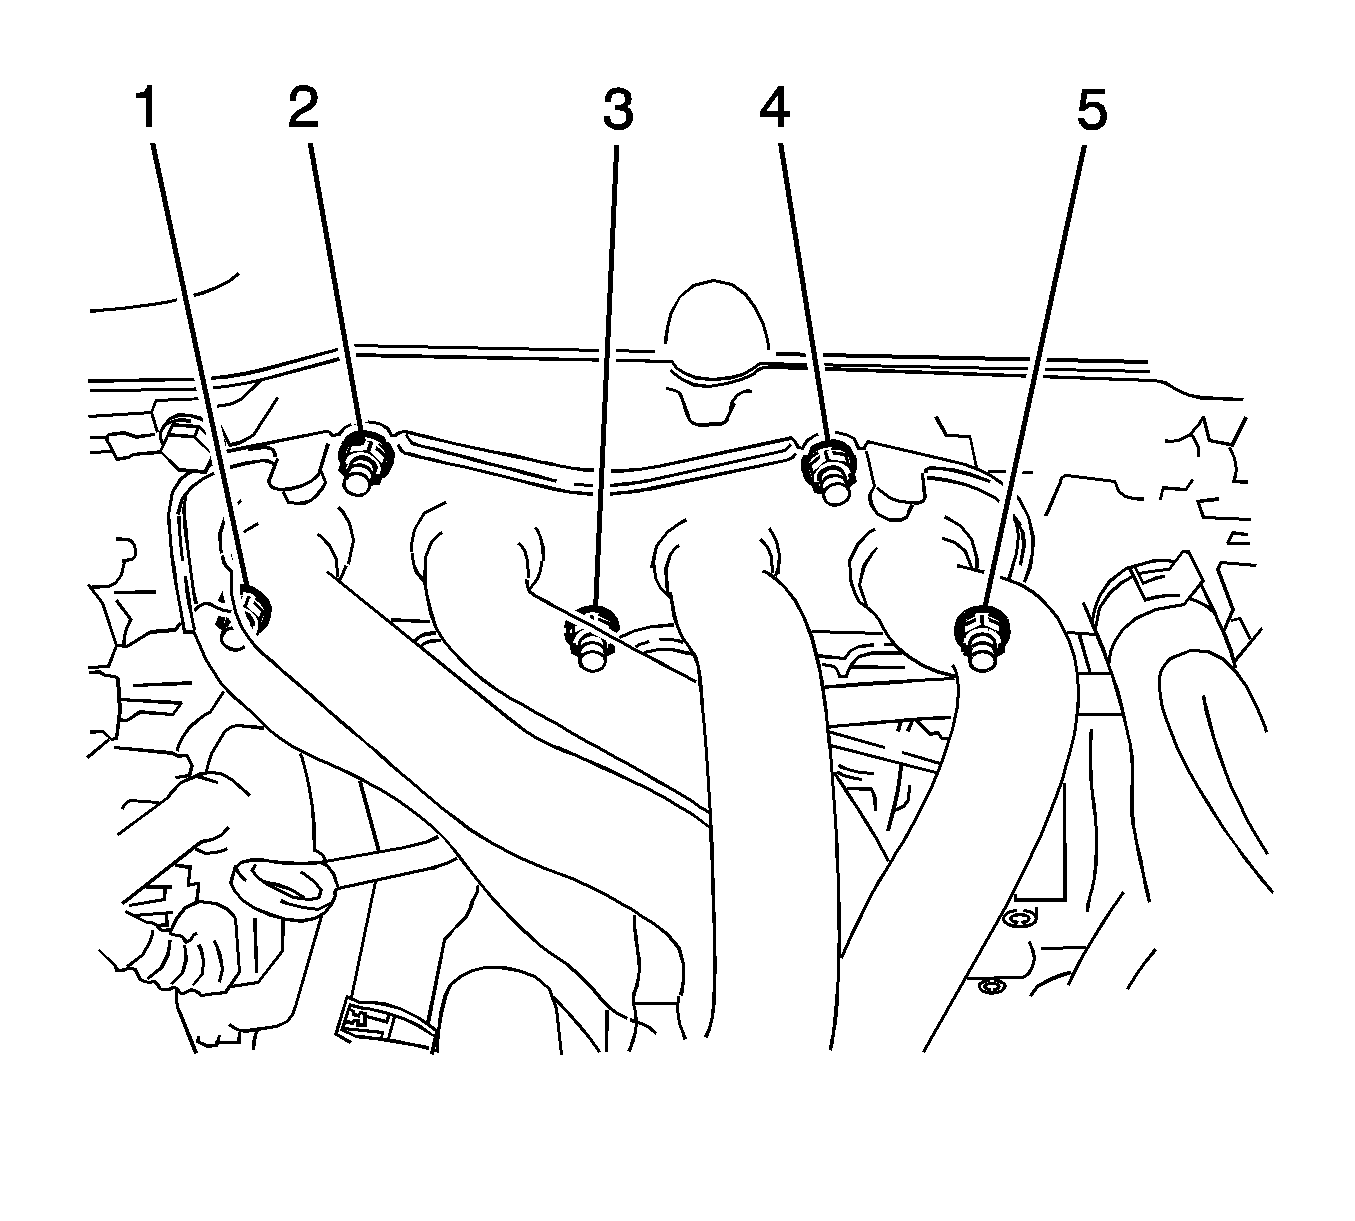
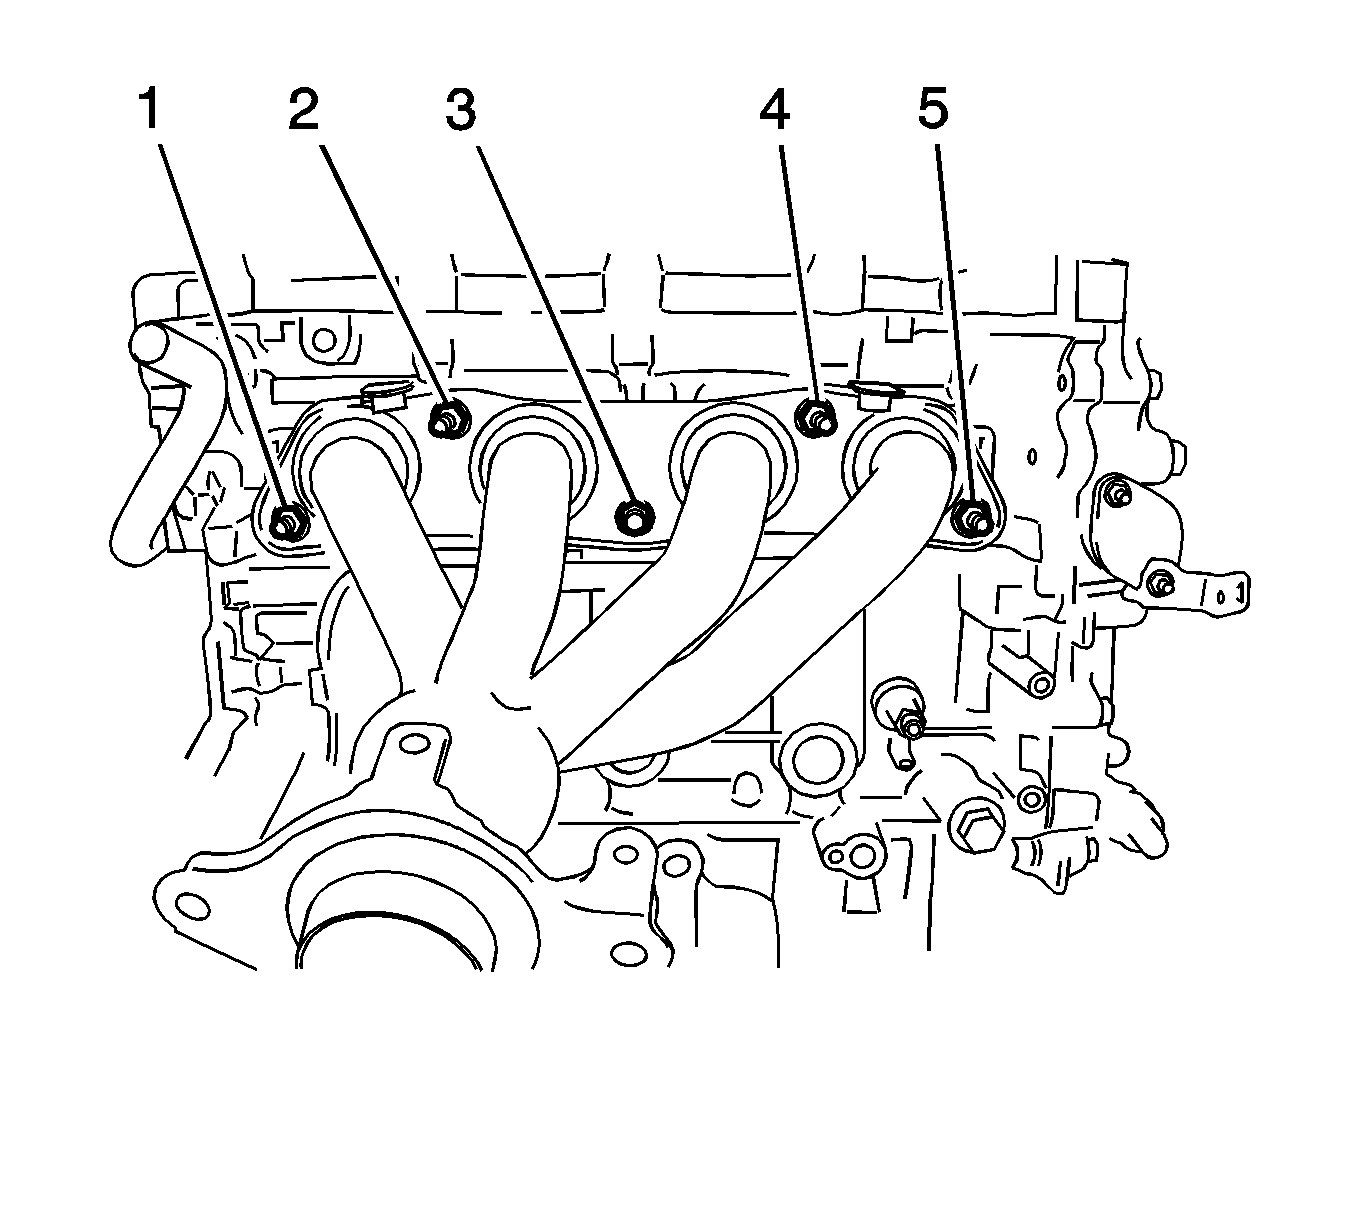
- Remove the 5 nuts (1, 2, 3, 4, 5) and the exhaust manifold converter sub-assembly.
- Remove the gasket.
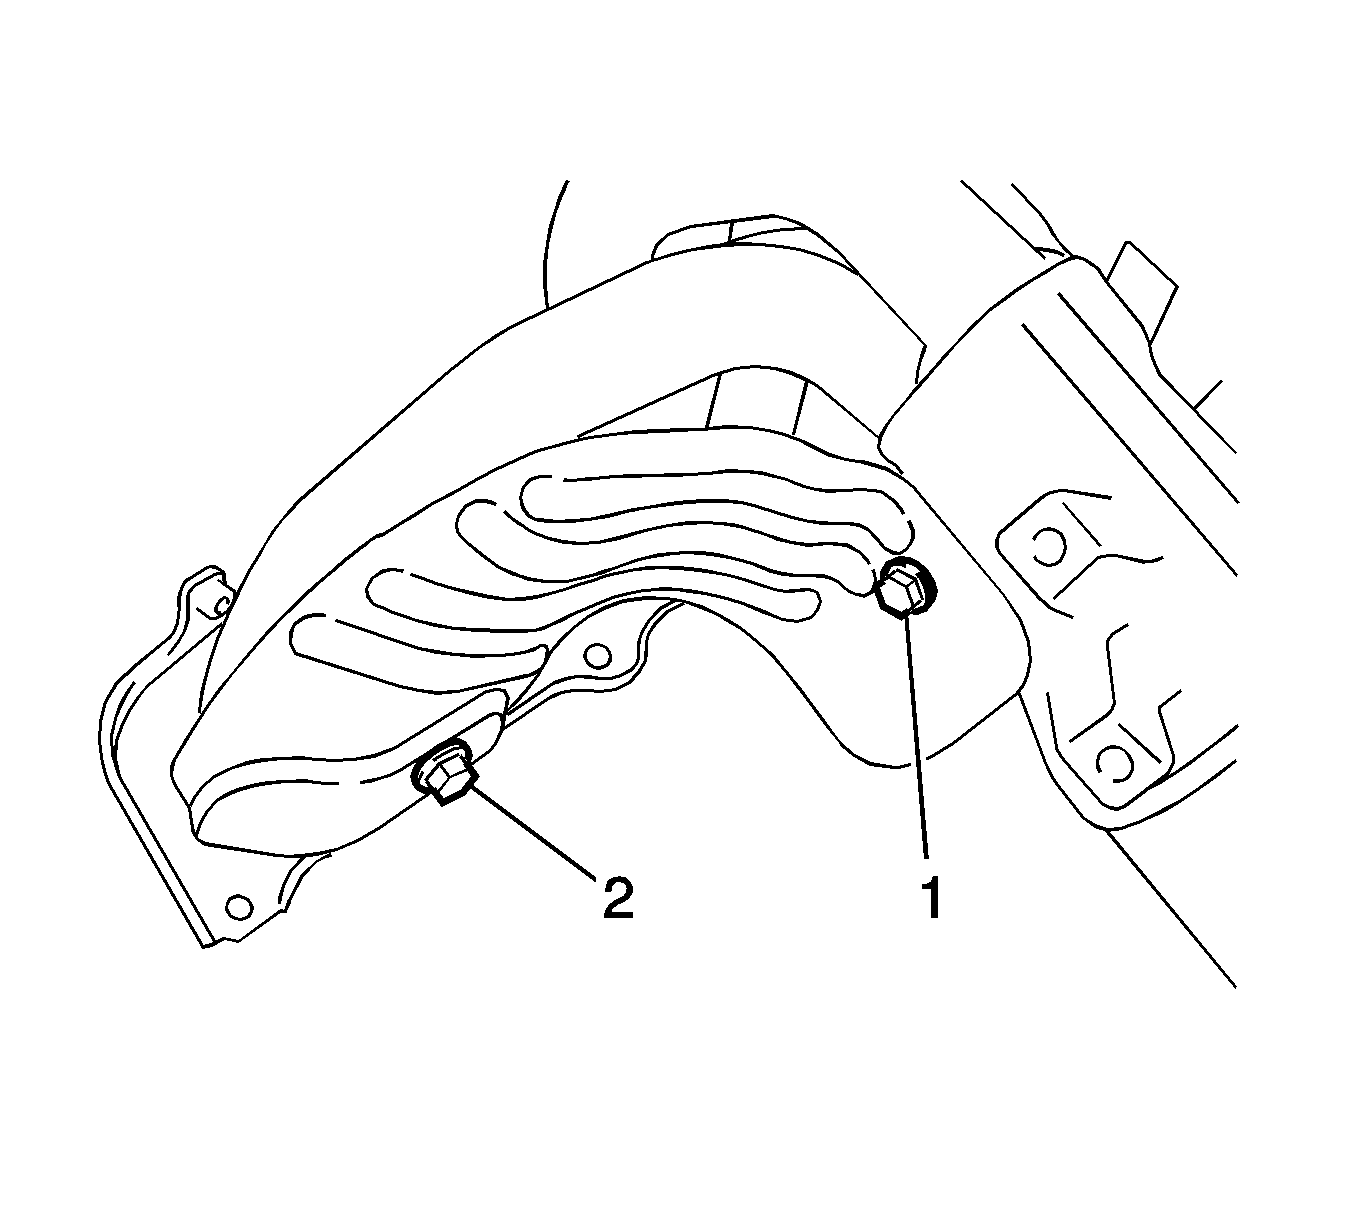
- Remove the 2 bolts (1, 2) and the exhaust manifold heat insulator.
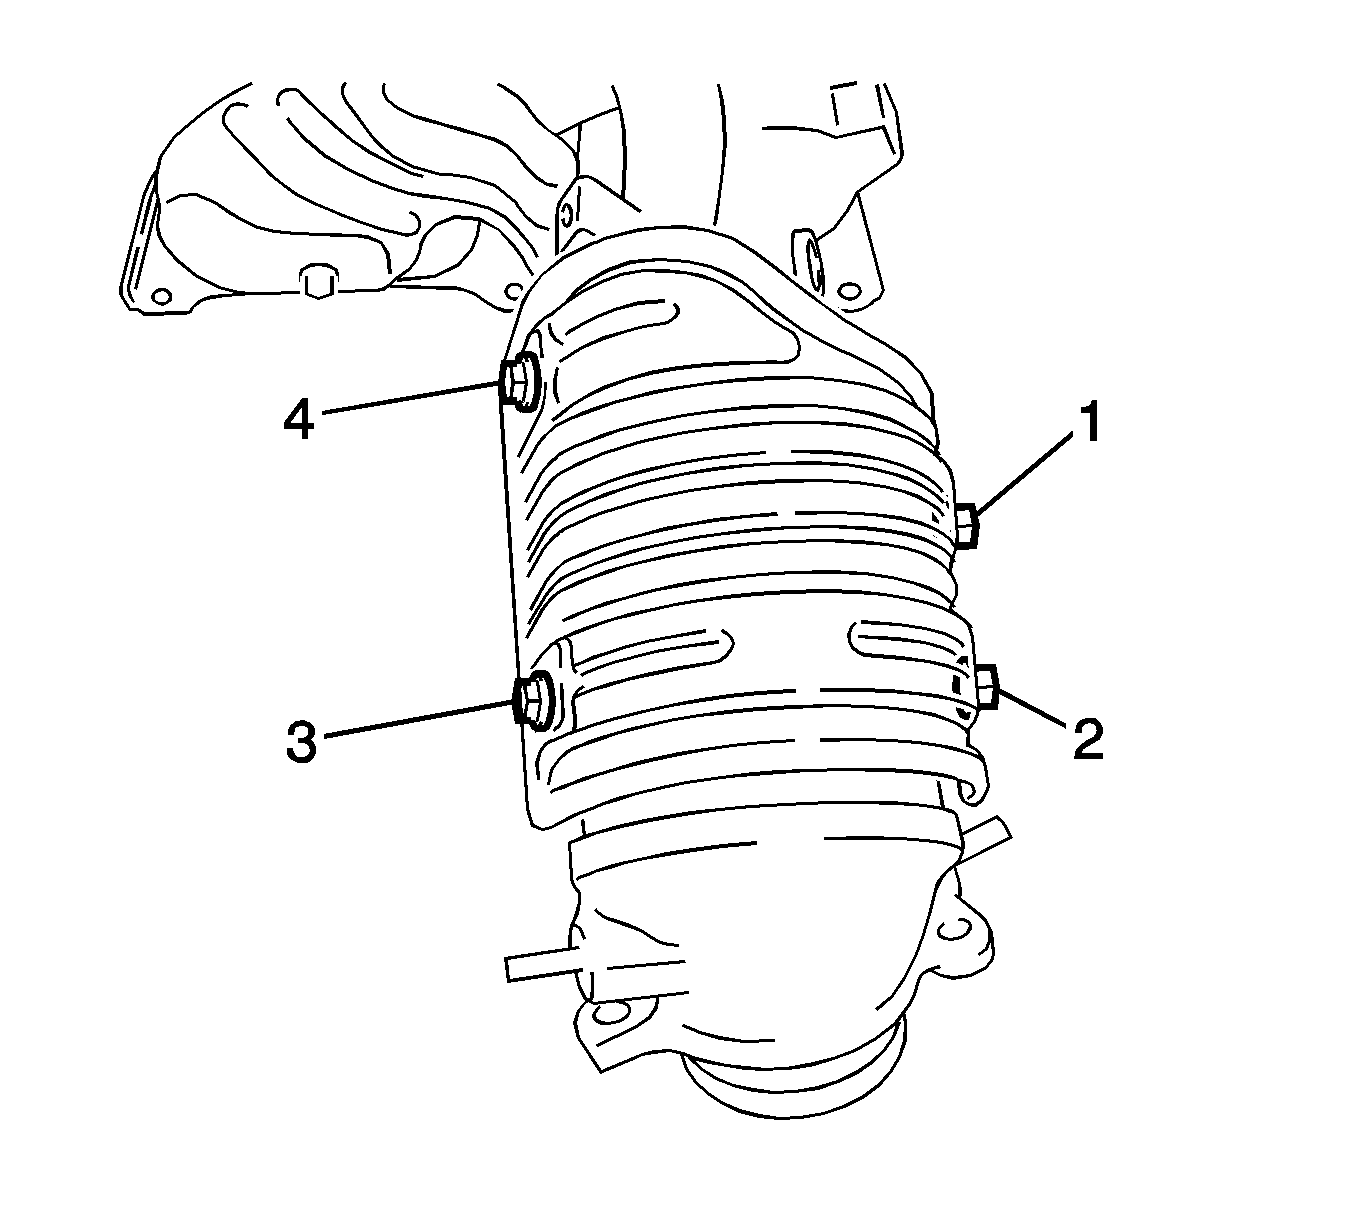
- Remove the 4 bolts (1, 2, 3, 4) and the manifold converter heat insulator.
Installation Procedure
- Install the manifold converter heat insulator with the 4 bolts (1, 2, 3, 4) and tighten to 12 N·m (9 lb ft).
- Install the exhaust manifold heat insulator with the 2 bolts (1, 2) and tighten to 12 N·m (9 lb ft).
- Install a new gasket.
- Install the exhaust manifold converter sub-assembly with the 5 nuts (1, 2, 3, 4, 5) in the order shown in the illustration and tighten to 37 N·m (27 lb ft).
- Install the manifold support bracket with the bolt (1) and nut (2) and tighten to 44 N·m (33 lb ft).
- Install the manifold support bracket with the bolt (2) and nut (1) and tighten to 44 N·m (33 lb ft).
- Install air fuel ratio sensor.
- Install the exhaust manifold heat insulator with the 4 bolts (1, 2, 3, 4) and tighten to 12 N·m (9 lb ft).
- Connect the front exhaust pipe assembly. Refer to Front Pipe Replacement.
- Using a plastic hammer and wooden block, tap in the new gasket until its surface is flush with the exhaust manifold.
- Install right hand engine under cover.
- Connect cable to negative battery terminal.
- Inspect for exhaust gas leaks.
Caution: Refer to Fastener Caution in the Preface section.




Exhaust Manifold Replacement 1.8L
Removal Procedure
- Remove the windshield wiper motor and link assembly. Refer to Windshield Wiper Motor Replacement.
- Remove the outer cowl top panel.
- Remove the engine cover. Refer to Engine Cover Replacement.
- Remove the air fuel ratio sensor. Refer to Heated Oxygen Sensor 1 Replacement.
- Remove the 4 bolts (1, 2, 3, 4) and the exhaust manifold heat insulator.
- Disconnect the front exhaust pipe assembly. Refer to Front Pipe Replacement.
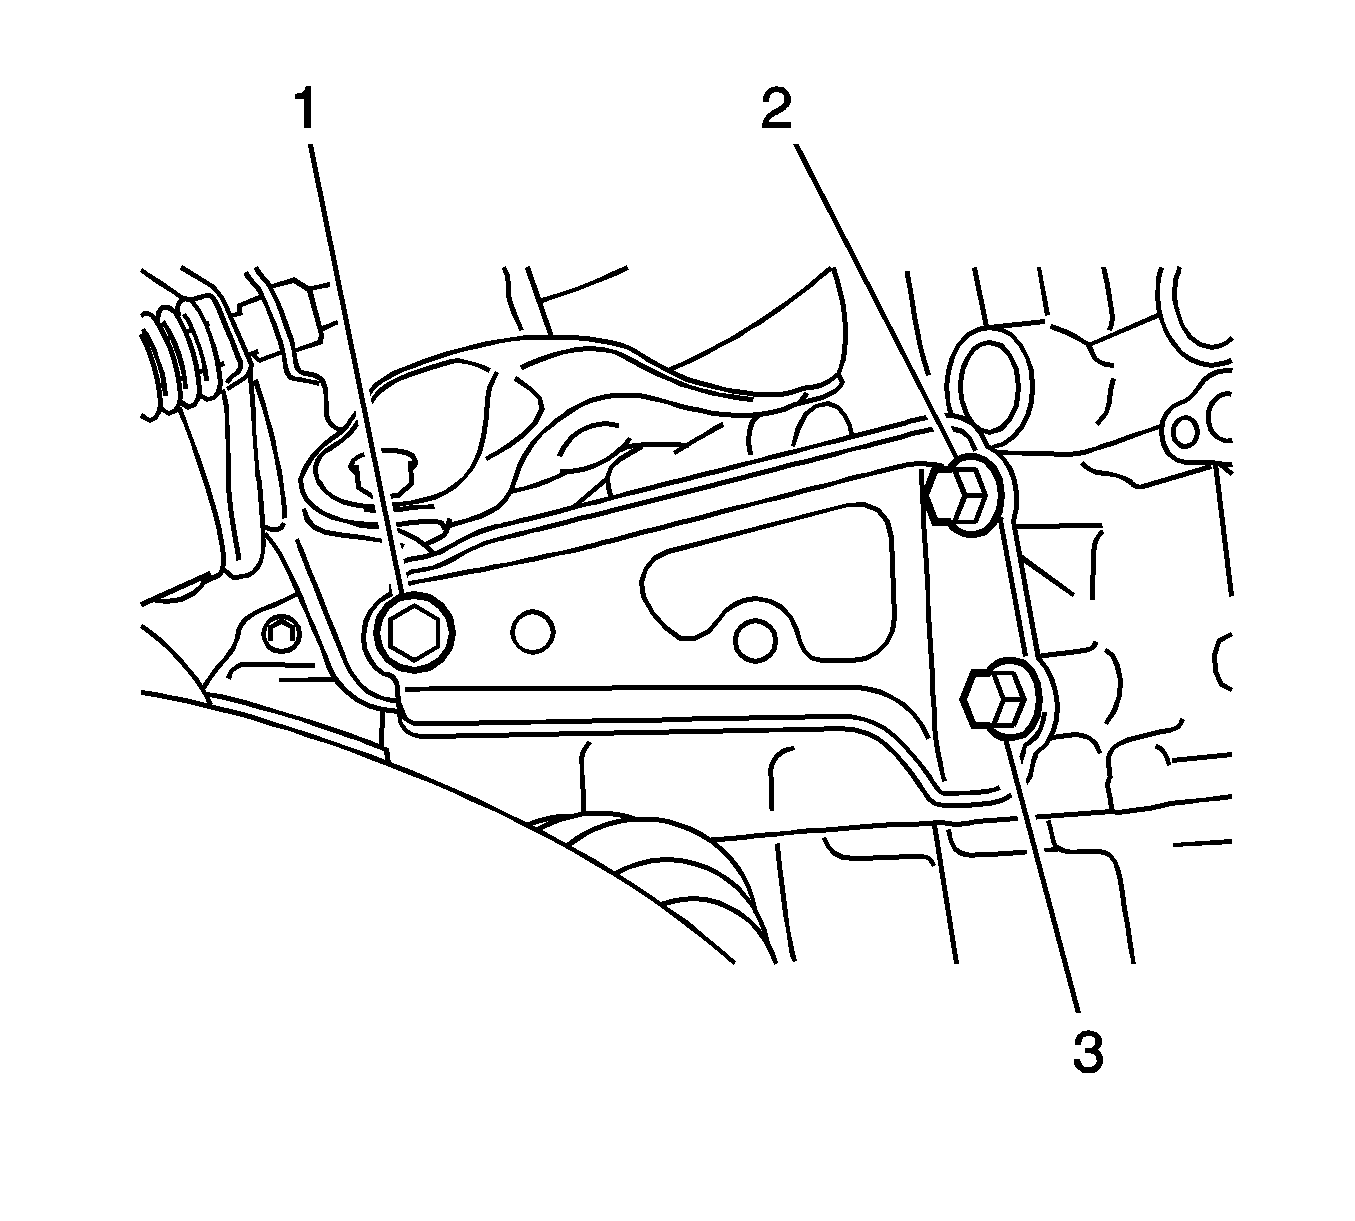
- Remove the 3 bolts (1, 2, 3) and the manifold support bracket.
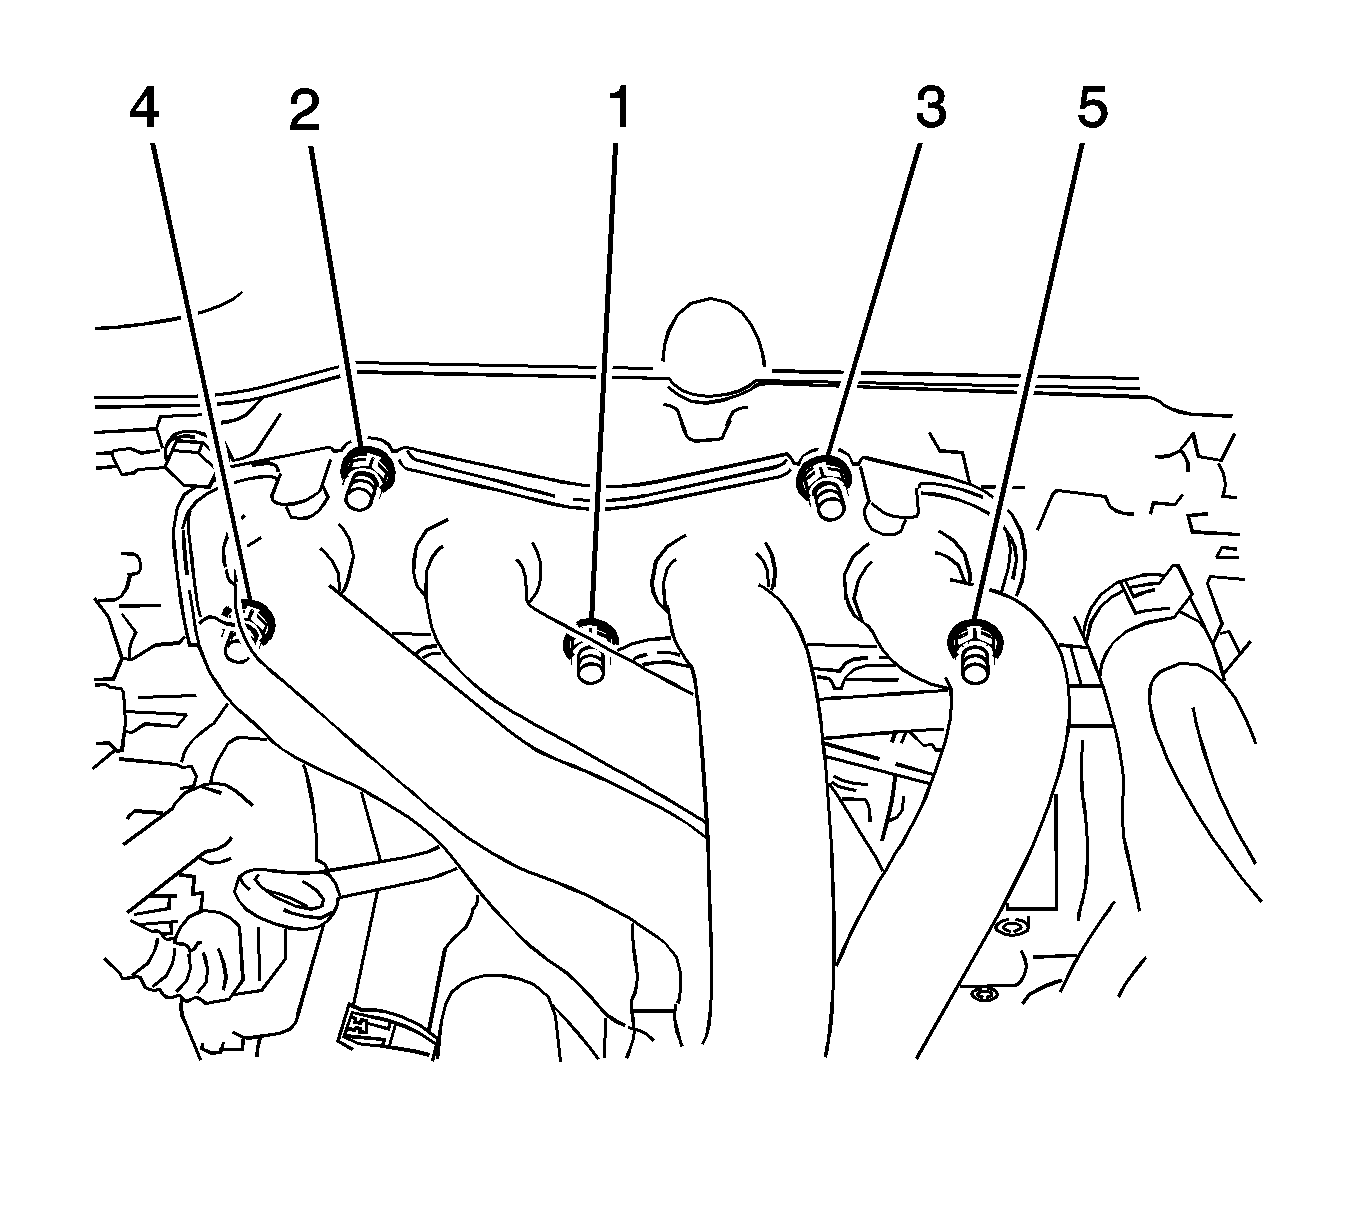
- Remove the 5 nuts (1, 2, 3, 4, 5) and the exhaust manifold.
- Remove the exhaust manifold gasket.
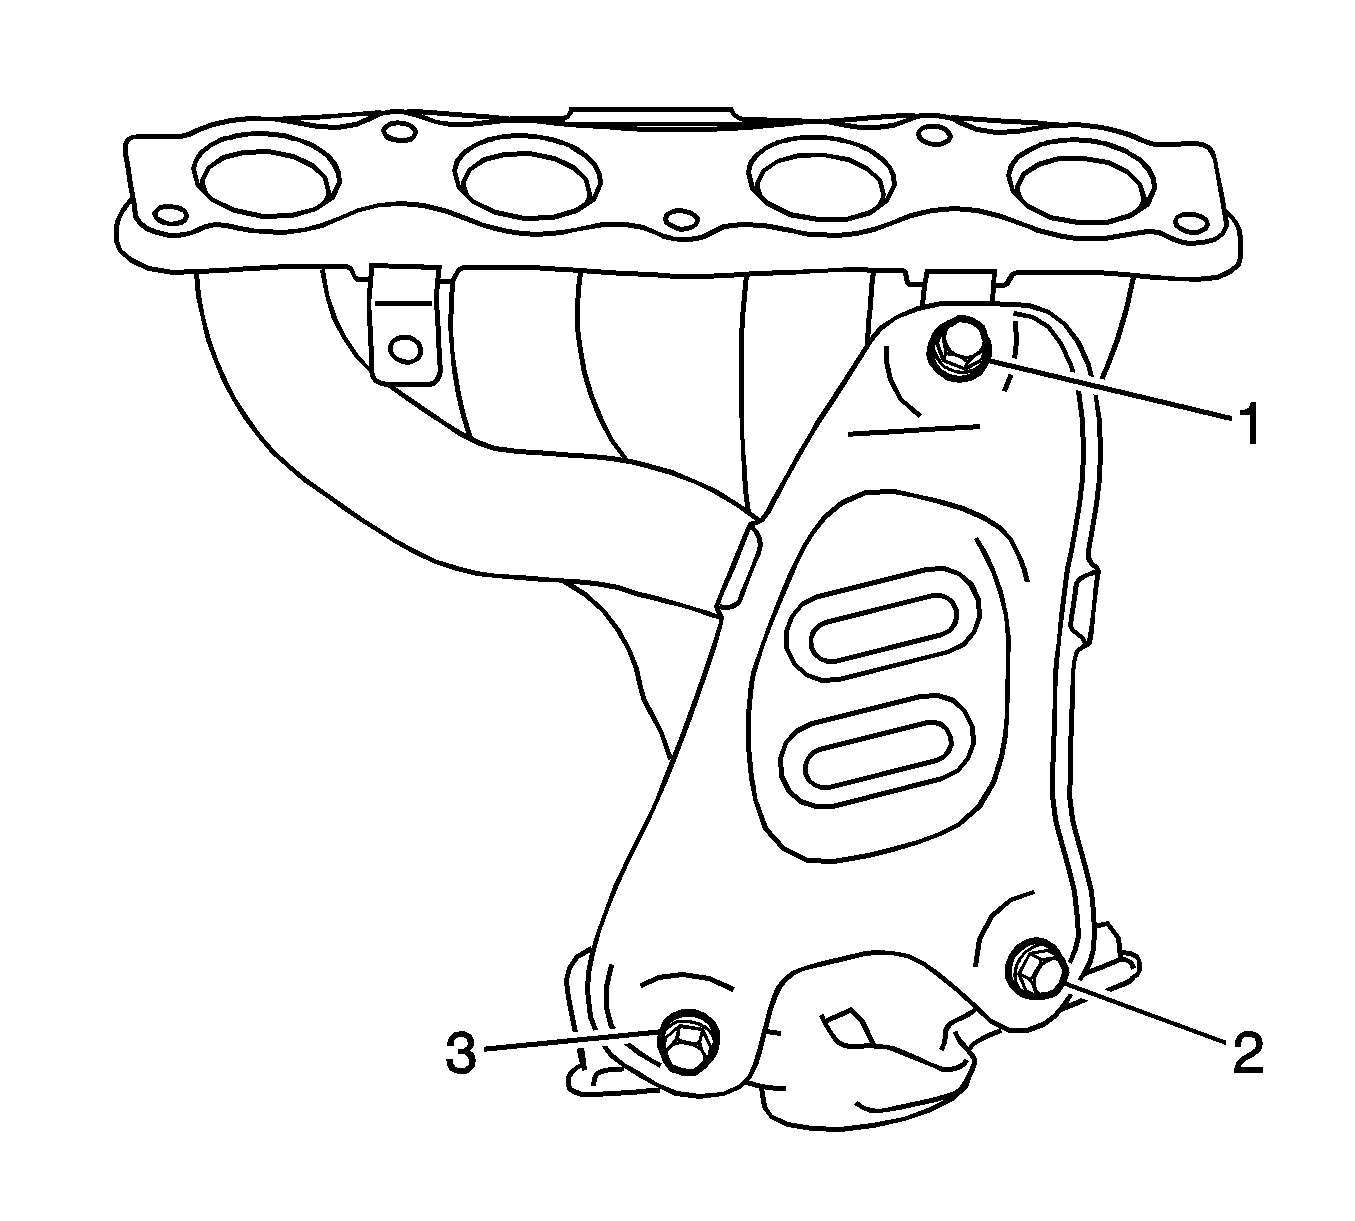
- Remove the 3 bolts (1, 2, 3) and the exhaust manifold heat insulator.
Installation Procedure
- Install the exhaust manifold heat insulator with the 3 bolts (1, 2, 3) and tighten to 12 N·m (9 lb ft).
- Install a new exhaust manifold gasket.
- Install the exhaust manifold with the 5 nuts (1, 2, 3, 4, 5) and tighten to 21 N·m (16 lb ft).
- Install the manifold support bracket with the 3 bolts (1, 2, 3) and tighten to 43 N·m (32 lb ft).
- Connect the front exhaust pipe assembly. Refer to Front Pipe Replacement.
- Install the exhaust manifold heat insulator with the 4 bolts (1, 2, 3, 4) and tighten to 12 N·m (9 lb ft).
- Install the air fuel ratio sensor. Refer to Heated Oxygen Sensor 1 Replacement.
- Install the engine cover. Refer to Engine Cover Replacement.
- Install the outer cowl top panel.
- Install the windshield wiper motor and link assembly. Refer to Windshield Wiper Motor Replacement.
- Inspect for exhaust gas leak.
Caution: Refer to Fastener Caution in the Preface section.


