For 1990-2009 cars only
Removal Procedure
- Disconnect cable from battery negative terminal. Refer to Battery Negative Cable Disconnection and Connection
- Remove the engine cover sub-assembly. Refer to Engine Cover Replacement
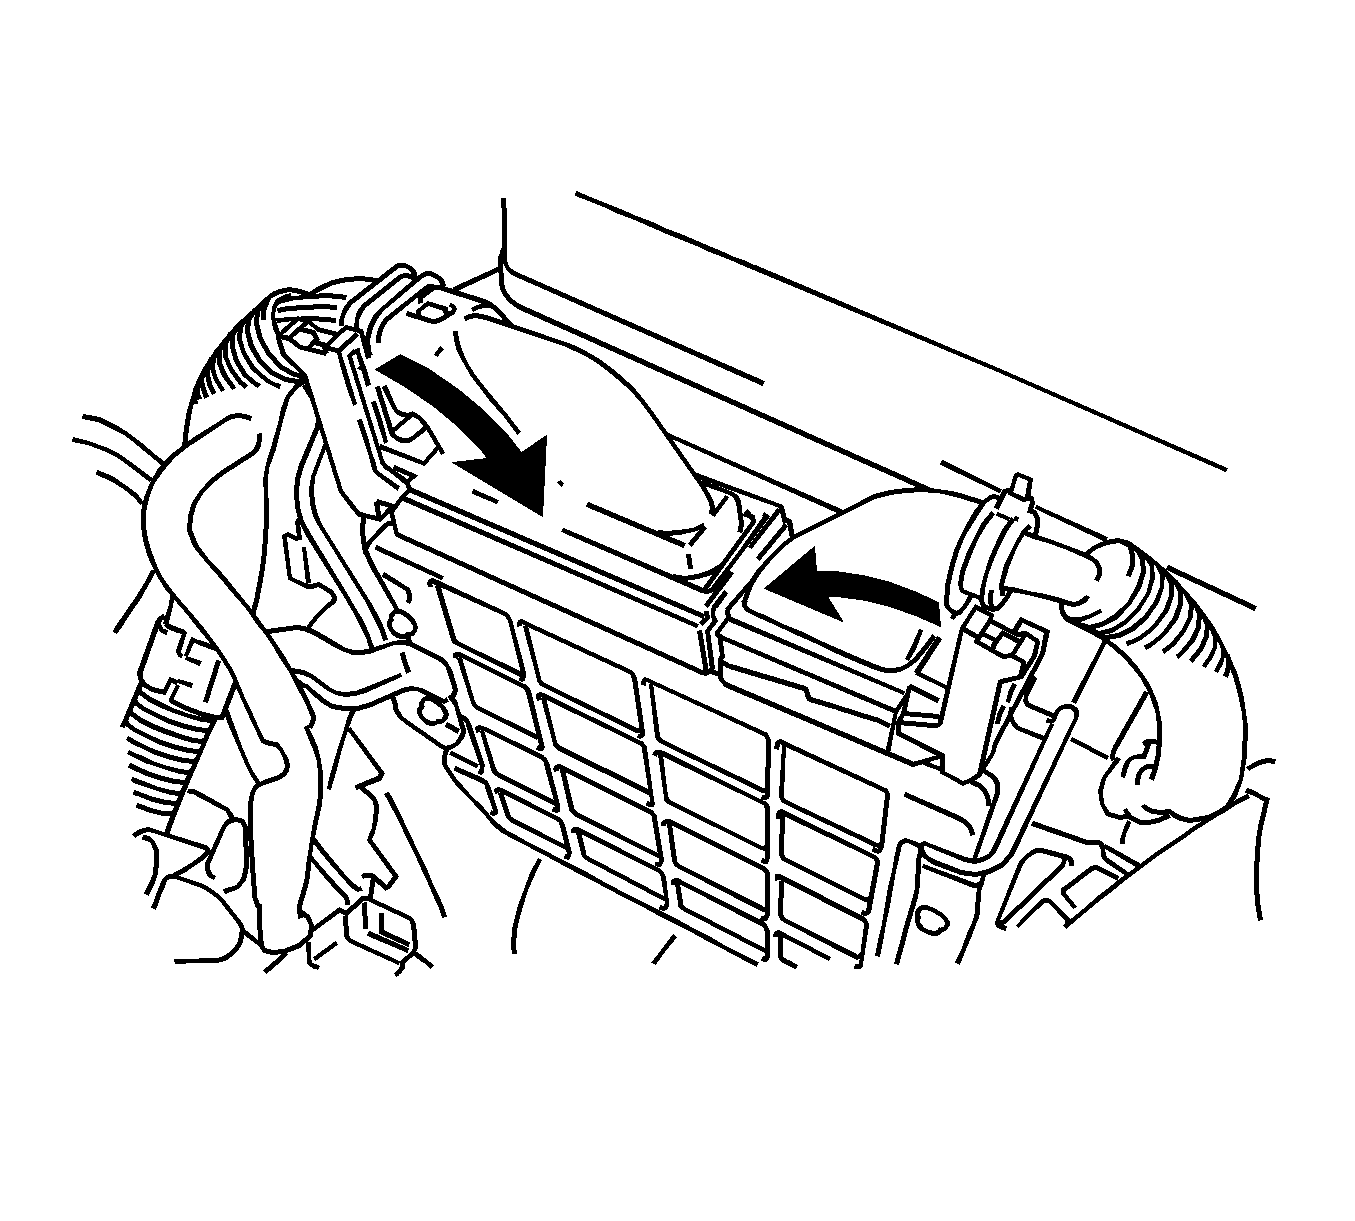
- Remove the air cleaner cap sub-assembly with hose.
- Remove the air cleaner case.
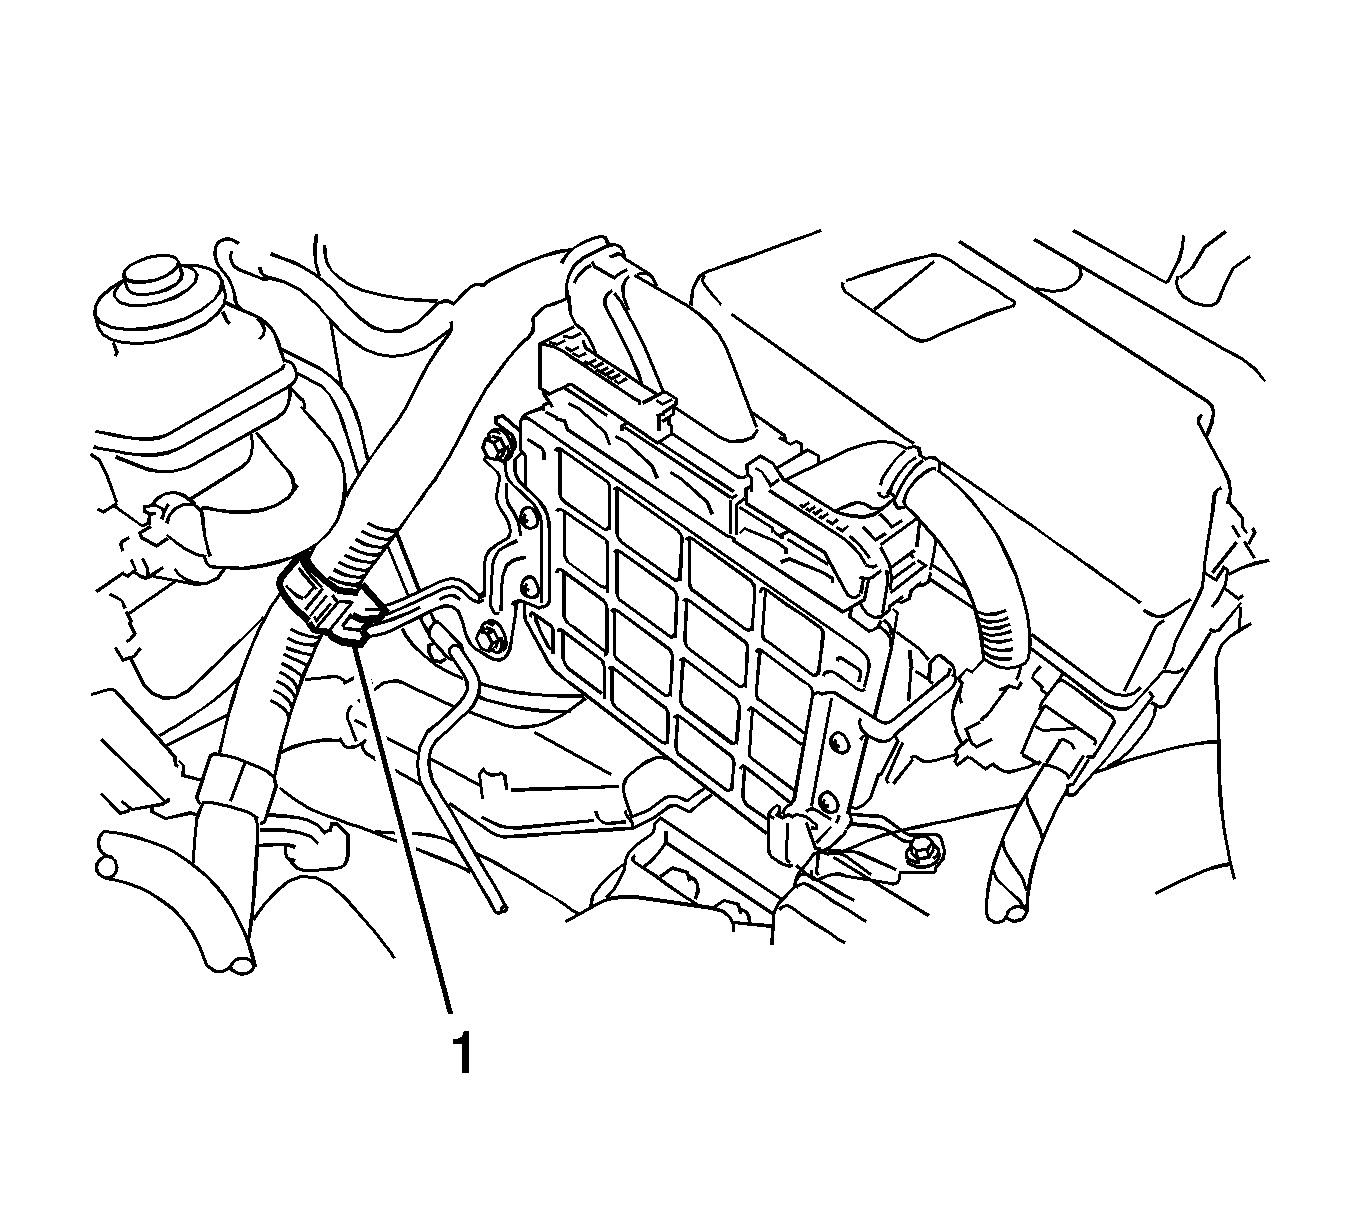
- Separate the wire harness clamp (1).
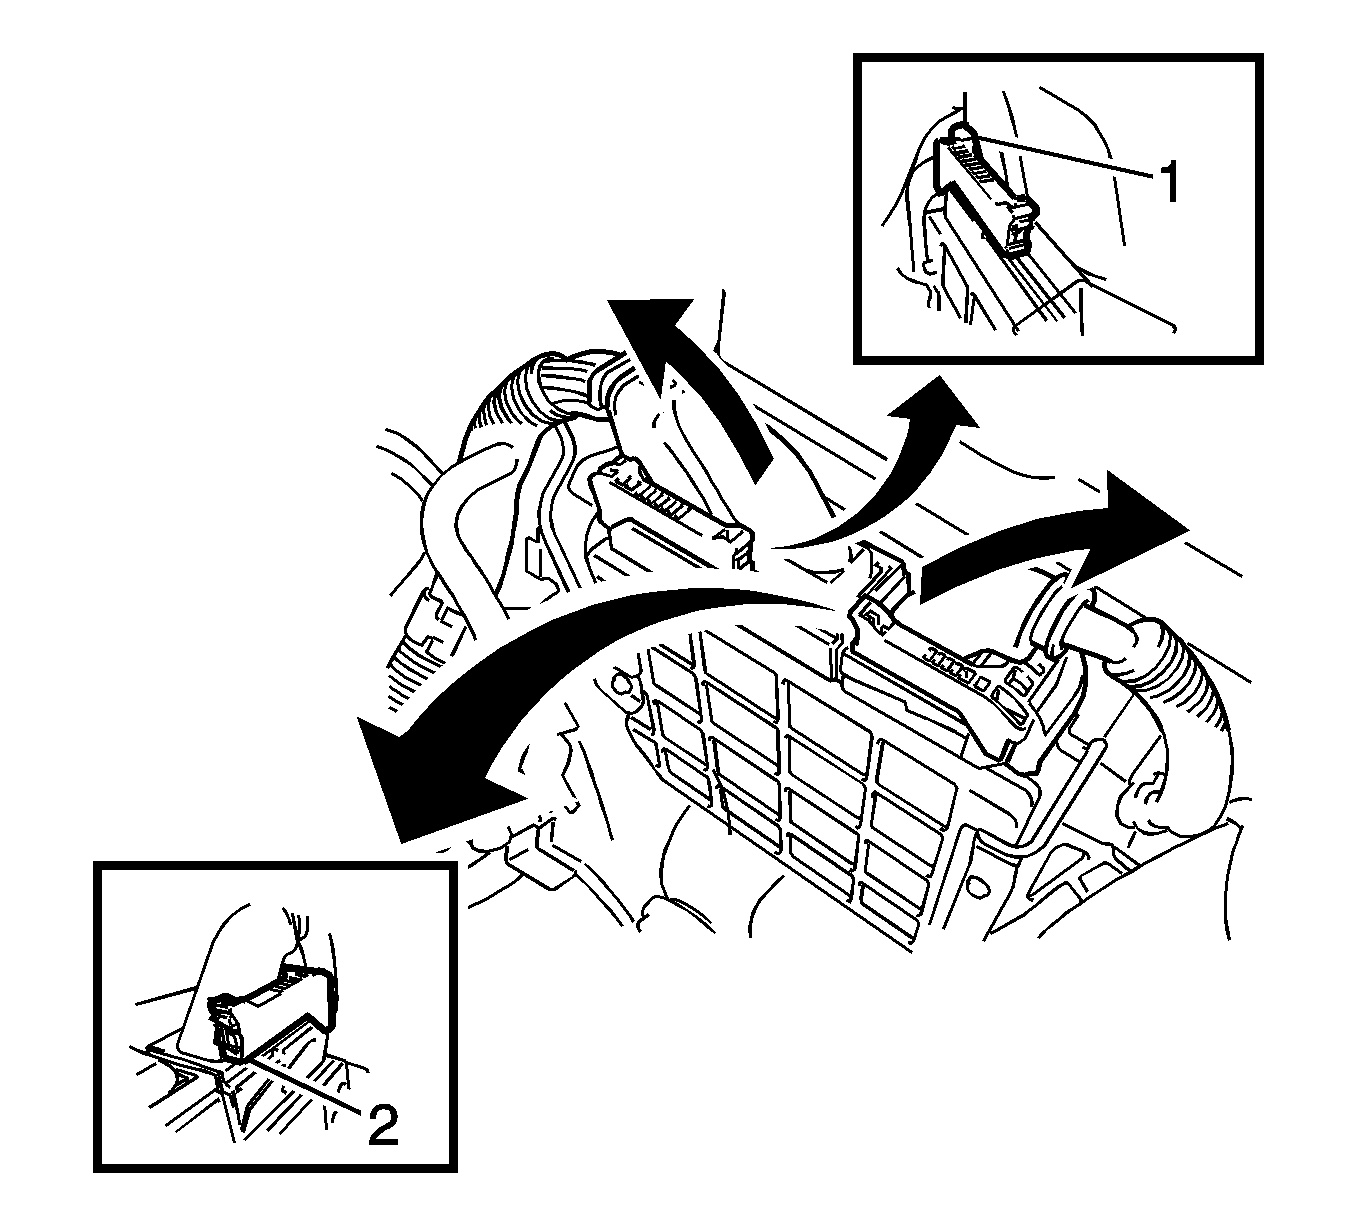
- Push the locks on the 2 levers (1, 2), then raise the levers, and disconnect the 2 ECM connectors.
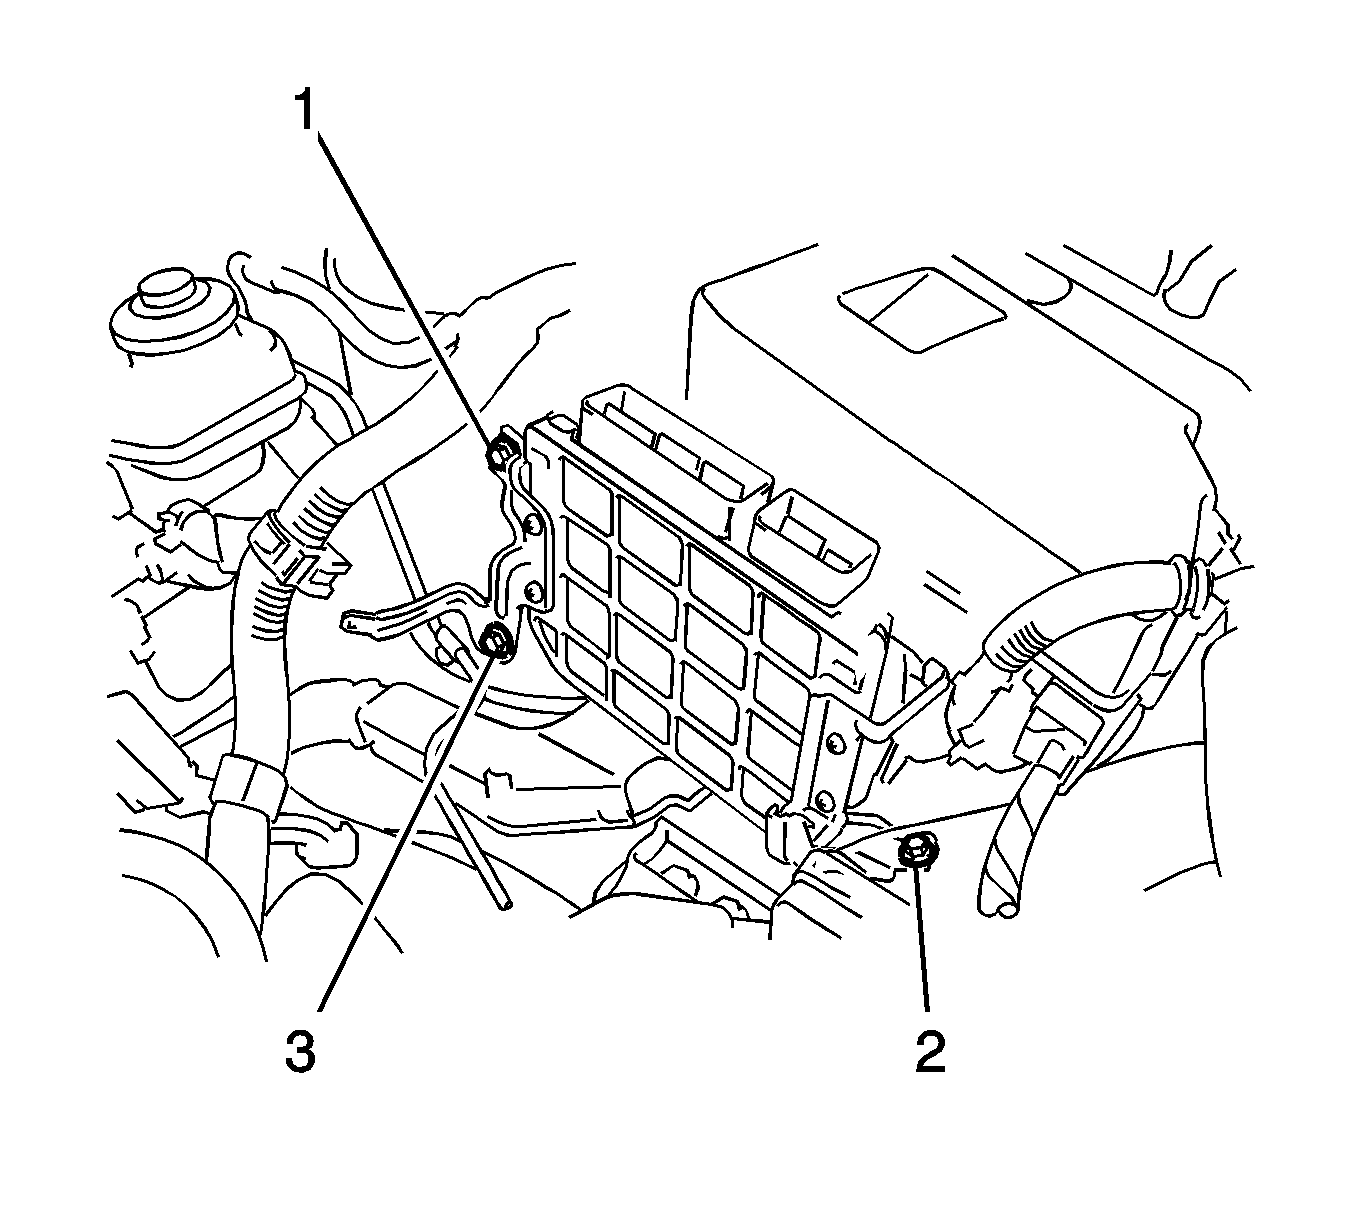
- Remove the 3 bolts (1, 2, 3) and the ECM.
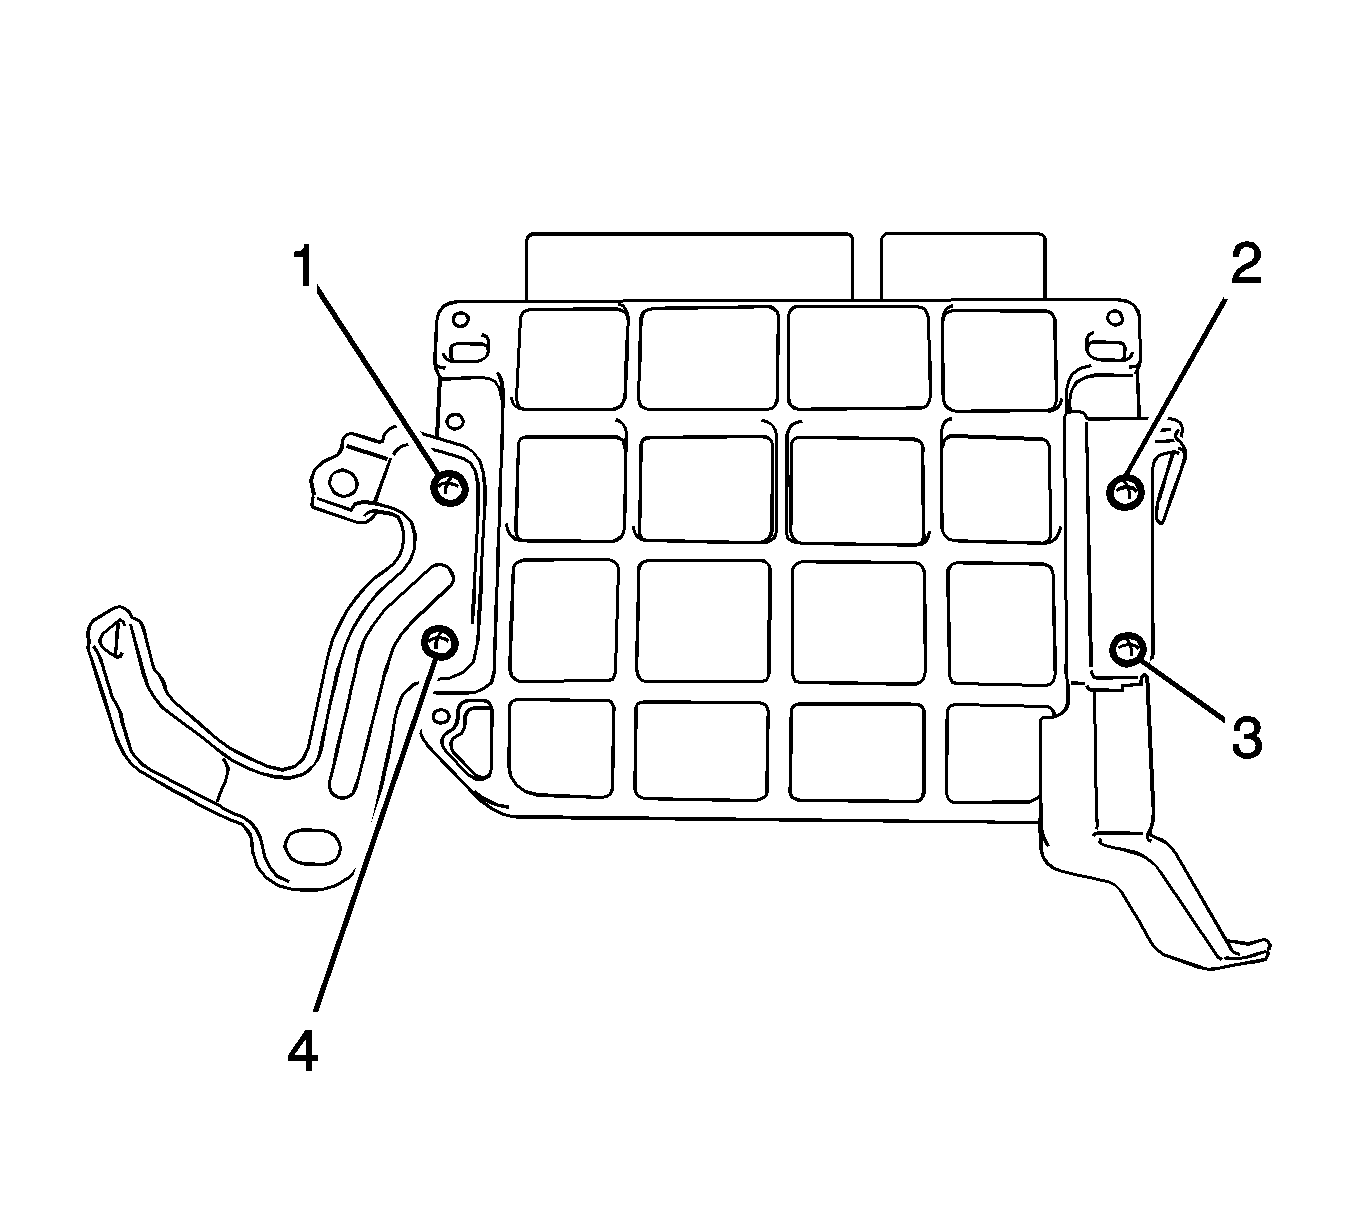
- Remove the 4 screws (1, 2, 3, 4) and the 2 ECM brackets.
Warning: Refer to Battery Disconnect Warning in the Preface section.
Installation Procedure
- Install the 2 ECM brackets onto the ECM with the 4 screws (1, 2, 3, 4).
- Install the ECM with the 3 bolts (1, 2, 3) and tighten to 8.0 N·m (71 lb in).
- Connect the 2 ECM connectors and lower the 2 levers.
- Install the wire harness clamp (1).
- Install the air cleaner case.
- Install the air cleaner cap sub-assembly with hose.
- Install the engine cover. Refer to Engine Cover Replacement
- Connect cable to battery negative terminal.
- Perform REGISTRATION (VIN registration) when replacing the ECM. Refer to Control Module References

Caution: Refer to Fastener Caution in the Preface section.

