For 1990-2009 cars only
Tools Required
J 39400-A Halogen Leak Detector
Removal Procedure
- Recover the refrigerant. Refer to Refrigerant Recovery and Recharging .
- Remove the front fascia. Refer to Front Bumper Fascia Replacement .
- For Pontiac models, remove the hood latch. Refer to Hood Primary and Secondary Latch Replacement .
- Remove the battery box air duct.
- Remove the condenser radiator fan module (CRFM) closeout panel.
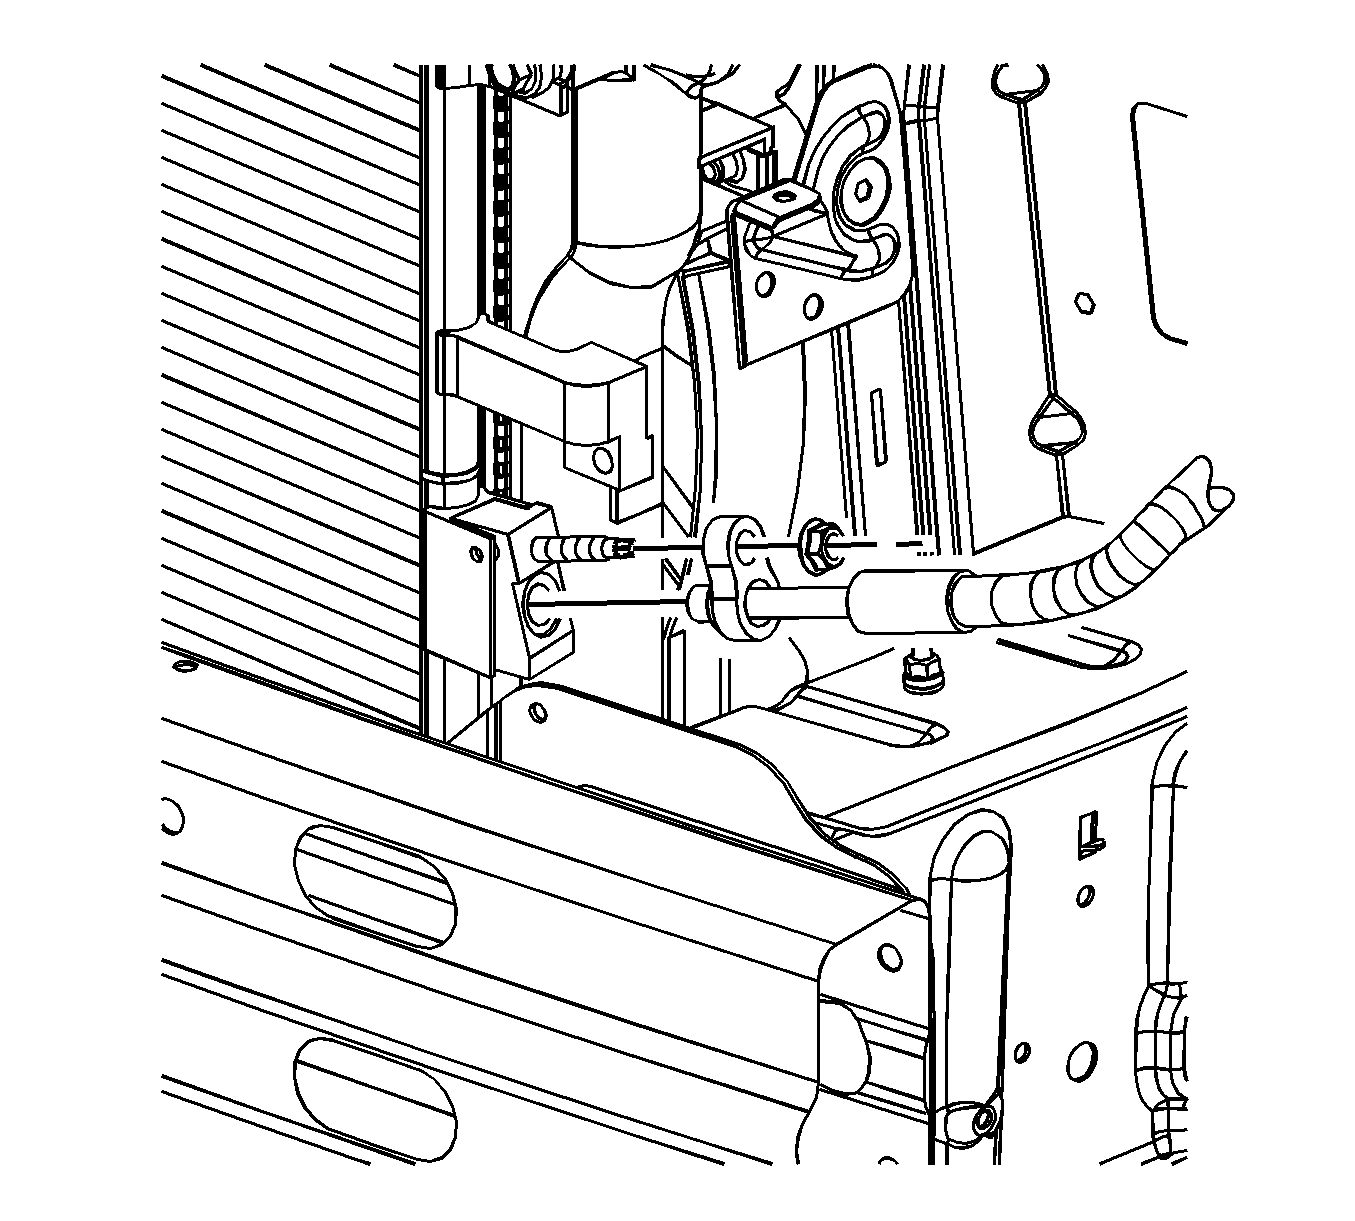
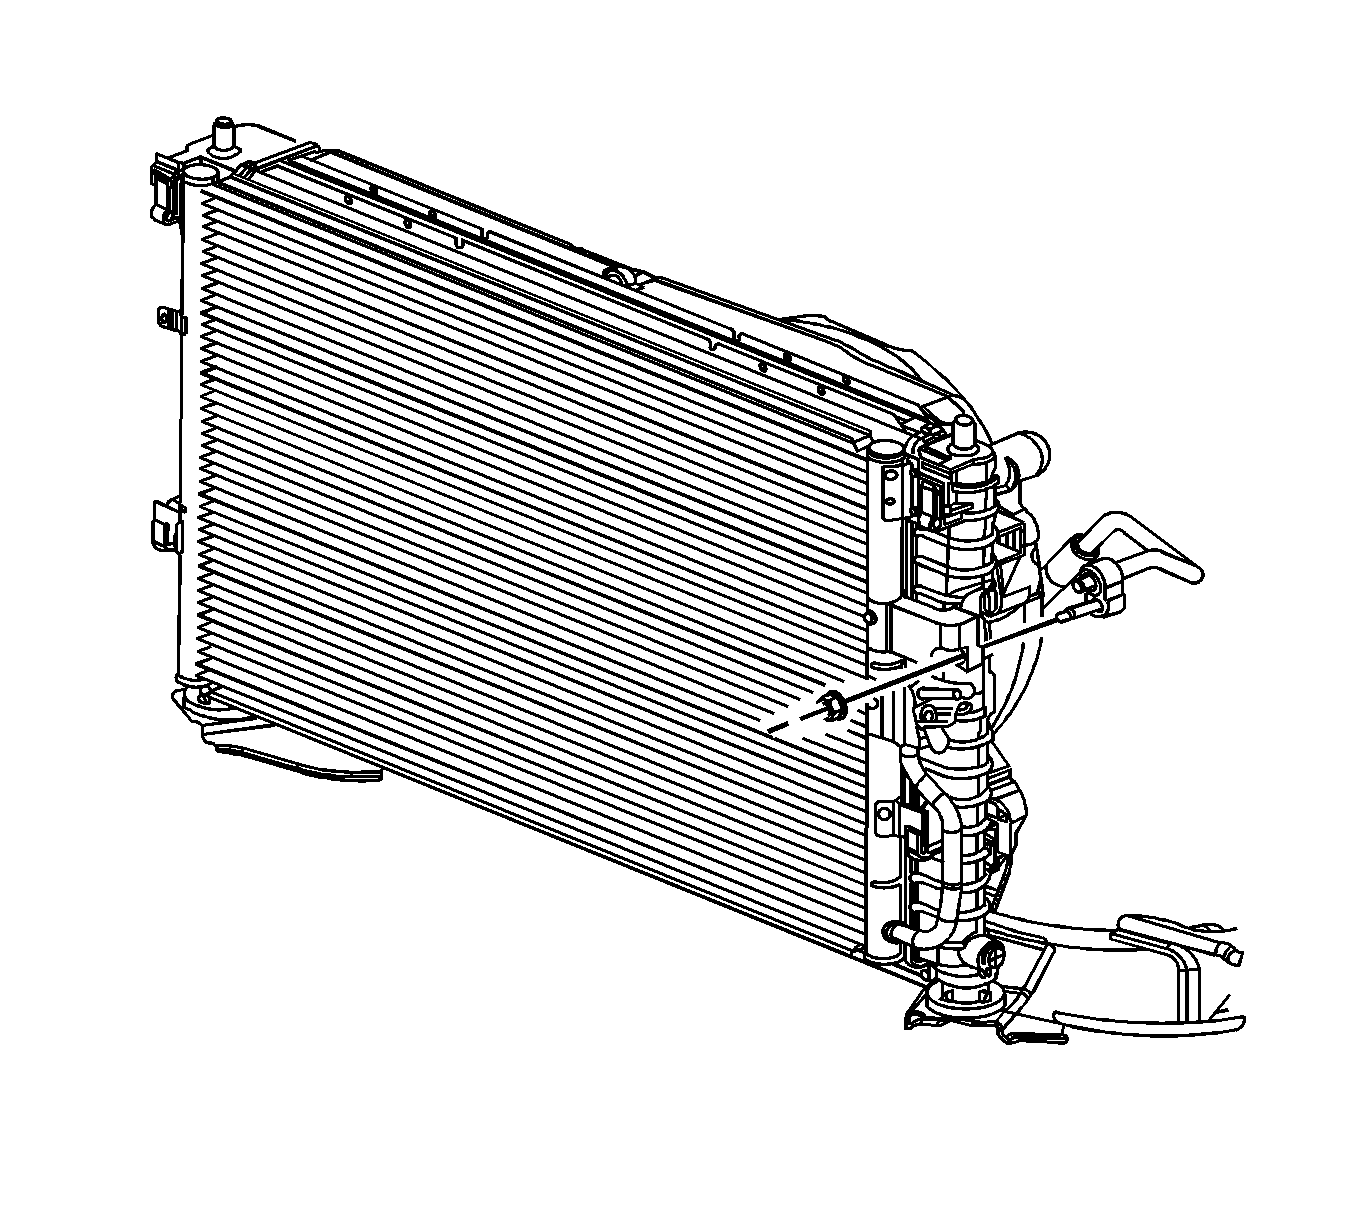
- Remove the liquid line nut from the condenser.
- Remove the liquid line from the condenser.
- Install a protective cap to the liquid line to prevent contamination and desiccant saturation.
- Remove the compressor hose nut from the condenser.
- Remove the compressor hose from the condenser.
- Install a protective cap to the compressor hose to prevent contamination and desiccant saturation.
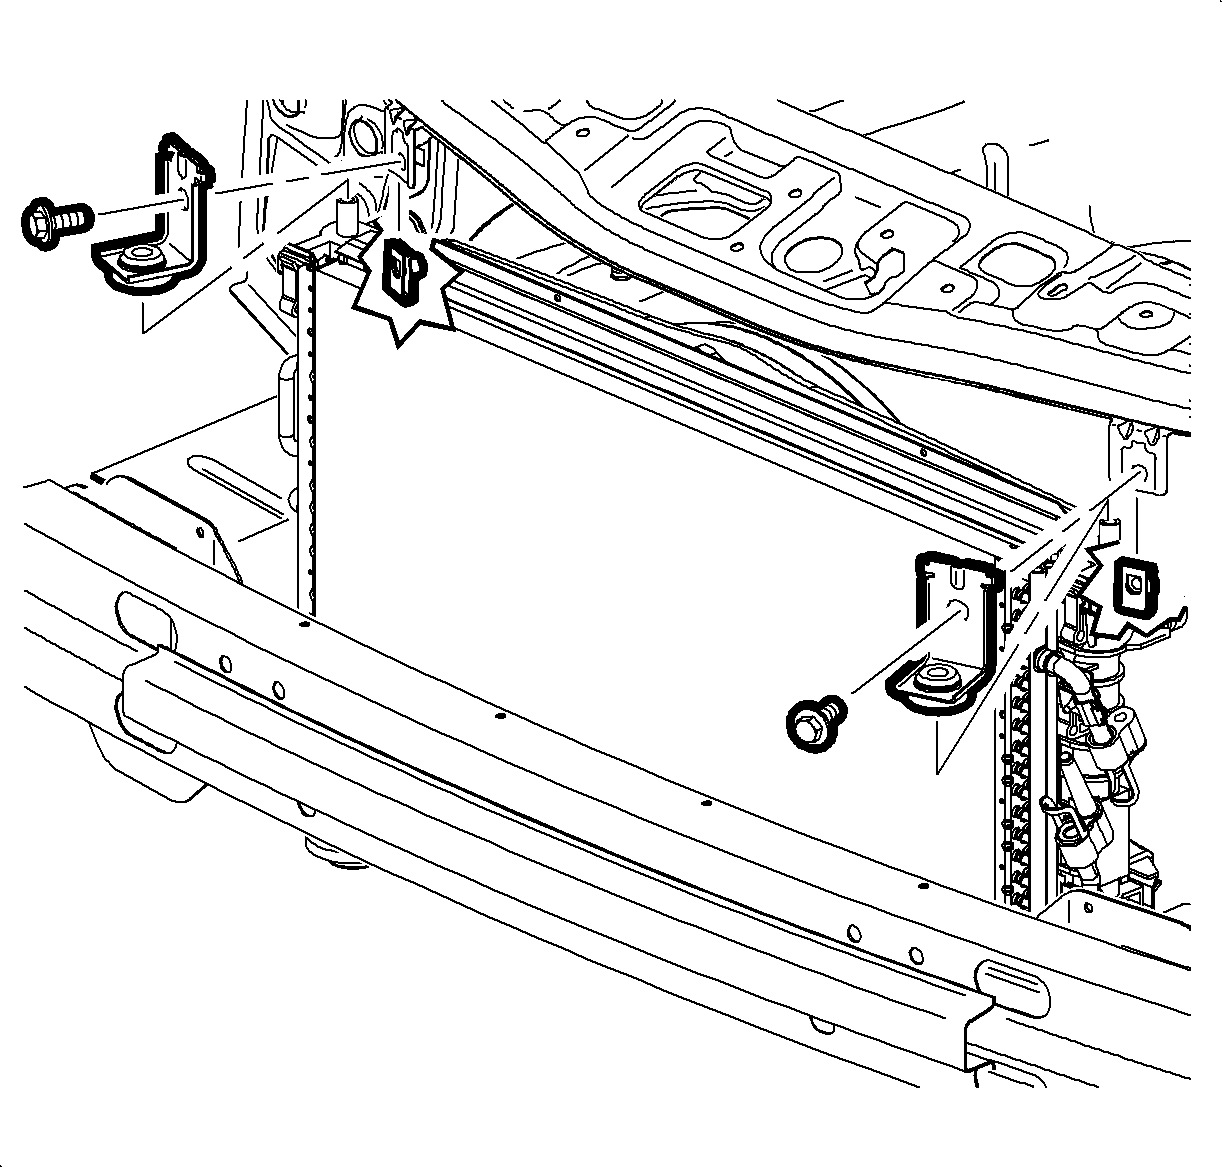
- Remove the CRFM bracket bolts from the radiator support.
- Remove the CRFM brackets from the vehicle.
- Remove the bolts retaining the top of the condenser to the radiator.
- Remove the condenser from the vehicle.


Installation Procedure
- Add the specified amount of PAG oil to the condenser. Refer to Refrigerant System Capacities .
- Inspect the radiator to condenser seals for the proper position.
- Install the condenser to the lower retention clips on the radiator.
- Install the bolts to retain the top of the condenser to the radiator.
- Install the CRFM brackets to the vehicle.
- Install the CRFM bracket bolts to the radiator support.
- Remove the protective cap from the compressor hose.
- Install a new sealing washer to the compressor hose. Refer to Sealing Washer Replacement .
- Install the compressor hose to the condenser.
- Install compressor hose nut to the condenser.
- Install a new seal washer to the liquid line. Refer to Sealing Washer Replacement .
- Install the liquid line to the condenser.
- Install the liquid line nut to the condenser.
- Install the CRFM closeout panel.
- Install the battery box air duct.
- For Pontiac models, install the hood latch assembly. Refer to Hood Primary and Secondary Latch Replacement .
- Install the front fascia. Refer to Front Bumper Fascia Replacement .
- Evacuate and charge the A/C system. Refer to Refrigerant Recovery and Recharging .
- Test the affected A/C joints leaks using J 39400-A .

Notice: Refer to Fastener Notice in the Preface section.
Tighten
Tighten the bolts to 9 N·m (80 lb in).

Tighten
Tighten the bolts to 20 N·m (15 lb ft).

Tighten
Tighten the nut to 20 N·m (15 lb ft).

Tighten
Tighten the nut to 20 N·m (15 lb ft).


