Front Bumper Fascia Replacement Chevrolet
Removal Procedure
- Remove the front fender liner from the fascia.
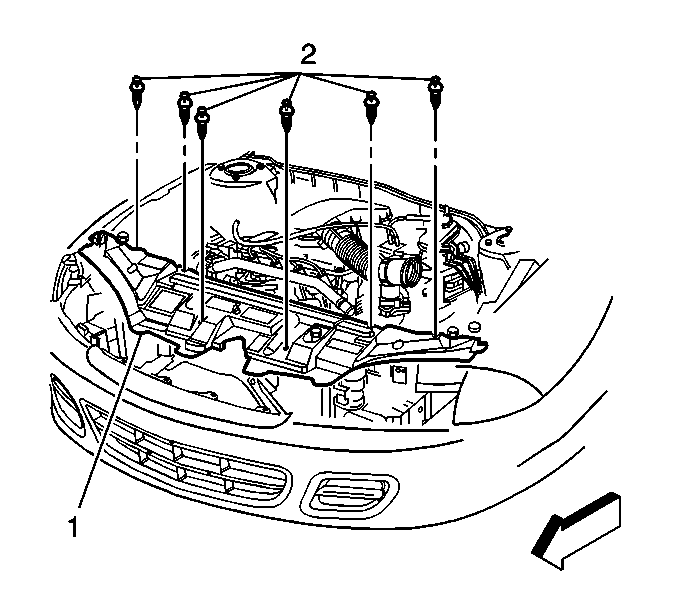
- Remove the hood latch close out panel. Refer to Hood Close Out Filler Replacement in Body Front End.
- Remove the headlamp assemblies. Refer to Headlamp Assembly or Headlamp Bulb and/or Cornering, Sidemarker, Park, Turn Signal Bulb Replacement in Lighting Systems.
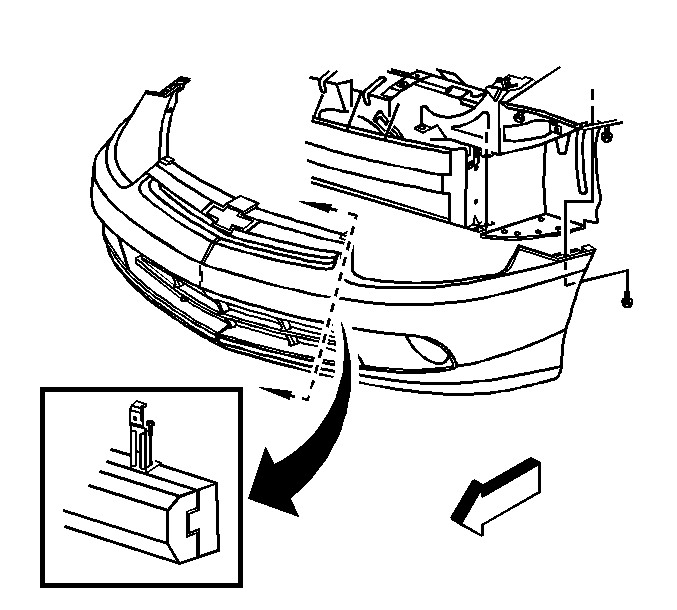
- Remove the fasteners that attach the front fascia bracket to the front impact beam.
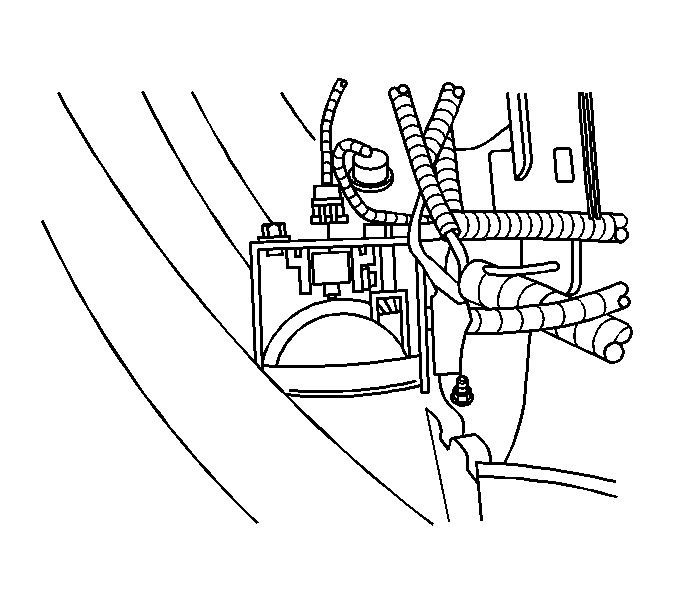
- Disconnect the fog lamp electrical connectors, if equipped.
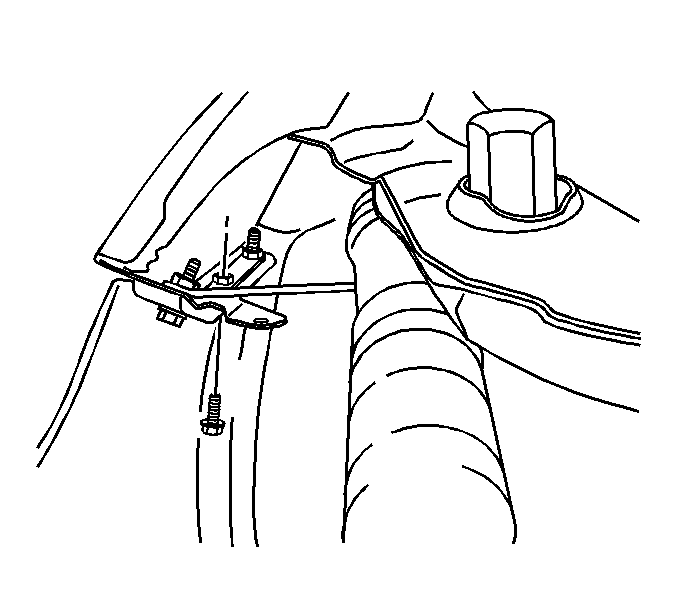
- Remove the center fastener that attaches the fascia to the fender. Access the fastener from the top, through the headlamp openings.
- Disengage the fascia from the shoulder bolts by pulling the fascia outward at the fenders.
- Remove the front bumper fascia from the vehicle.

Installation Procedure
- Position the front bumper fascia on the vehicle.
- Push the fascia onto the shoulder bolts at the fender joint.
- Accessing through the headlamp opening, install the bolt that attaches the fascia to the fender.
- Connect the fog lamp electrical connectors, if equipped.
- Install the fasteners that attach the fascia brackets to the bumper beam.
- Install the headlamps. Refer to Headlamp Assembly or Headlamp Bulb and/or Cornering, Sidemarker, Park, Turn Signal Bulb Replacement in Lighting Systems.
- Install the hood latch close out panel. Refer to Hood Close Out Filler Replacement in Body Front End.
- Install the front fender liner to the front fascia.


Notice: Use the correct fastener in the correct location. Replacement fasteners must be the correct part number for that application. Fasteners requiring replacement or fasteners requiring the use of thread locking compound or sealant are identified in the service procedure. Do not use paints, lubricants, or corrosion inhibitors on fasteners or fastener joint surfaces unless specified. These coatings affect fastener torque and joint clamping force and may damage the fastener. Use the correct tightening sequence and specifications when installing fasteners in order to avoid damage to parts and systems.
Tighten
Tighten the bolt to 9 N·m (80 lb in).


Front Bumper Fascia Replacement Pontiac
Removal Procedure
- Remove the front fender liner from the fascia.
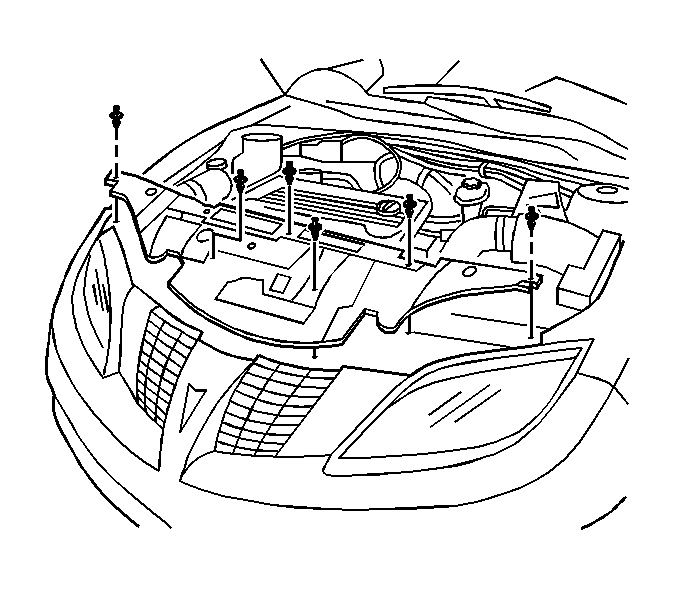
- Remove the hood latch close out panel. Refer to Hood Close Out Filler Replacement in Body Front End.
- Remove the grille and the park/turn signal turn lamp assembly. Refer to Grille Replacement in Exterior Trim and to Parking and Turn Signal Lamp Replacement in Lighting Systems.
- Remove the headlamp assemblies. Refer to Headlamp Assembly or Headlamp Bulb and/or Cornering, Sidemarker, Park, Turn Signal Bulb Replacement in Lighting Systems.
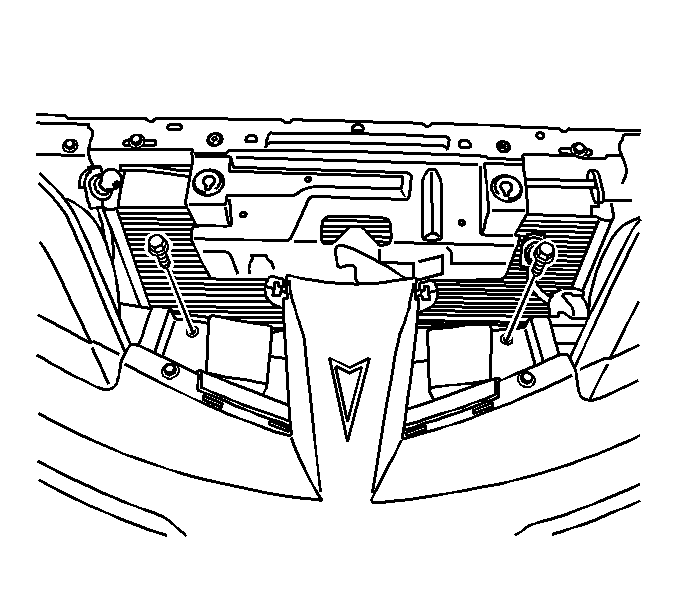
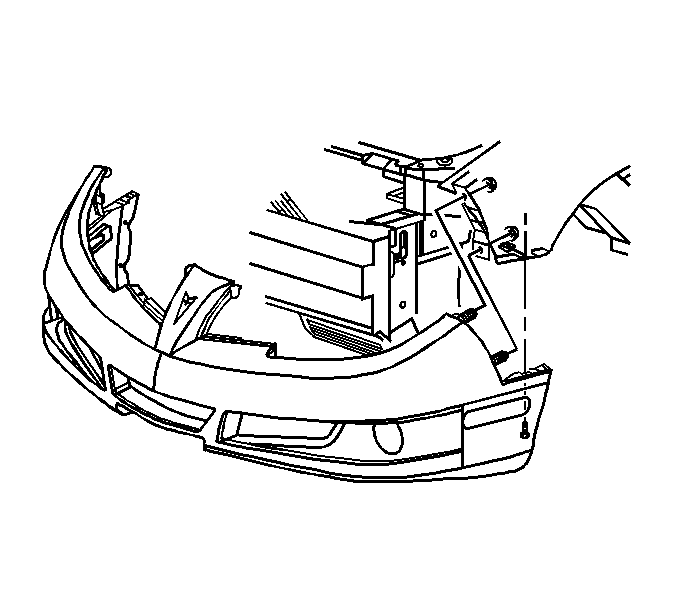
- Remove the fasteners that attach the front fascia bracket to the front impact beam.
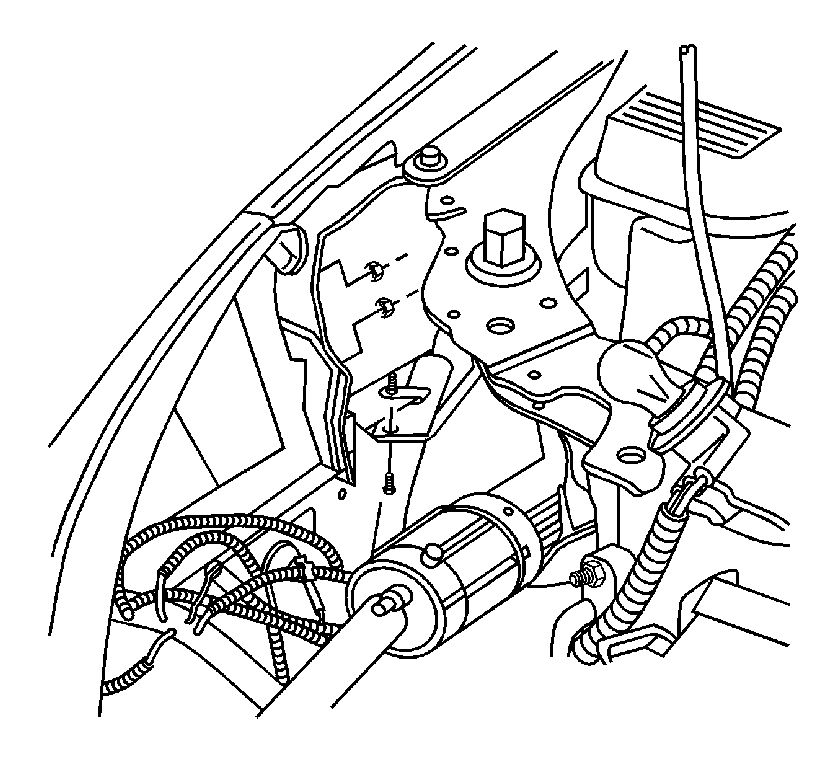
- Disconnect the fog lamp electrical connectors, if equipped.
- Disconnect the front side marker lamp sockets.
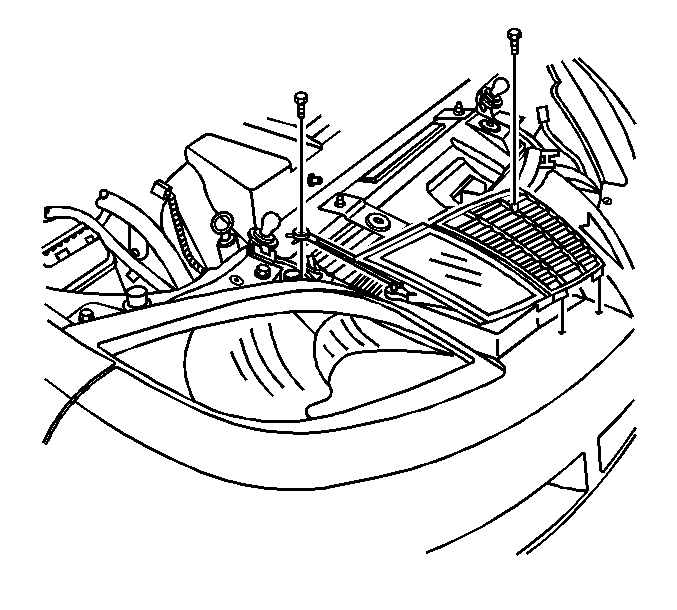
- Remove the fasteners that attach the fascia to the fender. Access the fasteners from the top, through the headlamp openings.
- Remove the front bumper fascia from the vehicle.

Installation Procedure
- Position the front bumper fascia on the vehicle.
- Accessing through the headlamp opening, install the bolts that attach the fascia to the fender.
- Connect the fog lamp electrical connectors, if equipped.
- Install the fasteners that attach the fascia brackets to the bumper beam.
- Install the headlamps. Refer to Headlamp Assembly or Headlamp Bulb and/or Cornering, Sidemarker, Park, Turn Signal Bulb Replacement in Lighting Systems.
- Install the grille and the park/turn signal turn lamp assembly. Refer to Grille Replacement in Exterior Trim and to Parking and Turn Signal Lamp Replacement in Lighting Systems.
- Install the hood latch close out panel. Refer to Hood Close Out Filler Replacement in Body Front End.
- Install the front fender liner to the front fascia.


Notice: Use the correct fastener in the correct location. Replacement fasteners must be the correct part number for that application. Fasteners requiring replacement or fasteners requiring the use of thread locking compound or sealant are identified in the service procedure. Do not use paints, lubricants, or corrosion inhibitors on fasteners or fastener joint surfaces unless specified. These coatings affect fastener torque and joint clamping force and may damage the fastener. Use the correct tightening sequence and specifications when installing fasteners in order to avoid damage to parts and systems.
Tighten
Tighten the bolts to 9 N·m (80 lb in).


