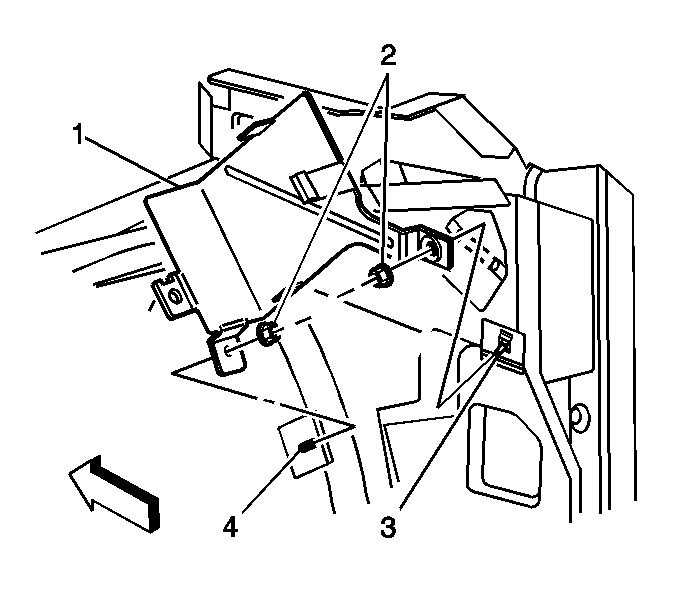
For 1990-2009 cars only
Removal Procedure
- Pull back enough of the carpet and the floor sound deadener for more access, if necessary. Refer to Front Floor Panel Carpet Replacement in Interior Trim.
- Remove the OnStar® module from the bracket assembly. Refer to Communication Interface Module Replacement .
- Remove the retaining nut (2) from the dash pan stud (4).
- Remove the retaining nut (2) from the hinge pillar stud (3).
- Remove the bracket assembly (1) from the hinge pillar stud, and the dash pan stud.

Installation Procedure
- Install the bracket assembly (1) to the hinge pillar stud (3), and the dash pan stud (4).
- Install the retaining nut (2) to the hinge pillar stud (3).
- Install the retaining nut (2) to the dash pan stud (4).
- Install the OnStar® module to the bracket assembly. Refer to Communication Interface Module Replacement .
- Reposition the carpet and the floor sound deadener to a desired appearance, if necessary. Refer to Front Floor Panel Carpet Replacement in Interior Trim.

Notice: Refer to Fastener Notice in the Preface section.
Tighten
Tighten nut to 9.5 N·m (84 lb in).
Tighten
Tighten nut to 9.5 N·m (84 lb in).
