-
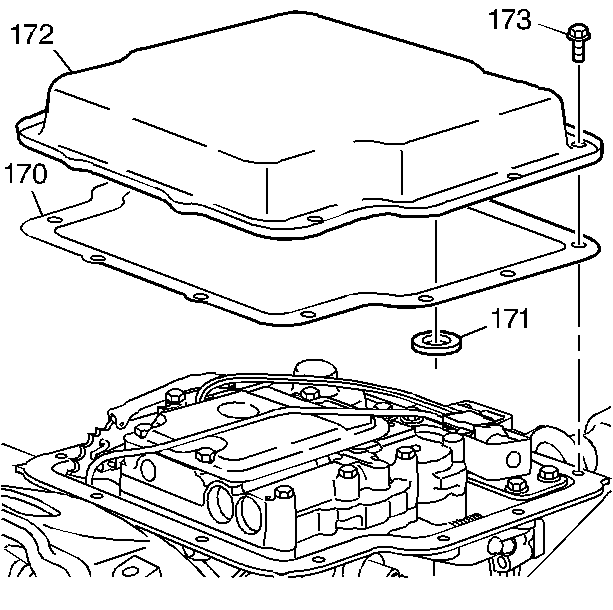
Install the transmission oil pan gasket (170).
- Install the transmission oil pan (172).
- Install the transmission oil pan bolts (173).
Tighten
Tighten the bolts to 11 N·m (98 lb in).
Refer to Fastener Notice
.
Notice: Use the correct fastener in the correct location. Replacement fasteners
must be the correct part number for that application. Fasteners requiring
replacement or fasteners requiring the use of thread locking compound or sealant
are identified in the service procedure. Do not use paints, lubricants, or
corrosion inhibitors on fasteners or fastener joint surfaces unless specified.
These coatings affect fastener torque and joint clamping force and may damage
the fastener. Use the correct tightening sequence and specifications when
installing fasteners in order to avoid damage to parts and systems.

- Install the following
components to the valve body:
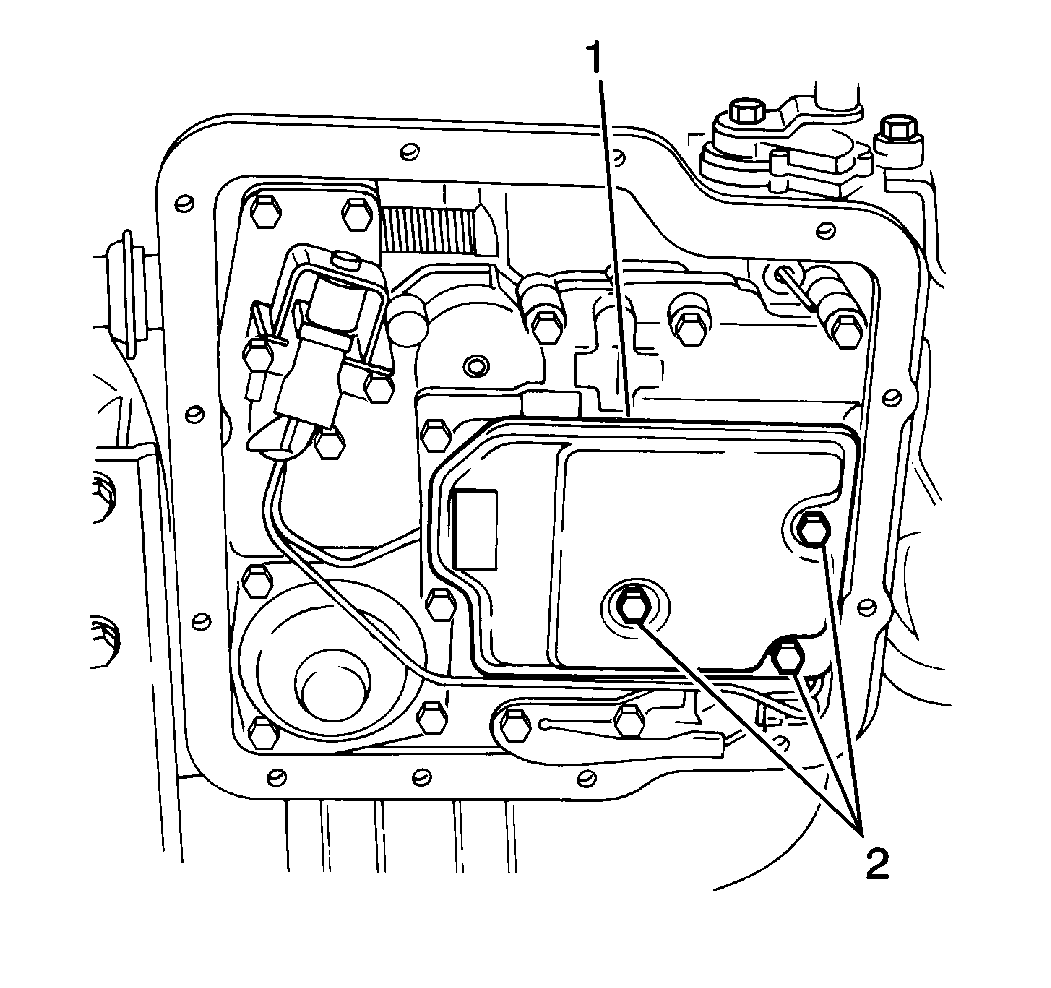
| • | The new fluid filter screen gasket. |
| • | The fluid filter screen (1). |
| • | Use the three fluid filter screen bolts (2), in order to secure the
fluid filter screen. |
Tighten
Tighten the fluid filter screen bolts to 19 N·m (14 lb ft).

- Install the following
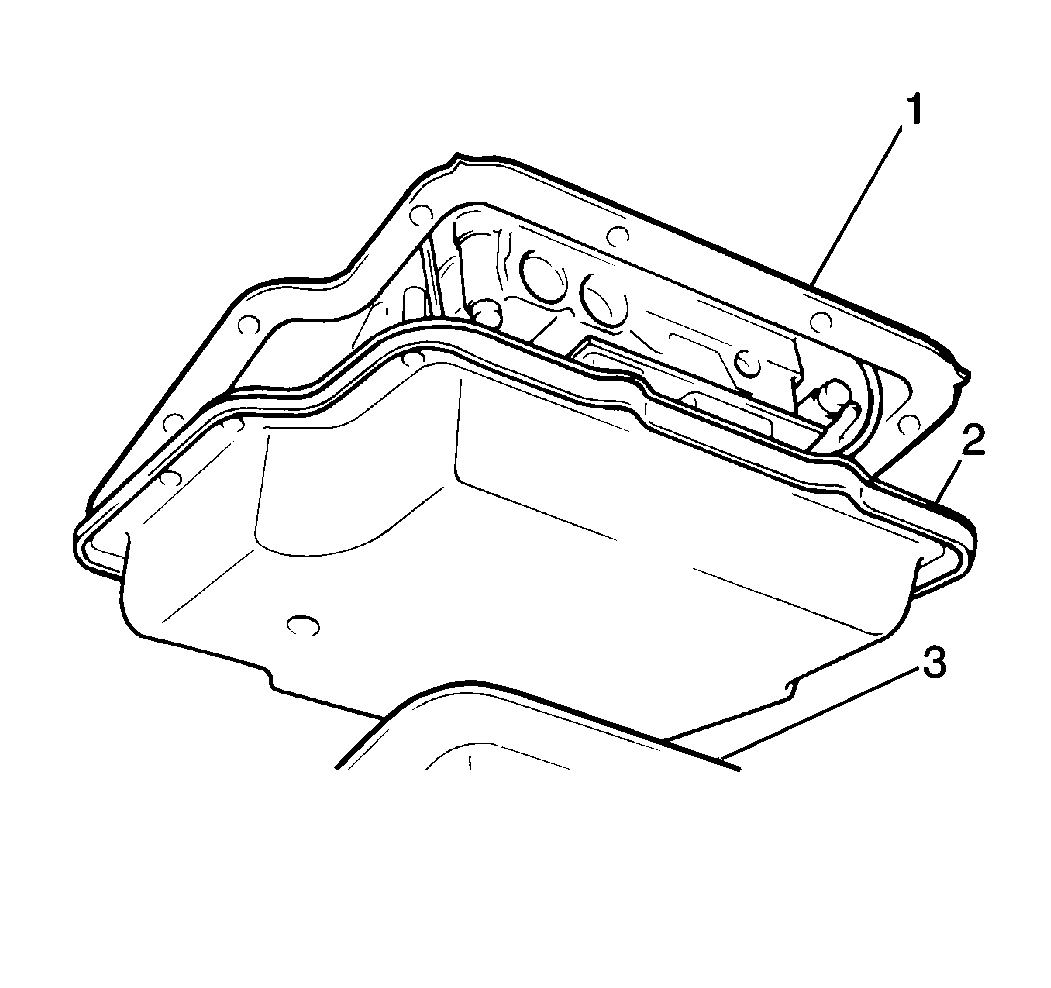
components to the transmission (1):
| • | The new transmission fluid pan gasket. |
| • | The transmission fluid pan (2). |
| • | Use twelve transmission fluid pan bolts in order to secure the transmission
fluid pan. |
Tighten
Tighten the transmission fluid pan bolts to 13 N·m (115 lb in).
- Install the front propeller shaft into the vehicle by aligning
the index marks made during the front propeller shaft removal(four-wheel drive
models).
Tighten
Tighten the front propeller shaft bolts and nuts to 50 N·m
(37 lb ft).
- Lower the vehicle.
- Use the following procedure in order to refill the transmission
if necessary.
| • | Place the vehicle on a level surface. |
| • | Remove the fluid level indicator. |
| • | Add approximately 1.5 liters (1.6 quarts) of automatic
transmission fluid into the fluid filler tube. |
| • | Use Dexron® III automatic transmission fluid GM P/N 12346143
or the equivalent. |
| • | Install the fluid level indicator into the fluid filler tube. |
| • | Apply the parking brake and block the vehicle wheels. |
| • | Start the engine with the engine selector level in the PARK position. |
| • | Do not race the engine. |
| • | Perform the following procedure with the engine running at idle: |
| - | Remove the fluid level indicator. |
| - | Wipe off the fluid level indicator. |
| • | Reinsert the fluid level indicator into the filler tube. |
| • | Verify that the indicator is seated in the indicators original
position. |
| • | Remove the fluid level indicator in order to inspect the fluid. |
| • | The fluid level should measure between the FULL HOT and LOW HOT marks. |
| • | If the level is below the LOW HOT mark then add fluid in order
to raise the fluid level to the FULL HOT mark. |
| • | Raising the fluid level from the LOW HOT mark to the FULL HOT mark requires
0.3 liters (0.3 quarts) of fluid. Use Dexron® III
automatic transmission fluid GM P/N 12346143 or the equivalent. |


