Tools Required
| • | EN-48585 Crankshaft Balancer Guide |
| • | EN-48953 Camshaft Actuator Locking Tool |
| • | J 38122-A Crankshaft Balancer Holder |
| • | J 45059 Angle Meter |
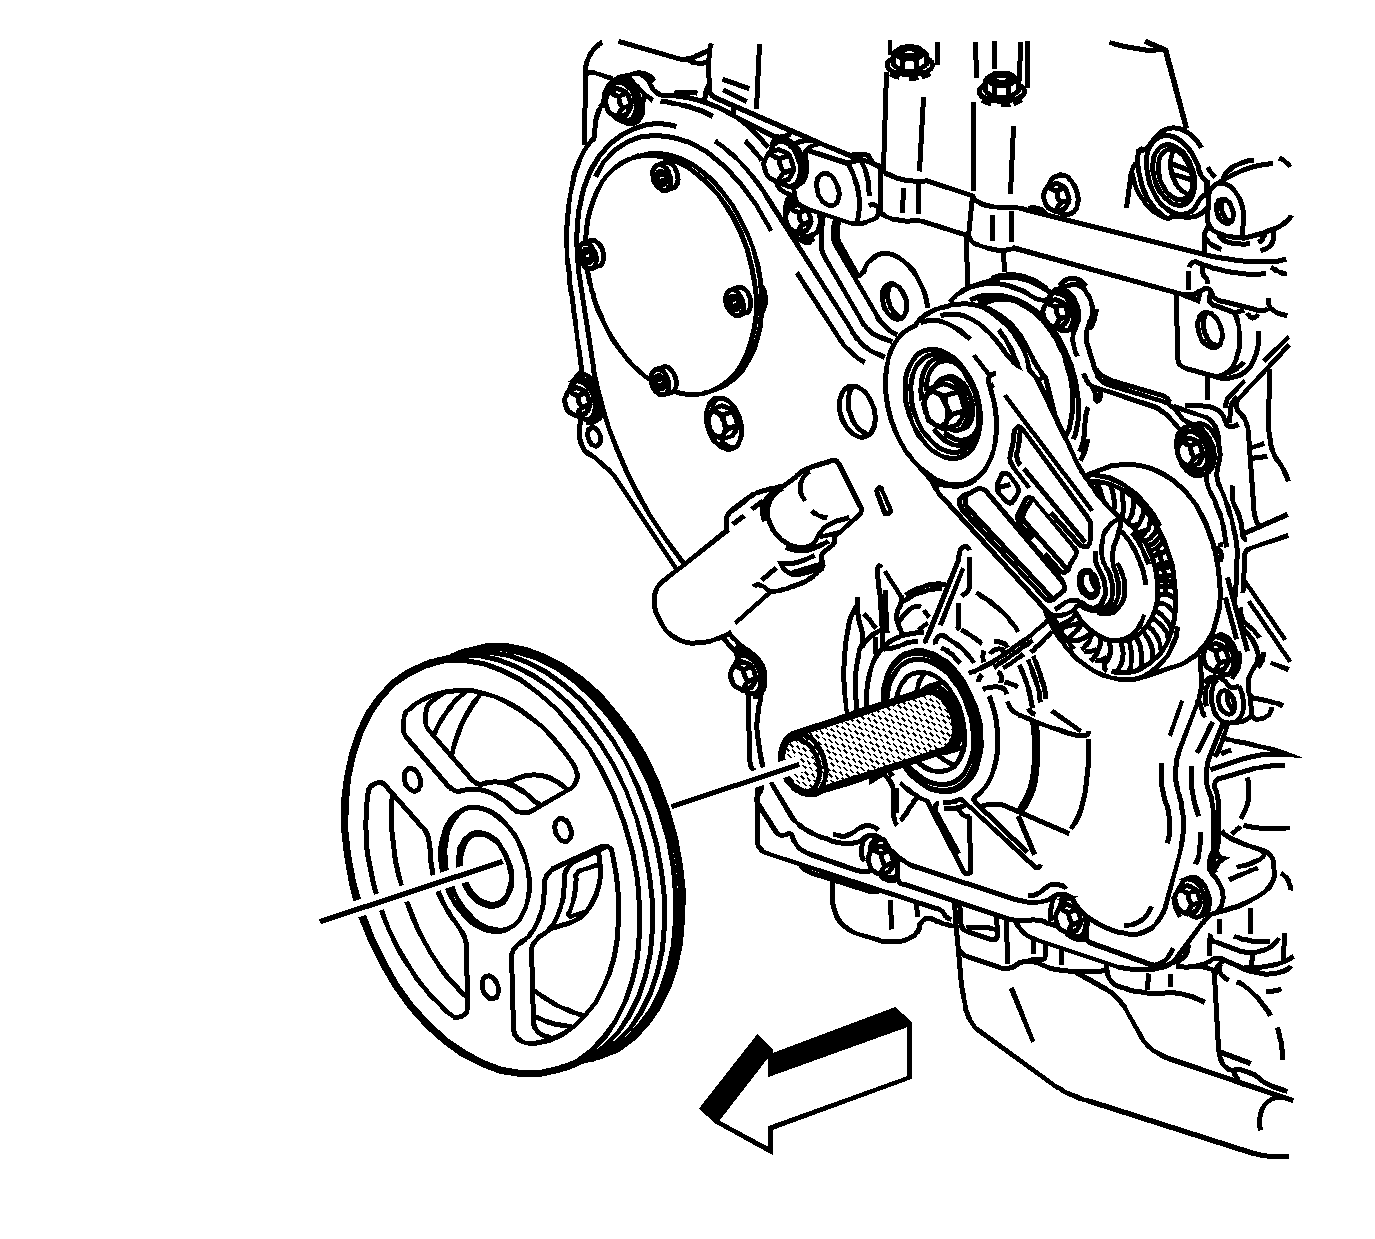
- Install the EN-48585 into the end of the crankshaft.
- Install the balancer onto the EN-48585 . Use care to properly align the keyway and flats on the balancer with the oil pump drive.
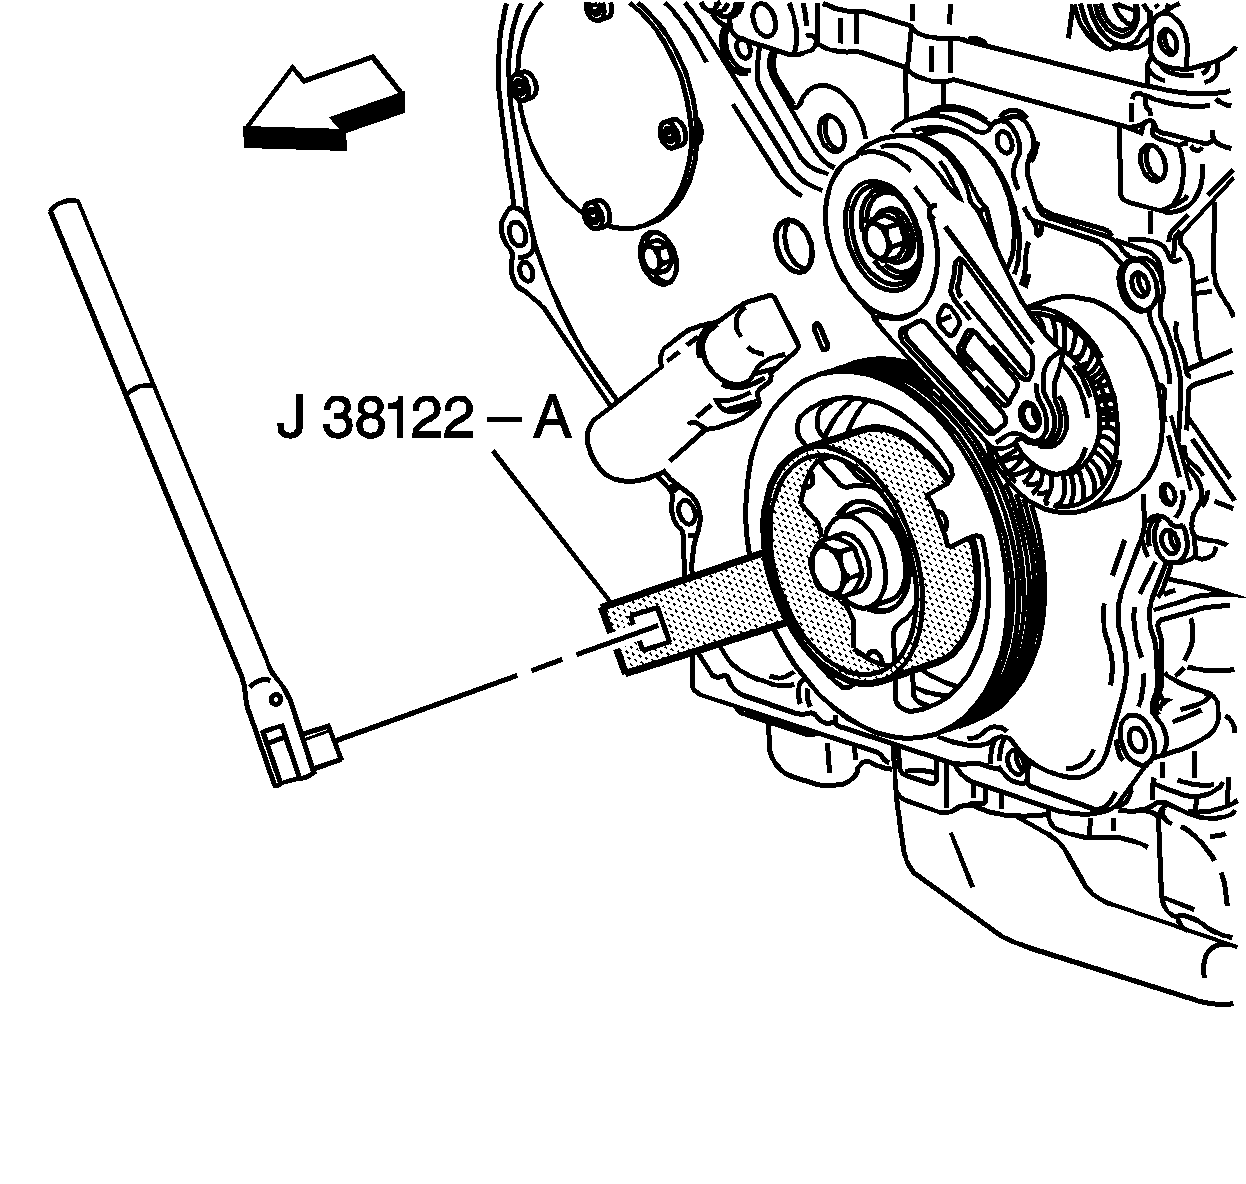
- Install the J 38122-A .
- Install a new retaining bolt and washer. Use the J 38122-A and a breaker bar to prevent the crankshaft from rotating when tightening the bolt.
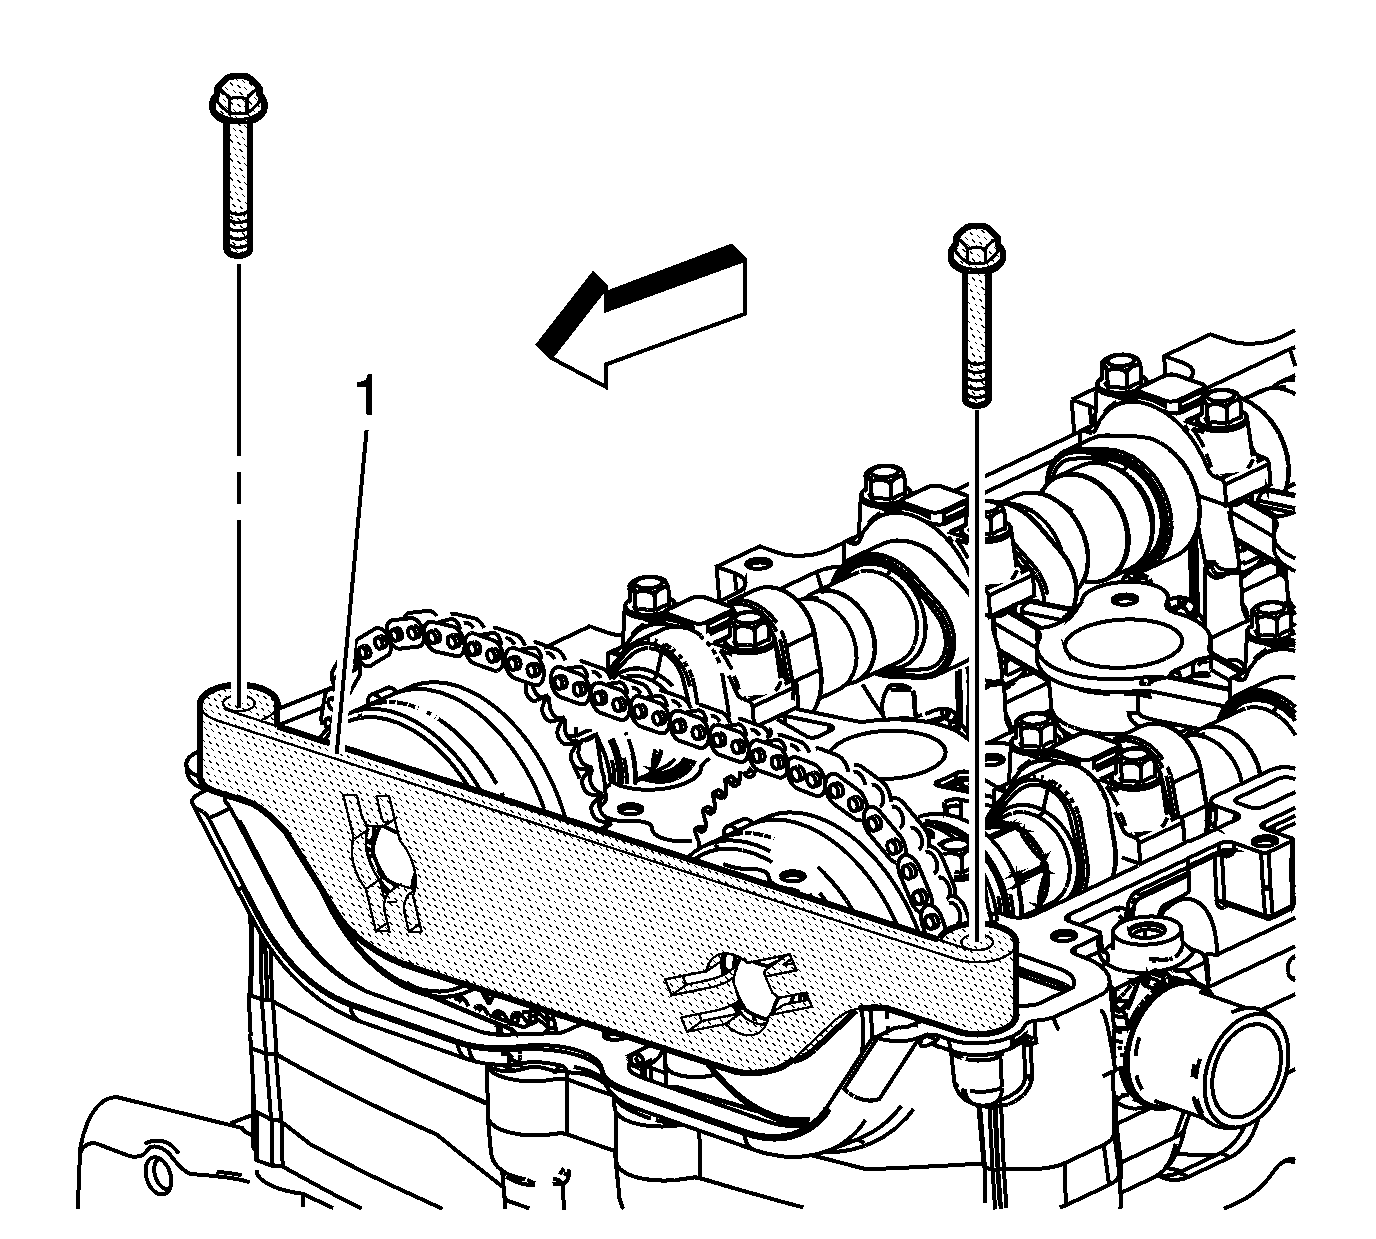
- Install the EN-48953 (1) and tighten the bolts into the cylinder head.
- Release the timing chain tensioner by applying counterclockwise torque to the crankshaft balancer bolt.
- Remove the EN-48953 .

Notice: Ensure both components are aligned correctly or serious engine damage will occur.

Notice: Use the correct fastener in the correct location. Replacement fasteners must be the correct part number for that application. Fasteners requiring replacement or fasteners requiring the use of thread locking compound or sealant are identified in the service procedure. Do not use paints, lubricants, or corrosion inhibitors on fasteners or fastener joint surfaces unless specified. These coatings affect fastener torque and joint clamping force and may damage the fastener. Use the correct tightening sequence and specifications when installing fasteners in order to avoid damage to parts and systems.
Important: Always install a new crankshaft balancer retaining bolt and washer.
Tighten
Tighten the bolt to 100 N·m (74 lb ft) plus 125 degrees using the
J 45059 .

Tighten
Tighten the
EN-48953 retaining bolts to 10 N·m (89 lb in).
Torque
Apply 45 N·m (33 lb ft) counterclockwise to the bolt.
