Sunroof Track Timing/Synchronization MD4
Removal Procedure
- Remove the headliner. Refer to Headlining Trim Panel Replacement .
- Disconnect the electrical connector from the motor/actuator.
- Remove the motor/actuator. Refer to Sunroof Motor/Actuator Replacement .
- Remove the sunroof window. Refer to Sunroof Window Replacement .
- Manually slide the mechanism forward in the track until the mechanism reaches the hard stop.
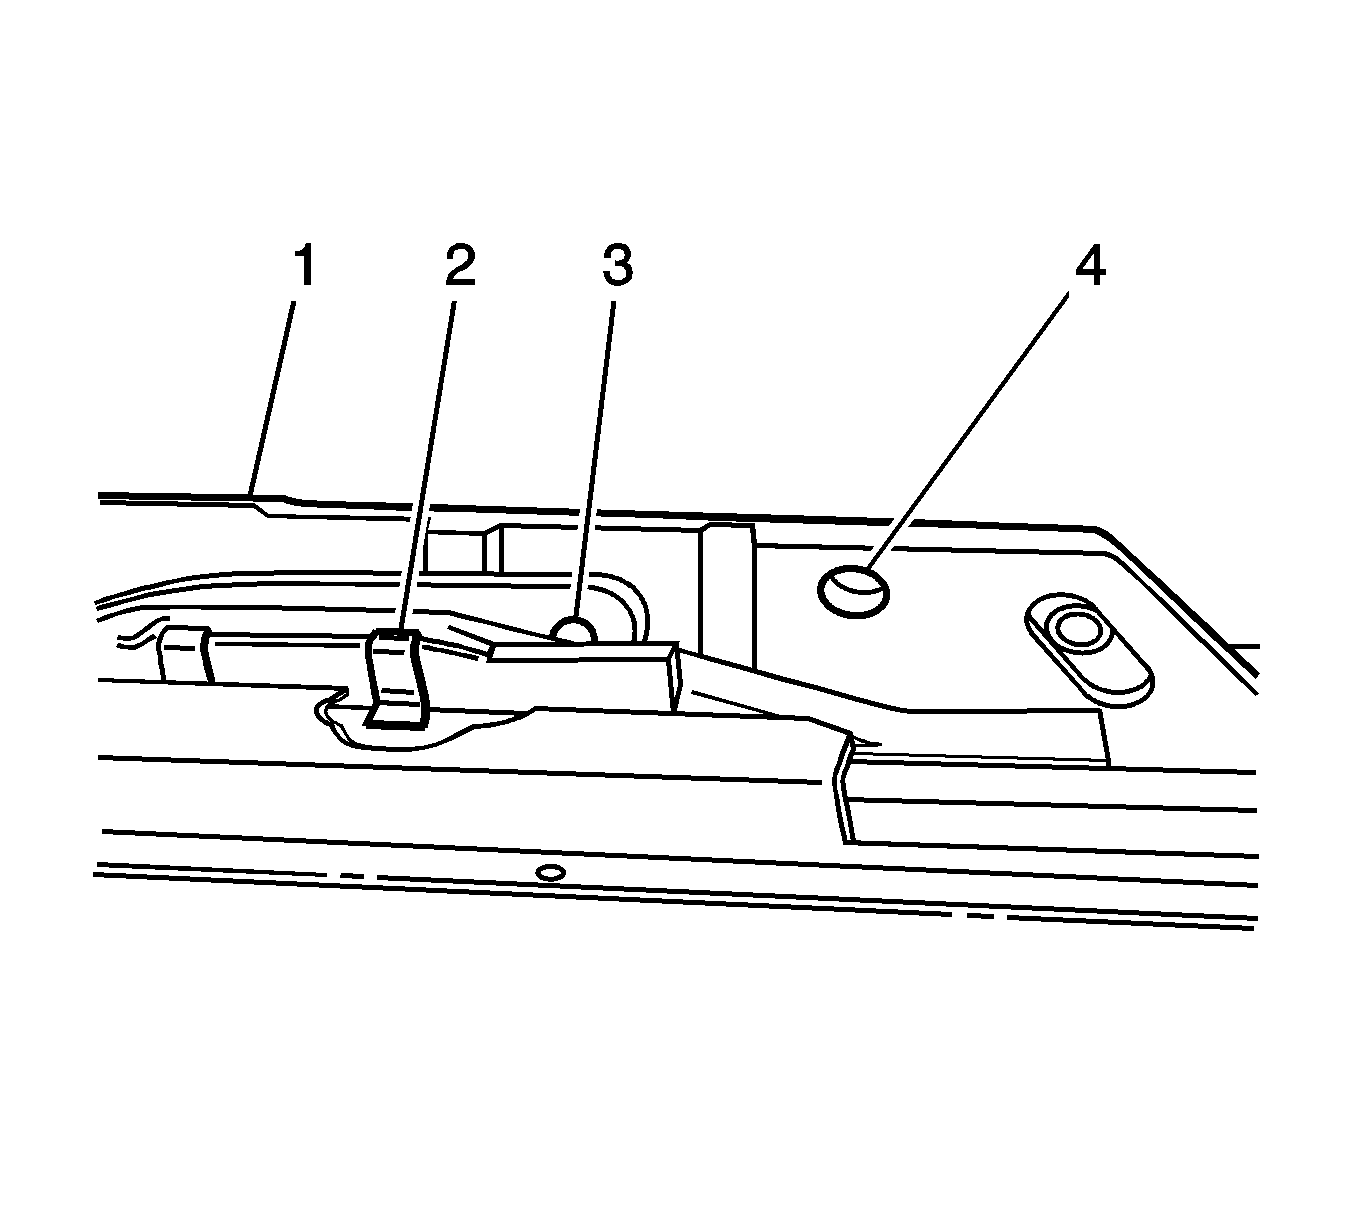
- Push the cam assembly (2) forward until the timing hole (3) in the cam is aligned with the timing hole (4) in the lifter arm (1).
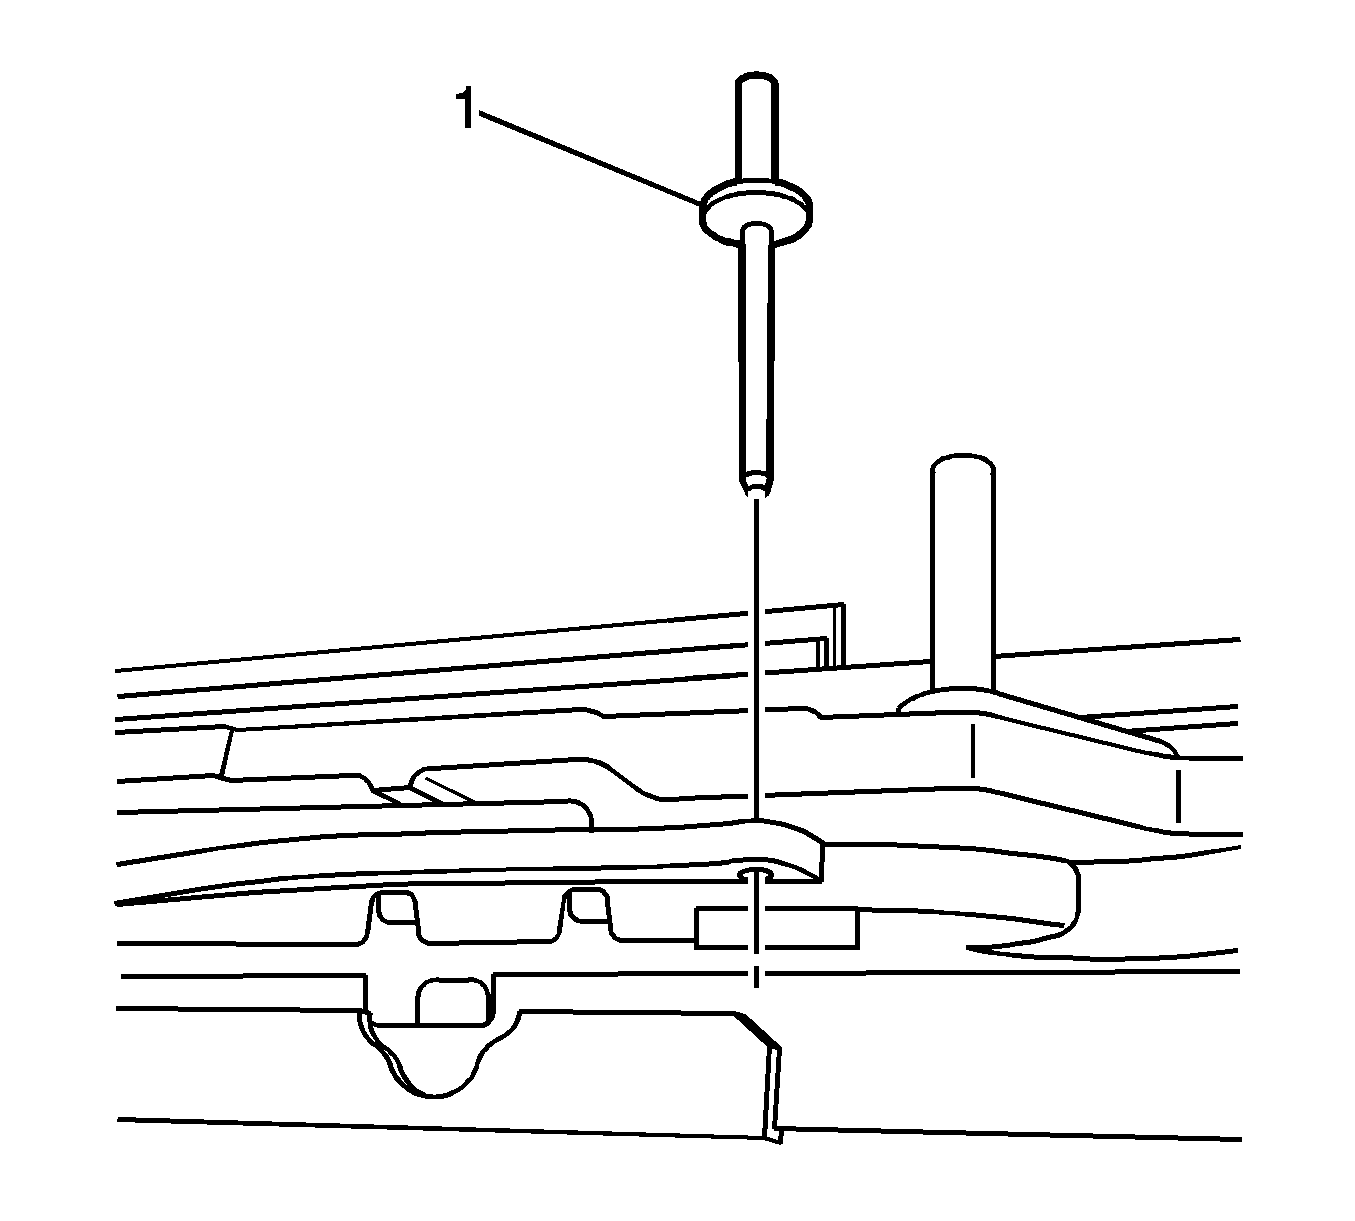
- Insert a pin (1) in the holes to hold the position while installing the drive motor.
- Repeat this procedure for the opposite side.


Important: Both mechanisms should now be in the closed position.
Installation Procedure
- Install the sunroof window. Refer to Sunroof Window Replacement .
- Install the motor/actuator. Refer to Sunroof Motor/Actuator Replacement .
- Connect the electrical connector to the motor/actuator.
- Remove the pin (1) from the holes that held the position while installing the drive motor.
- Install the headliner. Refer to Headlining Trim Panel Replacement .
- Perform the Initialization/Teach Procedure. Refer to Sunroof Motor/Actuator Initialization/Teach Process .
- Verify the operation of the sunroof.
Notice: Refer to Fastener Notice in the Preface section.
Tighten
Tighten the screws to 4 N·m (35 lb in).
Tighten
Tighten the motor attachment screws to 3.5 N·m (31 lb in).

Sunroof Track Timing/Synchronization PES
Removal Procedure
- Remove the headliner. Refer to Headlining Trim Panel Replacement .
- Disconnect the electrical connector from the motor/actuator.
- Remove the motor/actuator. Refer to Sunroof Motor/Actuator Replacement .
- Remove the screw that attaches the control module.
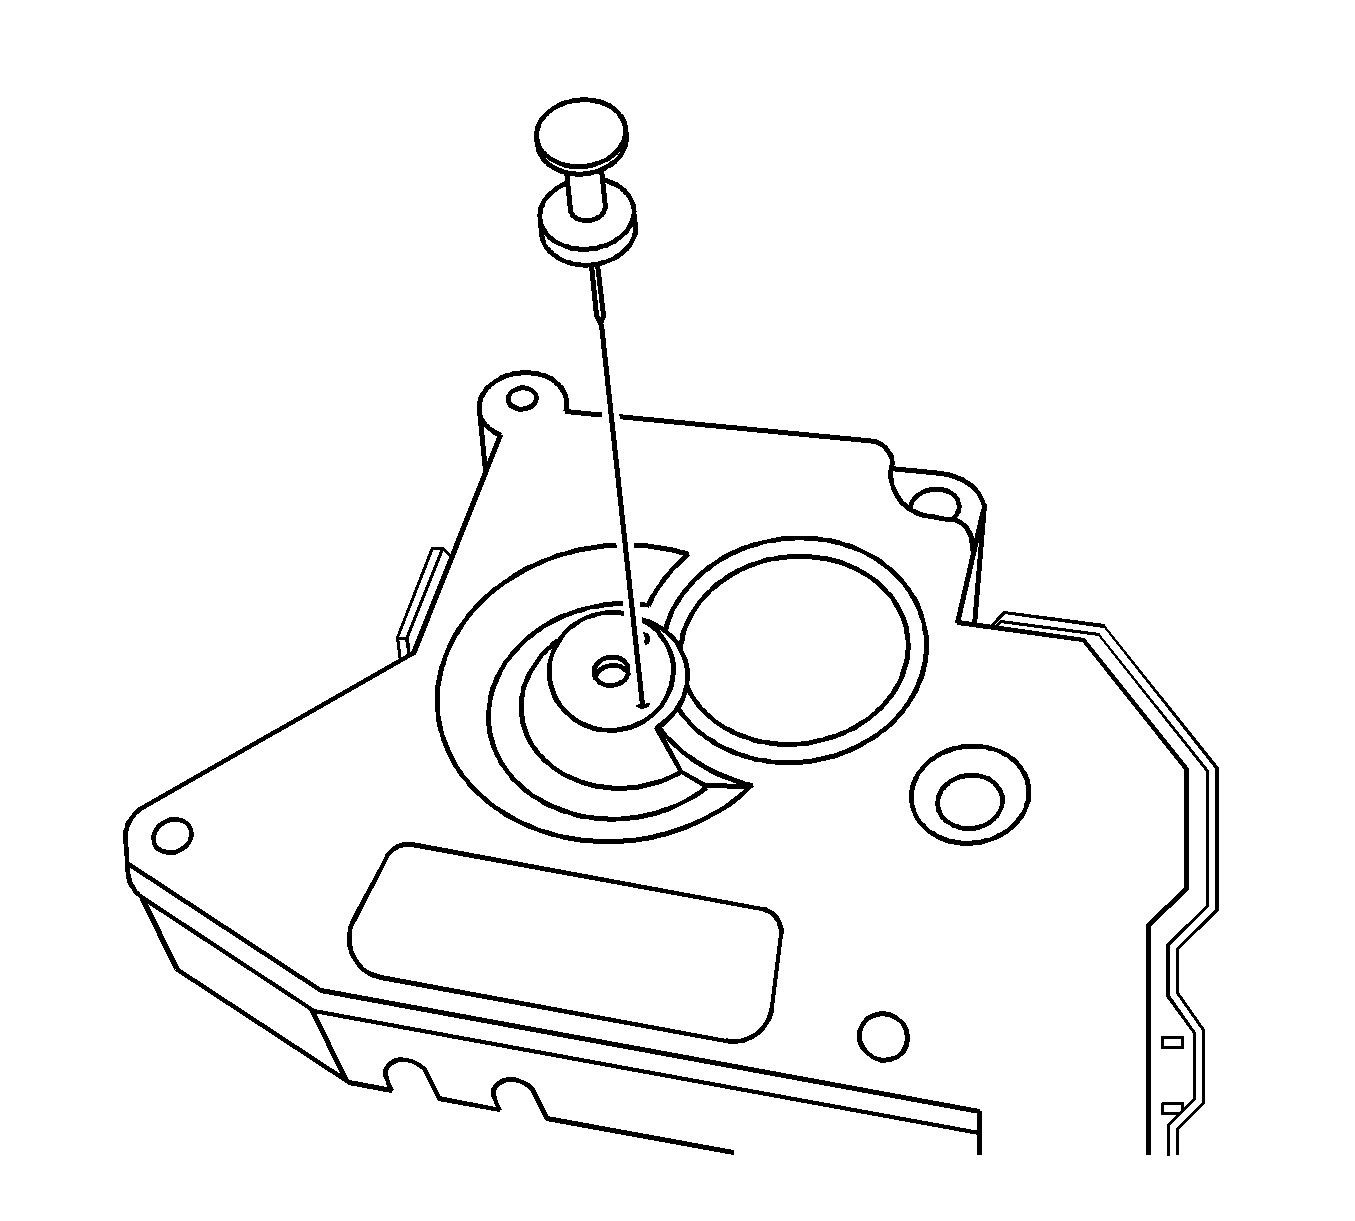
- Install a pin temporarily in the holes to hold the position while installing the drive motor.
- Remove the sunroof window. Refer to Sunroof Window Replacement .
- Manually slide the mechanism forward in the track until the mechanism reaches the hard stop.
- Push the cam assembly (2) forward until the timing hole (3) in the cam is aligned with the timing hole (4) in the lifter arm (1).
- Repeat this procedure for the opposite side.


Important: Both mechanisms should now be in the closed position.
Installation Procedure
- Install the sunroof window. Refer to Sunroof Window Replacement .
- Install the control module.
- Install the motor/actuator. Refer to Sunroof Motor/Actuator Replacement .
- Remove the pin that was installed to temporarily hold the position of the sunroof opening position switch.
- Connect the electrical connector to the motor/actuator.
- Install the headliner.
- Verify the operation of the sunroof.
Notice: Refer to Fastener Notice in the Preface section.
Tighten
Tighten the screws to 4 N·m (35 lb in).

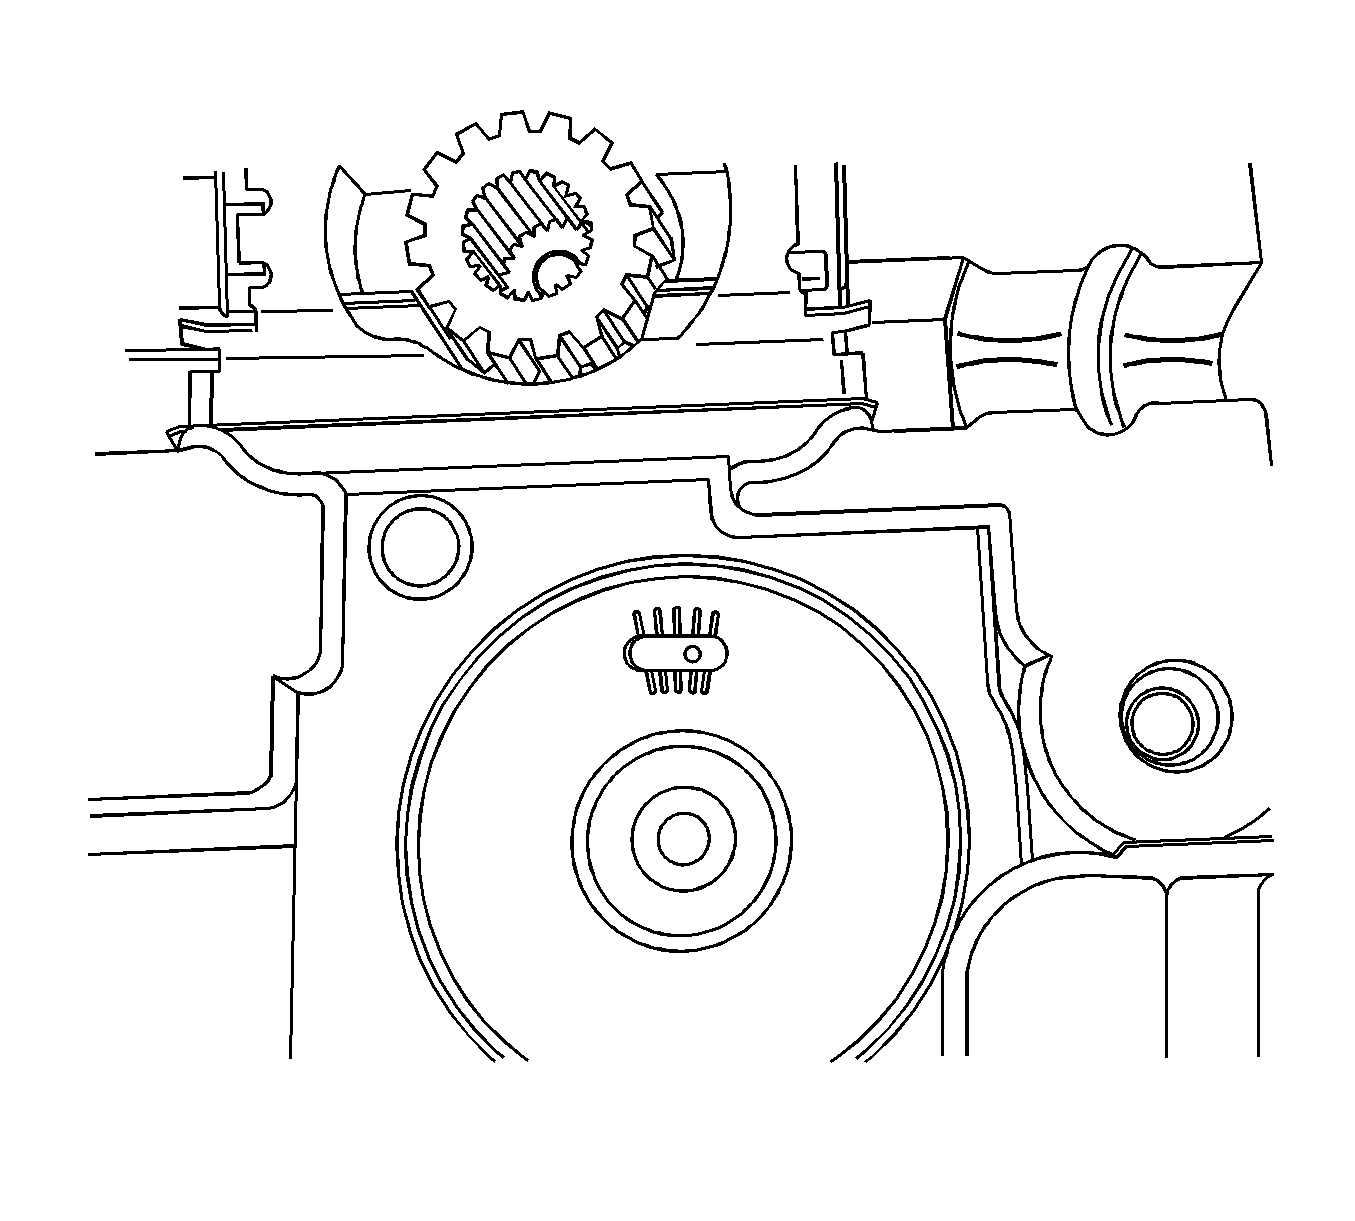
Important: Before installing the sunroof opening position switch, inspect the timing window. The small hole must be in line with the bar, as shown. If the hole is not aligned with the bar, rotate the gear by hand left or right until the hole and the bar are in position.

Tighten
Tighten the motor/actuator attachment screws to 3.5 N·m (31 lb in).
Important: If the sunroof does not function properly, and the guides are parallel, then replace the sunroof opening switch.
