Rocker Panel Molding Replacement Sedan, GT, GTP
Removal Procedure
- Open the front and rear doors.
- Raise the vehicle to gain access to the lower rocker molding retaining clips.
- Apply making tape to protect the painted surfaces.
- Remove the rocker molding sealing weatherstrip.
- Remove the rocker molding to fender screw (1) and quarter panel screw (2).
- Use a flat-bladed tool (3), to aid in the removal of the rocker molding retaining clips (2) from the underside of the rocker molding.
- Use a flat-bladed tool to aid in the removal of the rocker molding clips (3), working the tool by hand between the rocker panel and the rocker molding top edge until it releases.
- Remove the rocker molding by sliding it rearward until it releases from the retainer clips.
- Pull the top edge of the rocker molding (2) away from the rocker panel (1) by sliding it rearward until it disengages from the inner retaining clips (3).
- Remove the rocker molding from the vehicle.
Notice: Use a plastic, flat-bladed tool to prevent paint damage when removing an emblem/name plate.
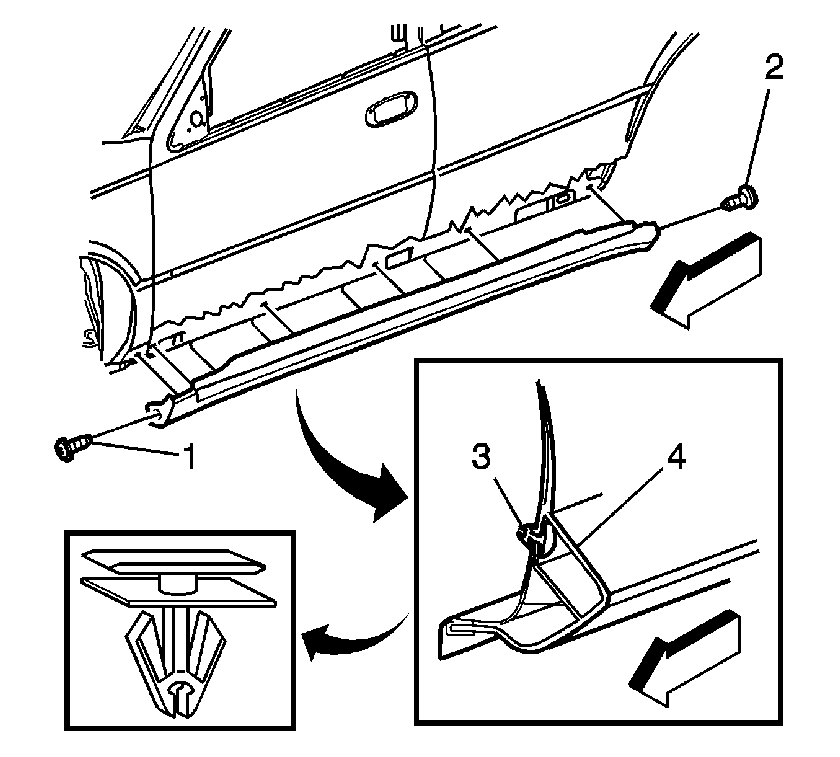
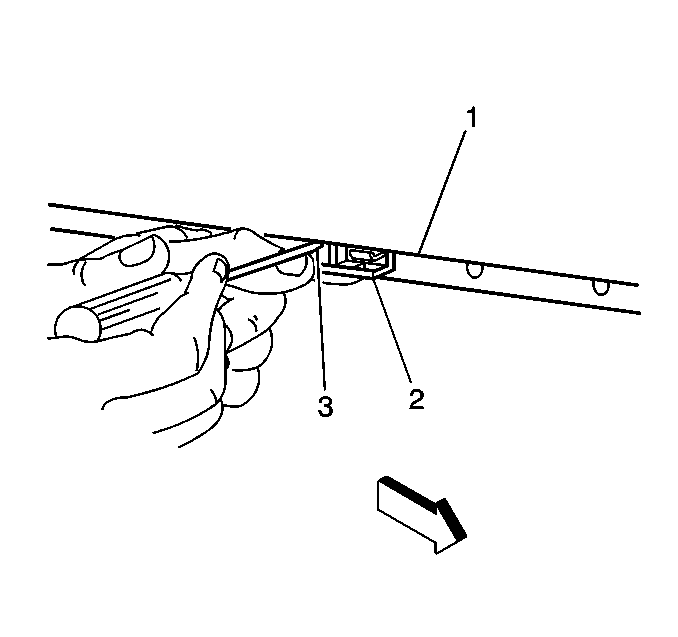
Important: The rocker molding retaining clips (2) maybe damaged when removing from the underbody and must be replaced.
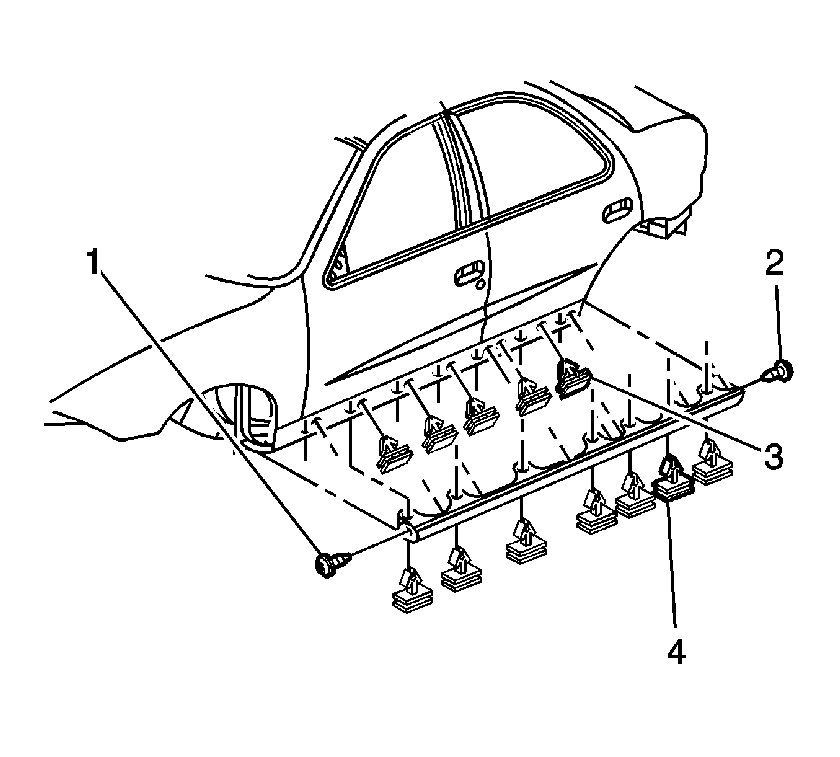
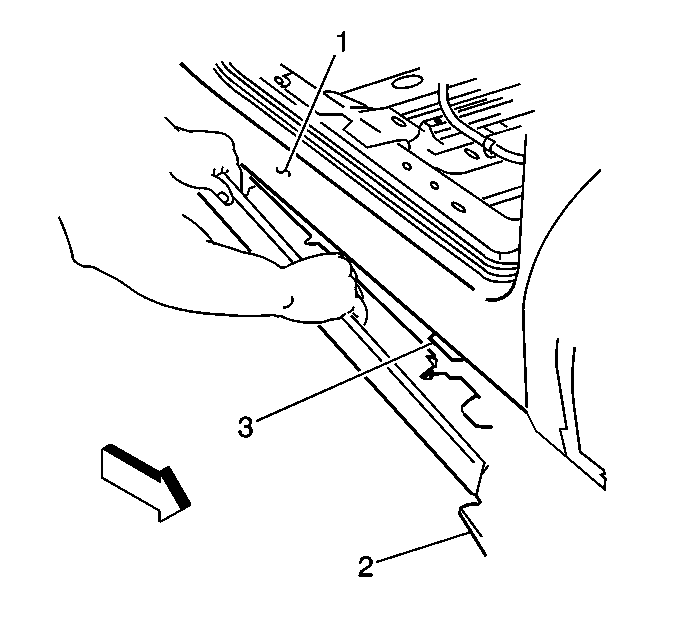
Important: The inner rocker molding clips are located along the upper inside edge of the rocker molding.
Installation Procedure
- Position the rocker molding retaining clips (3) to the locator holes in the rocker panel.
- Apply heavy hand pressure to secure the fasteners in the rocker panel.
- Install the lower rocker molding retaining clips.
- Install the rocker molding to fender screw (1) and quarter panel screw (2).
- Install the rocker molding sealing weatherstrip to doors.
- Remove the masking tape.
- Lower the vehicle.
- Inspect the doors to rocker molding for alignment.
- Close the front and rear doors.

Important: Replace all the damaged retaining clips (3, 4) before reinstall the rocker molding.
Notice: Use the correct fastener in the correct location. Replacement fasteners must be the correct part number for that application. Fasteners requiring replacement or fasteners requiring the use of thread locking compound or sealant are identified in the service procedure. Do not use paints, lubricants, or corrosion inhibitors on fasteners or fastener joint surfaces unless specified. These coatings affect fastener torque and joint clamping force and may damage the fastener. Use the correct tightening sequence and specifications when installing fasteners in order to avoid damage to parts and systems.

Tighten
Tighten the rocker molding to fender screw (1) and quarter panel screws (2) to 2 N·m (18 lb in).
Rocker Panel Molding Replacement GXP
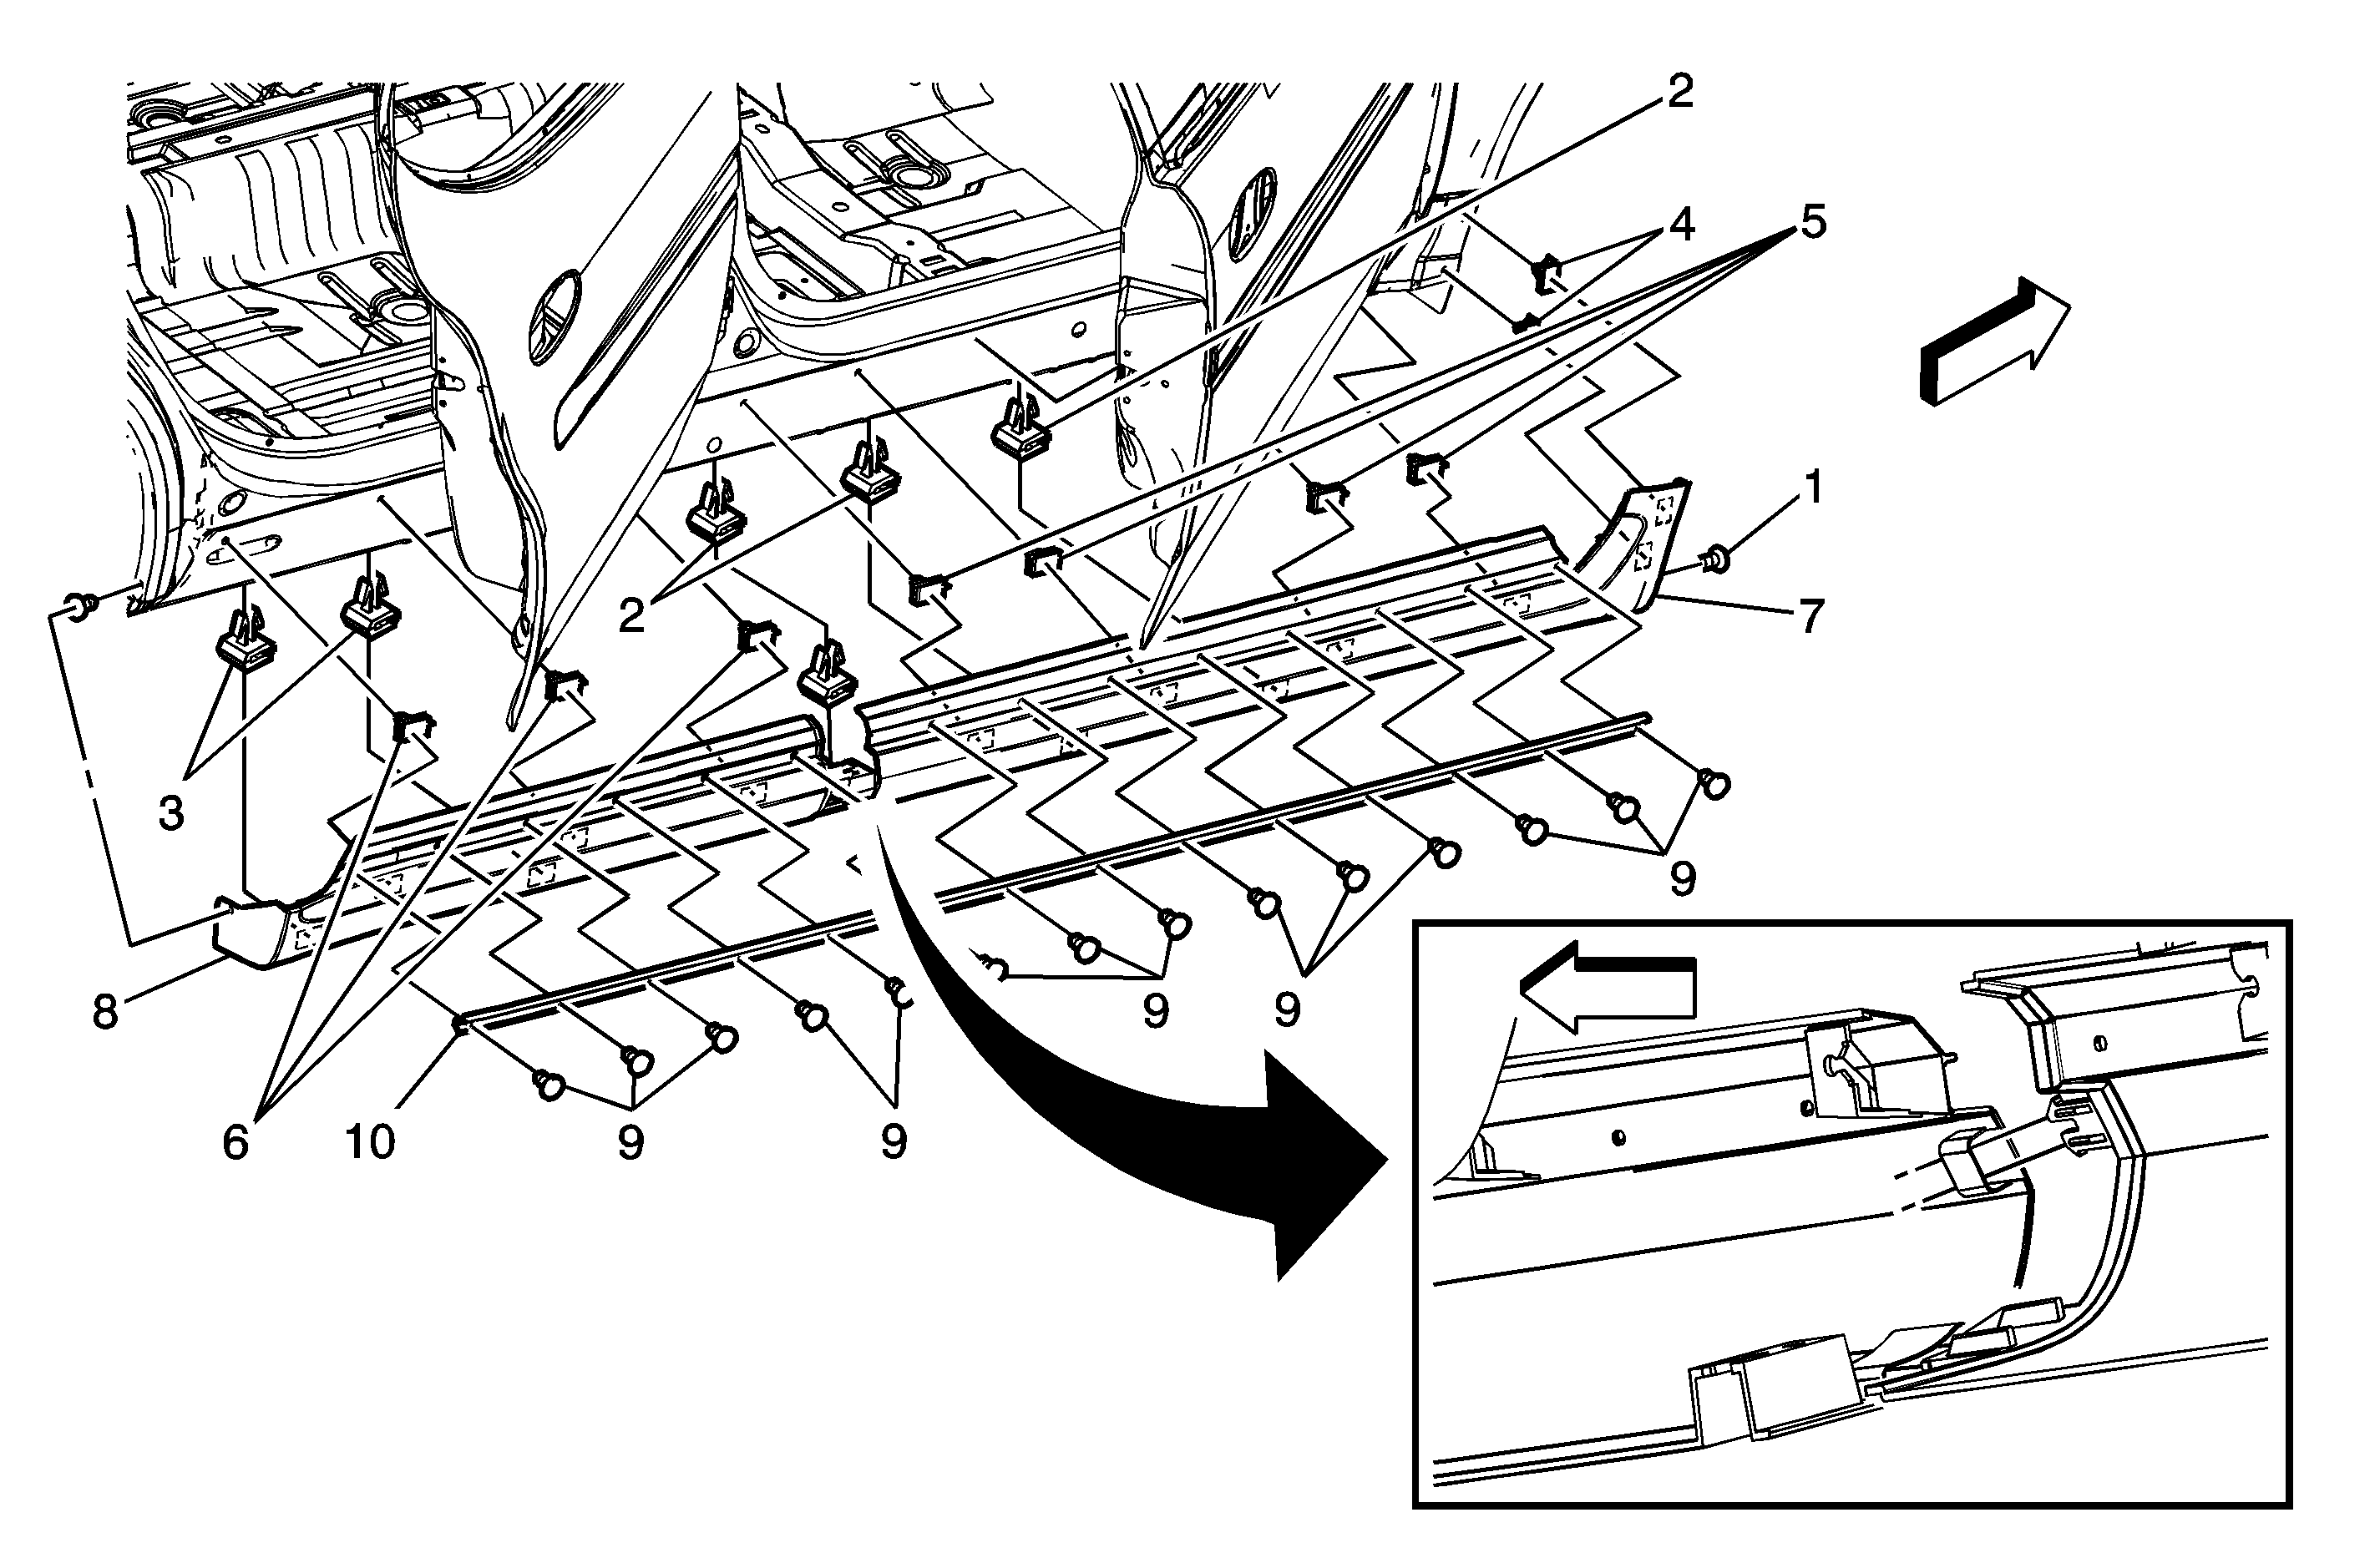
Callout | Component Name |
|---|---|
Fastener Tightening Specifications: Refer to Fastener Tightening Specifications . Preliminary Procedures
| |
1 | Front and Rear Wheelhouse Retainer (Qty: 2) |
2 | Front Rocker Panel Molding Lower Retainers (Qty: 3) |
3 | Rear Rocker Panel Molding Lower Retainers (Qty: 2) |
4 | Front Rocker Panel Molding Flange Retainers (Qty: 2) |
5 | Front Rocker Panel Molding Upper Retainers (Qty: 5) |
6 | Rear Rocker Panel Molding Upper Retainers (Qty: 3) |
7 | Front Rocker Panel Lower Molding |
8 | Rear Rocker Panel Lower Molding Tip |
9 | Weatherstrip Retainers (Qty: 14) |
10 | Rocker Panel Molding Weatherstrip Tip |
