Headlamps Shake at Night (Install Bracket)

| Subject: | Headlamps Shake at Night (Install Bracket) |
| Models: | 2004 Pontiac Grand Prix |
Condition
Some customer may comment that the headlamps shake at night.
Correction
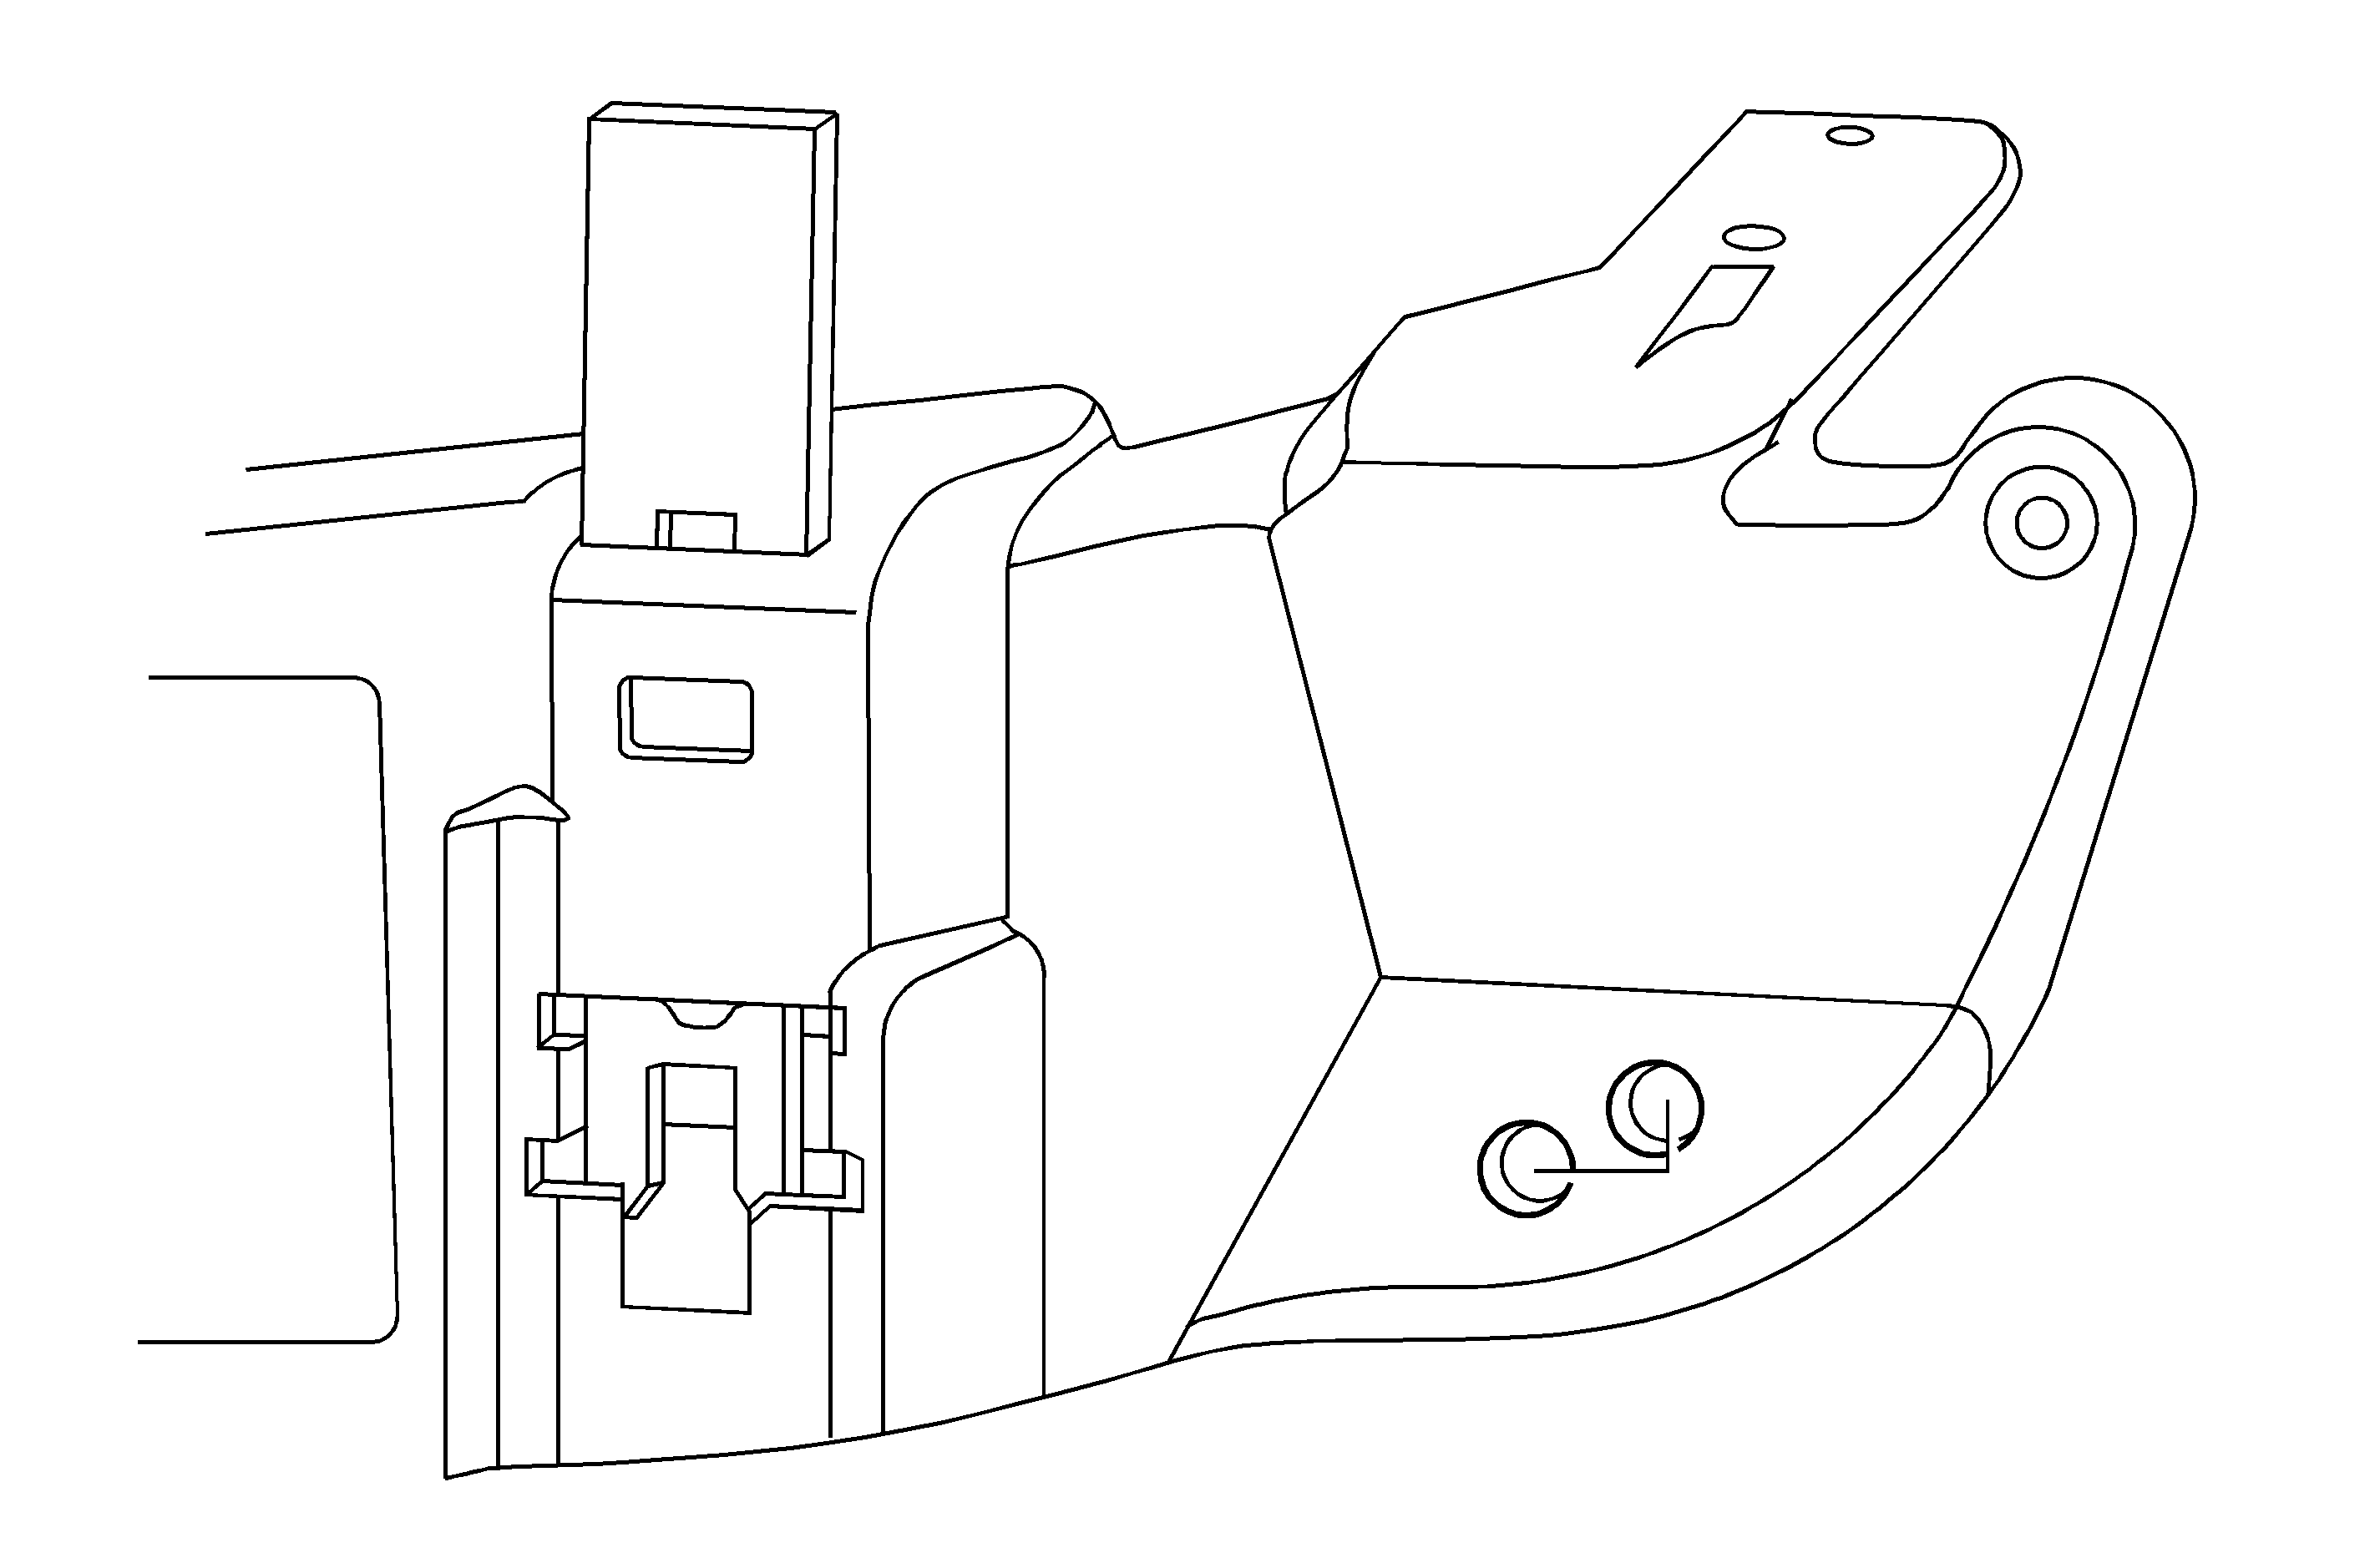
- Remove the headlamps following SI Document ID #1235508.
- Using a side cutter, remove the rubber bumper as shown in the illustration above.
- Measure from the CENTER of the existing hole 17 mm (21/32 in) outboard. Then measure 10 mm (13/32 in) from the end of that line upward. Drill an 11 mm (3/8 in) hole through the fascia support (drill pilot hole first)/ Refer to the illustration above.
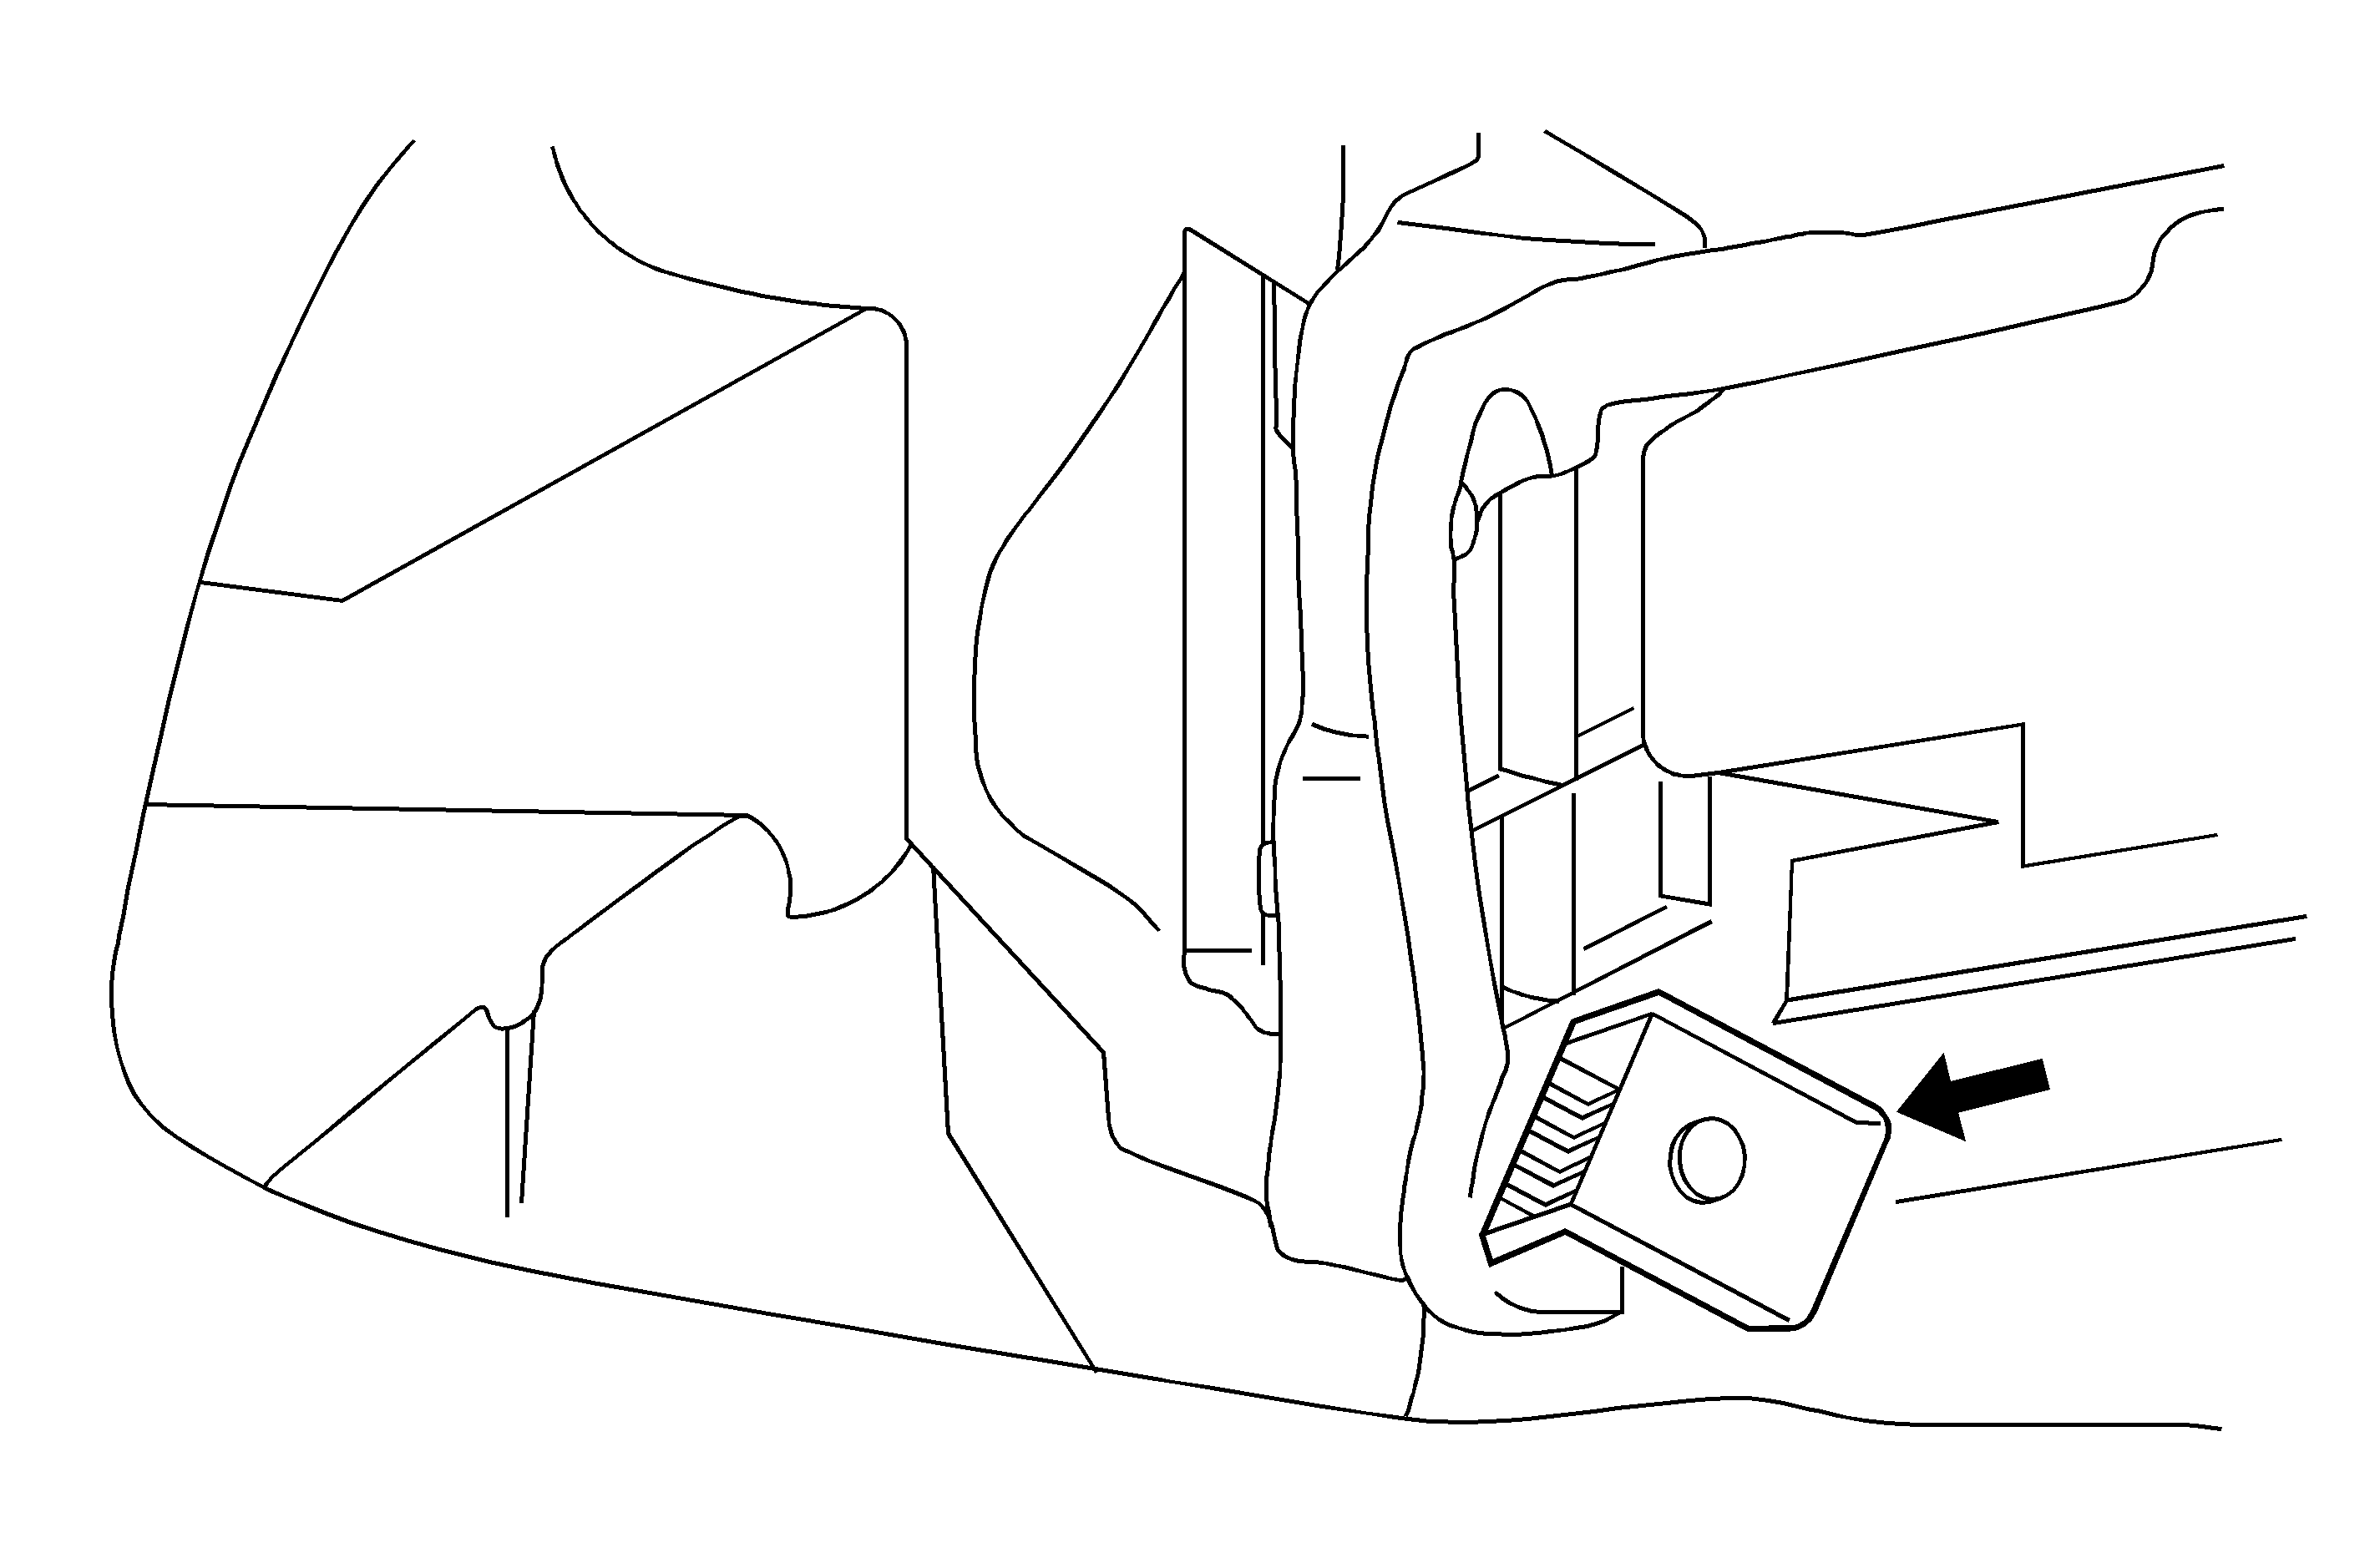
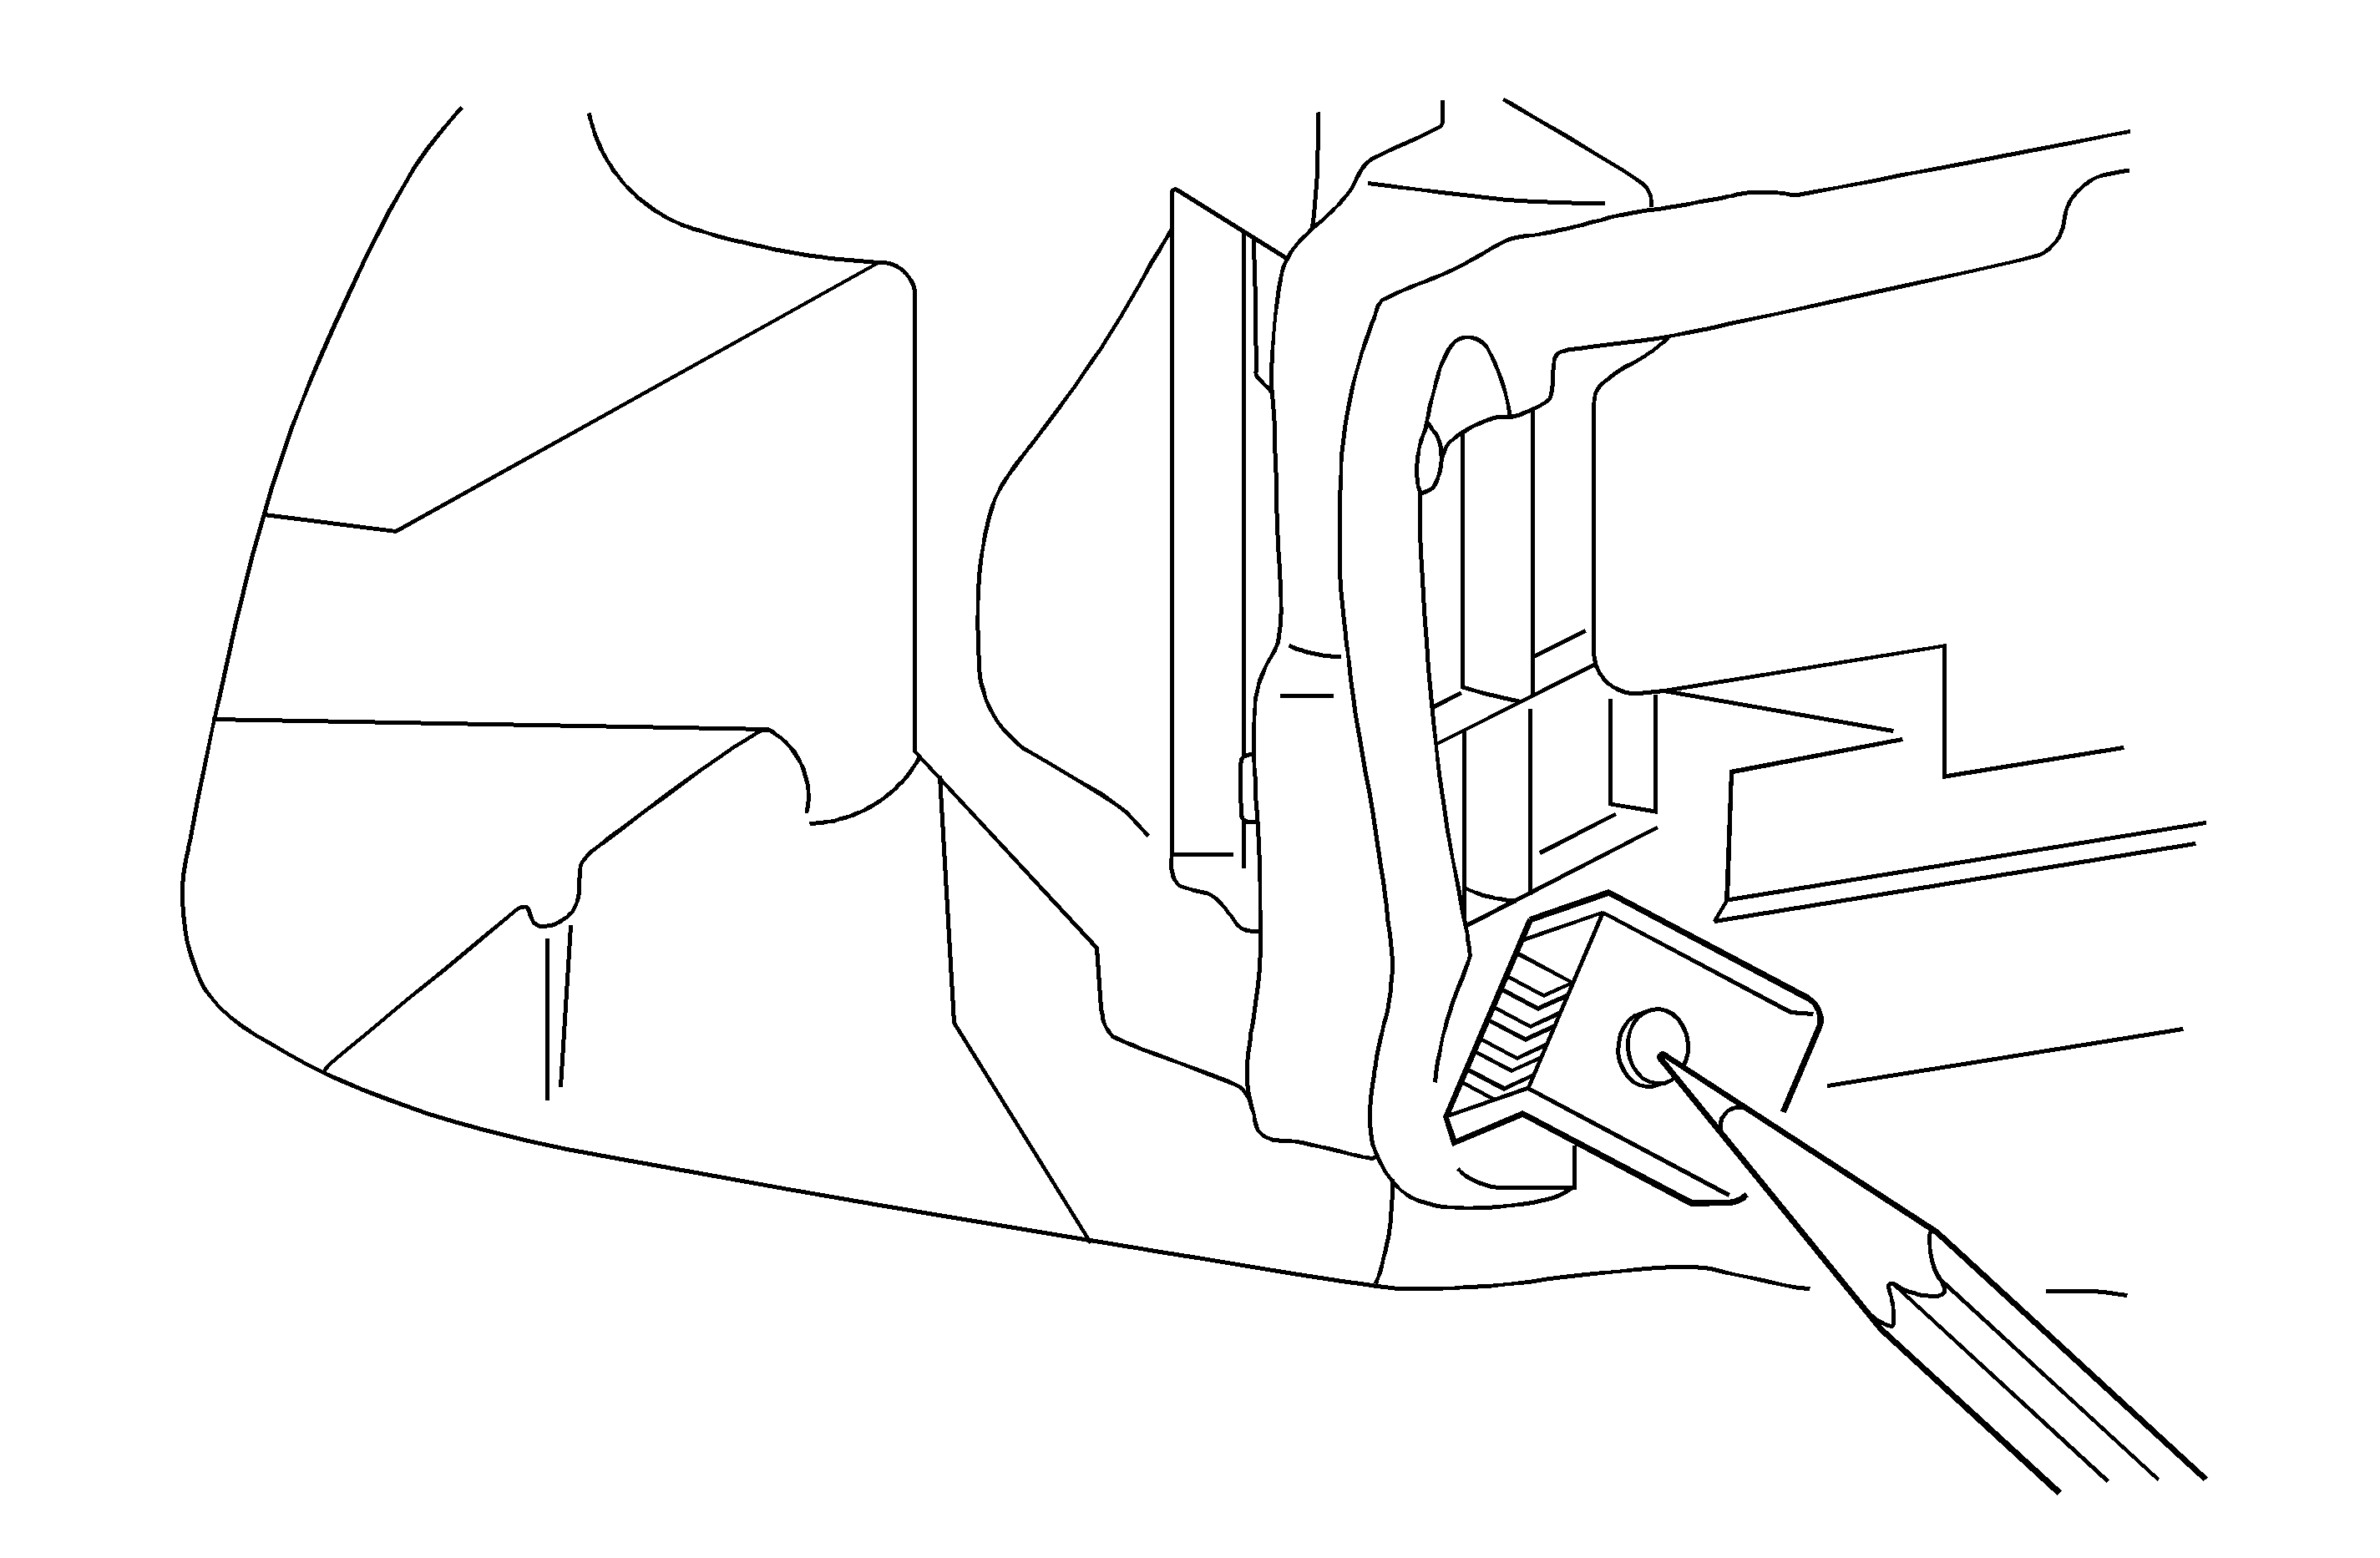
- Install a push-in nut into the bracket and install the bracket to the new hole in the fascia using one of the bolts from the kit. Refer to the illustration above.
- Mark the center of the hole in the bracket. Refer to the illustration above.
- Remove the support bracket. Center punch the mark made in Step 5 and drill an 11 mm (3/8 in) hole in the wheelhouse extension panel.
- Place the J-clip over the hole that was just drilled. Refer to the illustration above.
- Reinstall the support bracket and install the bolt in the J-clip and fascia support and tighten both bolts. Repeat for other side.
- Replace the plastic headlamp retainer with a metal retainer to the fascia support, orienting the upper tab rearward in car position. Ensure the part marked "L" is used on the left hand side of the fascia support and the part marked "R" is used on the right hand side of the fascia support. Refer to the illustration above.
- Push the metal headlamp retainer down until it contacts the upper radiator support.
- Mark the location to drill a hole in the radiator support tie bar using the hole in the metal headlamp retainer as a template.
- Remove the metal headlamp retainer from the fascia support.
- Drill a #3, 5.5 mm (7/32 in) hole in the radiator support.
- Reinstall the metal headlamp retainer to the fascia support. Ensure the two holes marked in the illustration above are clear before the headlamp installation. Do not push down on the retainer.
- Install the headlamp. Refer to SI Document ID #1235508.
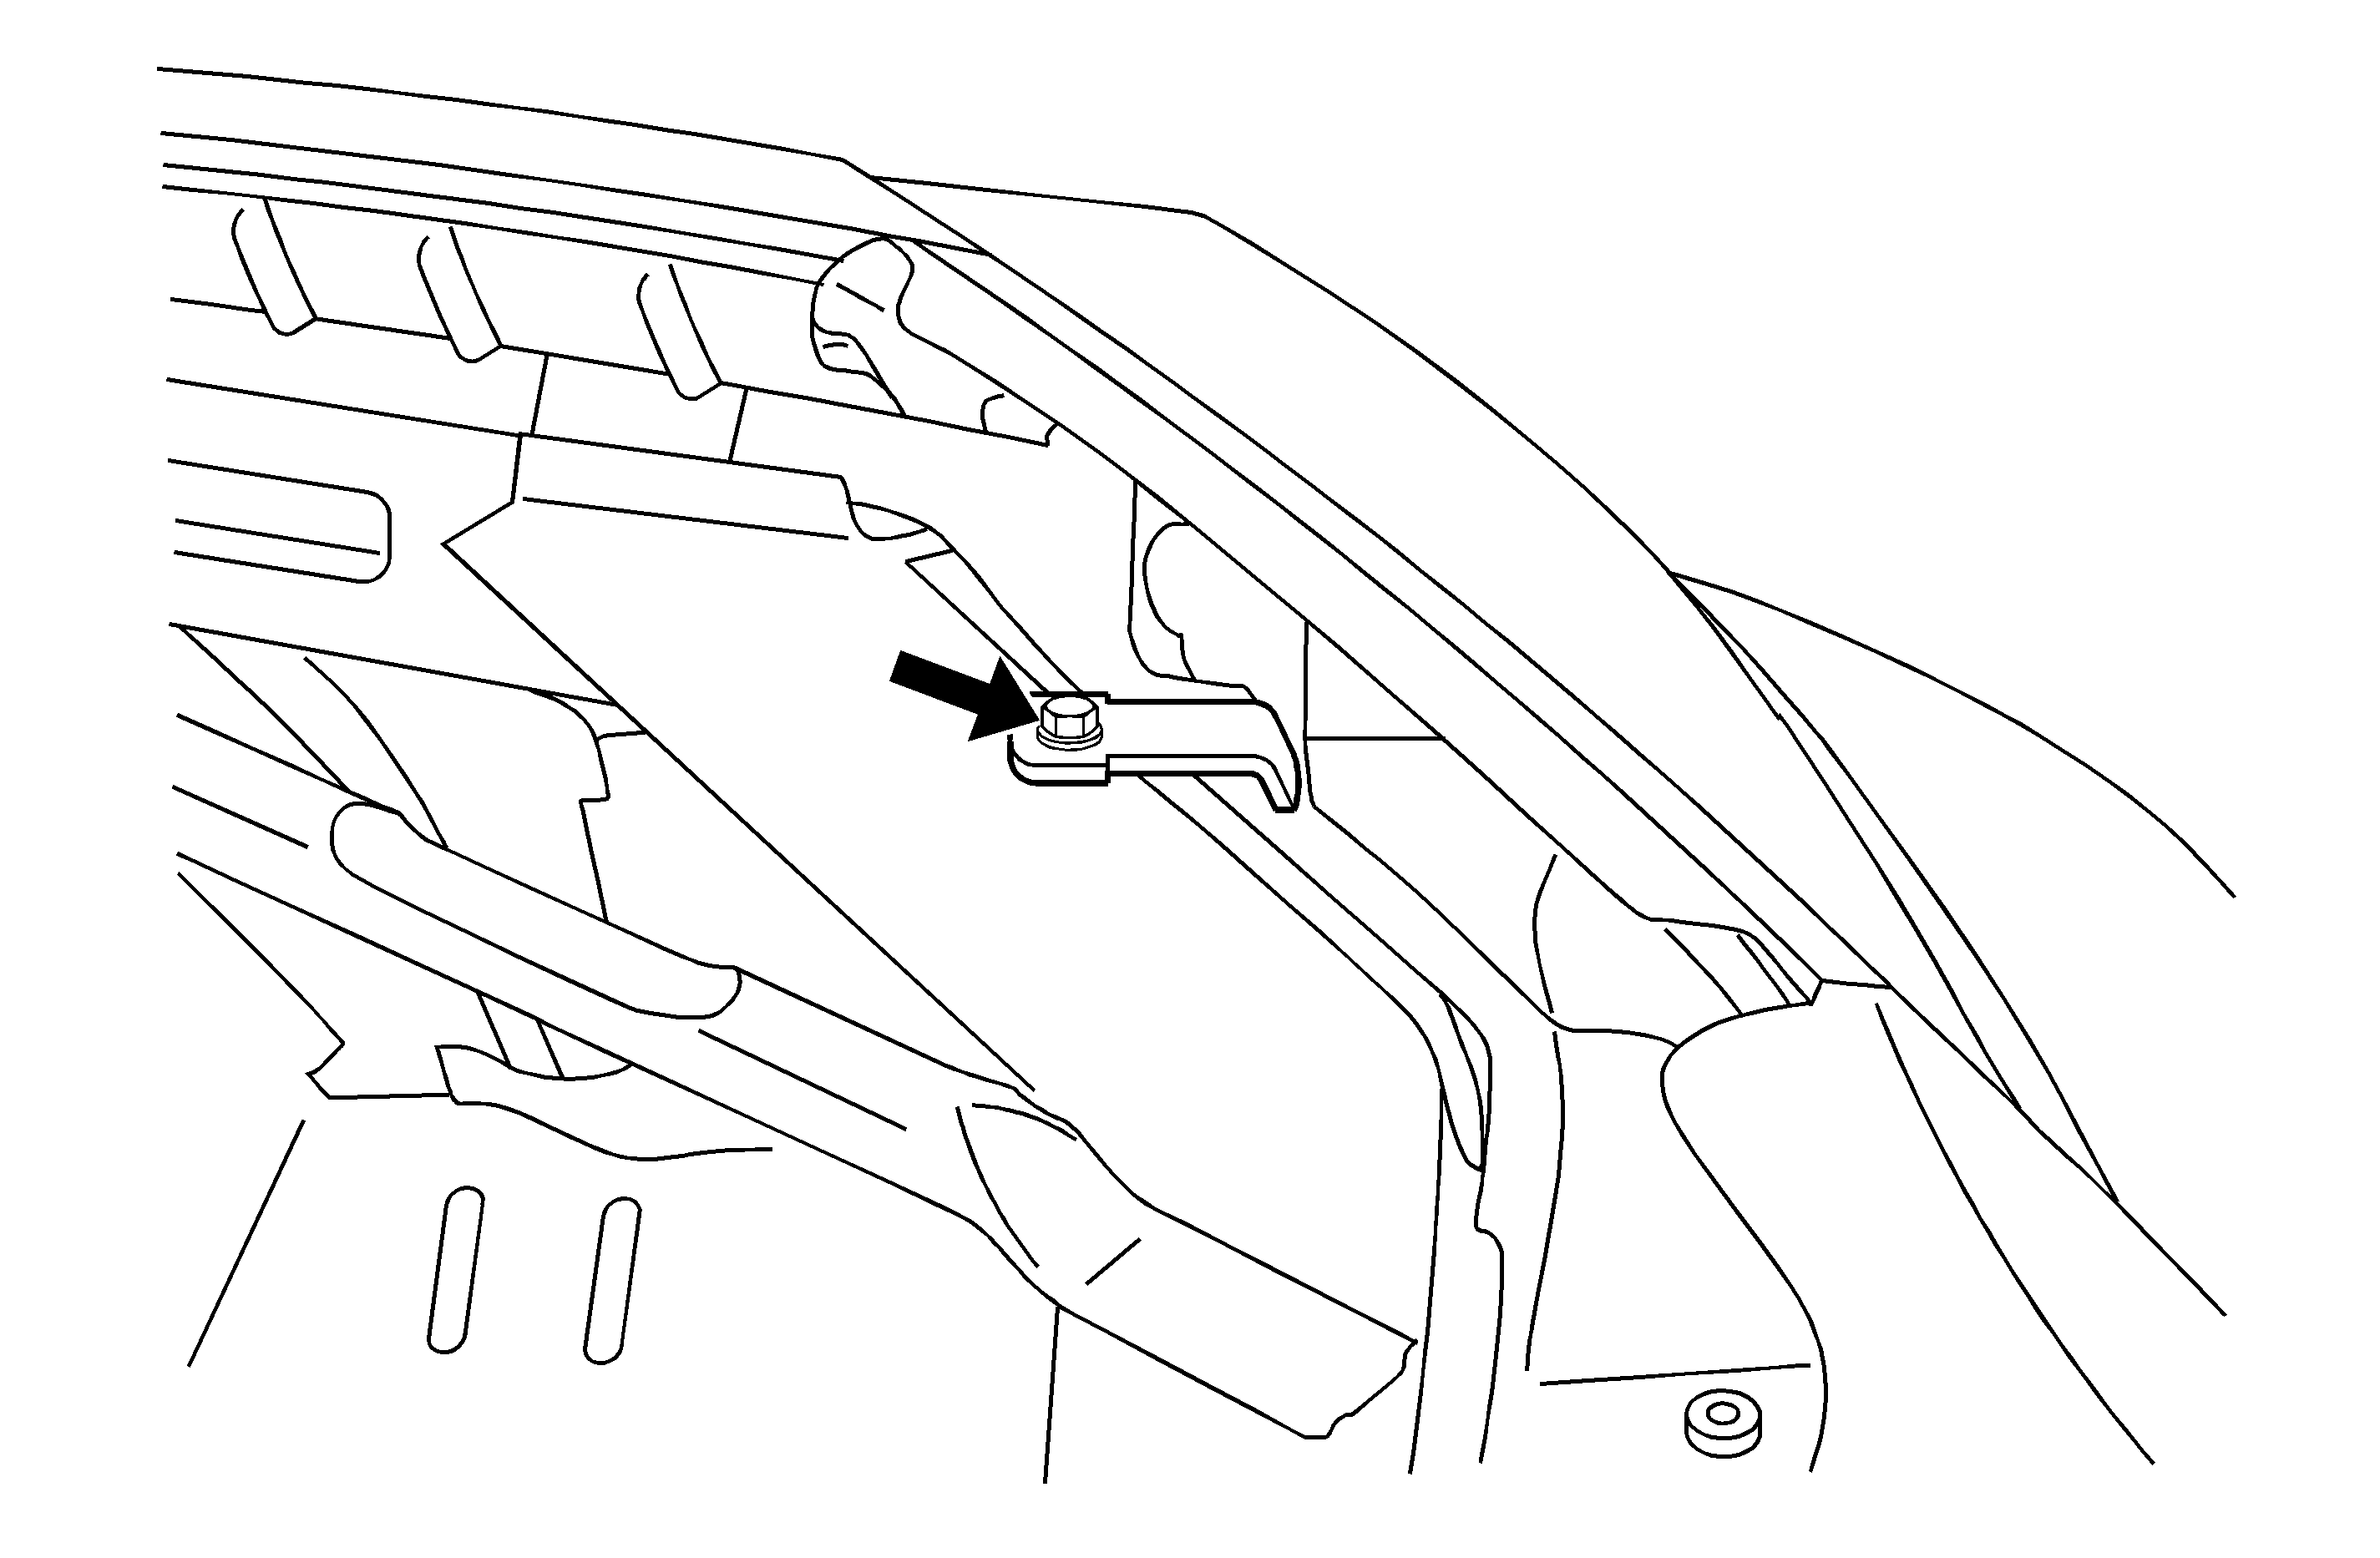
- Push the headlamp retainer fork down until the tab on the retainer fork rests against the radiator support tie bar.
- Install the bolt through the retainer and tighten the bolt. Refer to the illustration above.
- Verify correct headlamp function and operation.
- Verify that the headlamps are aimed correctly.

Notice: If needed in this next step, for better access to the marked hole location, loosen the cross car carrier by undoing the screw on the top outboard attachment leg. Slip off the location pin and flex cross car carrier forward. Cover the fender to avoid damage by the tool (the pilot hole can be drilled first).

Important: If needed, flatten the flange of the wheelhouse extension panel to get a flat seating surface for the J-clip and also for the fascia support bracket.
Tighten
Tighten the bolts to 9 ±2 N·m (7 lb ft).


Important: If needed, lift the metal headlamp retaining fork to allow the headlamp retention posts to slide through the headlamp retaining fork and fascia support.
Tighten
Tighten the bolt to 5 ±1 N·m (4 lb ft).
Parts Information
Part Number | Description |
|---|---|
10388091 | Bracket Kit |
Parts are expected to be available from GMSPO on Nov. 16, 2004.
Warranty Information
For vehicles repaired under warranty, use:
Labor Operation | Description | Labor Time |
|---|---|---|
B8729 | Headlamp Bracket Kit (Both Sides) | 0.8 hr |
