Removal Procedure
- Raise the hood.
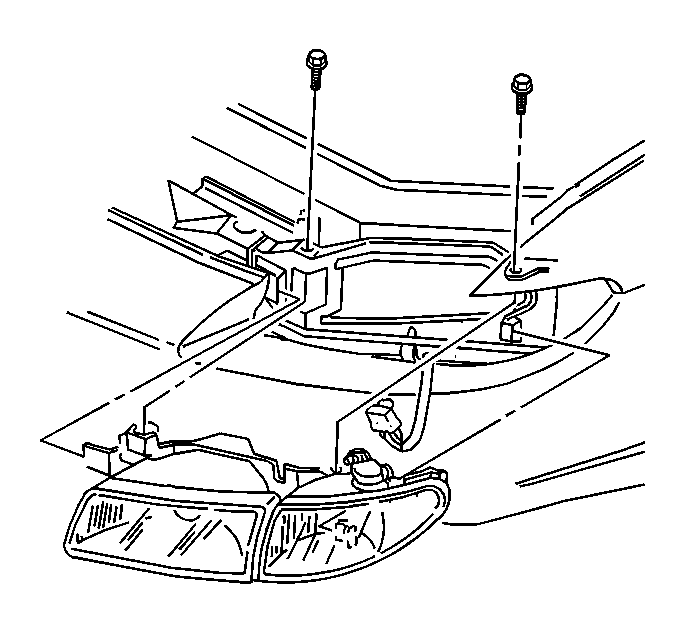
- Remove the bolts retaining the headlamp assembly to the upper fascia support and fender reinforcement.
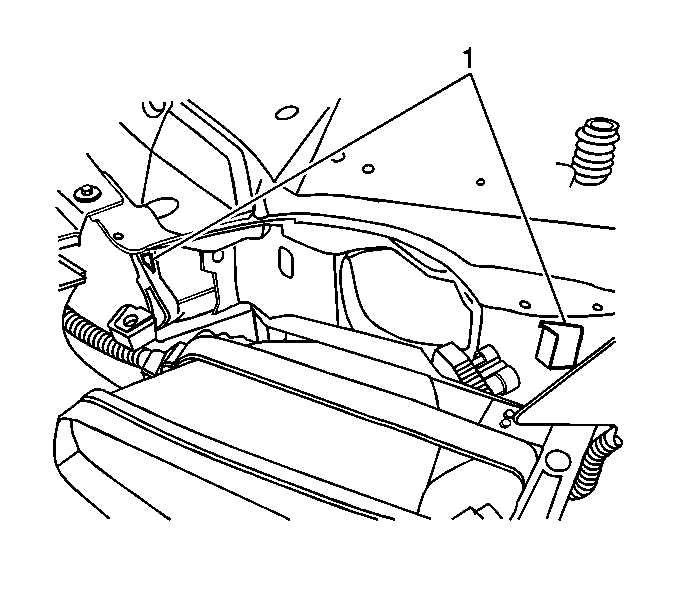
- Slide the headlamp outboard just enough to release the headlamp bracket tabs from the slots (1) on the upper fascia support and fender reinforcement.
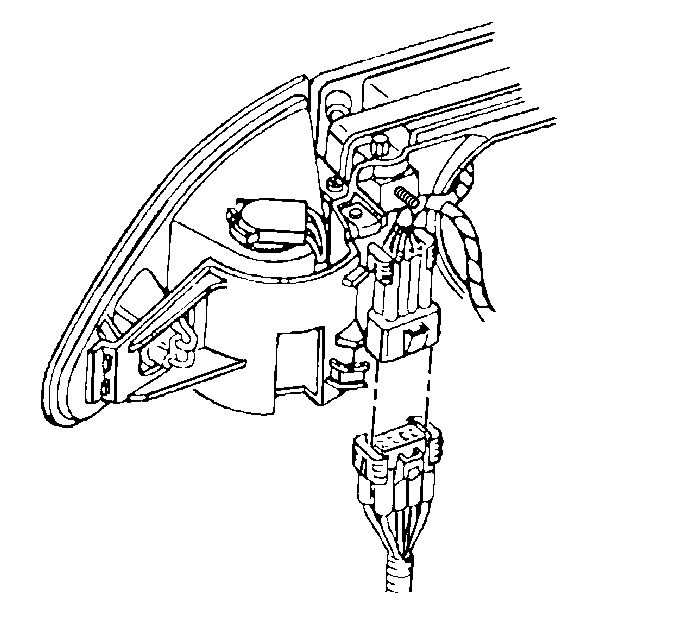
- Carefully reposition the headlamp assembly away from the vehicle body in order to access the electrical connector.
- Disconnect the electrical connector from the headlamp assembly.
- Remove the headlamp assembly.

Notice: When removing body panels, apply tape to corners of panel and adjacent surfaces to help prevent paint damage.


Installation Procedure
- Connect the electrical connector to the headlamp assembly.
- Position the headlamp assembly to the vehicle body, just outboard of the installed position.
- Align the headlamp bracket tabs to the slots (1) on the upper fascia support and fender reinforcement, then slide the headlamp inboard to engage and secure the tabs.
- Install the headlamp assembly retaining bolts.
- Check the headlamp aim, if a new headlamp assembly was installed, or if service or repairs in the front end area may have disturbed the headlamp mounting brackets.
- Close the hood.
- Remove any protective tape applied during the removal procedure.


Notice: Use the correct fastener in the correct location. Replacement fasteners must be the correct part number for that application. Fasteners requiring replacement or fasteners requiring the use of thread locking compound or sealant are identified in the service procedure. Do not use paints, lubricants, or corrosion inhibitors on fasteners or fastener joint surfaces unless specified. These coatings affect fastener torque and joint clamping force and may damage the fastener. Use the correct tightening sequence and specifications when installing fasteners in order to avoid damage to parts and systems.
Tighten
Tighten the headlamp assembly retaining bolts to 6 N·m
(53 lb in).
| • | To check the aim of the headlamps using the screen method, refer to Headlamp Aiming |
| • | To check the aim of the headlamps using the mechanical method, refer to Headlamp Aiming |
