For 1990-2009 cars only
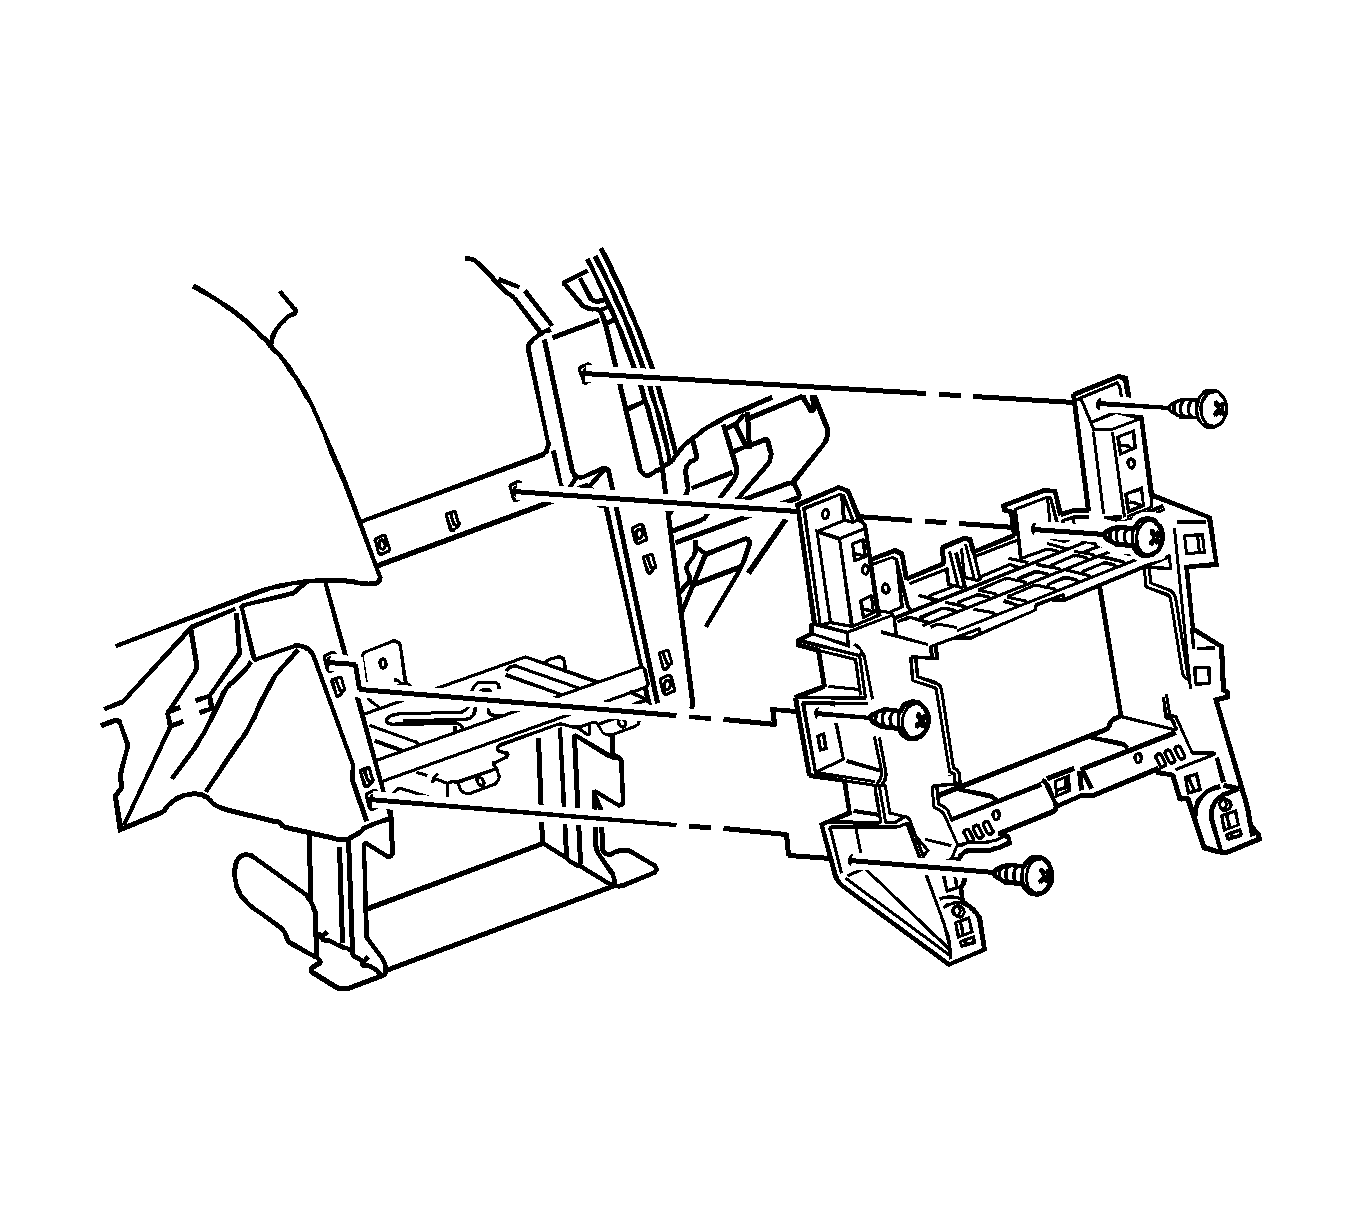
Radio Housing Bracket Replacement Upper
Removal Procedure
- Remove the radio housing. Refer to Radio Housing Replacement .
- Remove the lower compartment ashtray. Refer to Ashtray Replacement in Instrument Panel, Gauges, and Console.
- Remove the lower instrument panel extension panels. Refer to Instrument Panel Extension Replacement in Instrument Panel, Gauges, and Console.
- Remove the HVAC controls. Refer to Heater and Air Conditioning Control Replacement in Heating, Ventilation and Air Conditioning.
- Remove the eleven screws attaching the radio bracket assembly to the instrument panel.
- Remove the radio bracket assembly from its locating tabs.

Installation Procedure
- Position the radio bracket assembly to the instrument panel and install the bracket to the locating tabs.
- Install the eleven screws attaching the radio bracket assembly to the instrument panel.
- Install the HVAC controls. Refer to Heater and Air Conditioning Control Replacement in Heating, Ventilation and Air Conditioning.
- Install the lower instrument panel extension panels. Refer to Instrument Panel Extension Replacement in Instrument Panel, Gauges, and Console.
- Install the lower compartment ashtray. Refer to Ashtray Replacement in Instrument Panel, Gauges, and Console.
- Install the radio housing. Refer to Radio Housing Replacement .

Notice: Refer to Fastener Notice in the Preface section.
Tighten
Tighten the screws to 2 N·m (18 lb in).
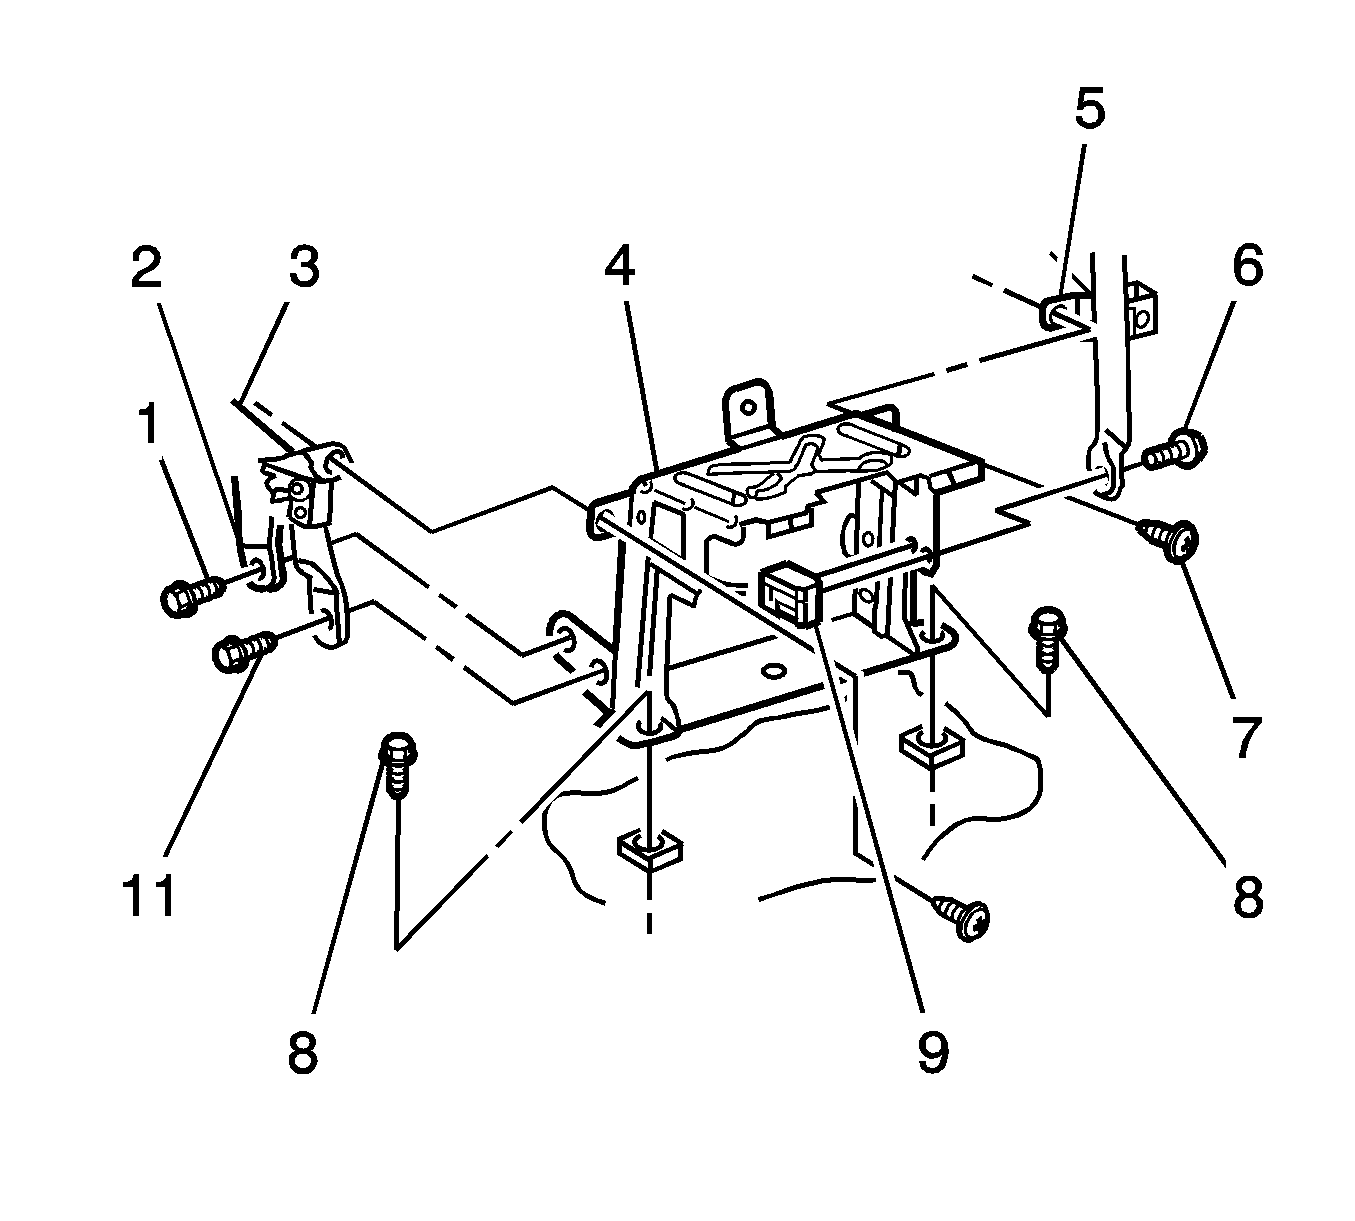
Radio Housing Bracket Replacement Lower
Removal Procedure
- Remove the instrument panel pad. Refer to Instrument Panel Upper Trim Pad Replacement in Instrument Panel, Gages and Console.
- Remove the bolt (11) attaching the driver side inner brace assembly (3) to the lower radio bracket (4).
- Remove the bolt (1) attaching the HVAC unit (2) to the bracket (4).
- Remove the bolt (6) attaching the instrument panel right end bracket (5) to the lower radio bracket (4).
- Remove the screw (7) attaching the instrument panel right end bracket (5) to the lower radio bracket (4).
- Remove the screws (8), attaching the lower radio bracket (4) to the vehicle.
- Remove the electrical connector from the lower radio housing bracket.
- Remove the lower radio bracket (4) from the vehicle.

Installation Procedure
- Install the lower radio bracket (4) to the vehicle.
- Install the electrical connector to the lower radio housing bracket.
- Install the screws (8) attaching the lower radio bracket (4) to the vehicle.
- Install the screw (7) attaching the instrument panel right end bracket (5) to the radio bracket (4).
- Install the bolt (6) attaching the instrument panel right end bracket (5) to the lower radio bracket (4).
- Install the bolt (1) attaching the HVAC unit (2) to the lower radio bracket (4).
- Install the bolt (11) attaching the driver side inner brace assembly (3) to the lower radio bracket (4).
- Install the instrument panel pad. Refer to Instrument Panel Upper Trim Pad Replacement in Instrument Panel, Gages and Console.

Notice: Refer to Fastener Notice in the Preface section.
Tighten
Tighten the screws to 2 N·m (18 lb in).
Tighten
Tighten the screw to 2 N·m (18 lb in).
Tighten
Tighten the bolt to 9 N·m (80 lb in).
Tighten
Tighten the bolt to 9 N·m (80 lb in).
Tighten
Tighten the bolt to 9 N·m (80 lb in).
