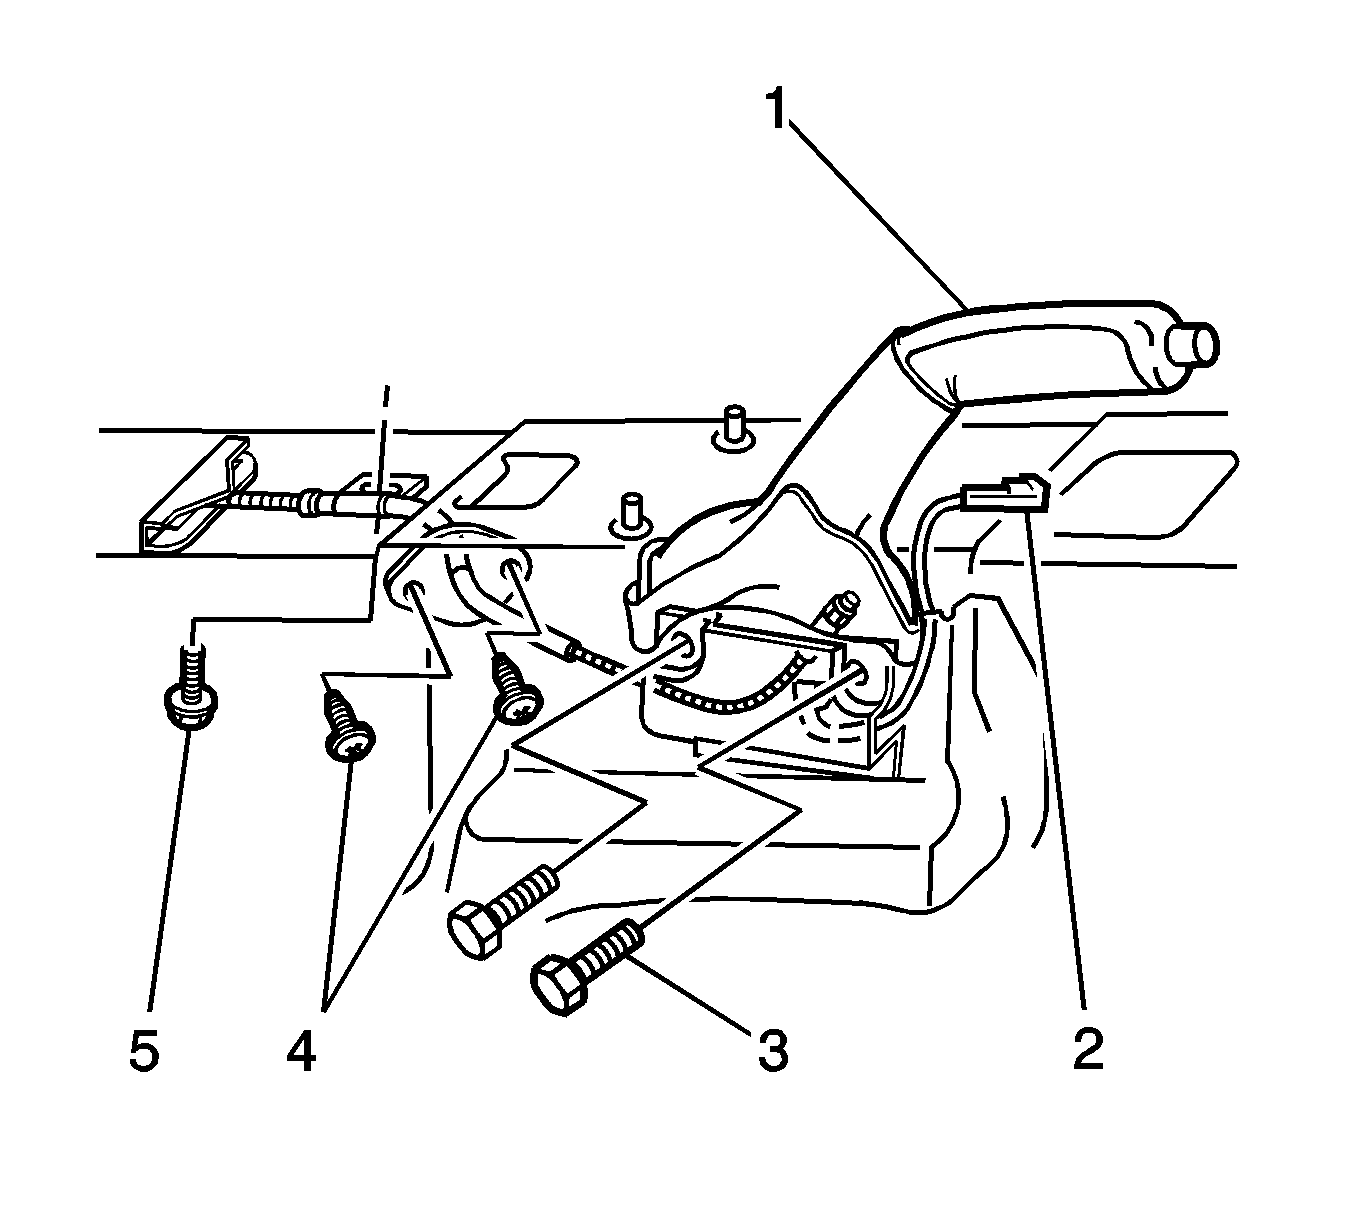
For 1990-2009 cars only
Removal Procedure
- Release the park brake.
- Remove the left front bucket seat. Refer to Front Seat Replacement - Bucket in Seats.
- Remove the park brake lever. Refer to Park Brake Lever Assembly Replacement .
- Remove the floor console assembly. Refer to Front Floor Console Replacement in Instrument Panel, Gages, and Console.
- Lift the carpet in order to access the 2 screws (4).
- Remove the 2 screws.
- Raise and support the vehicle. Refer to Lifting and Jacking the Vehicle in General Information.
- Wrap cloth or tape around the left rear cable near the equalizer.
- Using pliers on the wrapped portion of the cable, pull the left rear cable forward and up in order to release the cable from the equalizer.
- Pull the insulation for the left rear cable rearward in order to release the cable from the bracket.
- Wrap cloth or tape around the right rear cable near the equalizer.
- Using pliers on the wrapped portion of the cable, pull the right rear cable forward and up in order to release the cable from the equalizer.
- Pull the insulation for the right rear cable rearward in order to release the cable from the bracket.
- If necessary, remove the propeller shaft. Refer to Two-Piece Propeller Shaft Replacement in Propeller Shaft.
- Remove the bolt (5) from the bracket.
- Push the front cable and the equalizer through the aperture in the floor pan.
- Remove the front cable and the equalizer from the interior of the vehicle.

Installation Procedure
- From the interior of the vehicle, push the equalizer through the aperture in the floor pan.
- Install the front cable seal to the aperture in the floor pan.
- Install the 2 screws (4).
- Install the park brake lever and the adjusting nut. Refer to Park Brake Lever Assembly Replacement .
- Install the bolt (5) in order to retain the bracket to the body.
- If you removed the propeller shaft, install the propeller shaft. Refer to Two-Piece Propeller Shaft Replacement in Propeller Shaft.
- Install the left front bucket seat. Refer to Front Seat Replacement - Bucket in Seats.
- Install the floor console assembly. Refer to Front Floor Console Replacement in Instrument Panel, Gages, and Console.
- Under the vehicle, push the insulation for the right rear cable forward in order to retain the cable to the bracket.
- Using pliers on the wrapped portion of the right rear cable, push the cable forward and down in order to Install the cable to the equalizer.
- Push the insulation for the left rear cable forward in order to retain the cable to the bracket.
- Using pliers on the wrapped portion of the left rear cable, push the cable forward and down in order to install the cable to the equalizer.
- Remove all the cloth or tape from the cables.
- Adjust the park brake. Refer to Park Brake Adjustment .
- Lower the vehicle.

Important: Install the adjusting nut in order to retain the cable to the lever. Do not tighten the adjusting nut.
Notice: Refer to Fastener Notice in the Preface section.
Tighten
Tighten the bolt to 10 N·m (89 lb in).
