For 1990-2009 cars only
Removal Procedure
- Remove the upper center trim panel. Refer to Center Pillar Upper Trim Panel Replacement .
- Remove the rear quarter trim panel. Refer to Rear Quarter Trim Panel Replacement .
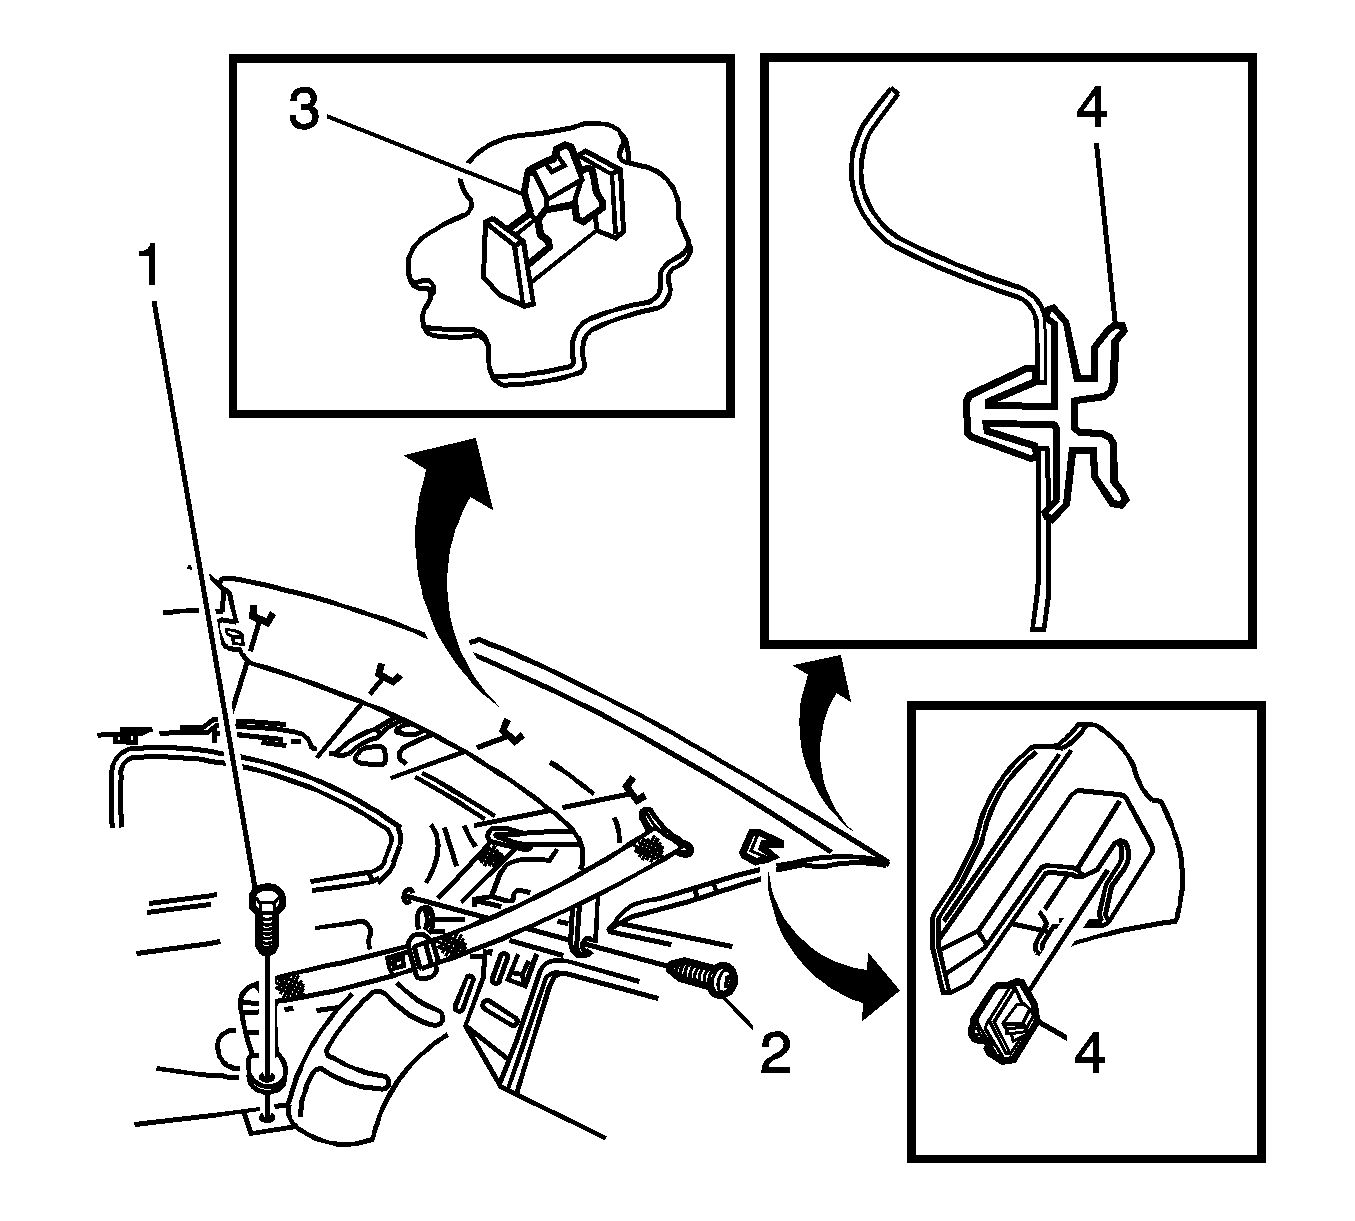
- Remove the rear lower seat belt bolt (1).
- Remove the retaining screw (2), from the lower edge of the rear quarter upper trim panel.
- Pull the front edge of the trim panel away from the body lock pillar, and working rearwards, disengage the trim panel clips (3), in 4 places.
- Slide the trim panel forward to disengage from the retainer (4), which is attached to the body lock pillar.
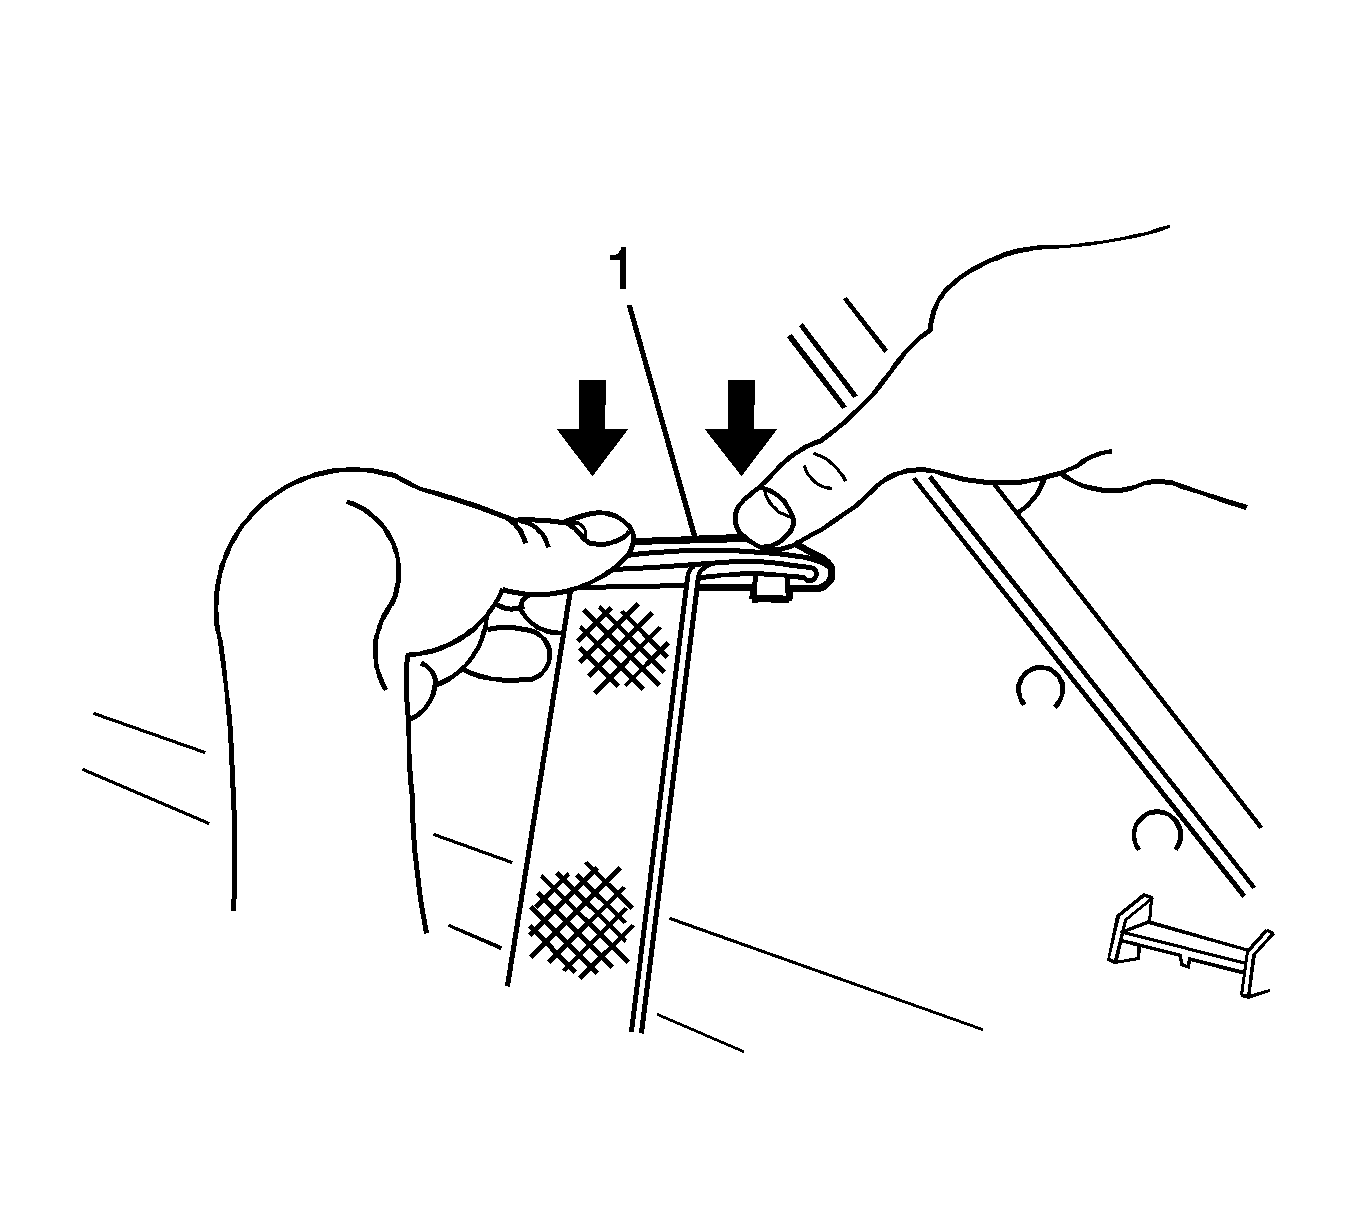
- Disengage the seat belt guide (1), and feed the seat belt and anchor plate through the opening.


Installation Procedure
- Feed the seat belt and anchor plate through the opening in the trim panel, then install the seat belt guide (1).
- Slide the trim panel rearward to engage it into the retainer (4), which is attached to the body lock pillar.
- Push the front edge of the trim panel into the body lock pillar, and working forwards, engage the trim panel clips (3), in 4 places.
- Install the retaining screw (2), in the lower edge of the rear quarter upper trim panel.
- Install the rear lower seat belt bolt (1).
- Install the rear quarter trim panel. Refer to Rear Quarter Trim Panel Replacement .
- Install the upper center trim panel. Refer to Center Pillar Upper Trim Panel Replacement .


Notice: Refer to Fastener Notice in the Preface section.
Tighten
Tighten the rear quarter upper trim panel retaining screw to 2 N·m
(18 lb in).
Tighten
Tighten the seat belt bolt to 42.5 N·m (31 lb ft).
