Tools Required
J 41409 Body Molding Removal Tool
Removal Procedure
- Raise and support vehicle. Refer to Lifting and Jacking the Vehicle in General Information.
- Remove the license bracket. Refer to Front License Plate Bracket Replacement .
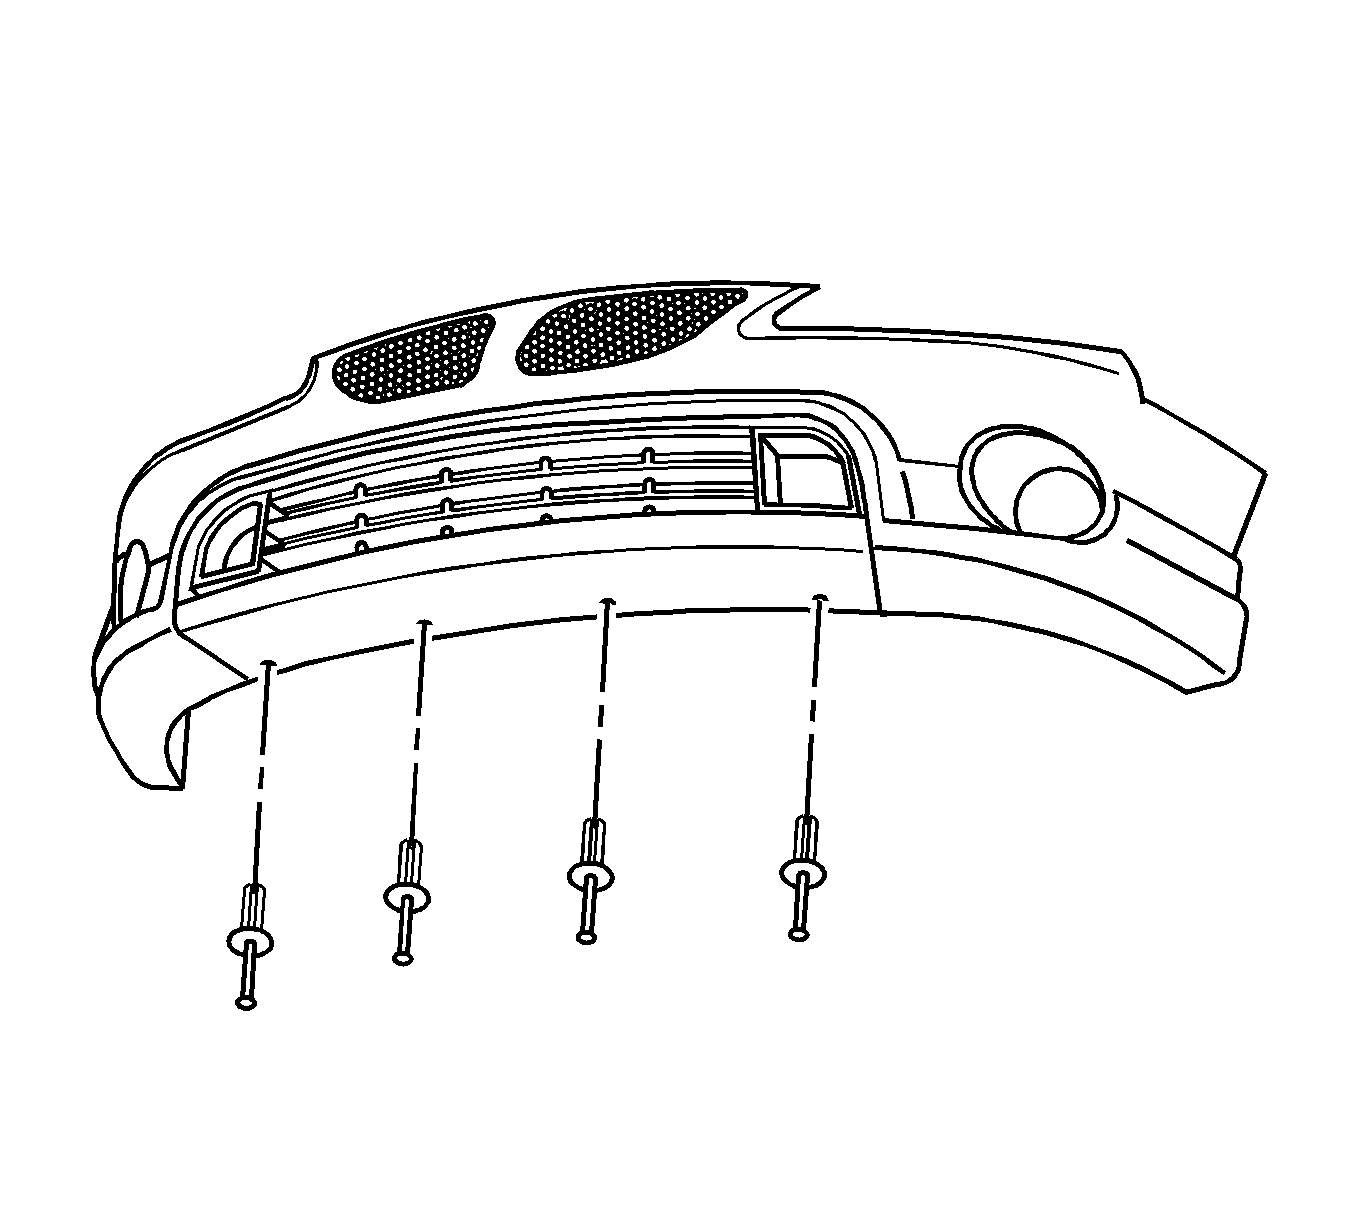
- Remove the push-in retainers from the front lower fascia.
- Remove the screws from the front lower wheel arch opening.
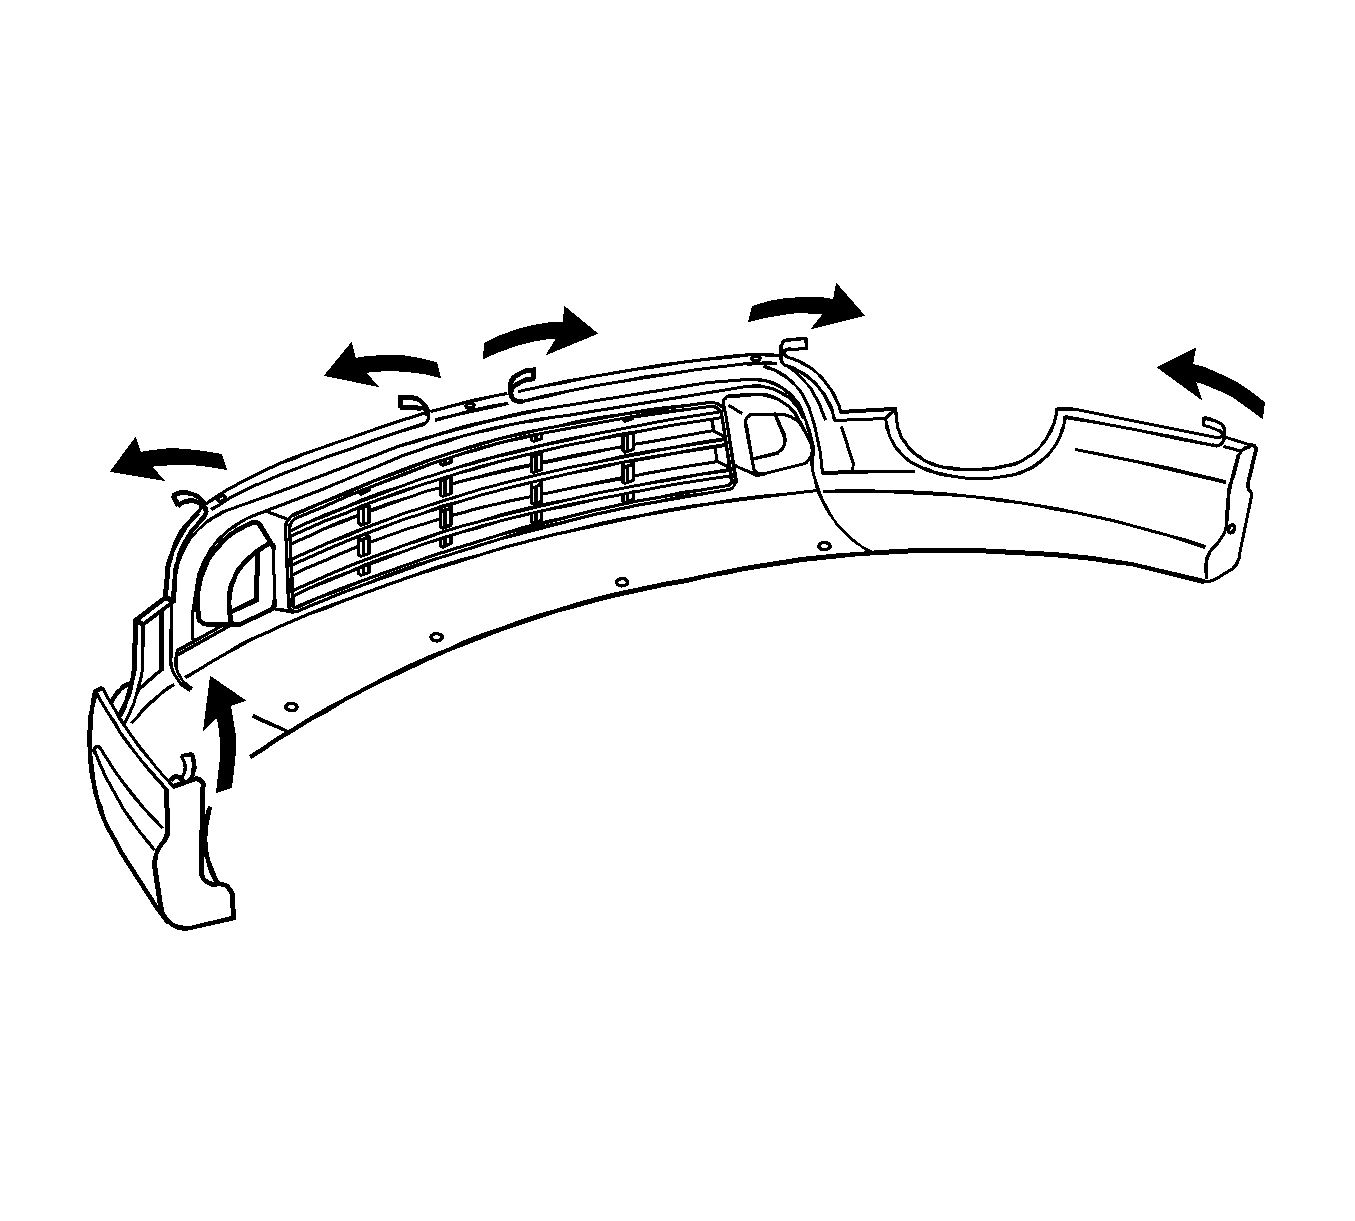
- Apply masking tape to the front fascia border of the extension, to protect the front fascia from scratches. The tape will also aid in aligning the extension during installation.
- Using an auxiliary heat source, heat the front fascia lower extension to between 40-60°C (104-140°F).
- Use J 41409 or the equivalent in order to cut through the adhesive material.
- Remove the front fascia extension from the vehicle.

Important: Do not overheat the component.
Installation Procedure
- Clean the area where the front fascia extension is to be mounted.
- Use a suitable solvent, such as a mixture of 50 percent isopropyl alcohol and 50 percent water, or equivalent.
- Dry the area thoroughly.
- Install adhesive tape to the outside edges of the front bumper fascia extension.
- Ensure that the body area is at a temperature range of 20-30°C (68-86°F). Heat the area, if necessary.
- Peel back 25.0 mm of the tape liner from both ends.
- Align front bumper fascia extension to the front bumper fascia.
- Carefully remove the tape liner starting from the center of the vehicle and press down working from the center to get good adhesion. Keep a distance of 6 inches between pressing down on tape area onto vehicle and peeling of tape liner to avoid stretching liner resulting in the liner breaking.
- using a roller, apply pressure to the part to press the tape onto the fasica.
- Install the screws to the front lower wheel arch opening.
- Fasten the lower edge of the front fascia extension using the push-in retainers.
- Install the license bracket. Refer to Front License Plate Bracket Replacement .
- Lower vehicle.
Important: Apply the adhesive tape in an environment free of dust or dirt so that it does not come in contact with the sticky backing and prevent proper adhesion.


Notice: Use the correct fastener in the correct location. Replacement fasteners must be the correct part number for that application. Fasteners requiring replacement or fasteners requiring the use of thread locking compound or sealant are identified in the service procedure. Do not use paints, lubricants, or corrosion inhibitors on fasteners or fastener joint surfaces unless specified. These coatings affect fastener torque and joint clamping force and may damage the fastener. Use the correct tightening sequence and specifications when installing fasteners in order to avoid damage to parts and systems.
Tighten
Tighten the screws to 2 N·m (17 lb in).
