For 1990-2009 cars only
Removal Procedure
- Remove the rear compartment rear center trim panel carpet. Refer to Rear Compartment Front Trim Panel Replacement in Interior Trim.
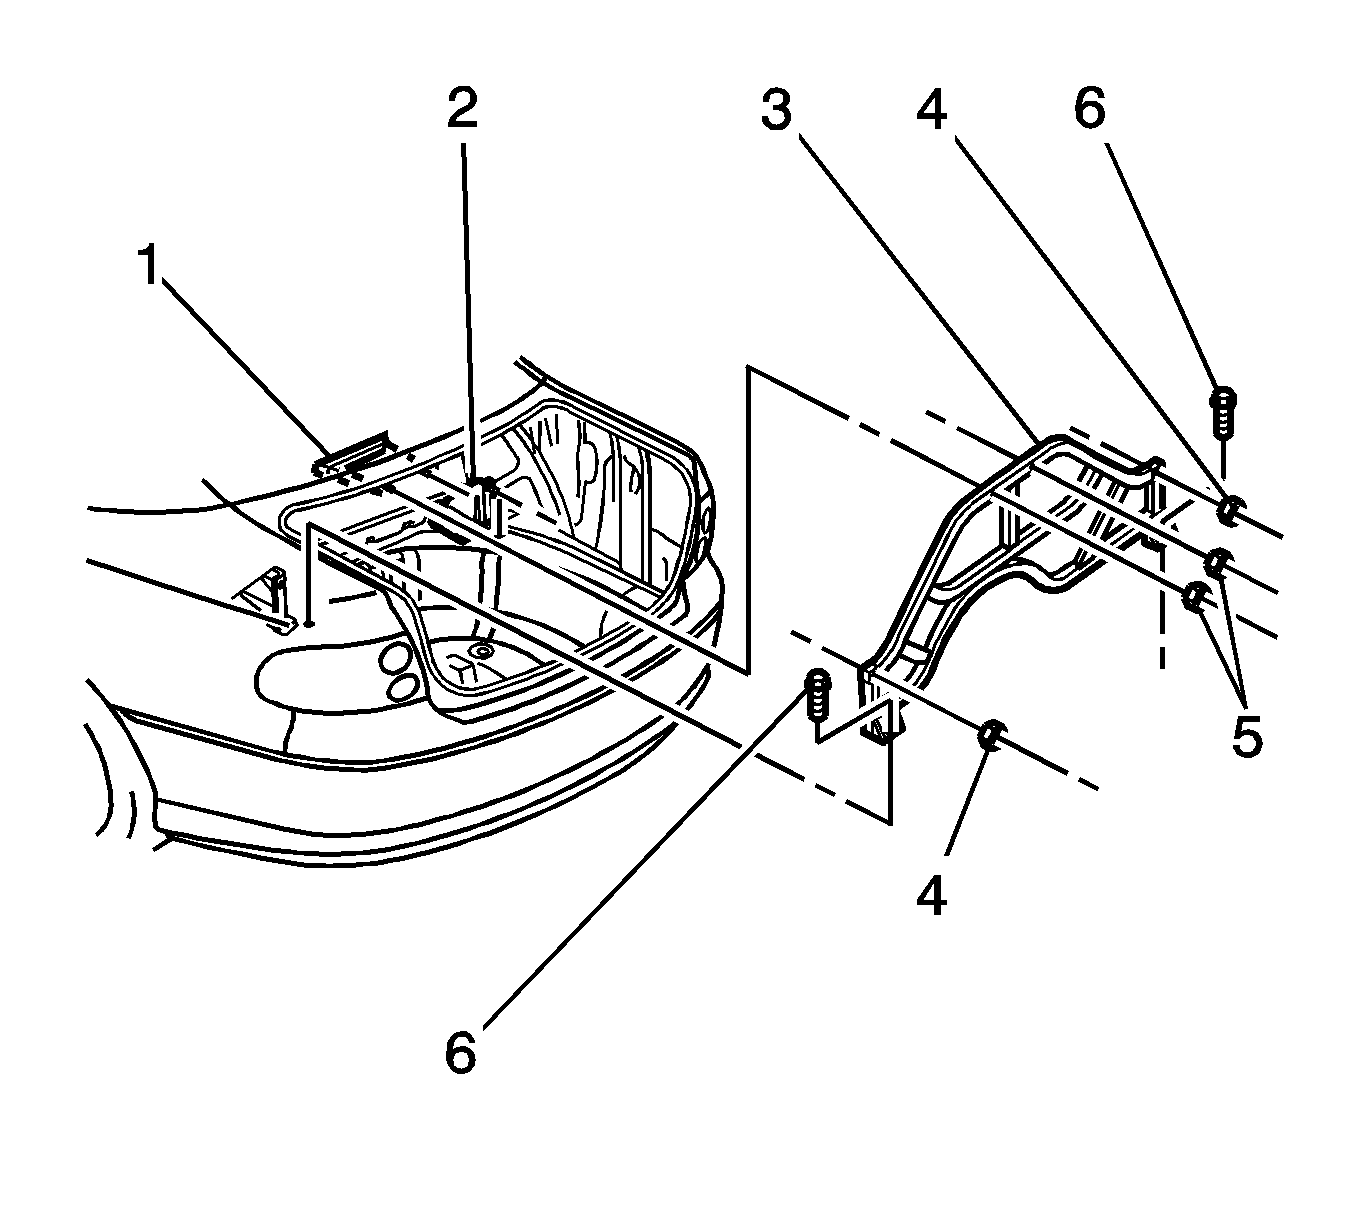
- Remove the 2 nuts (5) attaching the rear compartment support brace (3) to the rear compartment panel frame (1).
- Remove the 2 nuts (4) attaching the rear compartment support brace (3) to the underbody side rail brackets (2).
- Remove the 2 bolts (6).
- Lean the support brace (3) forward off the studs and remove from the rear compartment of the vehicle.
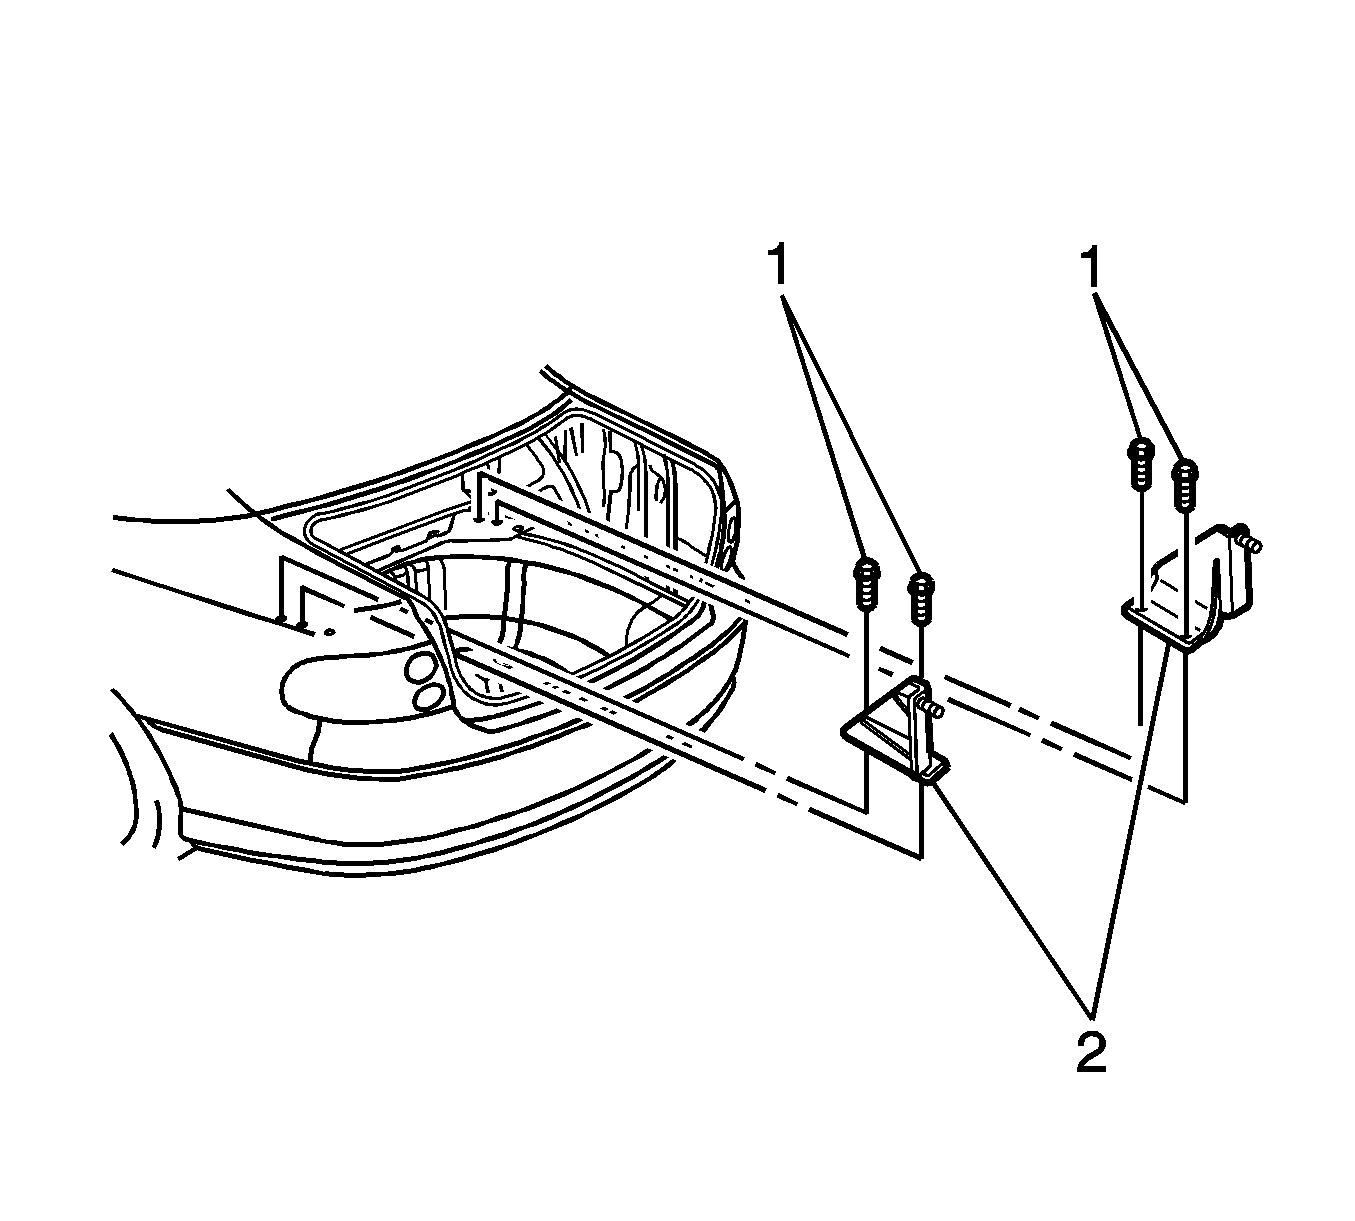
- Remove the 4 bolts (1) from the rear brackets (2), if necessary.
- Remove the brackets (2) from the rear compartment, if necessary.


Installation Procedure
- Install the brackets (2) to the rear compartment, if removed.
- Install the 4 bolts (1) attaching the rear brackets (2).
- Position the support brace (3) to the studs in the rear compartment of the vehicle.
- Install the 2 bolts (6).
- Install the 2 nuts (4) attaching the rear compartment support brace (3) to the underbody side rail brackets (2).
- Install the 2 nuts (5) attaching the rear compartment support brace (3) to the rear compartment panel frame (1).
- Install the rear compartment rear center trim panel. Refer to Rear Compartment Front Trim Panel Replacement in Interior Trim.

Notice: Refer to Fastener Notice in the Preface section.
Tighten
Tighten the bolts to 20 N·m (15 lb ft).

Tighten
Tighten the bolts to 20 N·m (15 lb ft).
Tighten
Tighten the nuts to 20 N·m (15 lb ft).
Tighten
Tighten the nuts to 20 N·m (15 lb ft).
