For 1990-2009 cars only
Removal Procedure
- Disconnect the negative battery cable.
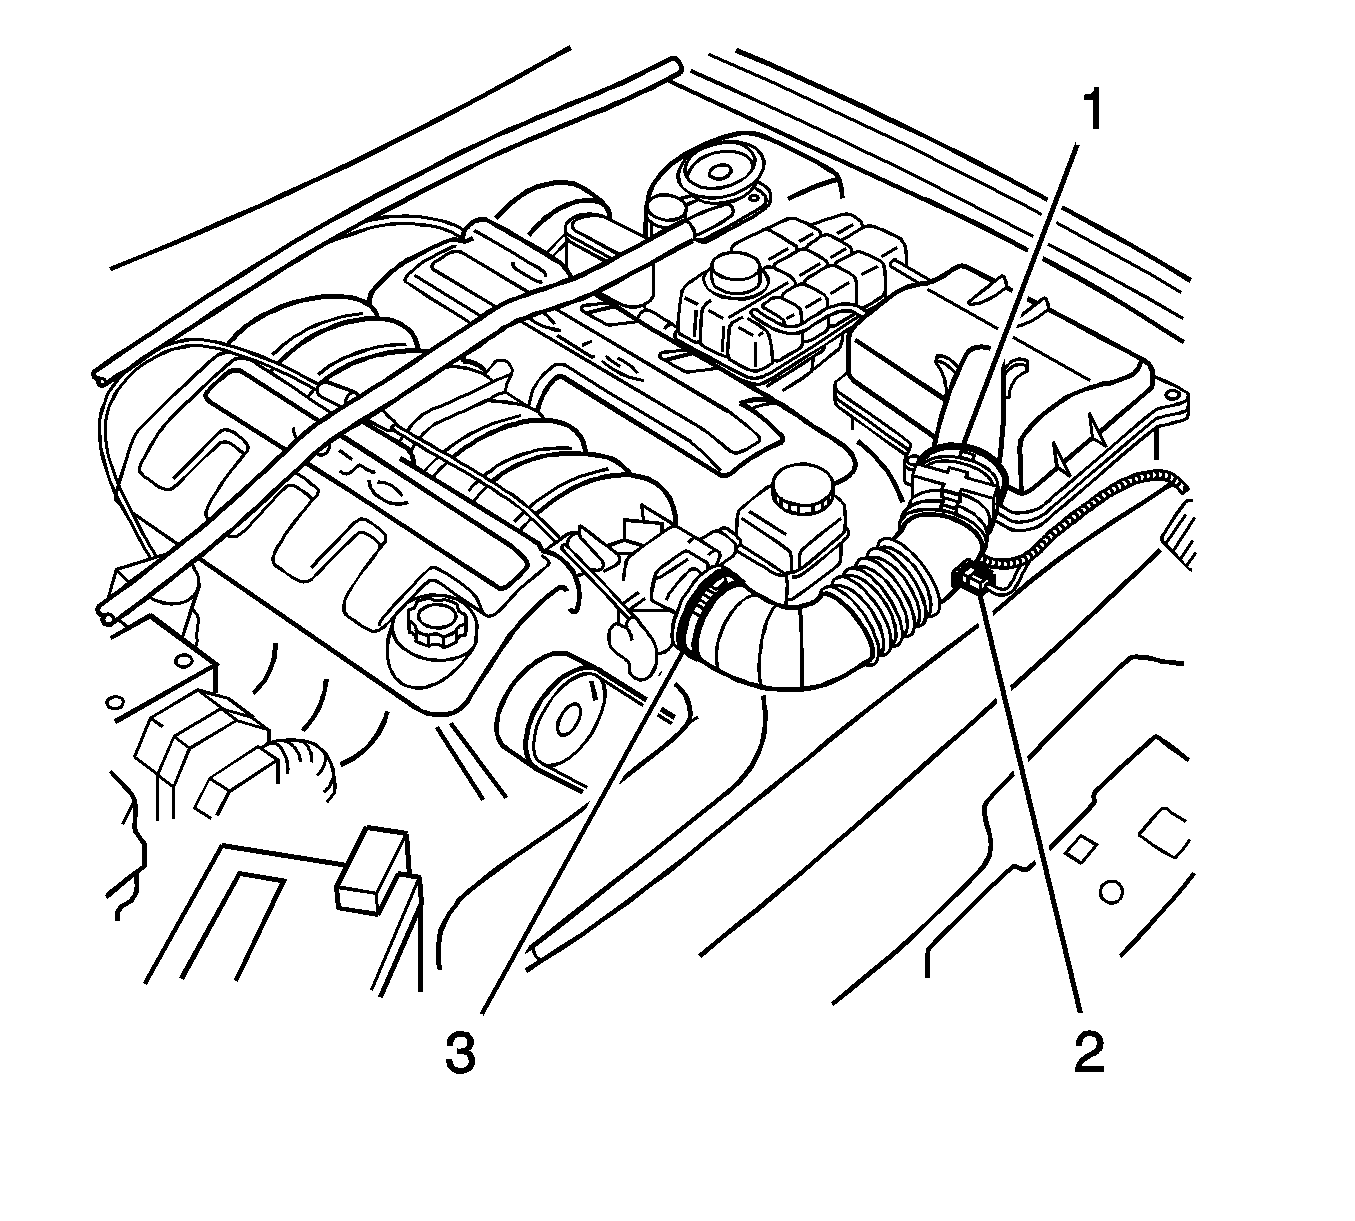
- Lift the locking lever on the mass air flow (MAF) sensor, then disconnect the MAF sensor electrical connector (1).
- Lift the locking lever on the intake air temperature (IAT) sensor, then disconnect the IAT sensor electrical connector (2).
- Loosen two intake duct clamps (3), then remove the duct.
- Drain the cooling system. Refer to Cooling System Draining and Filling .
- Remove the vapor hose from the radiator fan shroud clips.
- Remove the vapor hose to radiator clamp and position aside.
- Remove the vapor hose to surge tank clamp at the radiator and position aside.
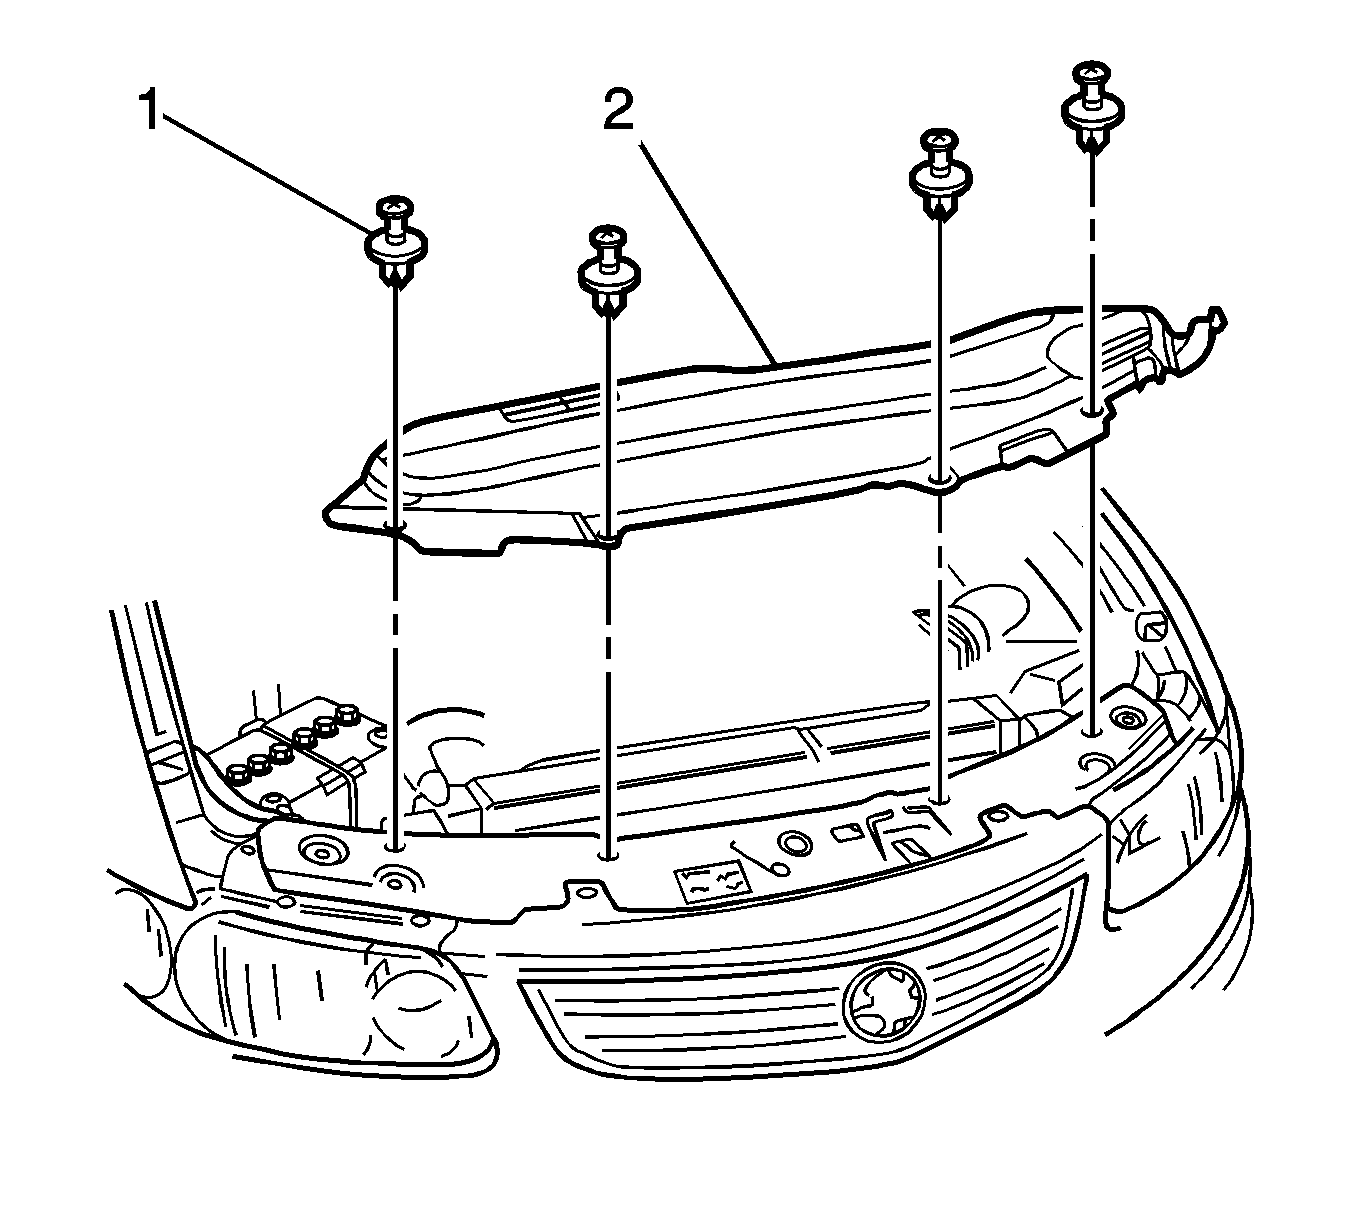
- Remove five upper shroud to radiator retainers (1).
- Lift the shroud (2) on the right side, then release the locating tab on the left side.
- Remove the radiator outlet hose. Refer to Radiator Outlet Hose Replacement .
- Remove the coolant vapor hose (1) from the fan shroud retaining clip.
- Disconnect the left side cooling fan motor electrical connector (2).
- Disconnect the right side cooling fan motor electrical connector (3).
- Push down on the fan shroud locking tab (1), then lift the fan and should assembly upwards to remove.
- Disconnect the intermediate fan motor electrical connector (1), then remove the motor assembly wire harness (2) from the fan shroud retaining clips.
Caution: Refer to Battery Disconnect Caution in the Preface section.


Important: To avoid damage to the fan motor shaft, do not lift the fan and shroud assembly by the fan rings.

| 16.1. | Remove four screws (3), attaching the fan motor and the fan assemblies to the fan shroud. |
| 16.2. | Remove the fan motor and wiring from the fan shroud. |
Installation Procedure
- Position the fan motor assembly.
- Install the fan and shroud assembly.
- Connect the right side cooling fan motor electrical connector (3).
- Connect the left side cooling fan motor electrical connector (2).
- Install the coolant vapor hose (1) to the fan shroud retaining clip.
- Install the radiator outlet hose. Refer to Radiator Outlet Hose Replacement .
- Lift the shroud (2) on the right side, then install the locating tab on the left side.
- Install five upper shroud to radiator retainers (1).
- Install the vapor hose to surge tank clamp at the radiator.
- Install the vapor hose to radiator clamp.
- Install vapor hose to the radiator fan shroud clips.
- Refill the cooling system. Refer to Cooling System Draining and Filling .
- Position the intake duct then install two intake duct clamps (3).
- Connect the IAT sensor electrical connector (2).
- Connect the MAF sensor electrical connector (1).
- Connect the negative battery cable.

Notice: Refer to Fastener Notice in the Preface section.
| 1.1. | Install four screws (3), attaching the fan motor and the fan assemblies to the fan shroud. |
Tighten
Tighten the fan motor screws to 5 N·m
(62 lb in).
| 1.2. | Install the motor assembly wire harness (2) to the fan shroud retaining clips, then connect the intermediate fan motor electrical connector (1). |
Important: To avoid damage to the fan motor shaft, do not lift the fan and shroud assembly by the fan rings.


Caution: Refer to Battery Disconnect Caution in the Preface section.
