For 1990-2009 cars only
Removal Procedure
- Disconnect the negative battery cable.
- If the vehicle has a manual transmission, remove the clutch pedal bracket assembly. Refer to Clutch Pedal Replacement in Clutch.
- Remove the left closeout panel. Refer to Instrument Panel Insulator Panel Replacement - Left Side in Instrument Panel, Gages, and Console.
- Remove the left ventilation ducts. Refer to Instrument Panel Air Outlet Ducts Replacement in Heating, Ventilation, and Air Conditioning.
- Remove the cruise control release switch. Refer to Cruise Control Release Switch Replacement in Cruise Control.
- Remove the stop lamp switch. Refer to Stop Lamp Switch Replacement in Lighting Systems.
- Remove the brake master cylinder assembly. Refer to Master Cylinder Replacement .
- Remove the vacuum brake booster assembly. Refer to Power Vacuum Brake Booster Replacement .
- Inside the vehicle, disconnect the accelerator cable from the accelerator pedal lever.
- Remove the 2 nuts that retain the brake pedal support bracket to the dash panel.
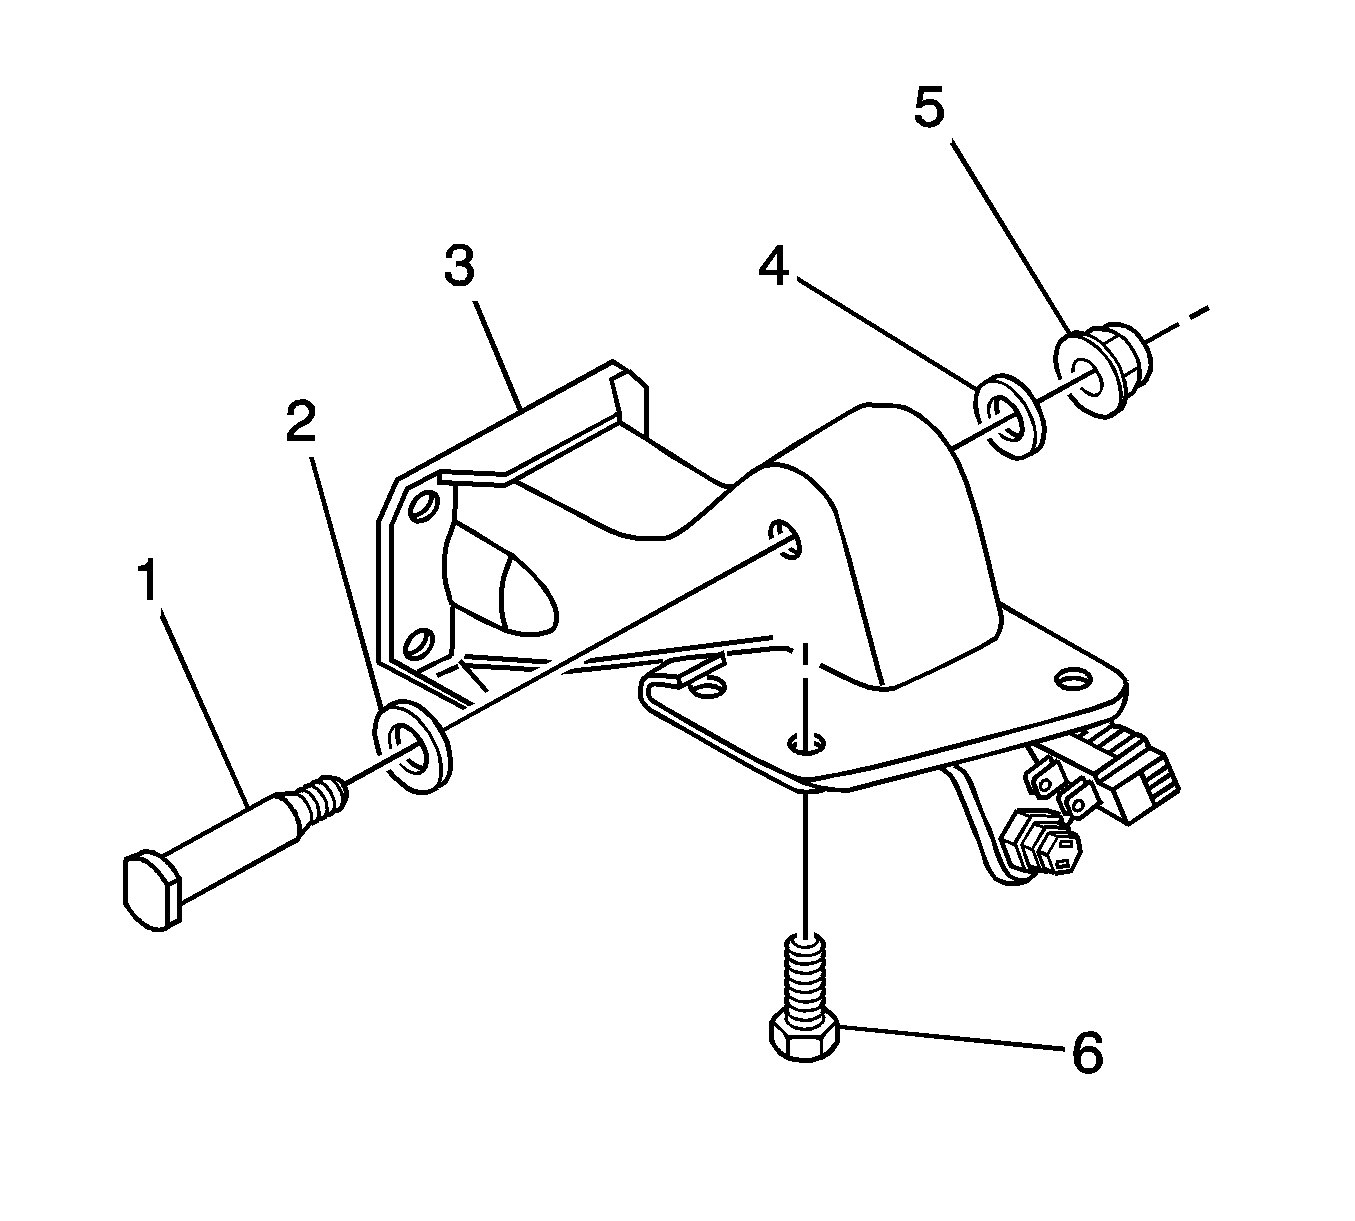
- Remove the 3 bolts (6) that retain the brake pedal bracket (3) to the steering column.
- Lower the brake pedal bracket.
- Remove the nut (5) and the washer (4) from the brake pedal shaft.
- Remove the brake pedal shaft (1) and the washer (2) from the brake pedal assembly.
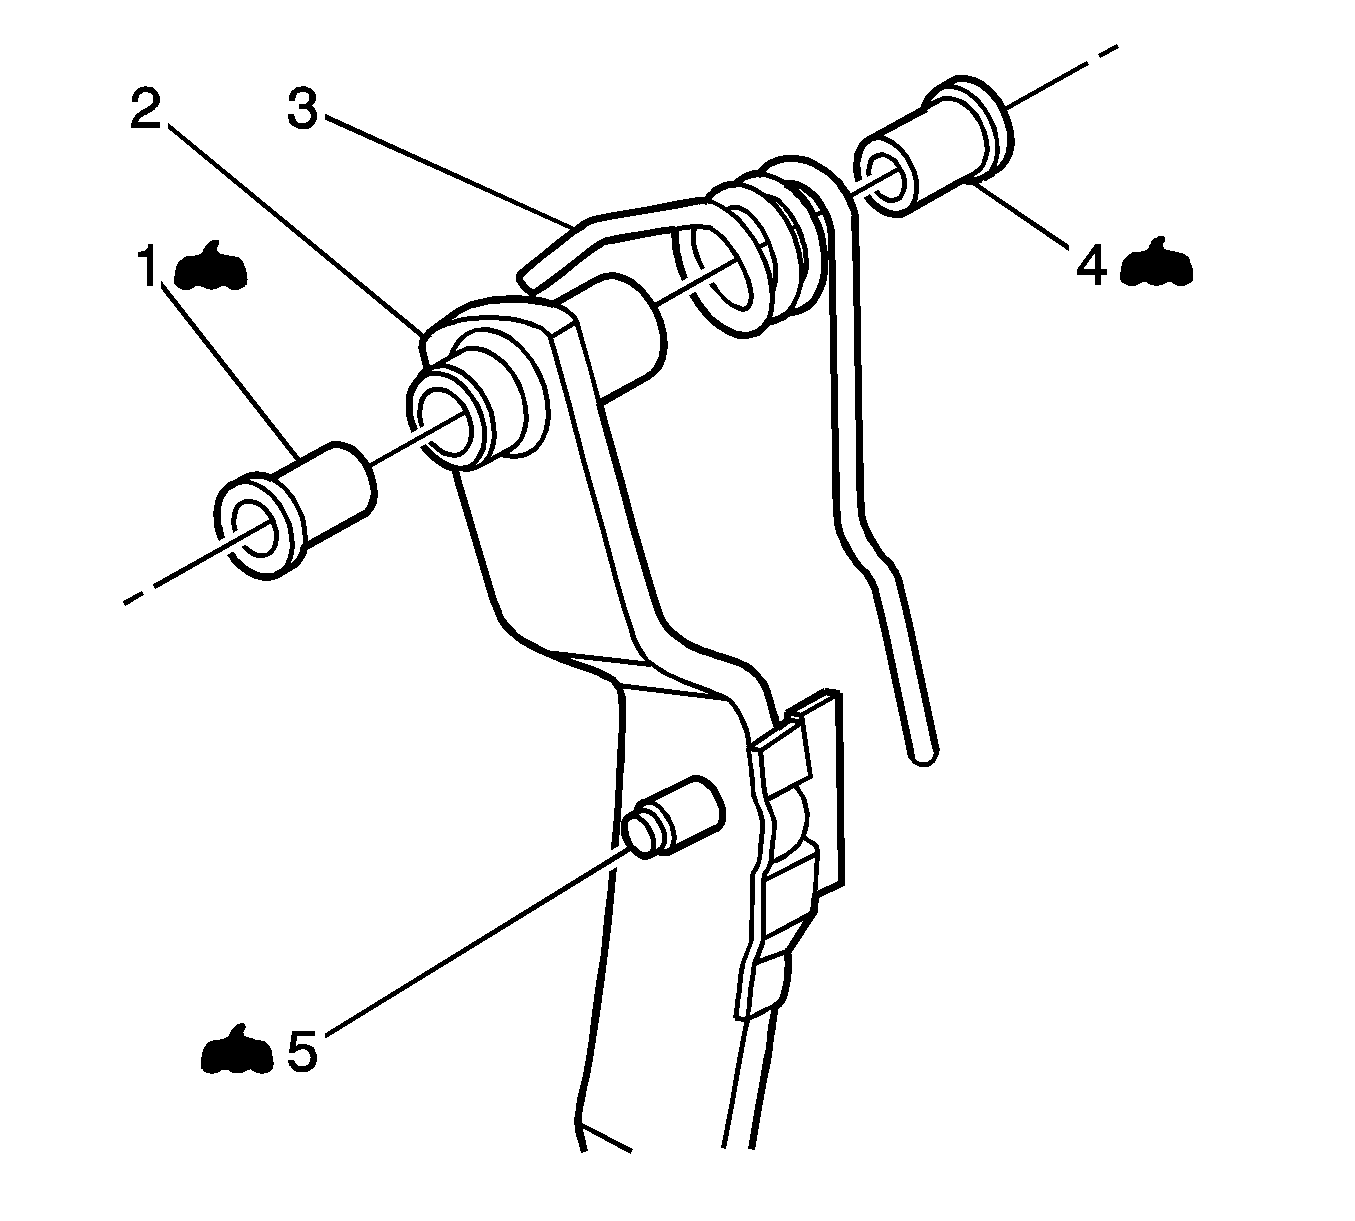
- Remove the brake pedal with the return spring.
- Remove the return spring.
- Remove the brake pedal pivot bushings.
Caution: Unless directed otherwise, the ignition and start switch must be in the OFF or LOCK position, and all electrical loads must be OFF before servicing any electrical component. Disconnect the negative battery cable to prevent an electrical spark should a tool or equipment come in contact with an exposed electrical terminal. Failure to follow these precautions may result in personal injury and/or damage to the vehicle or its components.

Installation Procedure
- Apply GM Vehicle Care® Dri-Slide Lubricant, GM P/N 1052948, or the equivalent lithium molybdenum disulphide lubricant, to the brake pedal pivot bushings (1, 4) and to the push rod pivot point (5).
- Install the brake pedal pivot bushings to the brake pedal.
- Hold the brake pedal and the return spring in position and install the brake pedal shaft (1) and the washer (2) to the brake pedal bracket (3).
- Install the washer (4) and the nut (5) to the brake pedal shaft.
- Install the brake pedal bracket and the 3 bolts to the steering column.
- Install the vacuum brake booster assembly. Refer to Power Vacuum Brake Booster Replacement .
- Install the 2 nuts that retain the brake pedal bracket to the dash panel.
- Tighten the 3 bolts that retain the brake pedal bracket to the steering column.
- Connect the accelerator cable to the accelerator pedal lever.
- Install the brake master cylinder assembly and bleed the brake system. Refer to Master Cylinder Replacement .
- Install and adjust the stop lamp switch. Refer to Stop Lamp Switch Replacement in Lighting Systems.
- Install and adjust the cruise control release switch. Refer to Cruise Control Release Switch Replacement in Cruise Control.
- Install the left ventilation ducts. Refer to Instrument Panel Air Outlet Ducts Replacement in Heating, Ventilation, and Air Conditioning.
- Install the left I/P lower insulator panel. Refer to Instrument Panel Insulator Panel Replacement - Left Side in Instrument Panel, Gages, and Console.
- If the vehicle has a manual transmission, install the clutch pedal bracket assembly. Refer to Clutch Pedal Replacement in Clutch.
- Connect the negative battery cable.


Notice: Refer to Fastener Notice in the Preface section.
Tighten
Tighten the nut to 55 N·m (41 lb ft).
Important: Do not tighten the bolts yet.
Important: Do not install the brake master cylinder yet.
Tighten
Tighten the nuts to 23 N·m (17 lb ft).
Tighten
Tighten the bolts to 23 N·m (17 lb ft).
