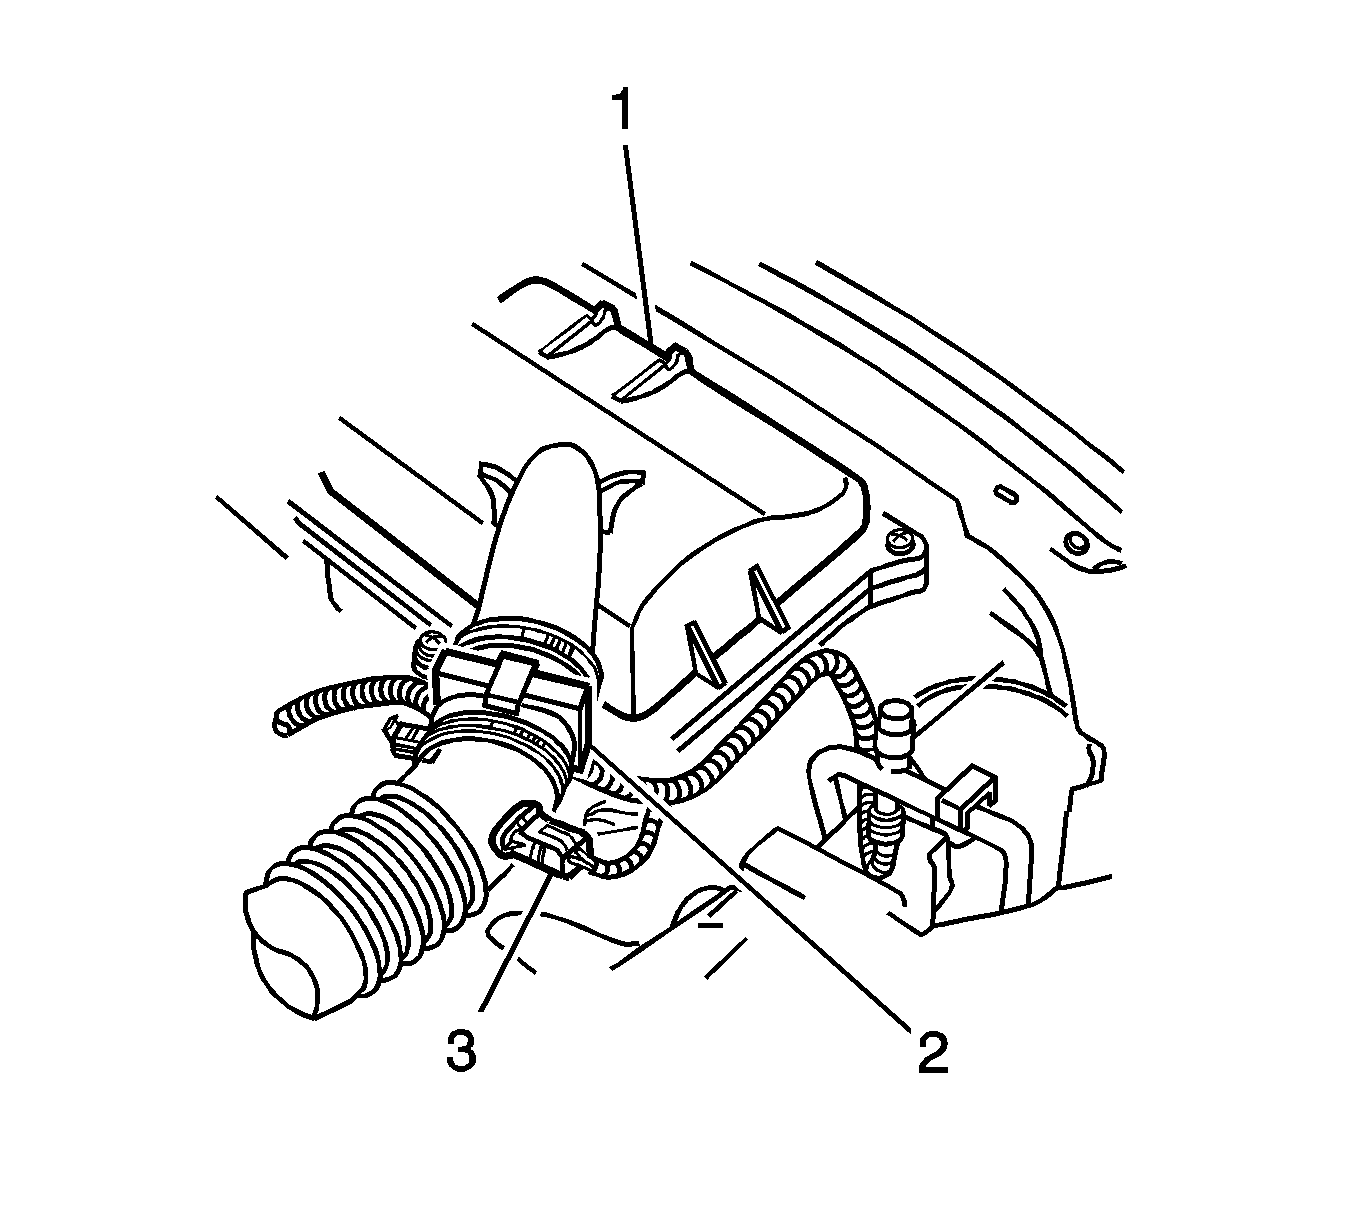
Removal Procedure
Important: Take care when handling the MAF sensor. DO NOT dent, puncture, or otherwise damage the honeycell located at the air inlet end of the MAF sensor. Do not touch the sensing elements or allow anything, including cleaning solvents and lubricants, to come in contact with the elements. Use a small amount of a non-silicone based lubricant on the air duct only, to aid in installation. DO NOT drop or roughly handle the MAF sensor.
- Disconnect the MAF sensor (2) wiring harness connector.
- Disconnect the IAT sensor (3) wiring harness connector.
- Loosen the clamp on air duct adaptor closest to the air cleaner upper housing (1).
- Loosen the clamp on the intake air duct at the MAF sensor (2) and pull back the intake air duct to clear the sensor
- Remove the MAF sensor (2).

Important: The air duct adaptor (between air cleaner and MAF sensor), retaining clamps, air duct and MAF sensor, all have locating notches.
Installation Procedure
Important:: The embossed arrows on the MAF sensor indicate the proper air flow direction. The arrows must point toward the engine.
- Install the MAF sensor (2) into the air duct adaptor.
- Install the retaining clamps, aligning notches, tighten clamps to the specified torque.
- Connect the MAF sensor (2) wiring harness connector.
- Connect the IAT sensor (3) wiring harness connector.

Tighten
Tighten the retaining clamps to 2 N·m
(17 lb in).
