For 1990-2009 cars only
Removal Procedure
- Remove the knee bolster. Refer to Knee Bolster Replacement.
- Remove the left close out panel. Refer to Instrument Panel Insulator Panel Replacement - Left Side.
- Remove the hood release handle. Refer to Hood Primary Latch Release Cable Replacement.
- Remove the instrument panel retainer. Refer to Instrument Panel Retainer Replacement.
- Remove the left instrument panel extension. Refer to Instrument Panel Extension Replacement.
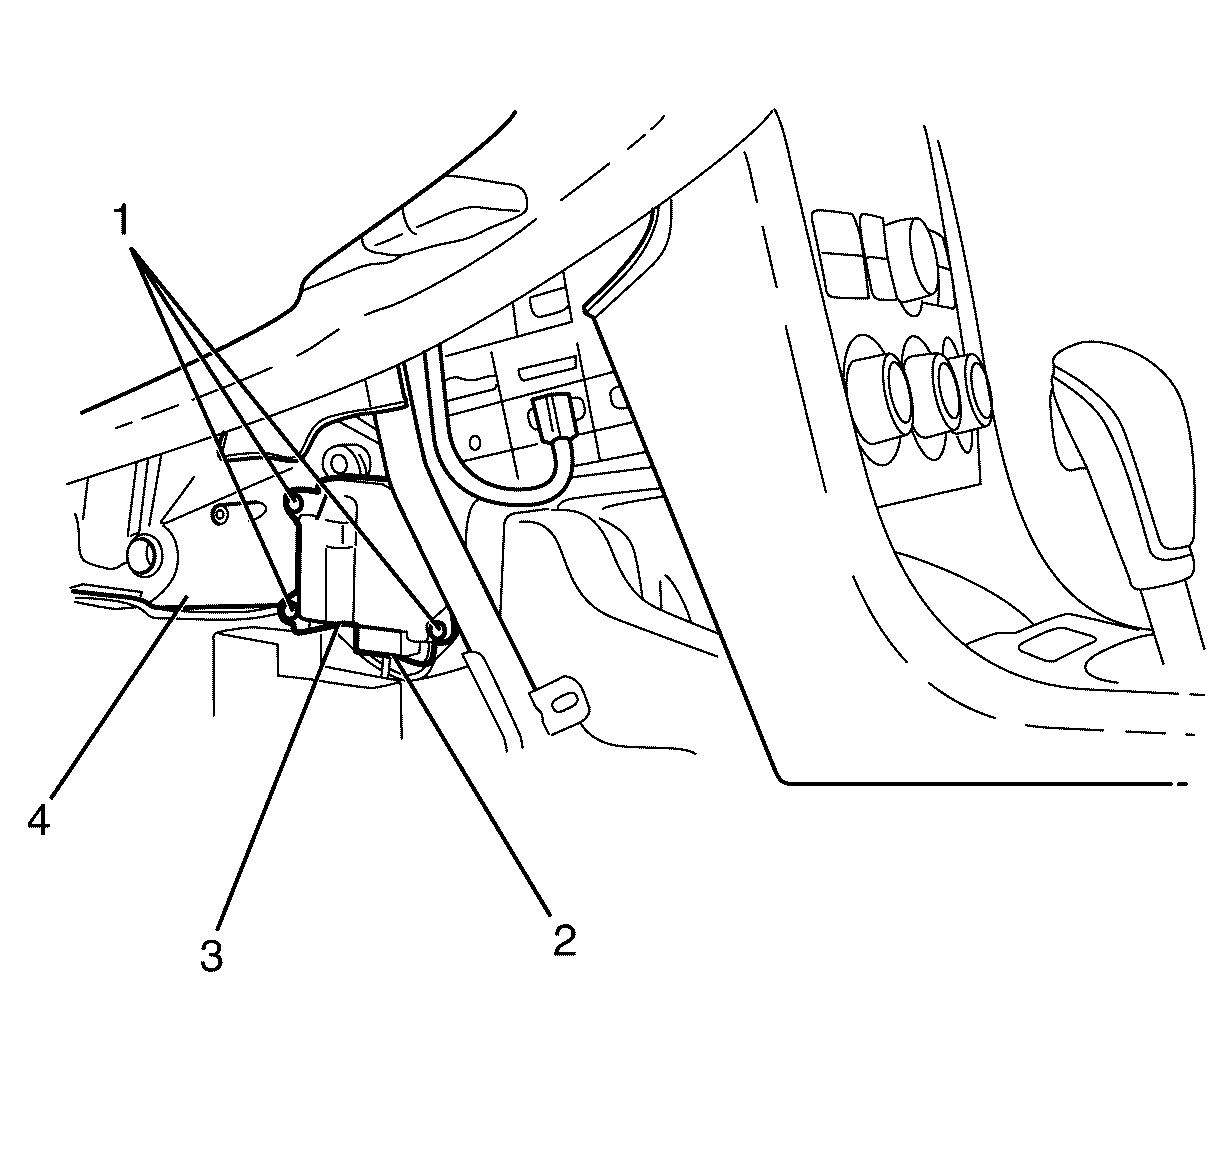
- Disconnect the auxiliary mode door actuator electrical connector (2).
- Remove the auxiliary mode door actuator to HVAC module assembly retaining screws (1).
- Remove the auxiliary mode door actuator (3) from the HVAC module assembly (4).

Installation Procedure
- Install the auxiliary mode door actuator (3) to the HVAC module assembly (4)..
- Install the auxiliary mode door actuator to HVAC module assembly retaining screws (1) and tighten to 1 N·m (9 lb ft).
- Connect the auxiliary mode door actuator electrical connector (2).
- Install the left instrument panel extension. Refer to Instrument Panel Extension Replacement.
- Install the instrument panel retainer. Refer to Instrument Panel Retainer Replacement.
- Install the hood release handle. Refer to Hood Primary Latch Release Cable Replacement.
- Install the left close out panel. Refer to Instrument Panel Insulator Panel Replacement - Left Side.
- Install the knee bolster. Refer to Knee Bolster Replacement.
- Perform HVAC system relearn. Refer to HVAC Control Module Programming and Setup.

Caution: Refer to Fastener Caution in the Preface section.
