Removal Procedure
- Disable the SIR system. Refer to SIR Disabling and Enabling.
- Disconnect the negative battery cable. Refer to Battery Negative Cable Disconnection and Connection.
- Remove the engine assembly. Refer to Engine Replacement for the 3.6L engine or Engine Replacement for the 6.0L engine.
- Remove the negative cable from the engine bay. Refer to Battery Negative Cable Replacement.
- Remove the positive cable from the engine bay. Refer to Battery Positive Cable Replacement.
- Raise and support the vehicle. Refer to Lifting and Jacking the Vehicle.
- Remove the front wheels. Refer to Tire and Wheel Removal and Installation.
- Remove the front wheelhouse liner. Refer to Front Wheelhouse Liner Replacement.
- Remove the front wheel hub assembly. Refer to Front Wheel Bearing and Hub Replacement.
- Remove the front strut assembly. Refer to Strut Assembly Replacement.
- Lower the vehicle.
- Remove the brake lines. Refer to Brake Pipe Replacement.
- Remove the front fascia. Refer to Front Bumper Fascia Replacement.
- Remove the fender assembly. Refer to Front Fender Replacement.
- Remove the coolant reservoir. Refer to Coolant Recovery Reservoir Replacement.
- Remove the front end module. Refer to Front End Panel Module Carrier Assembly Replacement.
- Remove the air inlet grille. Refer to Air Inlet Grille Panel Replacement.
- Remove the plenum chamber. Refer to Air Inlet Assembly Replacement.
- Remove the relay box. Refer to Underhood Electrical Center or Junction Block Replacement.
- Remove the ABS unit. Refer to Brake Pressure Modulator Valve Assembly Replacement.
- Remove the brake master cylinder. Refer to Master Cylinder Replacement.
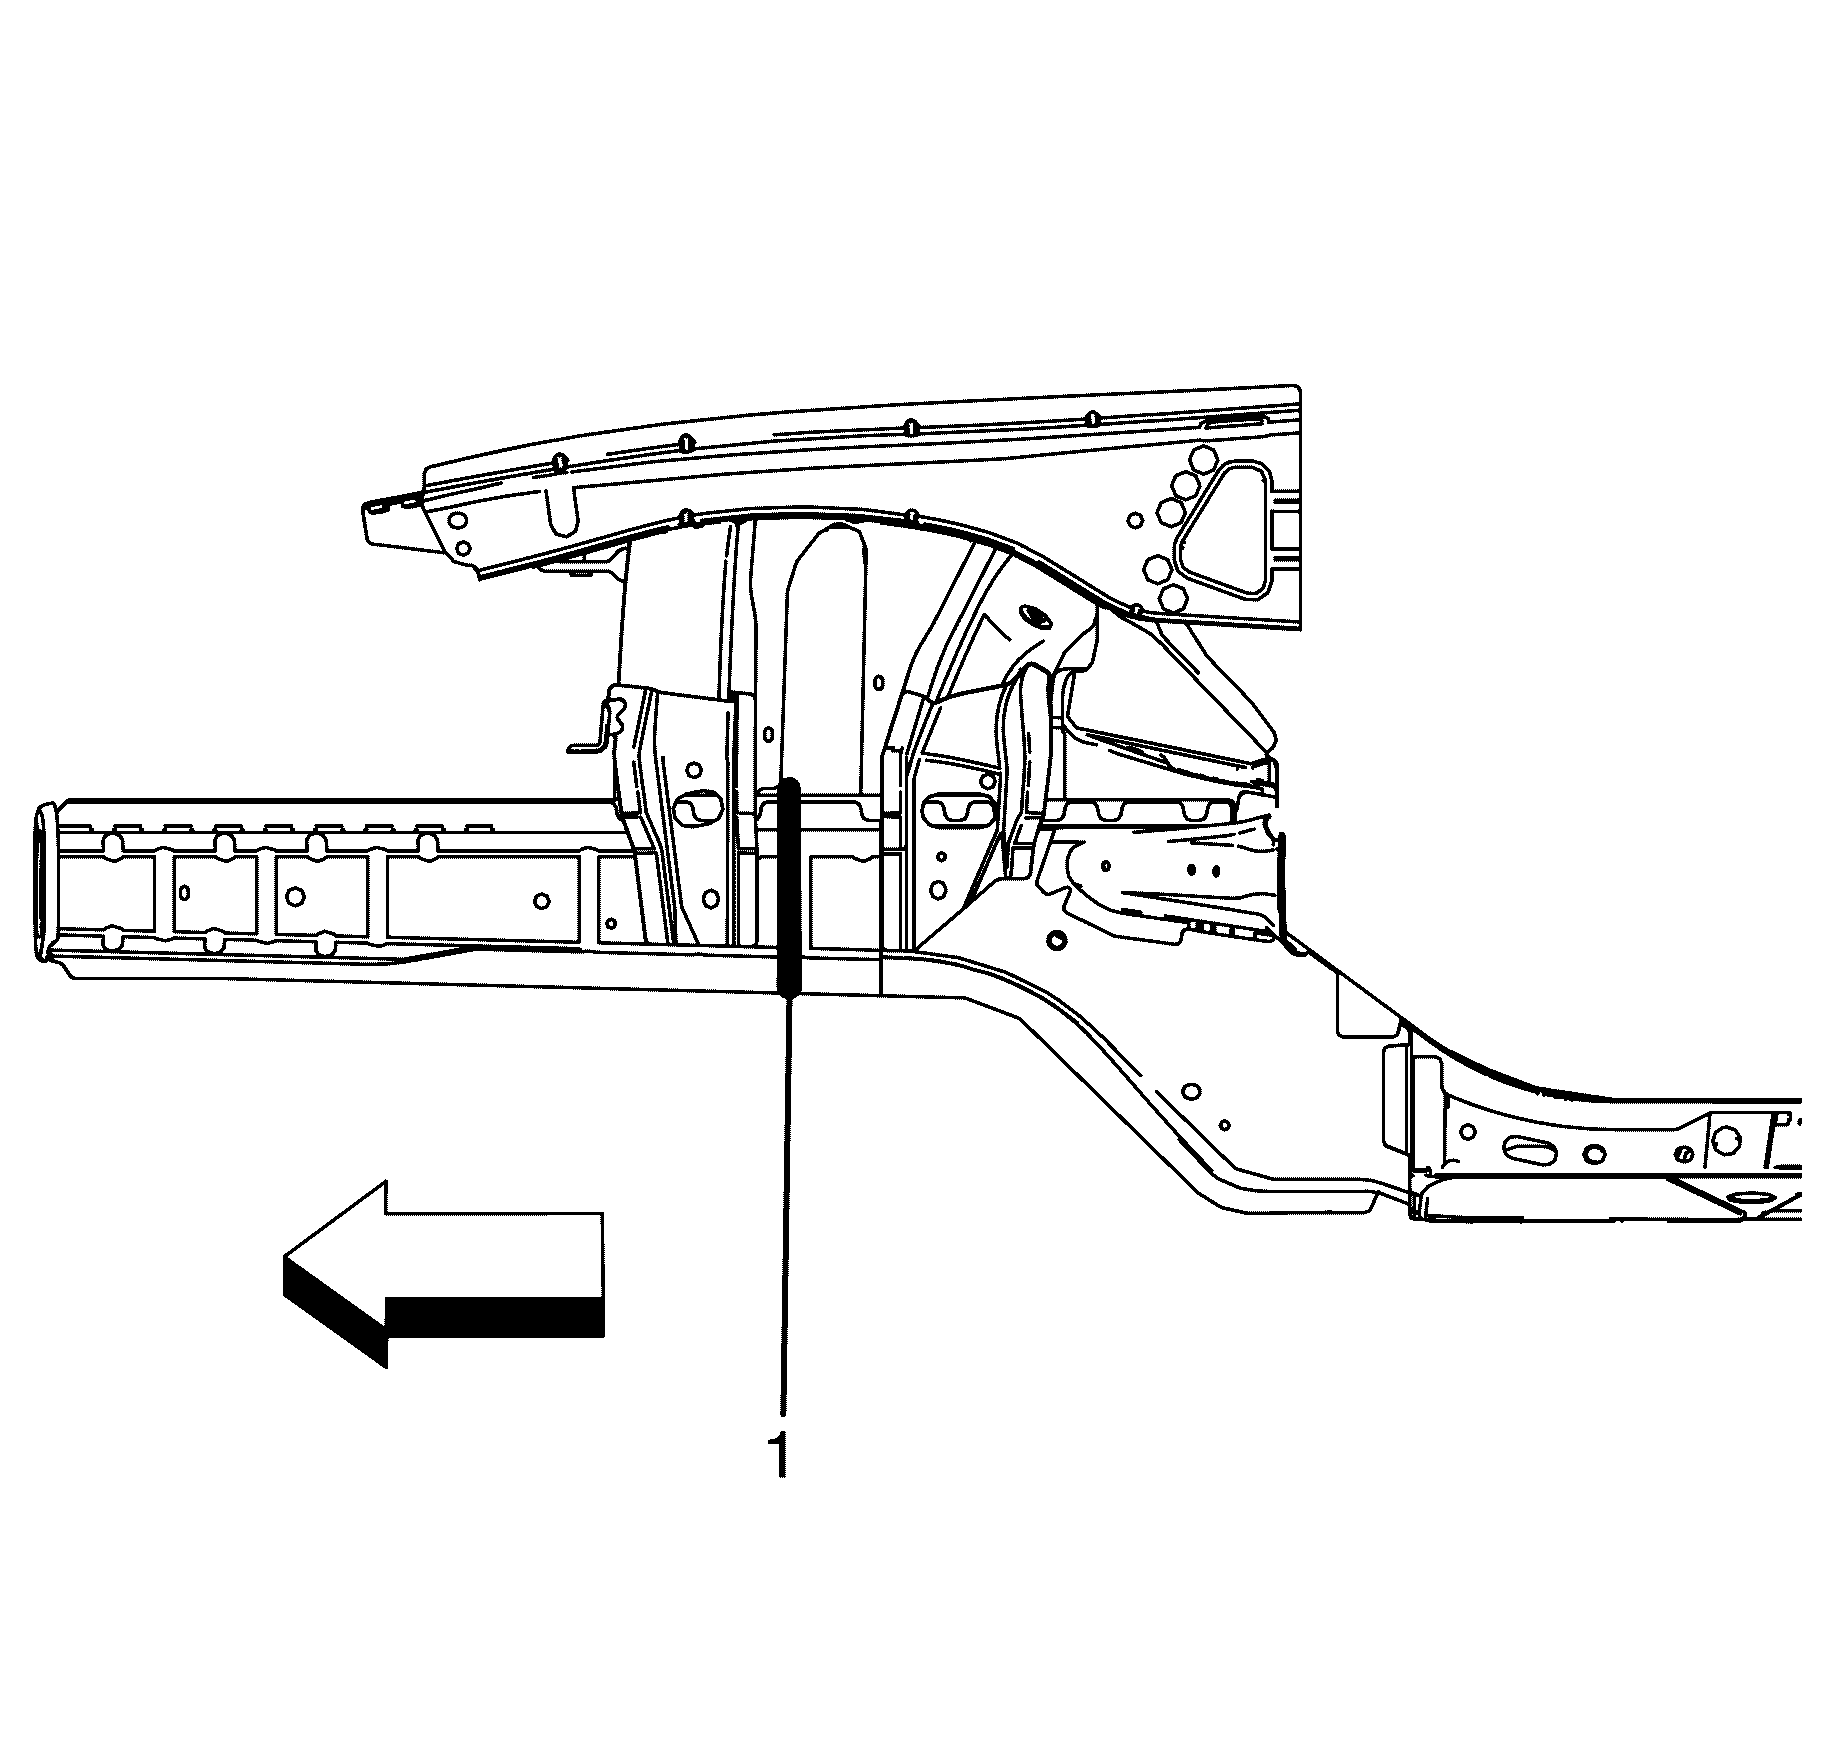
- Note the location and remove the sealers and anti-corrosion materials from the repair area, as necessary. Refer to Anti-Corrosion Treatment and Repair.
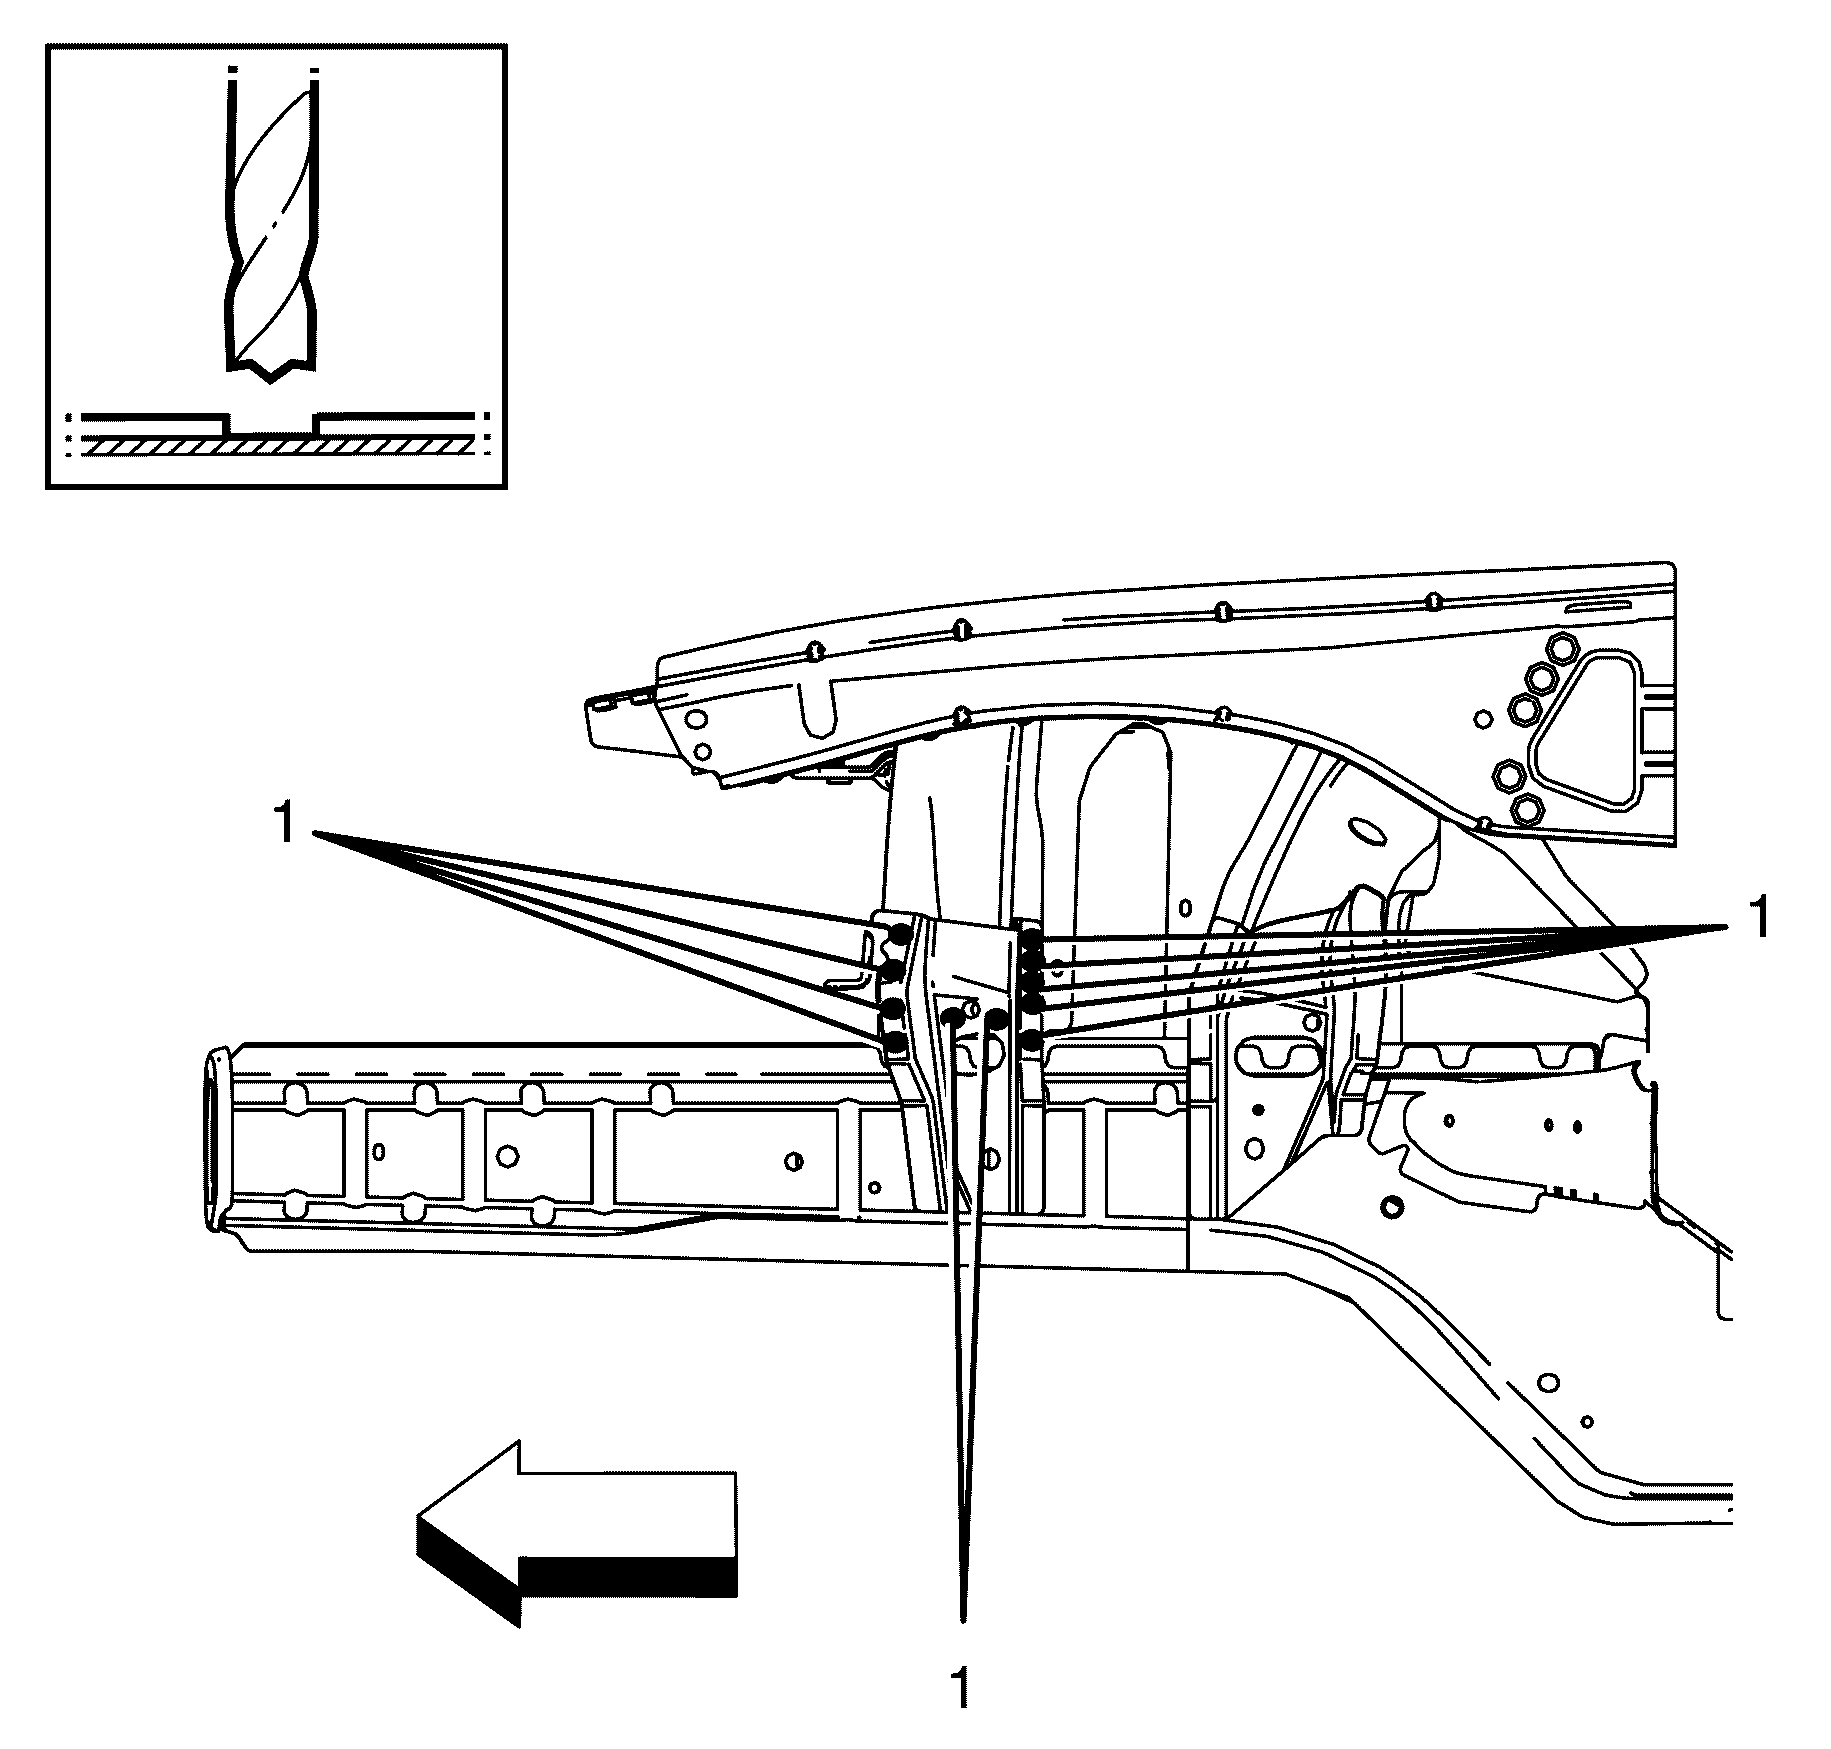
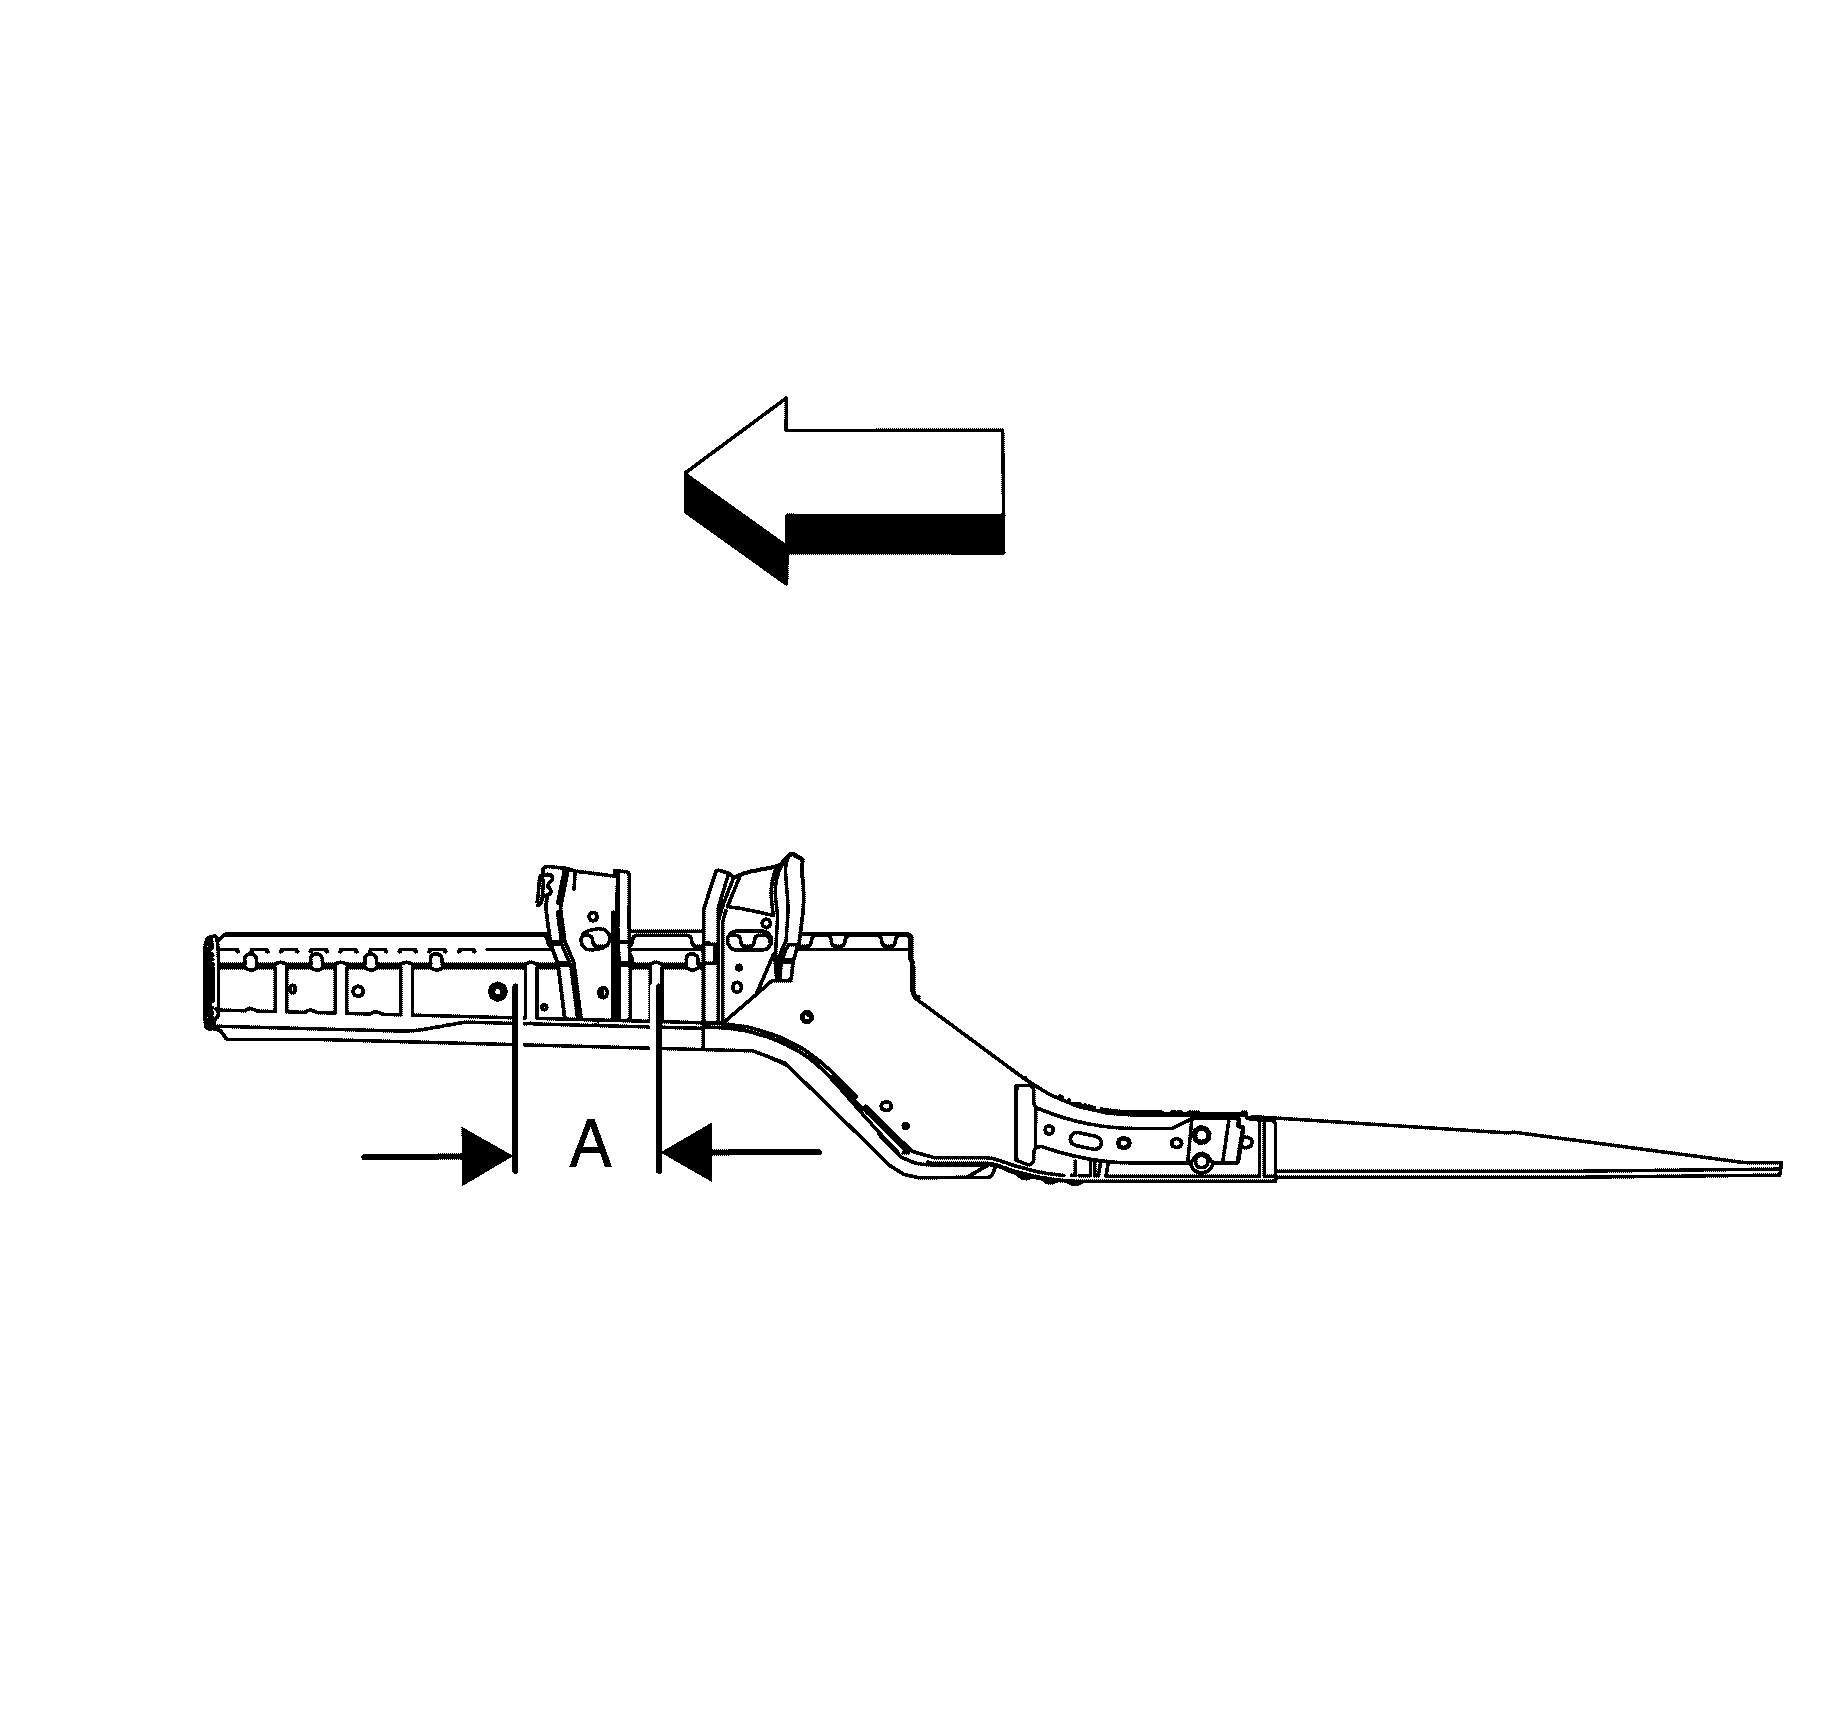
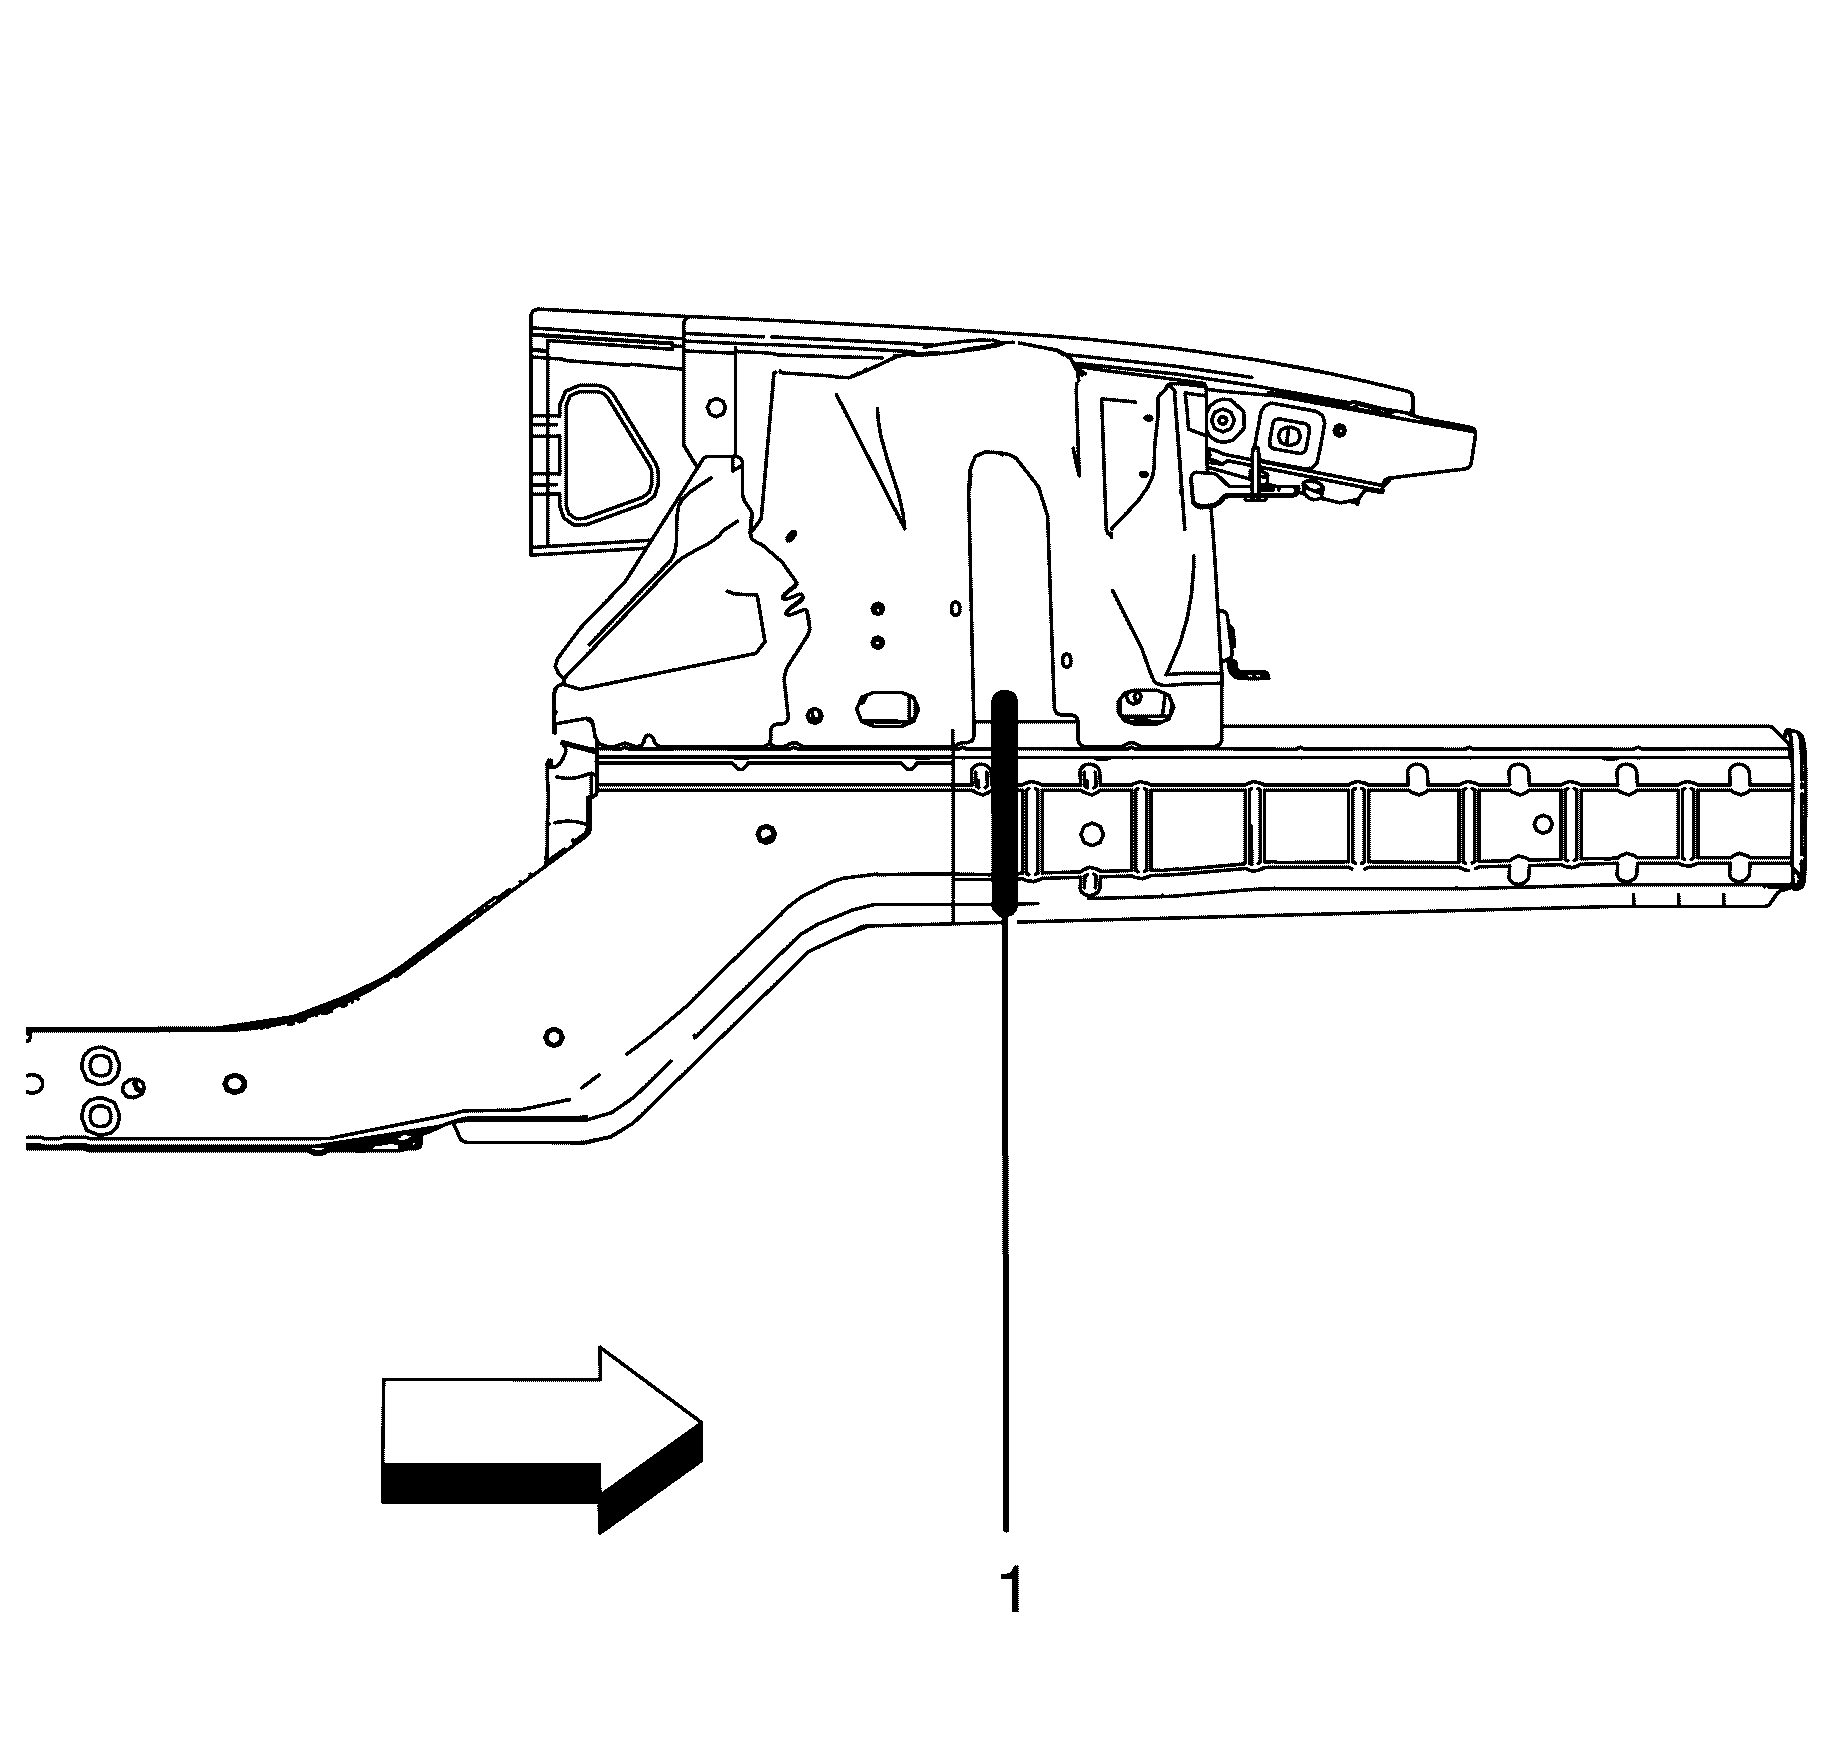
- Locate, mark and drill out the front wheelhouse brace to front wheelhouse assembly spot welds (1).
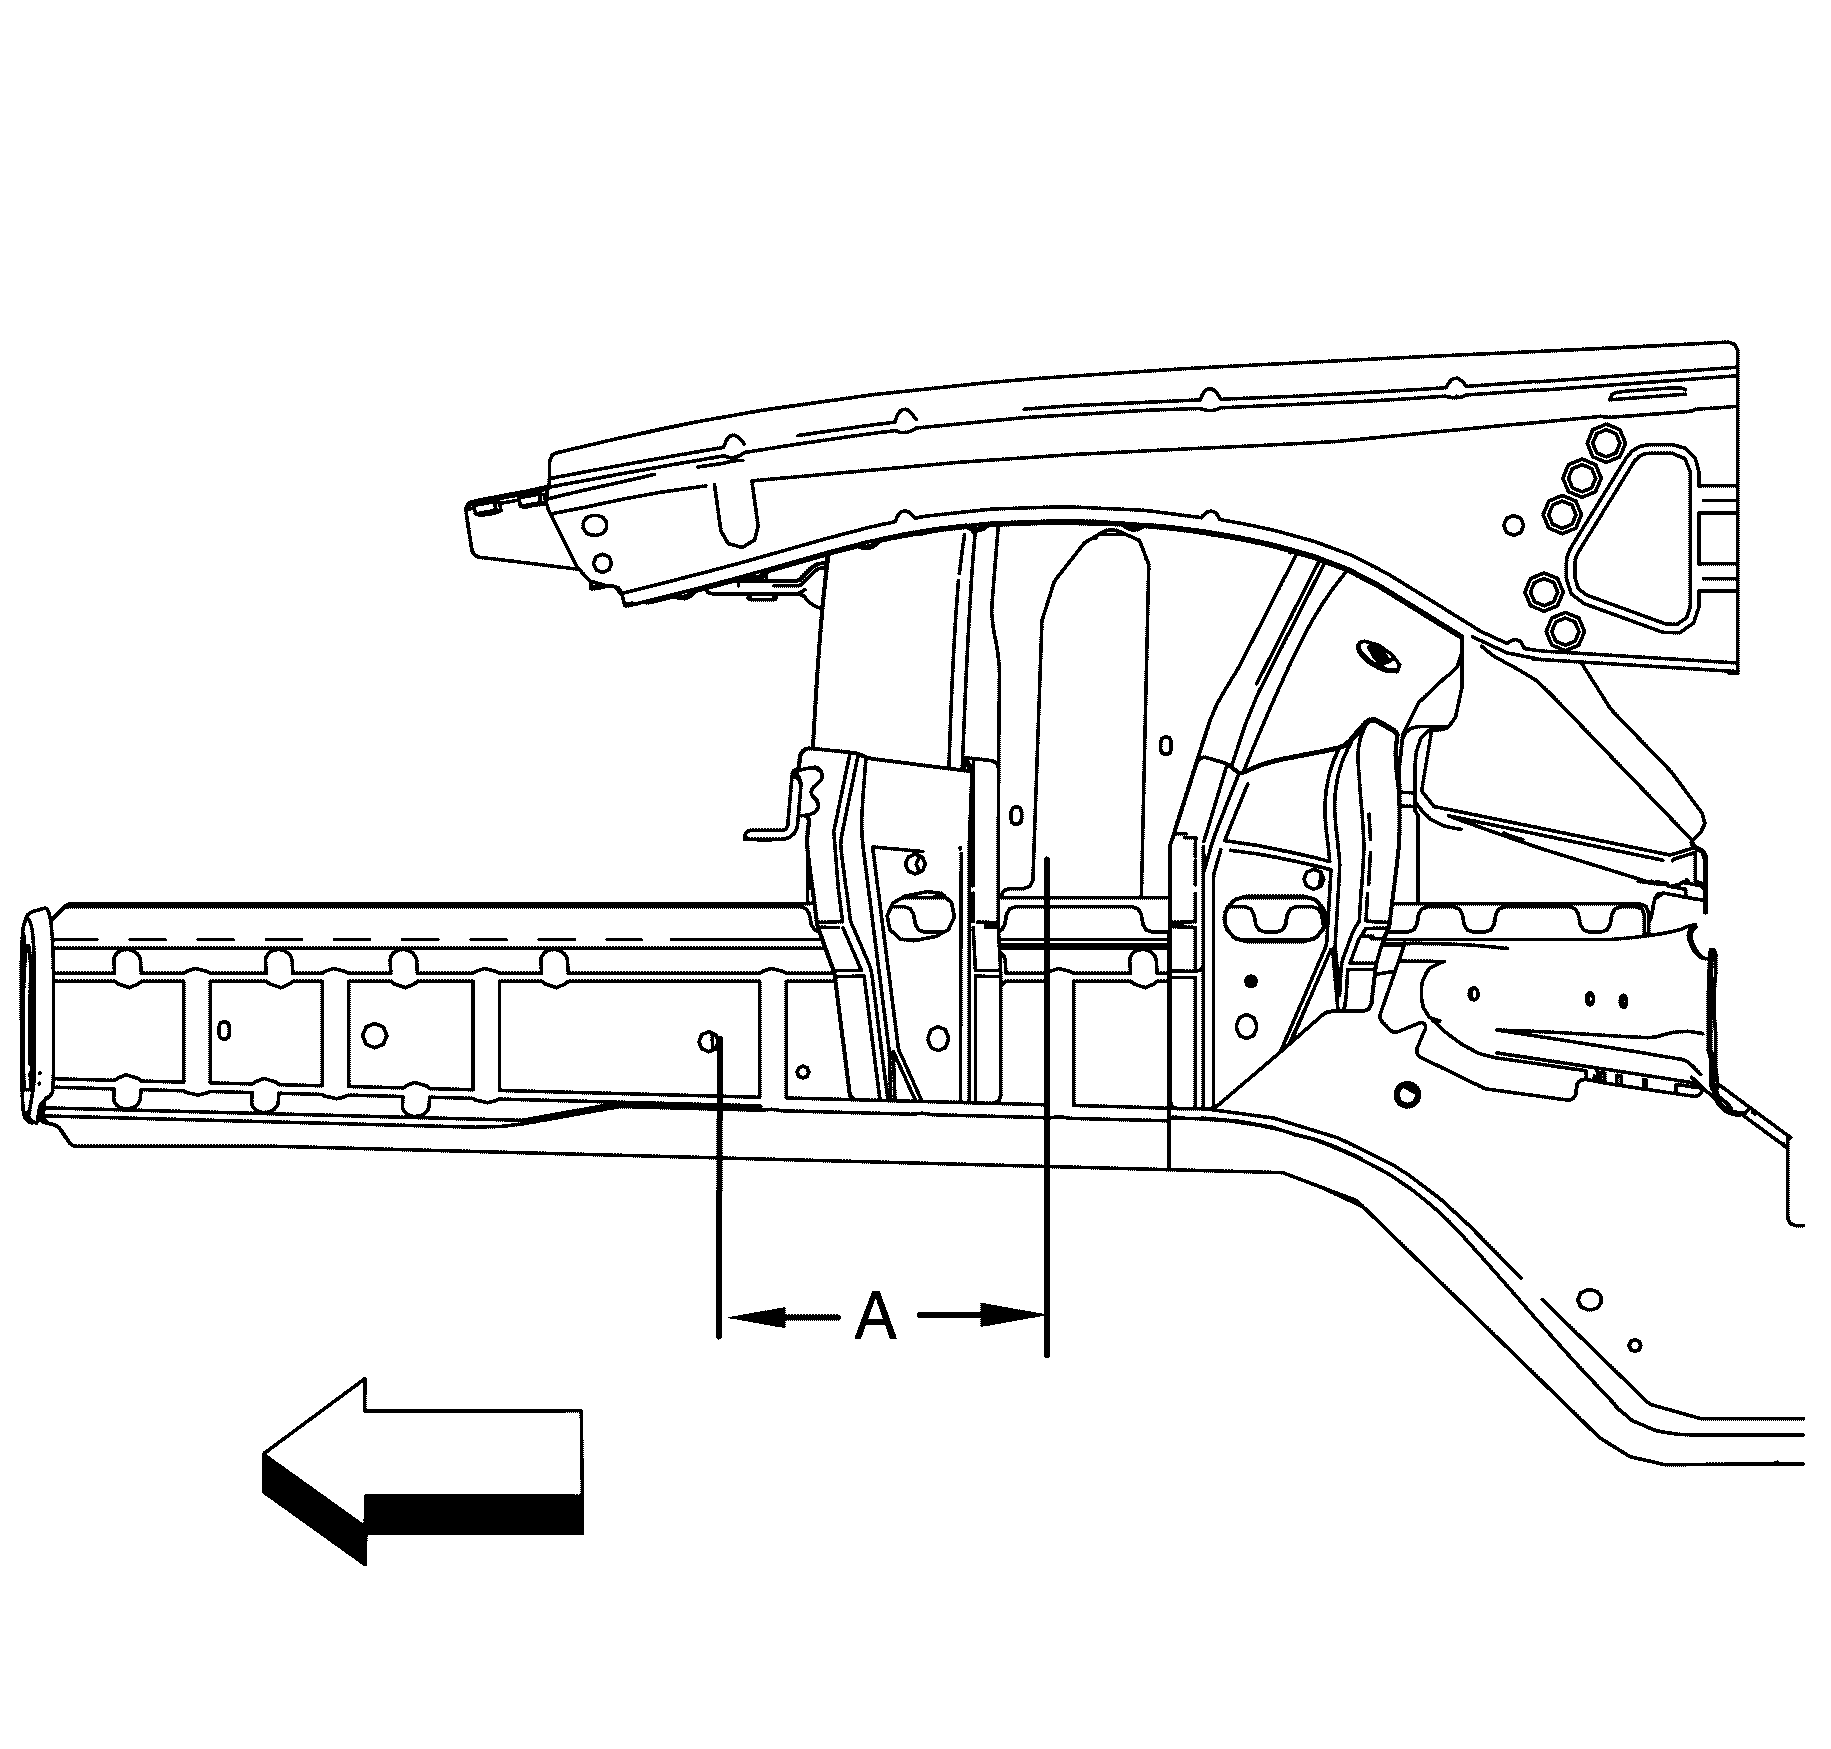
- Measure rearward from the datum hole to cut point 210 mm (8.27 in) (A).
- Using a suitable tool cut through the inner and outer rail at the measurement point.
- Remove the front section of the front chassis rail and discard.
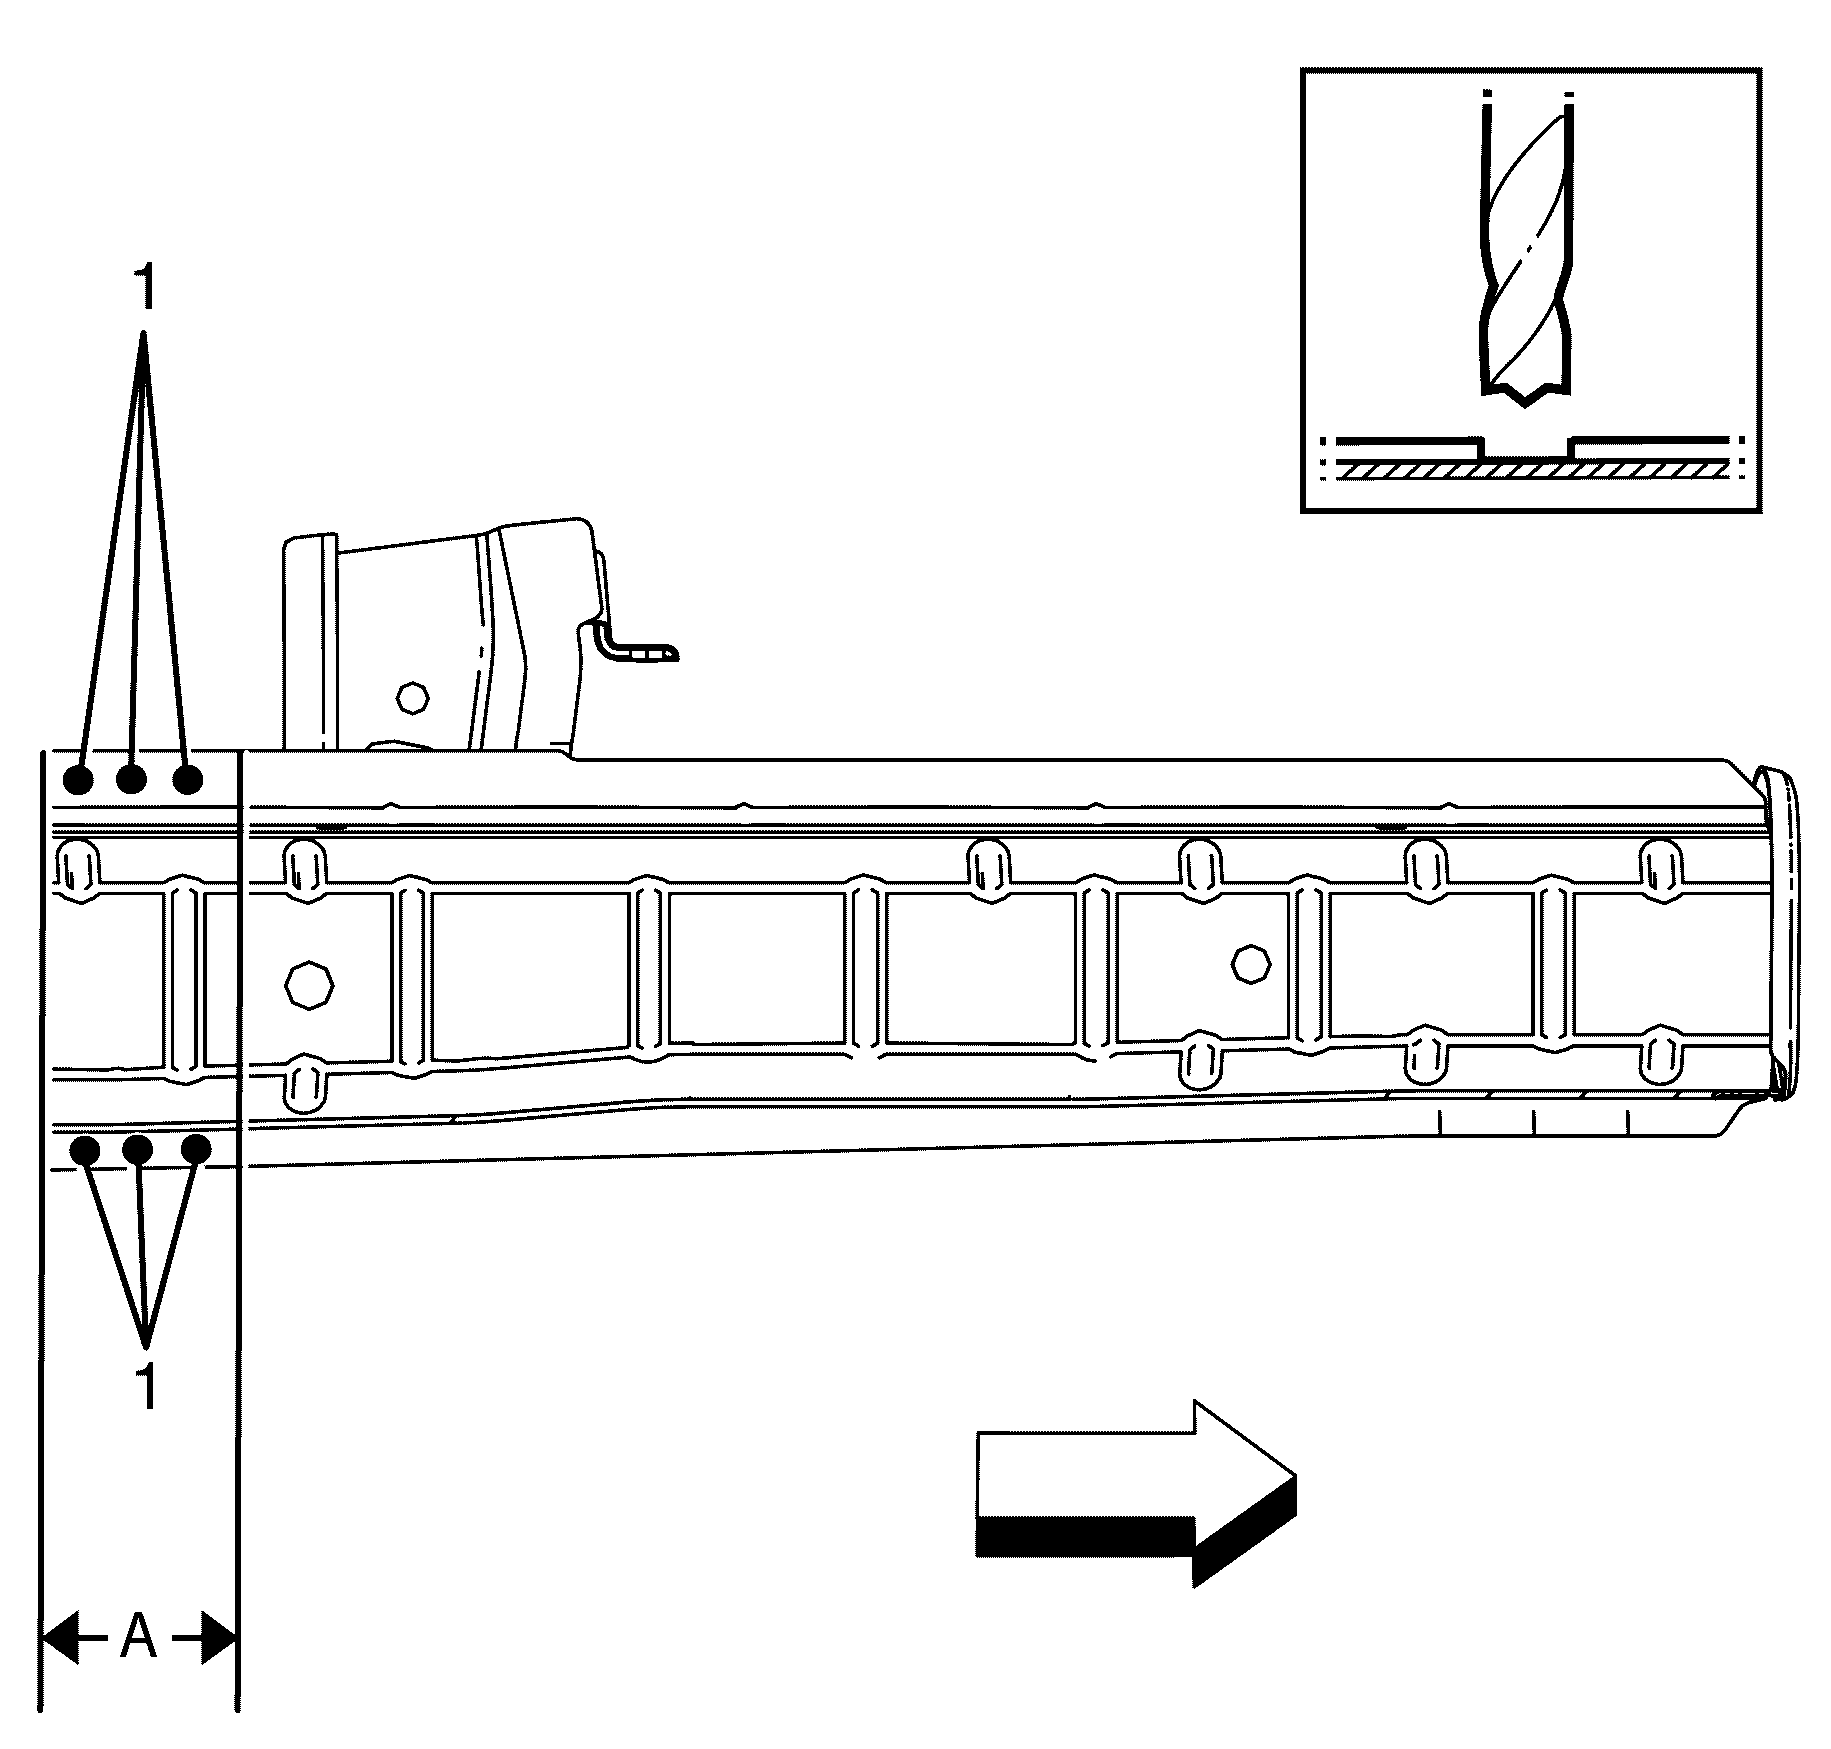
- Measure rearward from the first cut point 50 mm (1.97 in) (A).
- Locate, mark and drill out the spot welds (1) from the outer front chassis rail to the inner front chassis rail within the measurement made.
- Using a suitable tool cut along the second cut point (A) on the inner front chassis rail and discard.
Warning: Refer to Approved Equipment for Collision Repair Warning in the Preface section.
Warning: Refer to Safety Glasses Warning in the Preface section.
Warning: Refer to Foam Sound Deadeners Warning in the Preface section.
Warning: Refer to Battery Disconnect Warning in the Preface section.
Danger: To avoid any vehicle damage, serious personal injury or death when major components are removed from the vehicle and the vehicle is supported by a hoist, support the vehicle with jack stands at the opposite end from which the components are being removed and strap the vehicle to the hoist.
Note:
• Sectioning procedures have been developed to simplify the repair of the lower rails, as long as the damage rearward of the sectioning location can be repaired to factory specifications. • Failure to follow the instructions may lead to improper rail sectioning, which may compromise the structural integrity of the vehicle.
Discard the front section of the front chassis rail.
Note: Only cut the inner part of the front chassis rail to stagger the front chassis rail.
Discard the inner section of the front chassis rail.
Installation Procedure
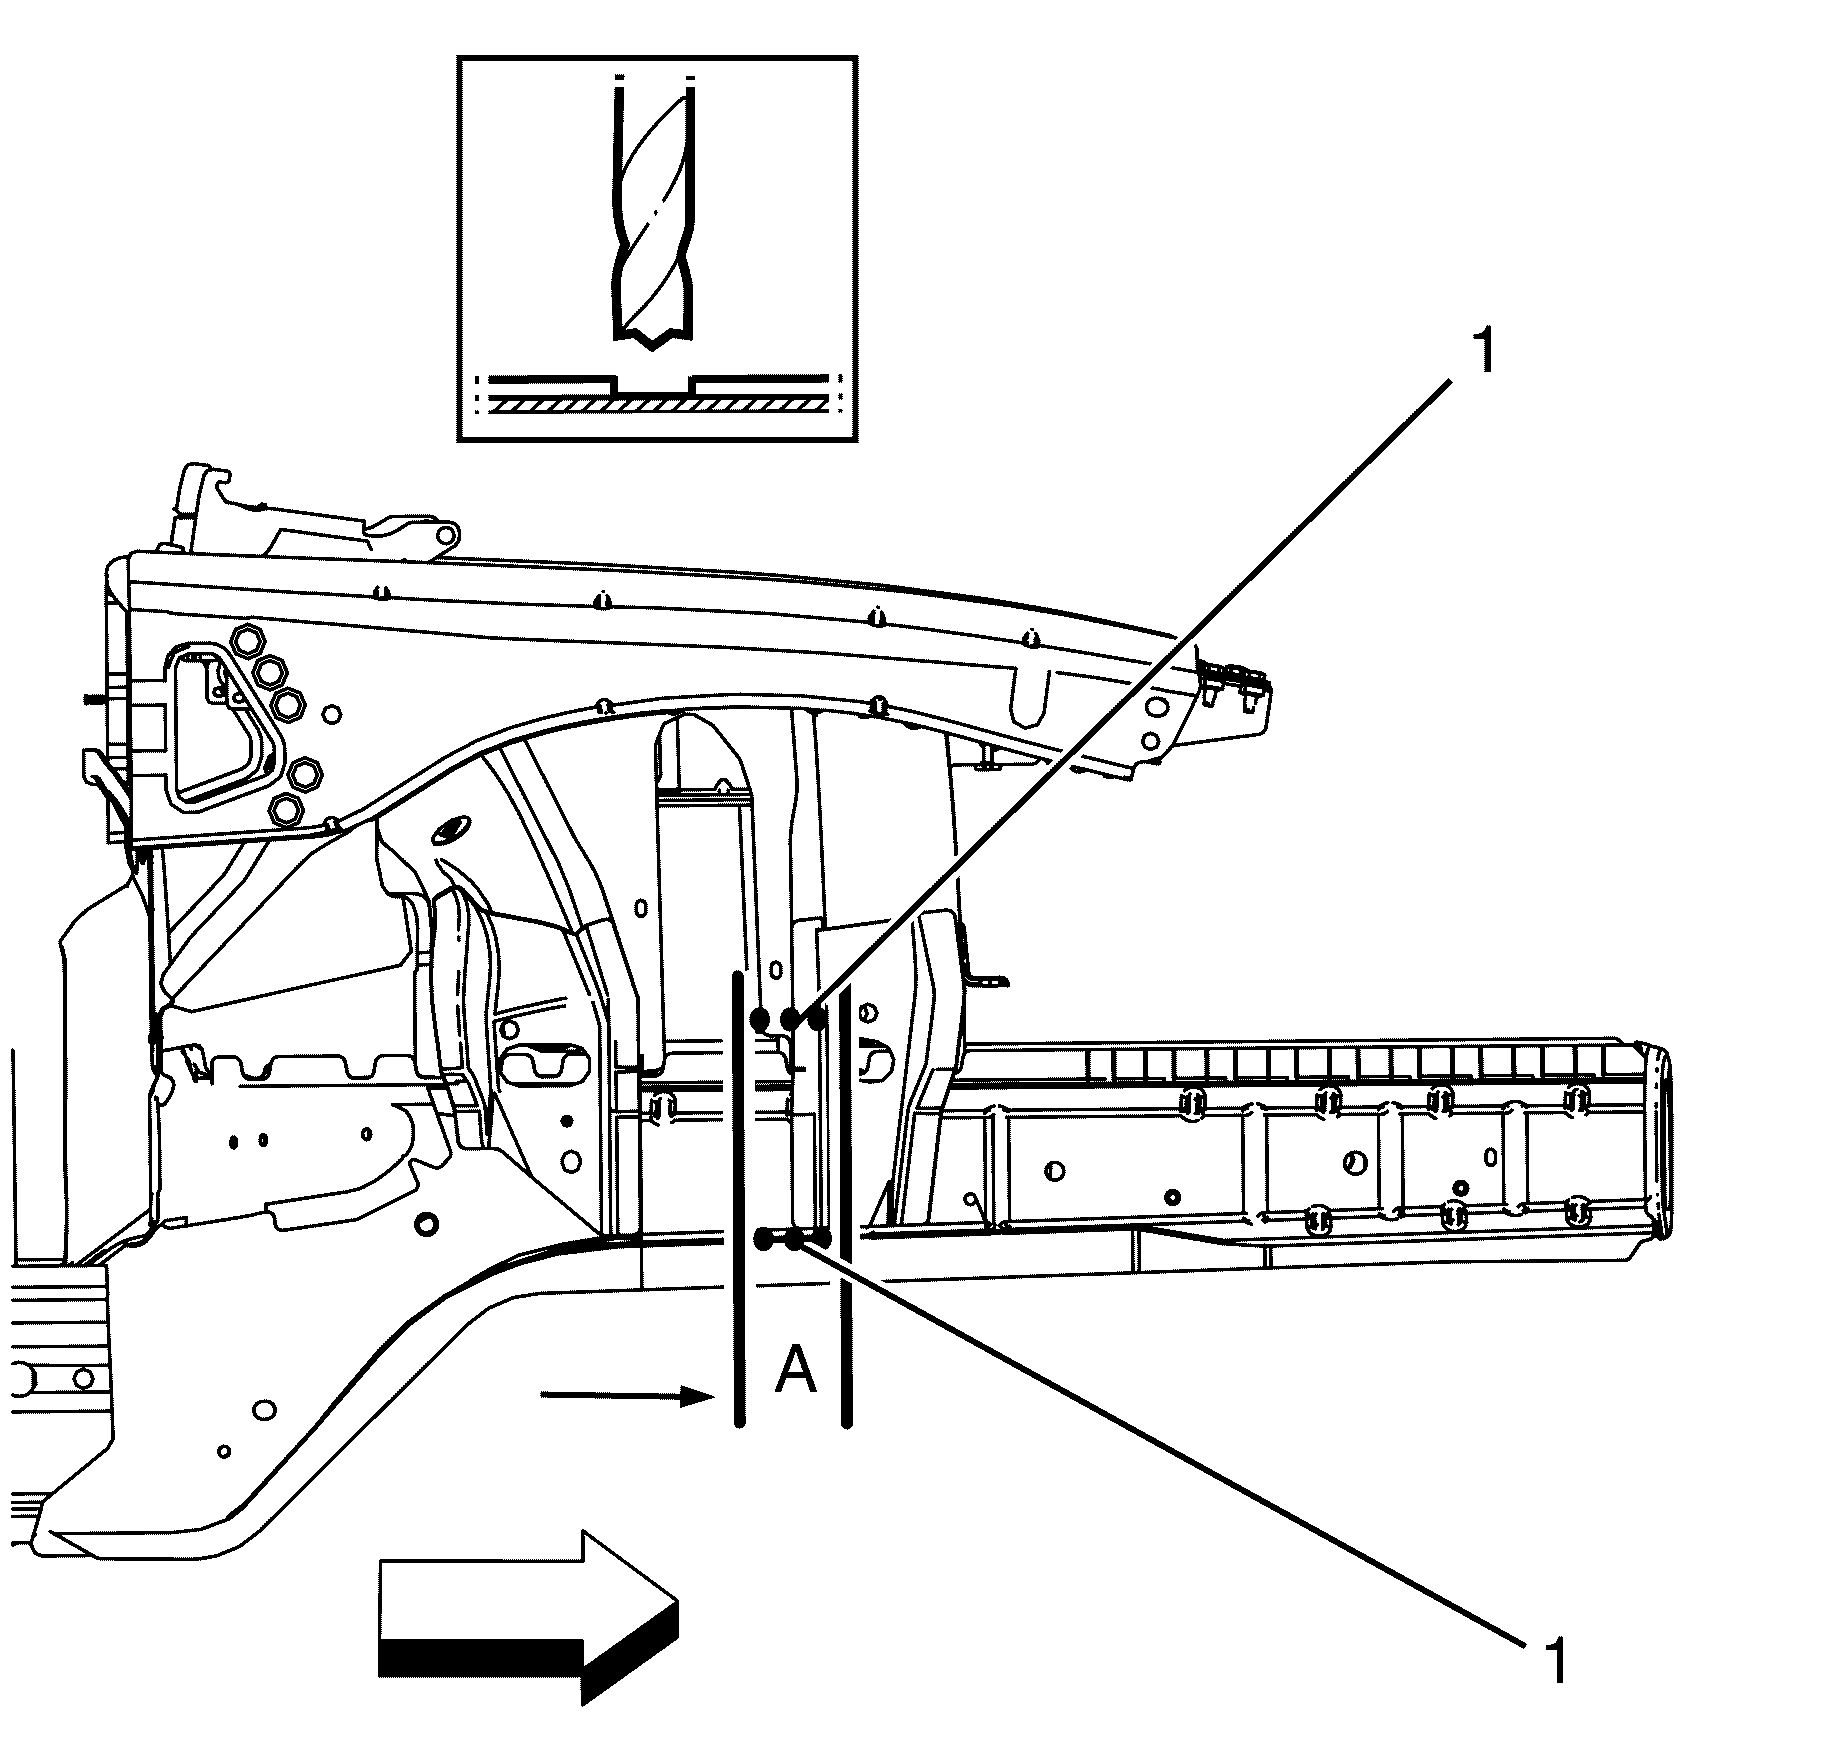
- Drill 8 mm (5/16 in) plug weld holes as necessary in the locations noted from the original assembly.
- Clean and prepare the mating surfaces of both parts of the front chassis rail.
- In order to create the rail section service part, cut the full rail service part at 260 mm (10.24 in) (A) rearward from the datum hole.
- Measure forward from the first cut point 50 mm (1.97 in) (A) on the outer front chassis rail.
- Locate, mark and drill out the spot welds (1) from the outer front chassis rail to the inner front chassis rail within the measurement made.
- Cut along the second cut point (A) on the outer front chassis rail and discard.
- Clean and prepare the mating surfaces of both parts of the front chassis rail.
- Position the front section of the front chassis rail to the remaining front chassis rail.
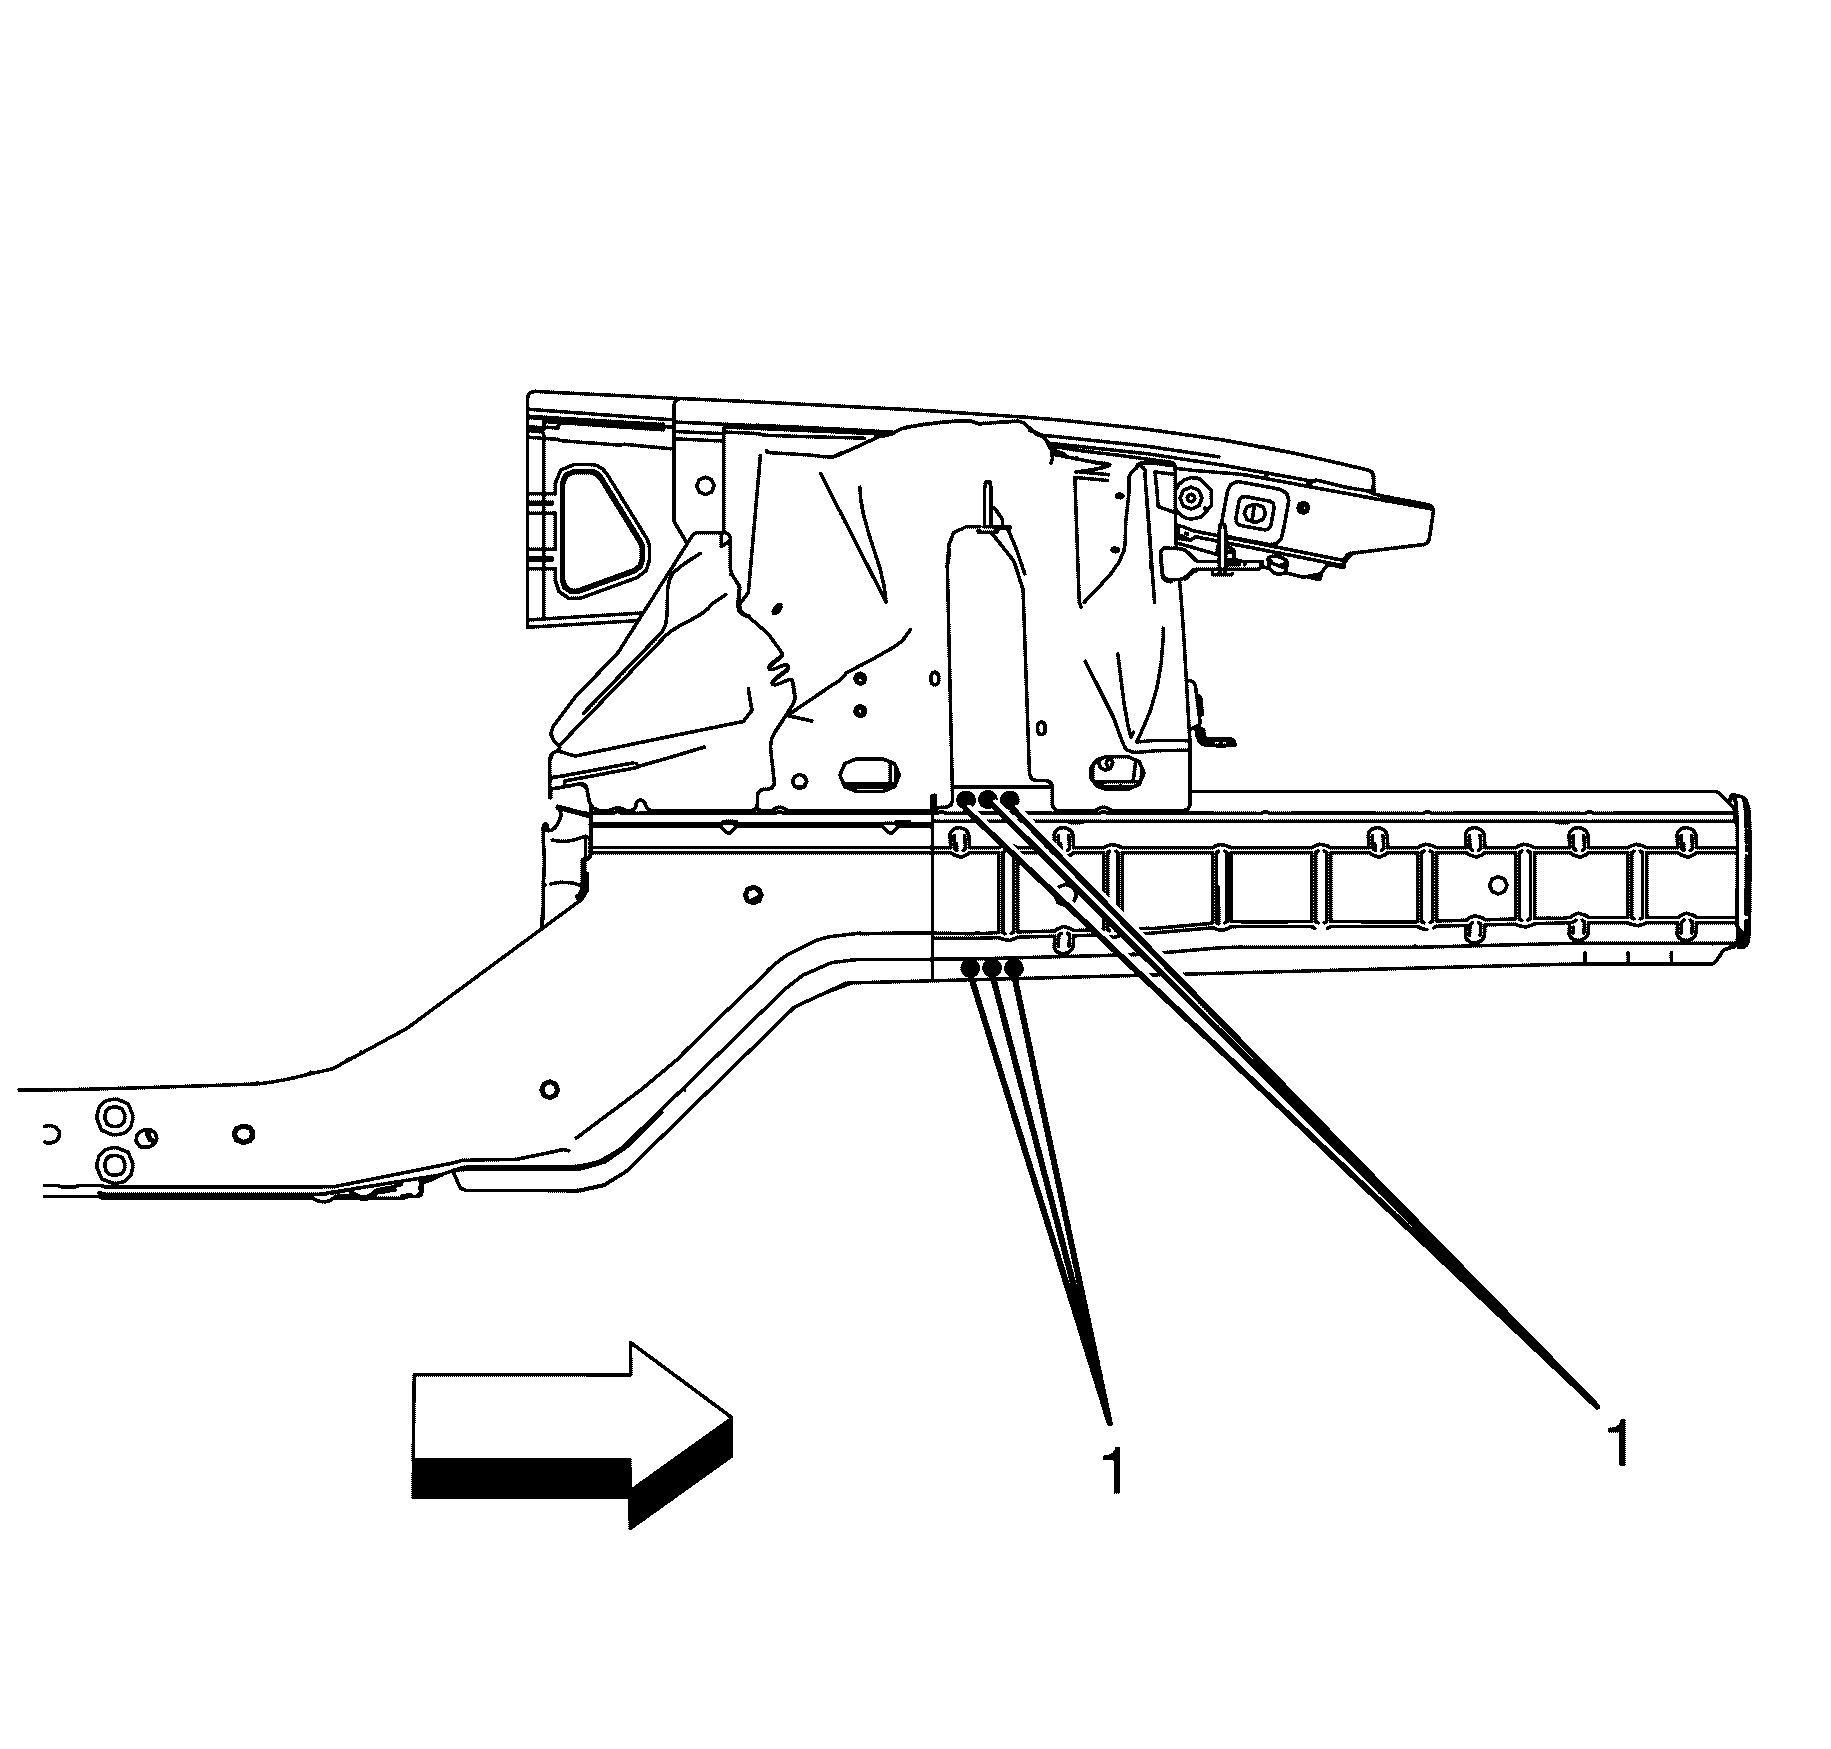
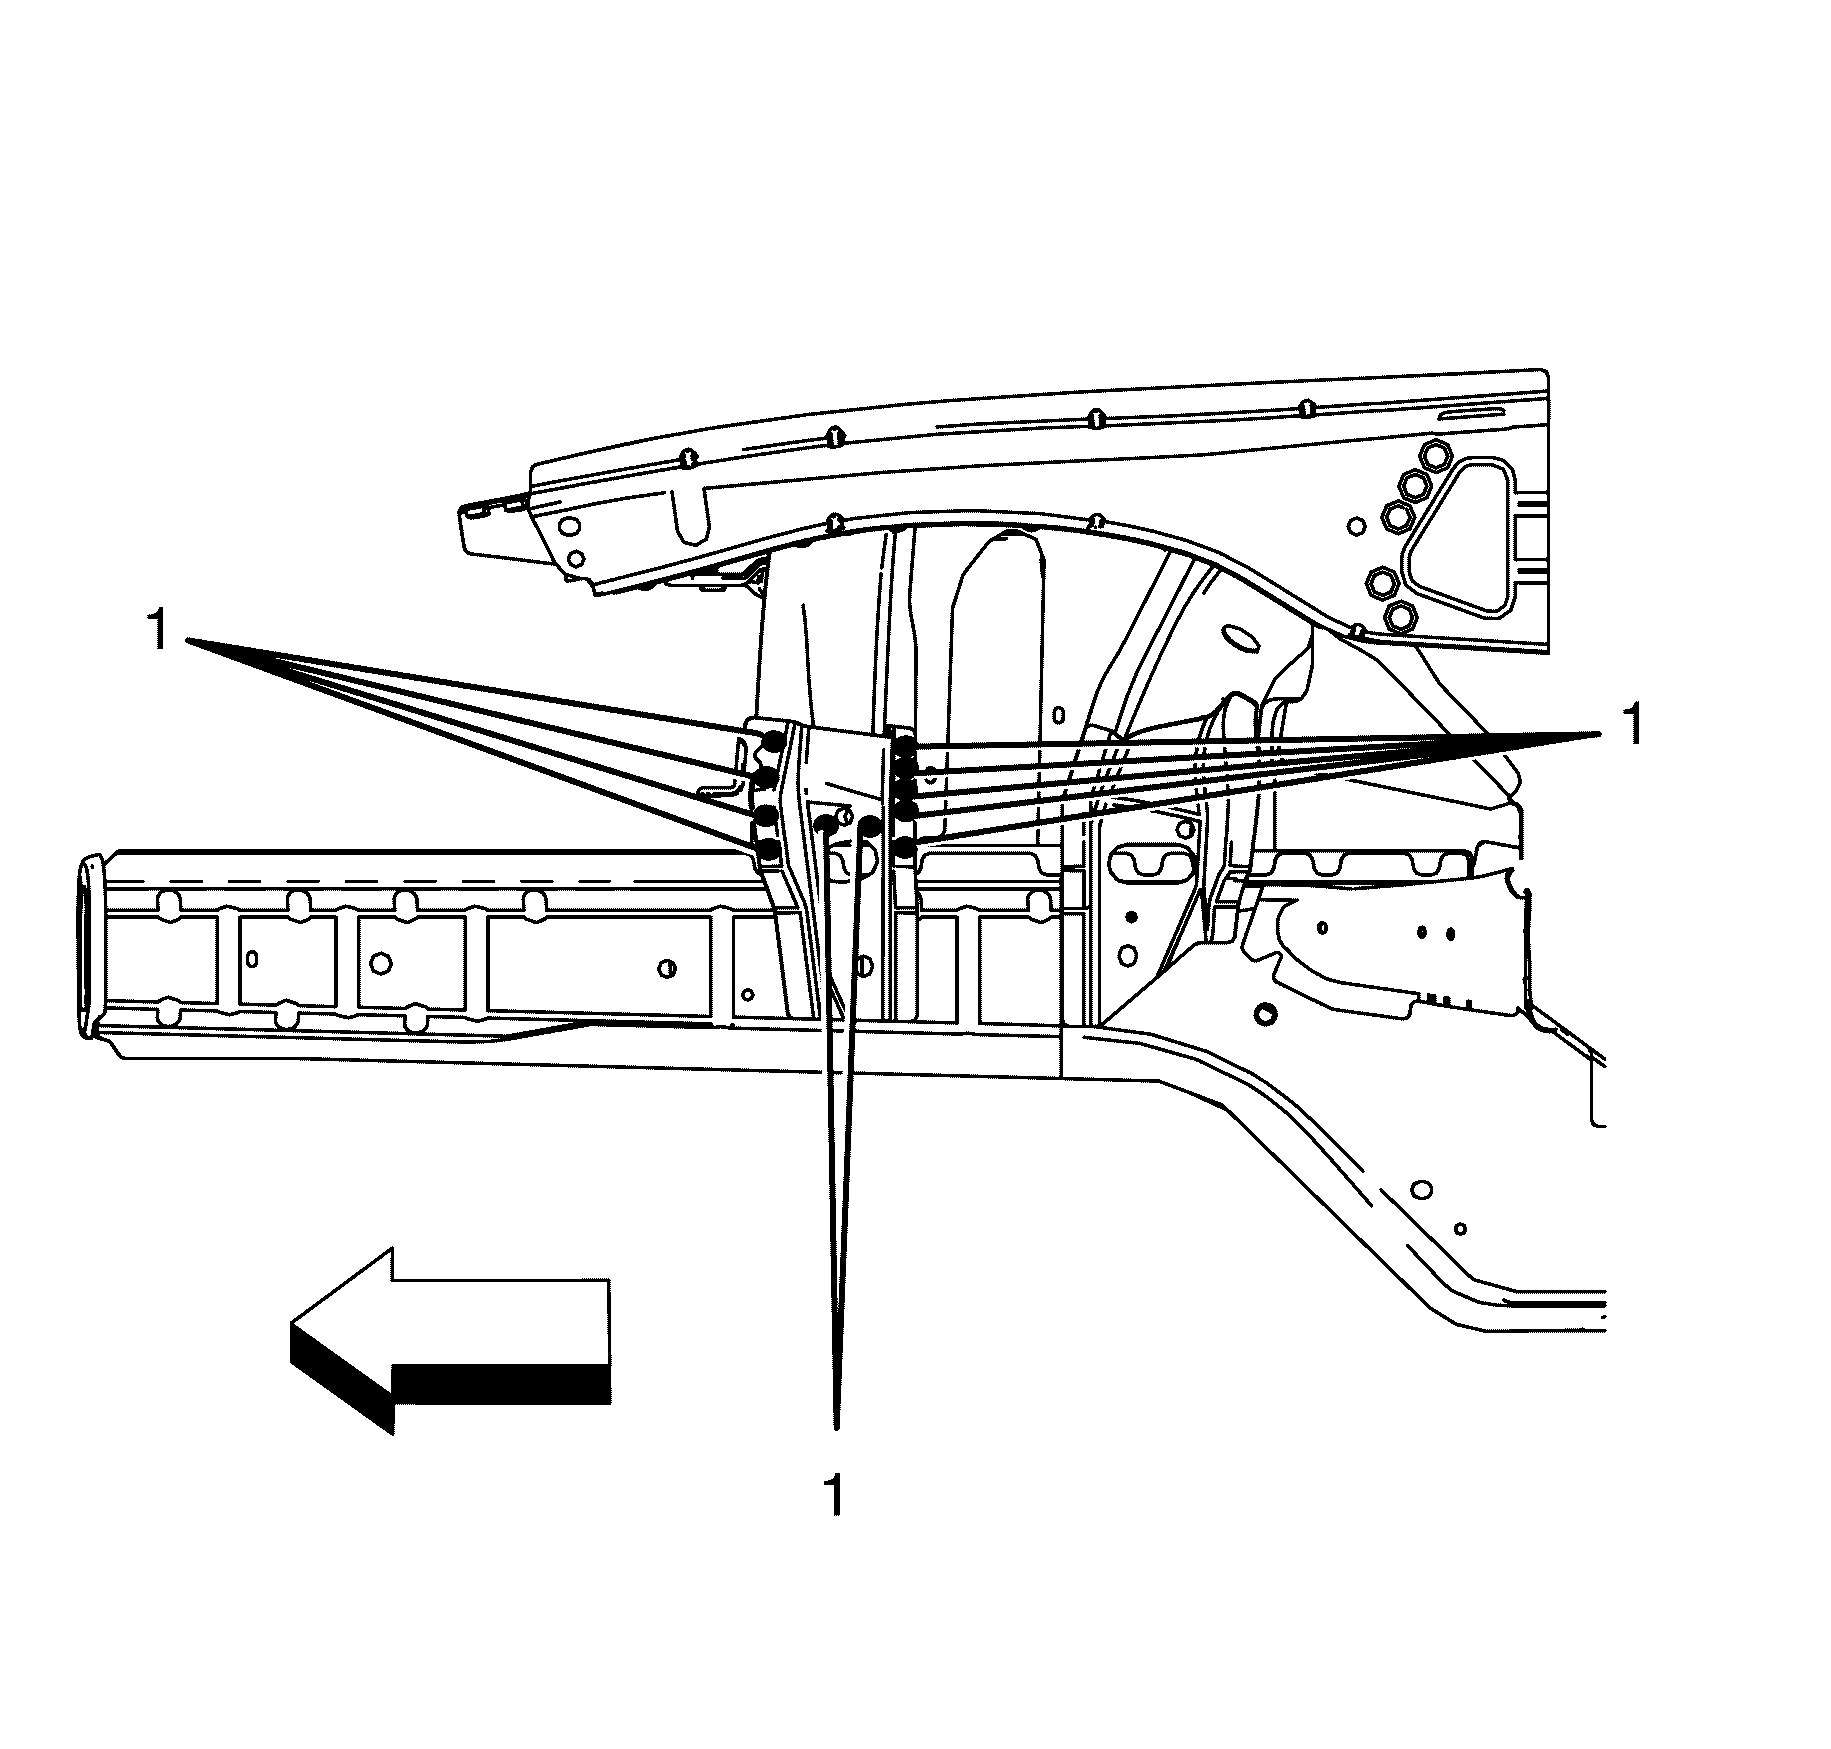
- Weld the top and bottom (1) edges of the front chassis rail.
- Weld (1) the front wheelhouse brace to front wheelhouse assembly.
- Seam weld (1) the inner front portion of the chassis rail to the remaining front chassis rail.
- Seam weld (1) the outer front portion of the chassis rail to the remaining front chassis rail.
- Clean and prepare all of the welded surfaces.
- Apply the sealers and anti-corrosion materials to the repair area, as necessary. Refer to Anti-Corrosion Treatment and Repair.
- Paint the repaired area. Refer to Basecoat/Clearcoat Paint Systems.
- Install the brake master cylinder. Refer to Master Cylinder Replacement.
- Install the ABS unit. Refer to Brake Pressure Modulator Valve Assembly Replacement.
- If re-programming is required. Refer to Control Module References.
- Install the relay box. Refer to Underhood Electrical Center or Junction Block Replacement.
- Install the plenum chamber. Refer to Air Inlet Assembly Replacement.
- Remove the air inlet grille. Refer to Air Inlet Grille Panel Replacement.
- Install the front end module. Refer to Front End Panel Module Carrier Assembly Replacement.
- Install the coolant reservoir. Refer to Coolant Recovery Reservoir Replacement.
- Install the fender assembly. Refer to Front Fender Replacement.
- Install the front fascia. Refer to Front Bumper Fascia Replacement.
- Install the brake lines. Refer to Brake Pipe Replacement.
- Raise and support the vehicle. Refer to Lifting and Jacking the Vehicle.
- Install the front strut assembly. Refer to Strut Assembly Replacement.
- Install the front wheel hub assembly. Refer to Front Wheel Bearing and Hub Replacement.
- Install the front wheel house liner. Refer to Front Wheelhouse Liner Replacement.
- Install the front wheels. Refer to Tire and Wheel Removal and Installation.
- Lower the vehicle.
- Install the negative cable from the engine bay. Refer to Battery Negative Cable Replacement.
- Install the positive cable from the engine bay. Refer to Battery Positive Cable Replacement.
- Install the engine assembly. Refer to Engine Replacement for the 3.6L engine or Engine Replacement for the 6.0L engine.
- Connect the negative battery cable. Refer to Battery Negative Cable Disconnection and Connection.
- Enable the SIR system. Refer to SIR Disabling and Enabling.
- If re-programming is required. Refer to Control Module References.
Note: Spot welding is the preferred method for attaching panels and should be used wherever possible. A plug weld should be performed where your spot welder is unable reach.
Note: If the location of the original plug weld holes can not be determined, or if structural weld-thru adhesive is present, space the plug weld holes every 32 mm (1¼ in).
Note: Only cut the outer part of the front chassis rail to stagger the front chassis rail.
Discard the outer section of the front chassis rail.
Note: Care must be taken to minimise the heat absorbed by the panel which could lead to panel distortion.