For 1990-2009 cars only
Removal Procedure
- Disable the SIR system. Refer to SIR Disabling and Enabling.
- Disconnect the negative battery cable. Refer to Battery Negative Cable Disconnection and Connection.
- Remove the rear compartment side trims. Refer to Rear Compartment Side Trim Panel Replacement.
- Remove the rear interior trims. Refer to Quarter Upper Trim Panel Replacement.
- Remove the battery. Refer to Battery Replacement.
- Remove the rear bumper fascia. Refer to Rear Bumper Fascia Replacement.
- Remove the tail lights. Refer to Parking and Turn Signal Lamp Replacement.
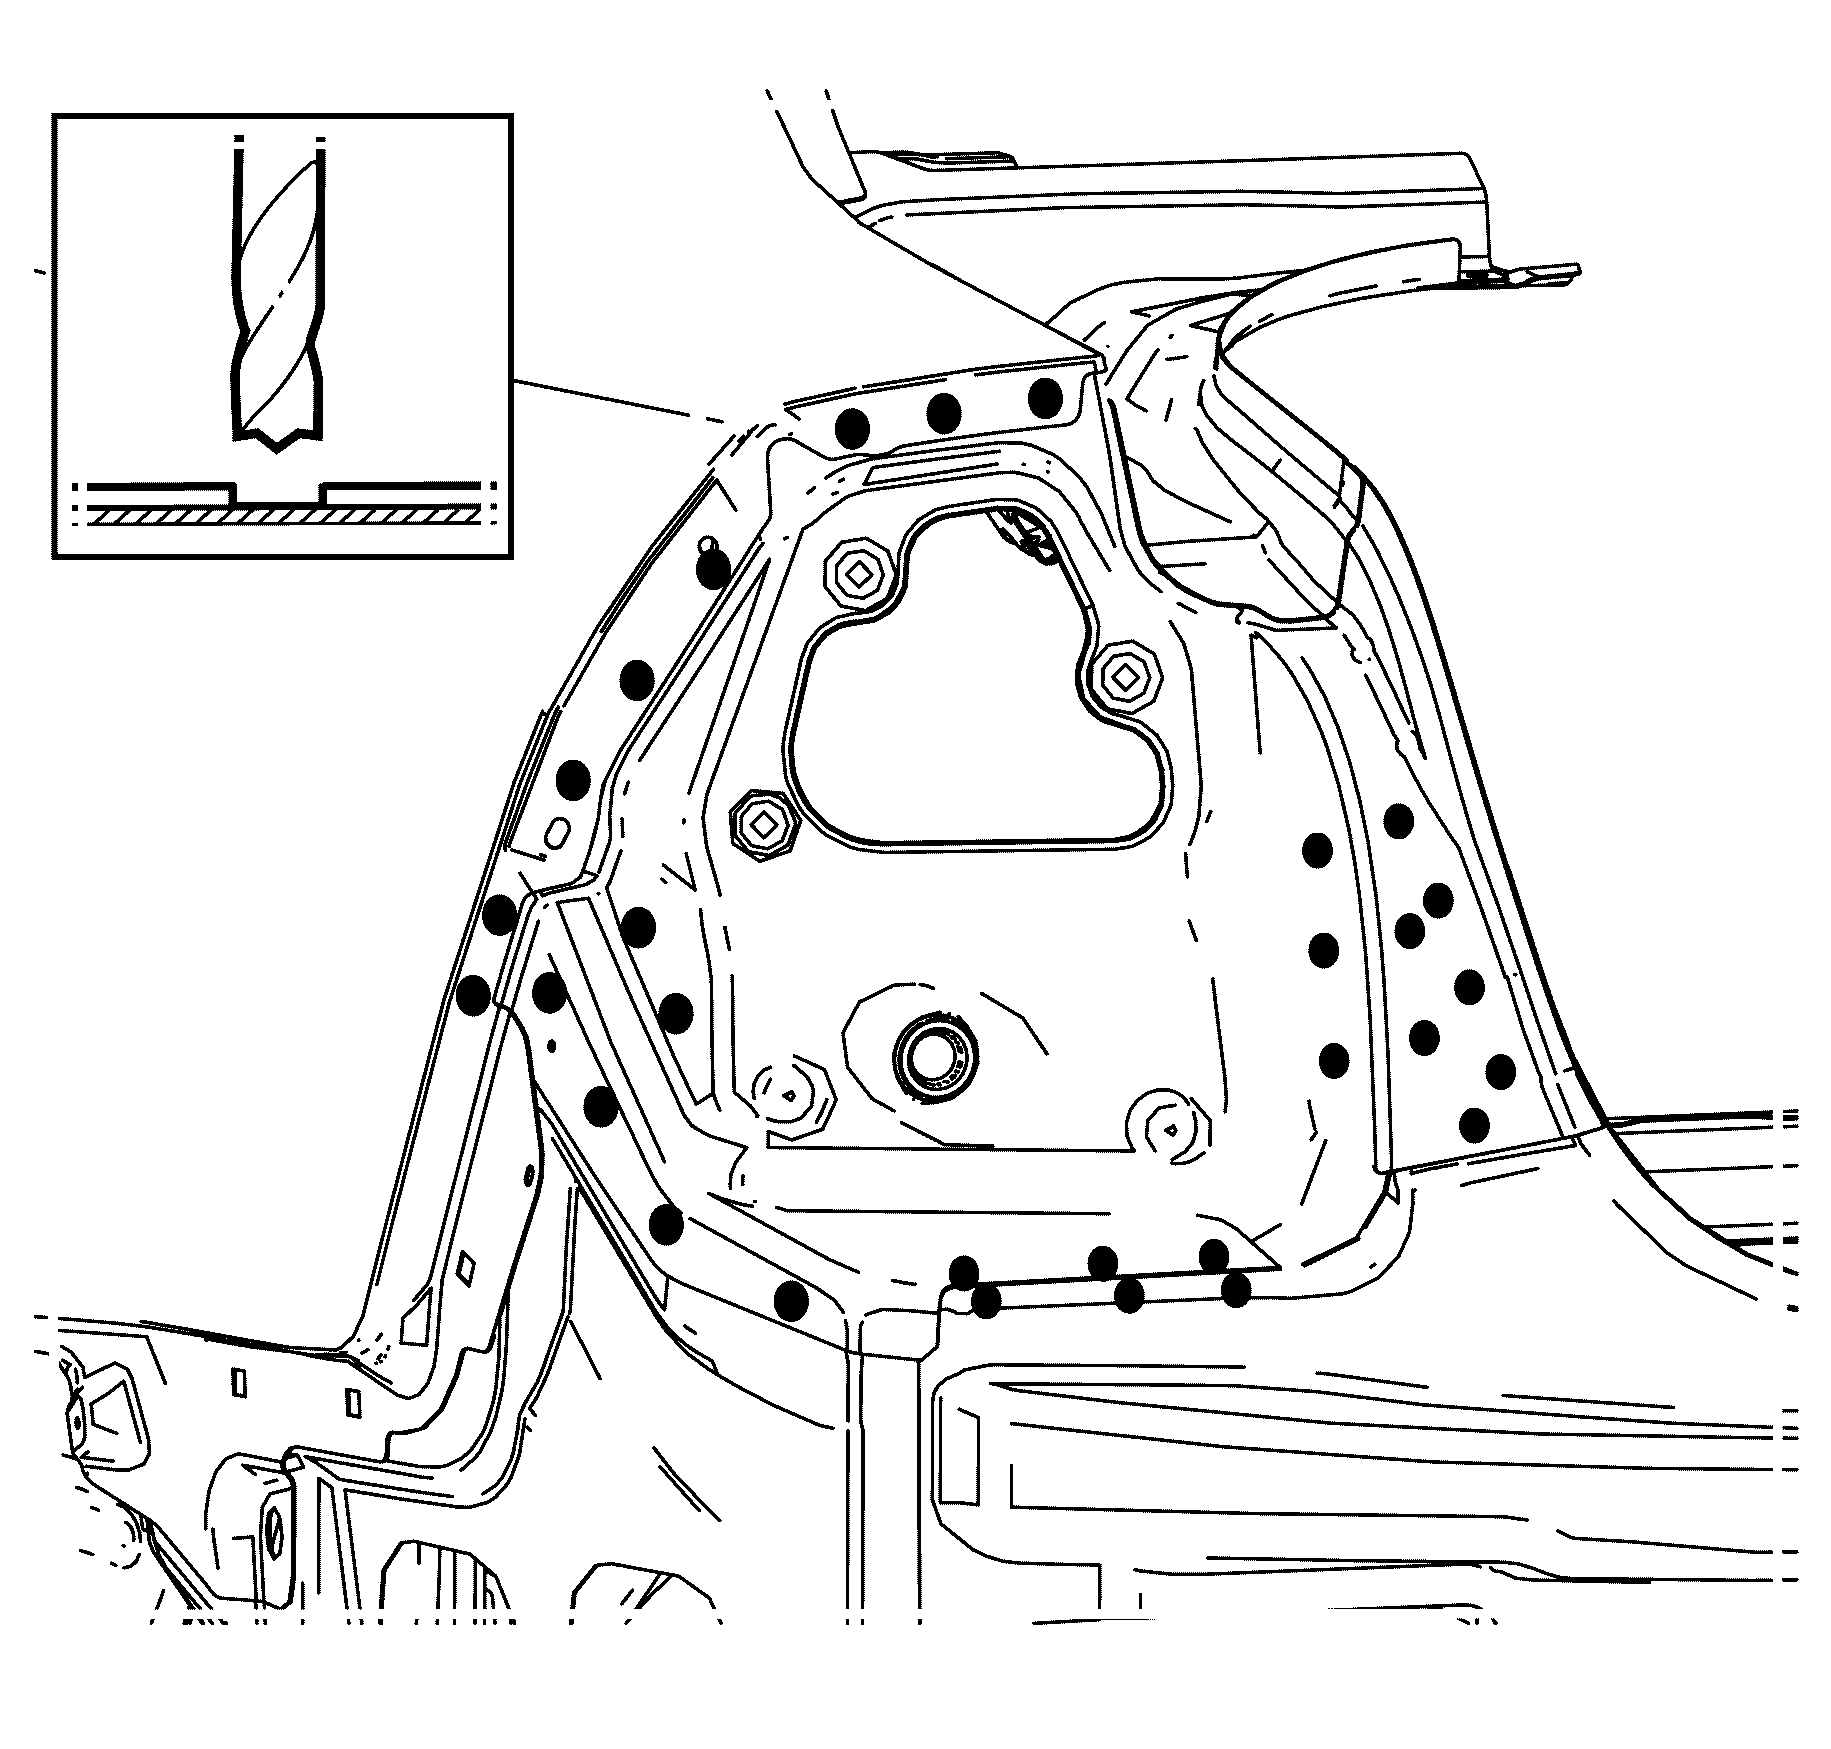
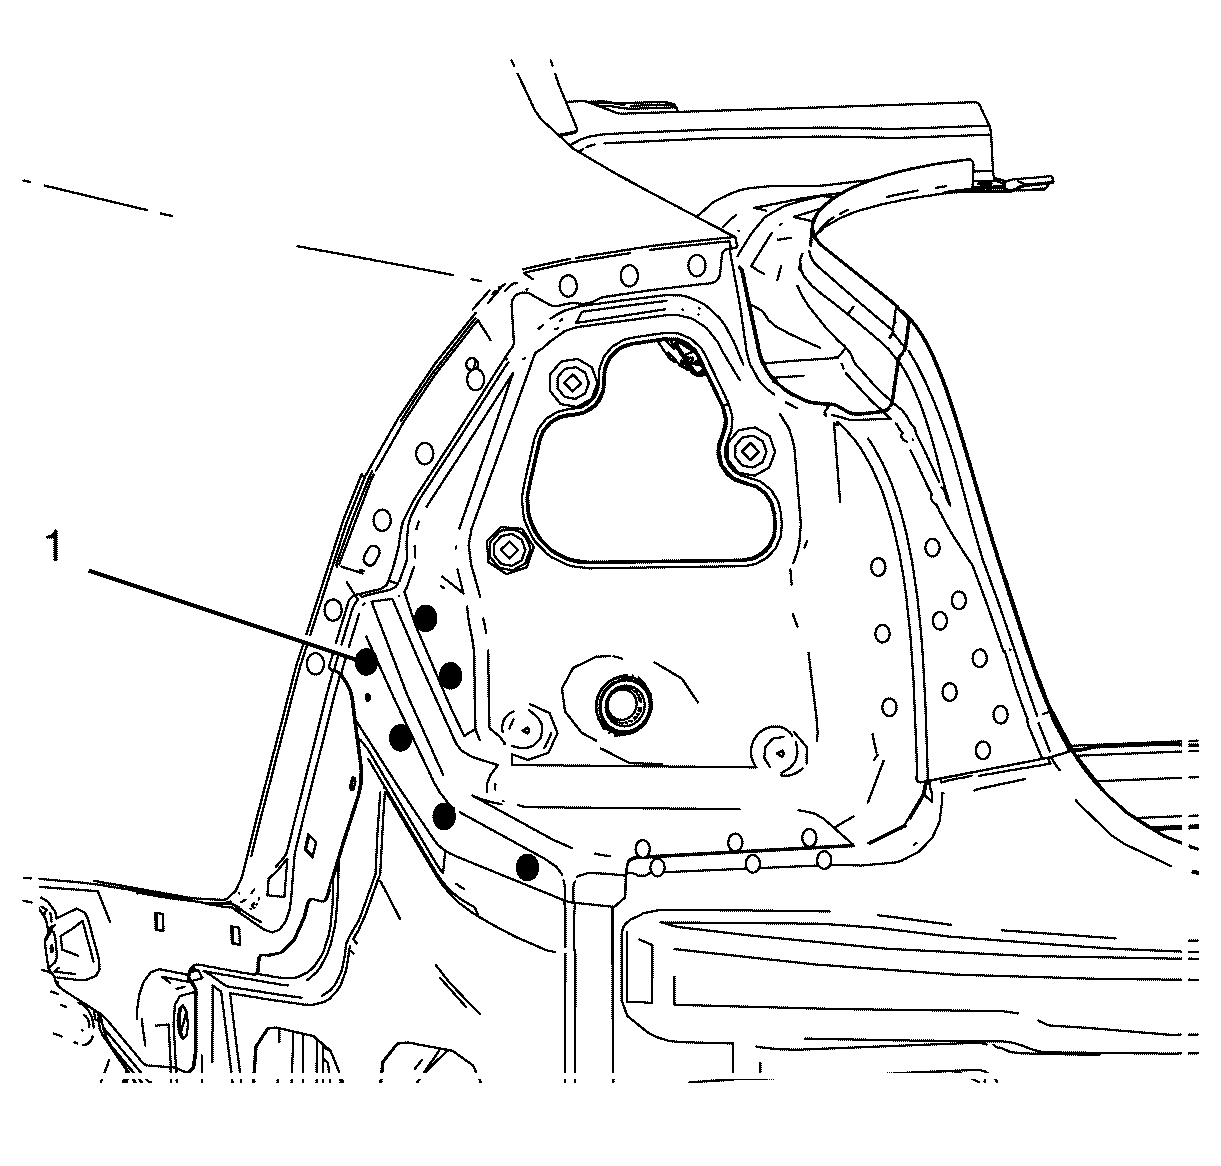
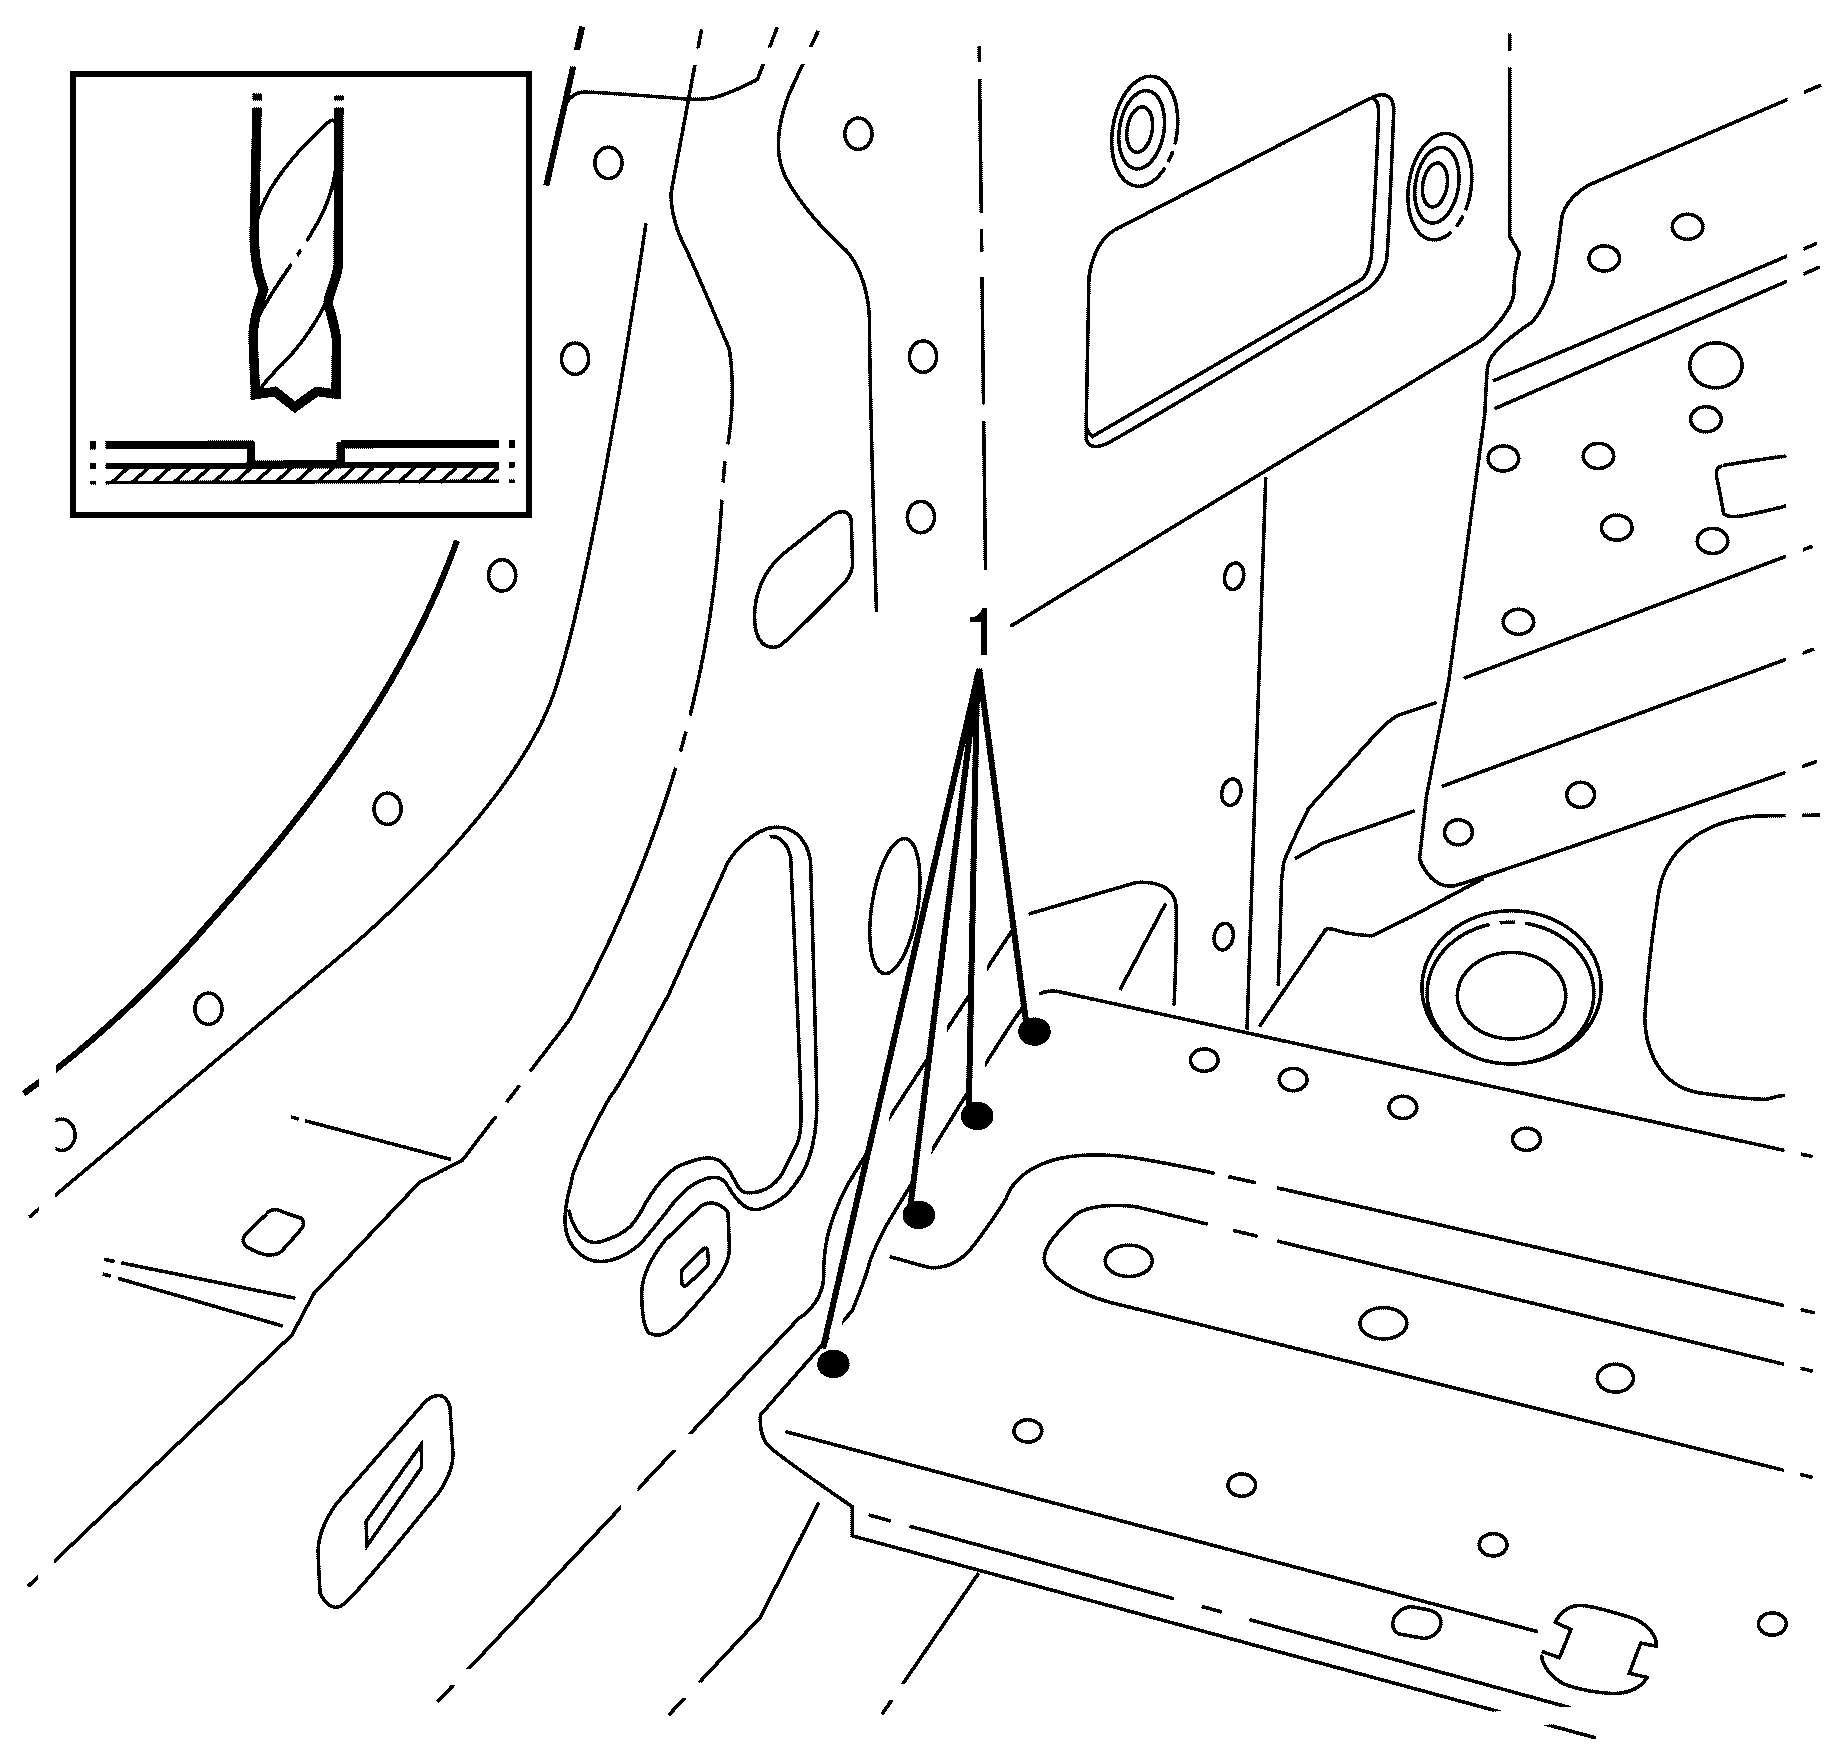
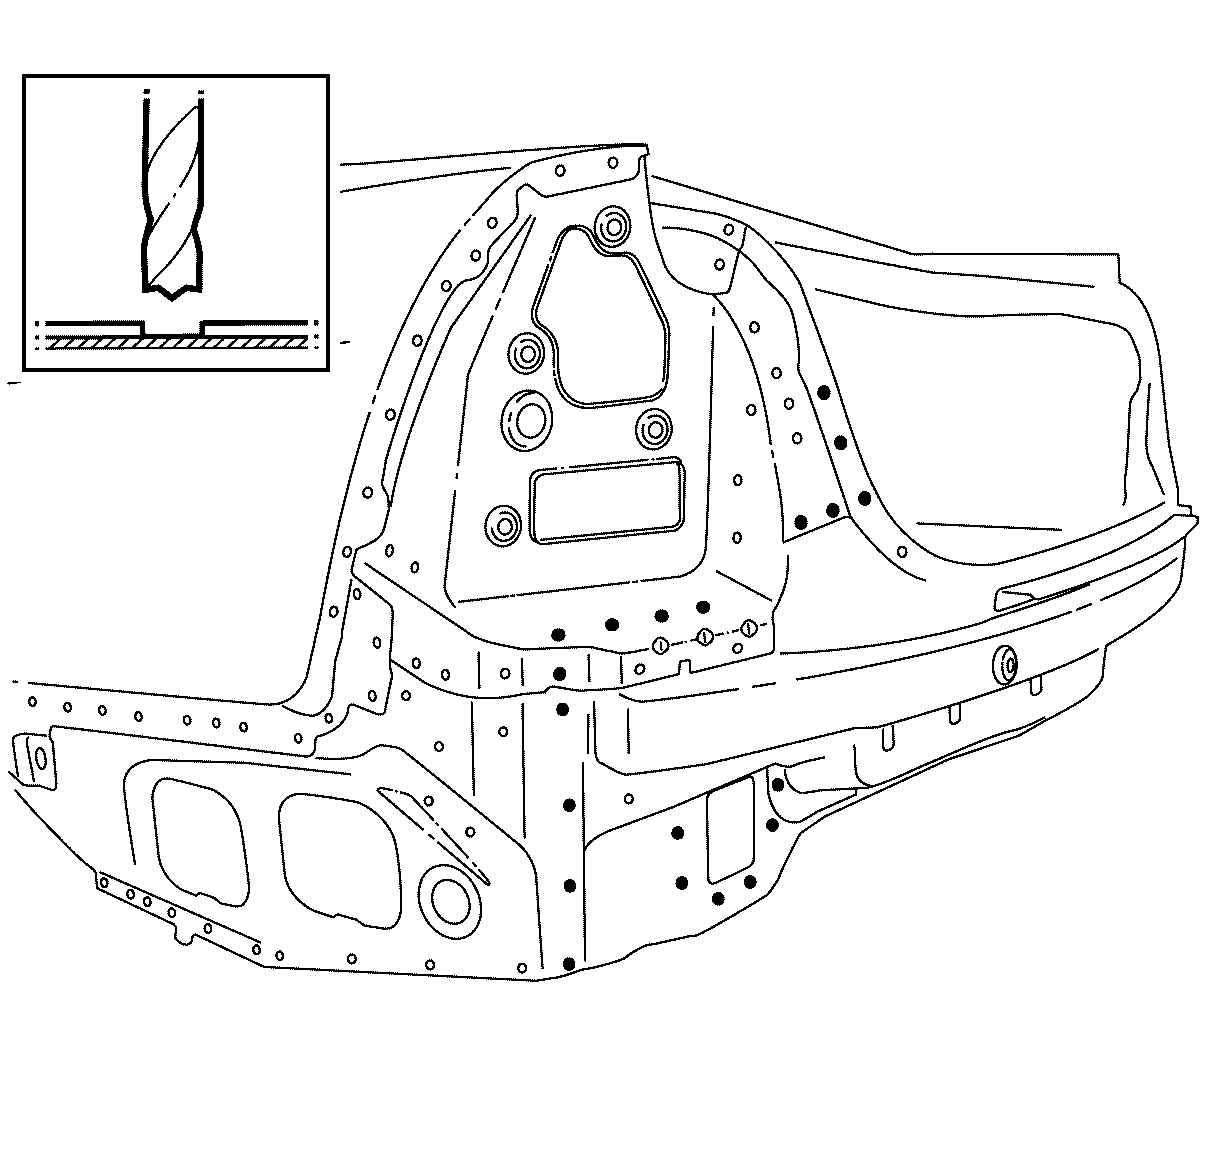
- Locate, mark and drill out the spot welds in the tail lamp filler panel to rear quarter panel.
- Locate, mark and drill out the spot welds in the tail lamp filler panel to rear end panel.
- Locate, mark and drill out the spot welds in the tail lamp filler panel to side extension.
- Locate, mark and drill out the spot welds in the tail lamp filler panel to upper extension.
- Remove the tail lamp filler panel from the vehicle.
Warning: Refer to Approved Equipment for Collision Repair Warning in the Preface section.
Warning: Refer to Foam Sound Deadeners Warning in the Preface section.
Warning: Refer to Battery Disconnect Warning in the Preface section.
Installation procedure
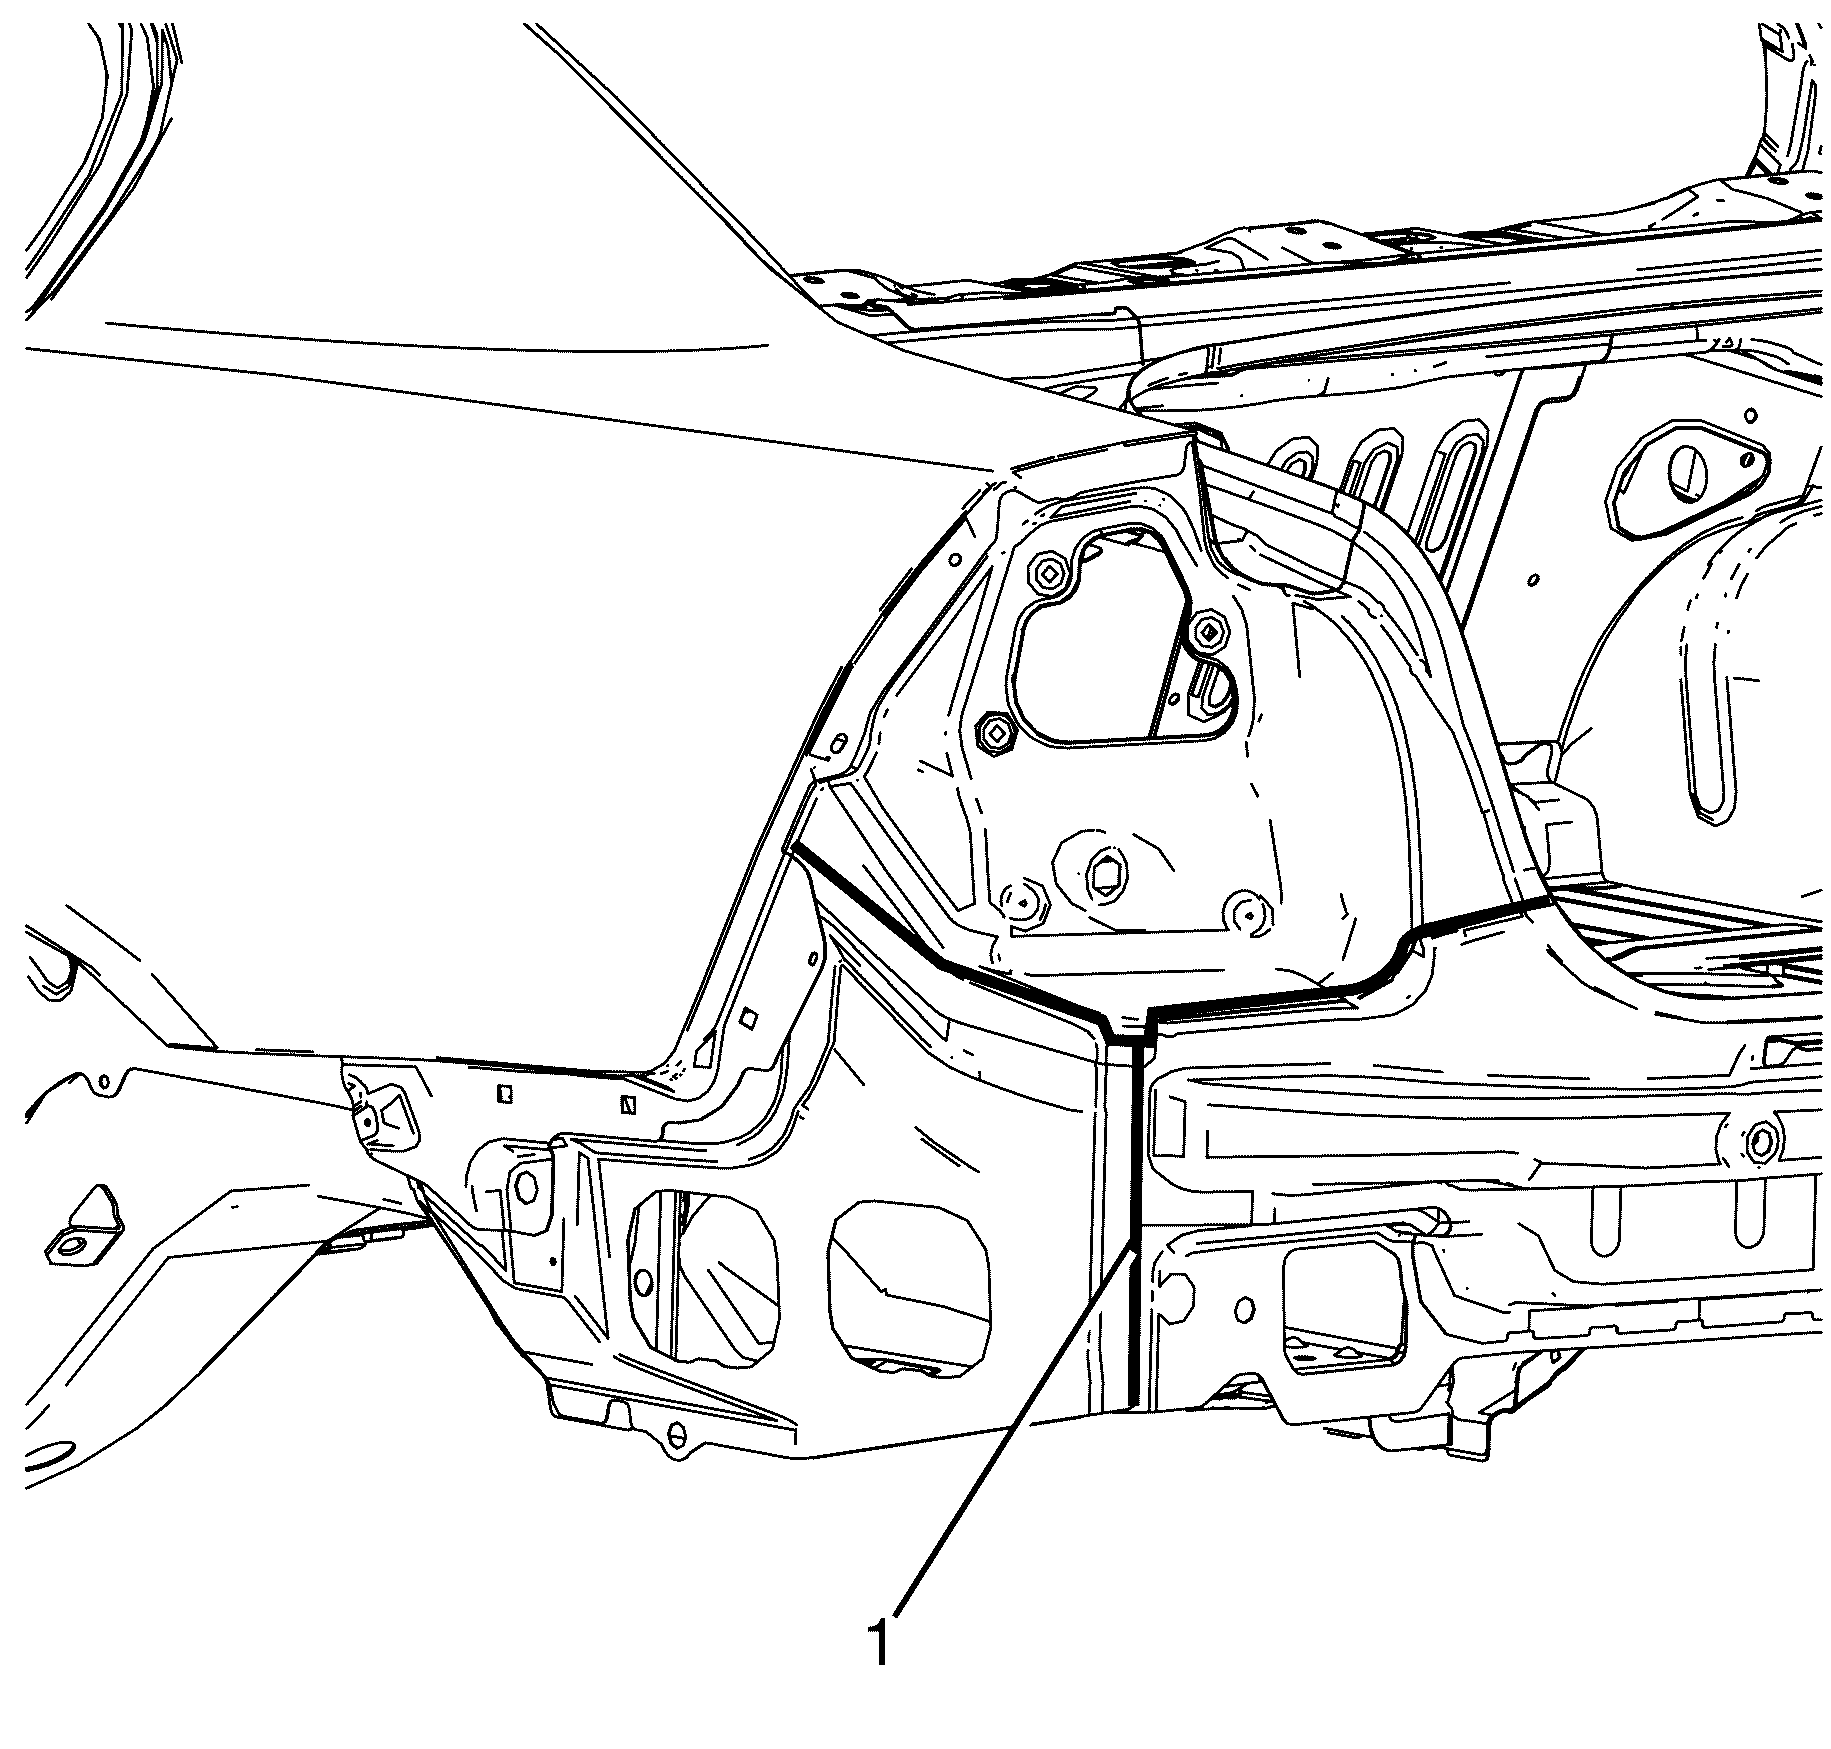
- Apply the primary sealer (1) GM6449G or equivalent path to the tail lamp filler panel.
- Install the tail lamp filler panel to the vehicle.
- Align the datum hole alignment points at A, B and C.
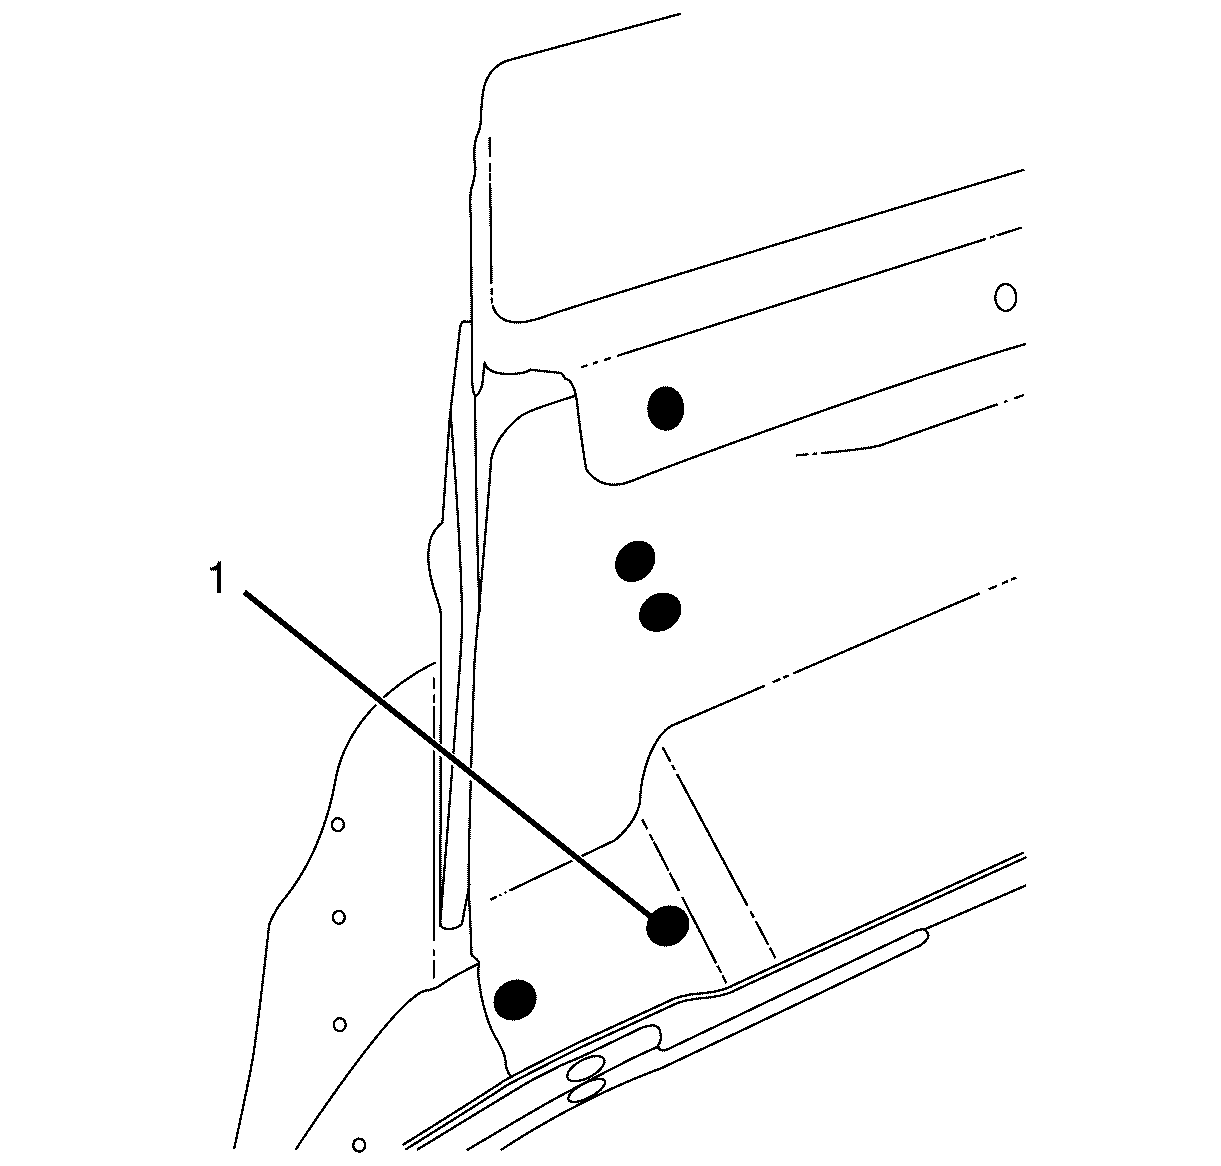
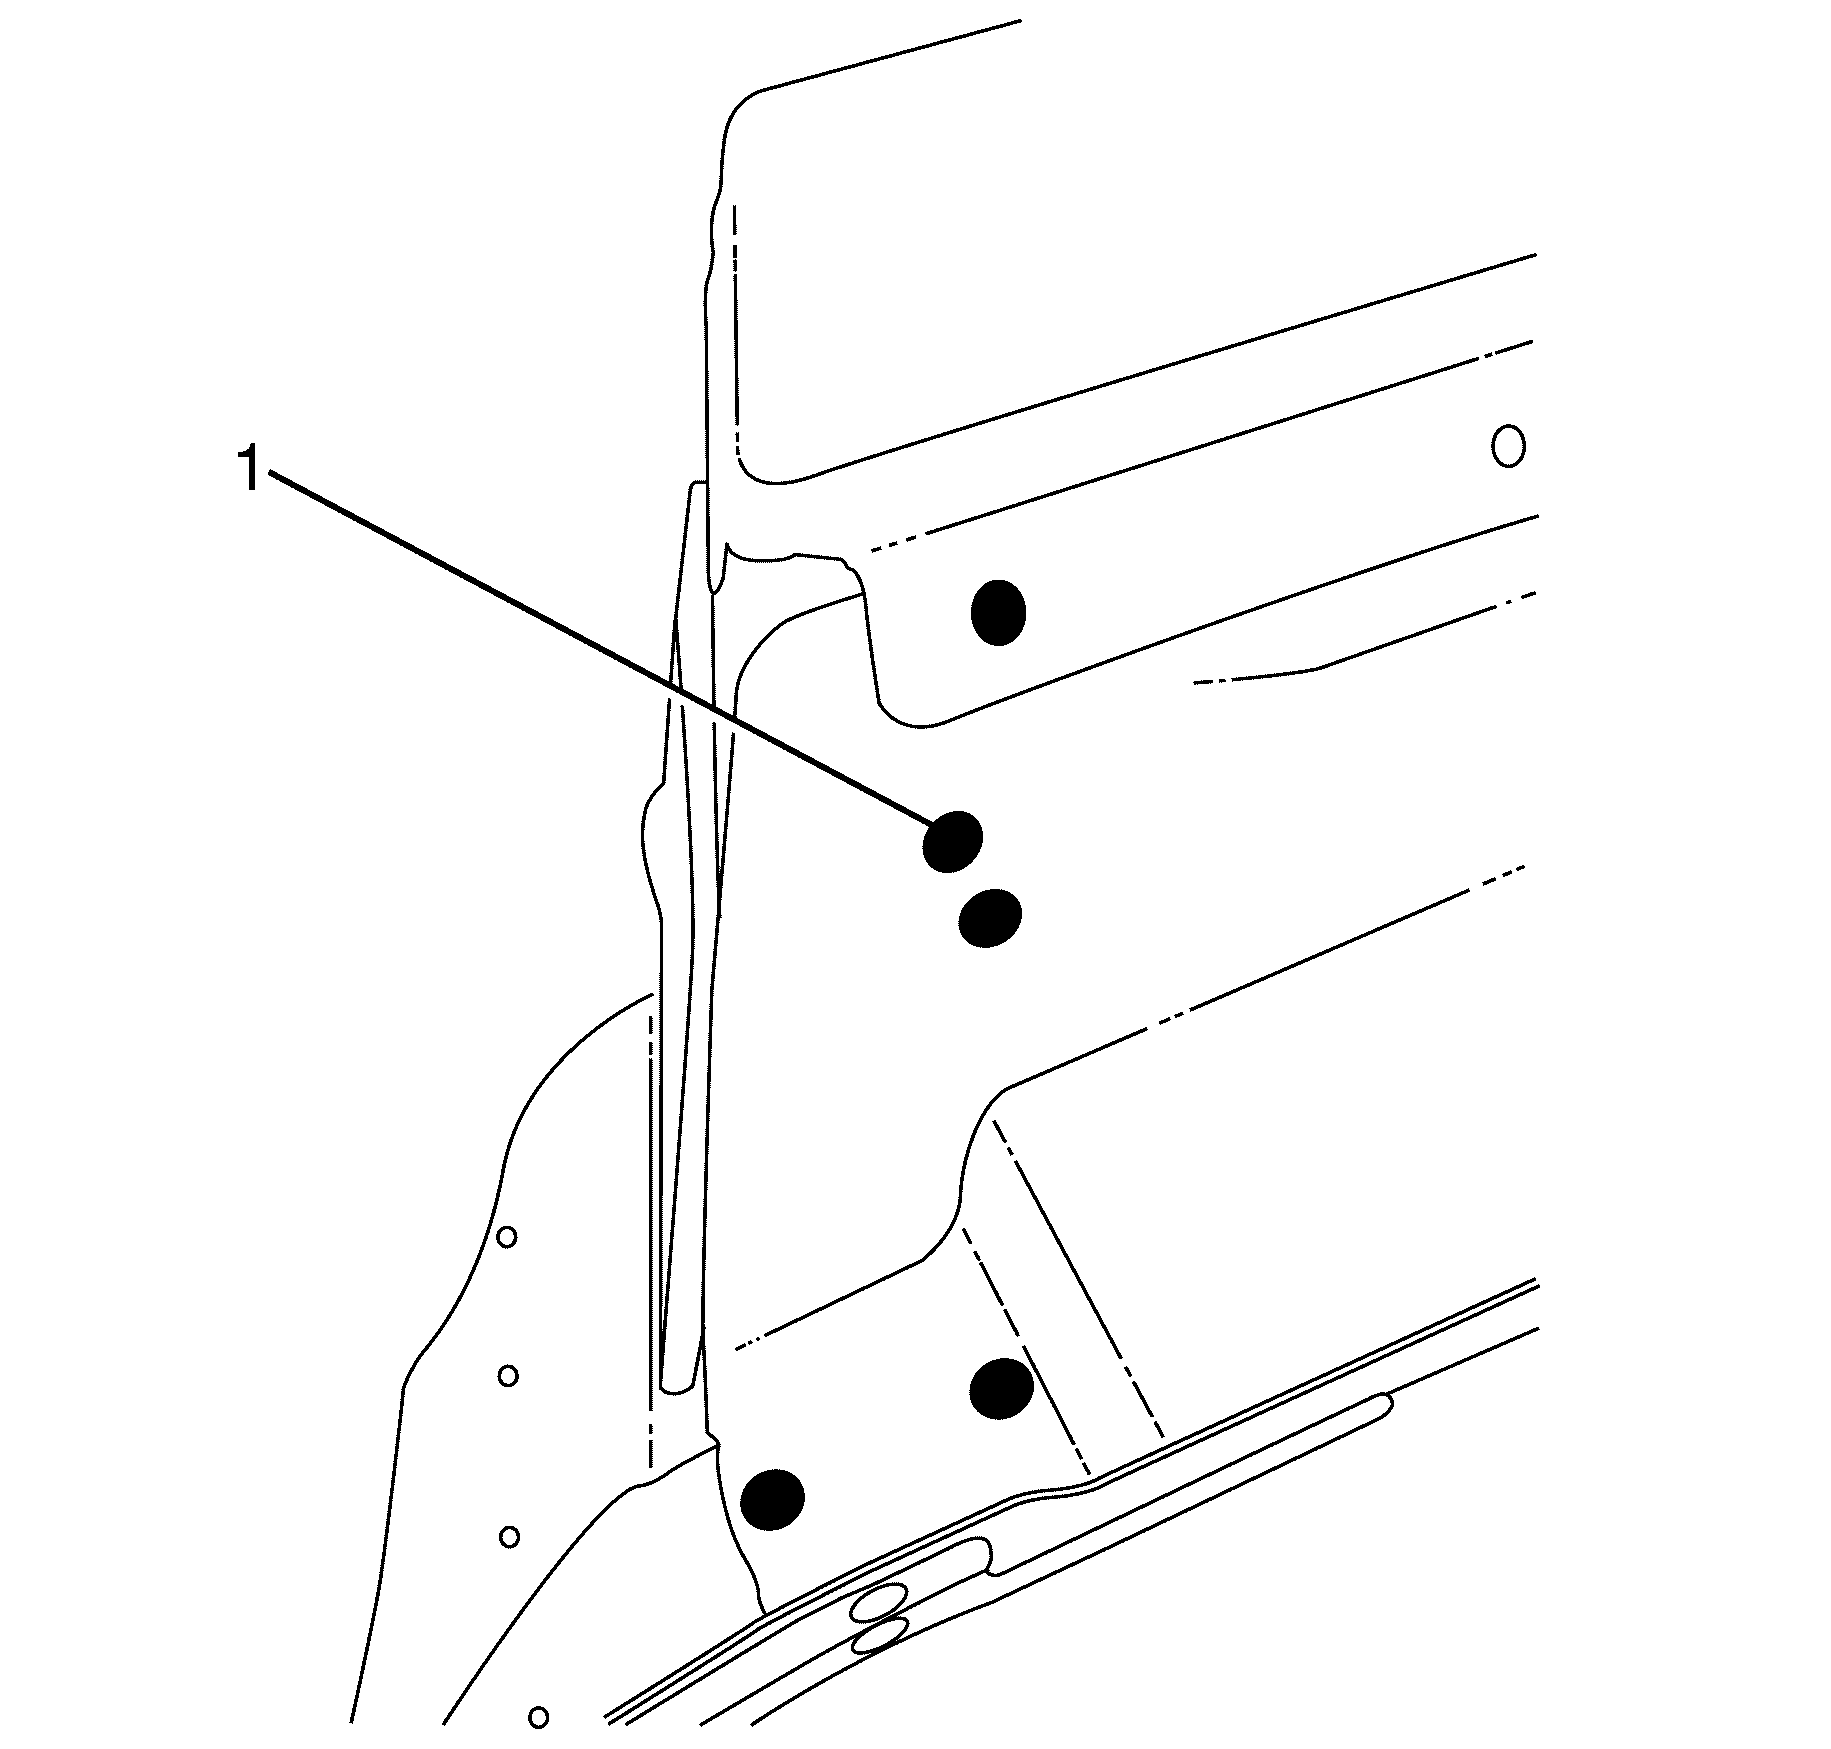
- Weld (1) the tail light filler panel to the upper extension.
- Weld (1) the tail light filler panel to the side extension.
- Weld (1) the tail lamp filler panel to the rear end panel.
- Weld (1) the tail lamp filler panel to the rear quarter panel.
- Apply the secondary sealer (1) GM specification 9984532 or equivalent along the tail lamp filler panel to the rear quarter panel.
- Apply the secondary sealer (1) GM specification 9984532 or equivalent along the tail lamp filler panel to the rear end panel.
- Apply the secondary sealer (1) GM specification 9984532 or equivalent along the tail lamp filler panel to the side extension panel.
- Apply the sealers and anti-corrosion materials to the repair area, as necessary. Refer to Anti-Corrosion Treatment and Repair.
- Paint the repaired area. Refer to Basecoat/Clearcoat Paint Systems.
- Install the tail lights. Refer to Parking and Turn Signal Lamp Replacement.
- Install the rear bumper fascia. Refer to Rear Bumper Fascia Replacement.
- Install the battery. Refer to Battery Replacement.
- Install the rear compartment side trims. Refer to Rear Compartment Side Trim Panel Replacement.
- Install the rear interior trims. Refer to Quarter Upper Trim Panel Replacement.
- Connect the negative battery cable. Refer to Battery Negative Cable Disconnection and Connection.
- Enable the SIR system. Refer to SIR Disabling and Enabling.
- If re-programming is required. Refer to Control Module References.

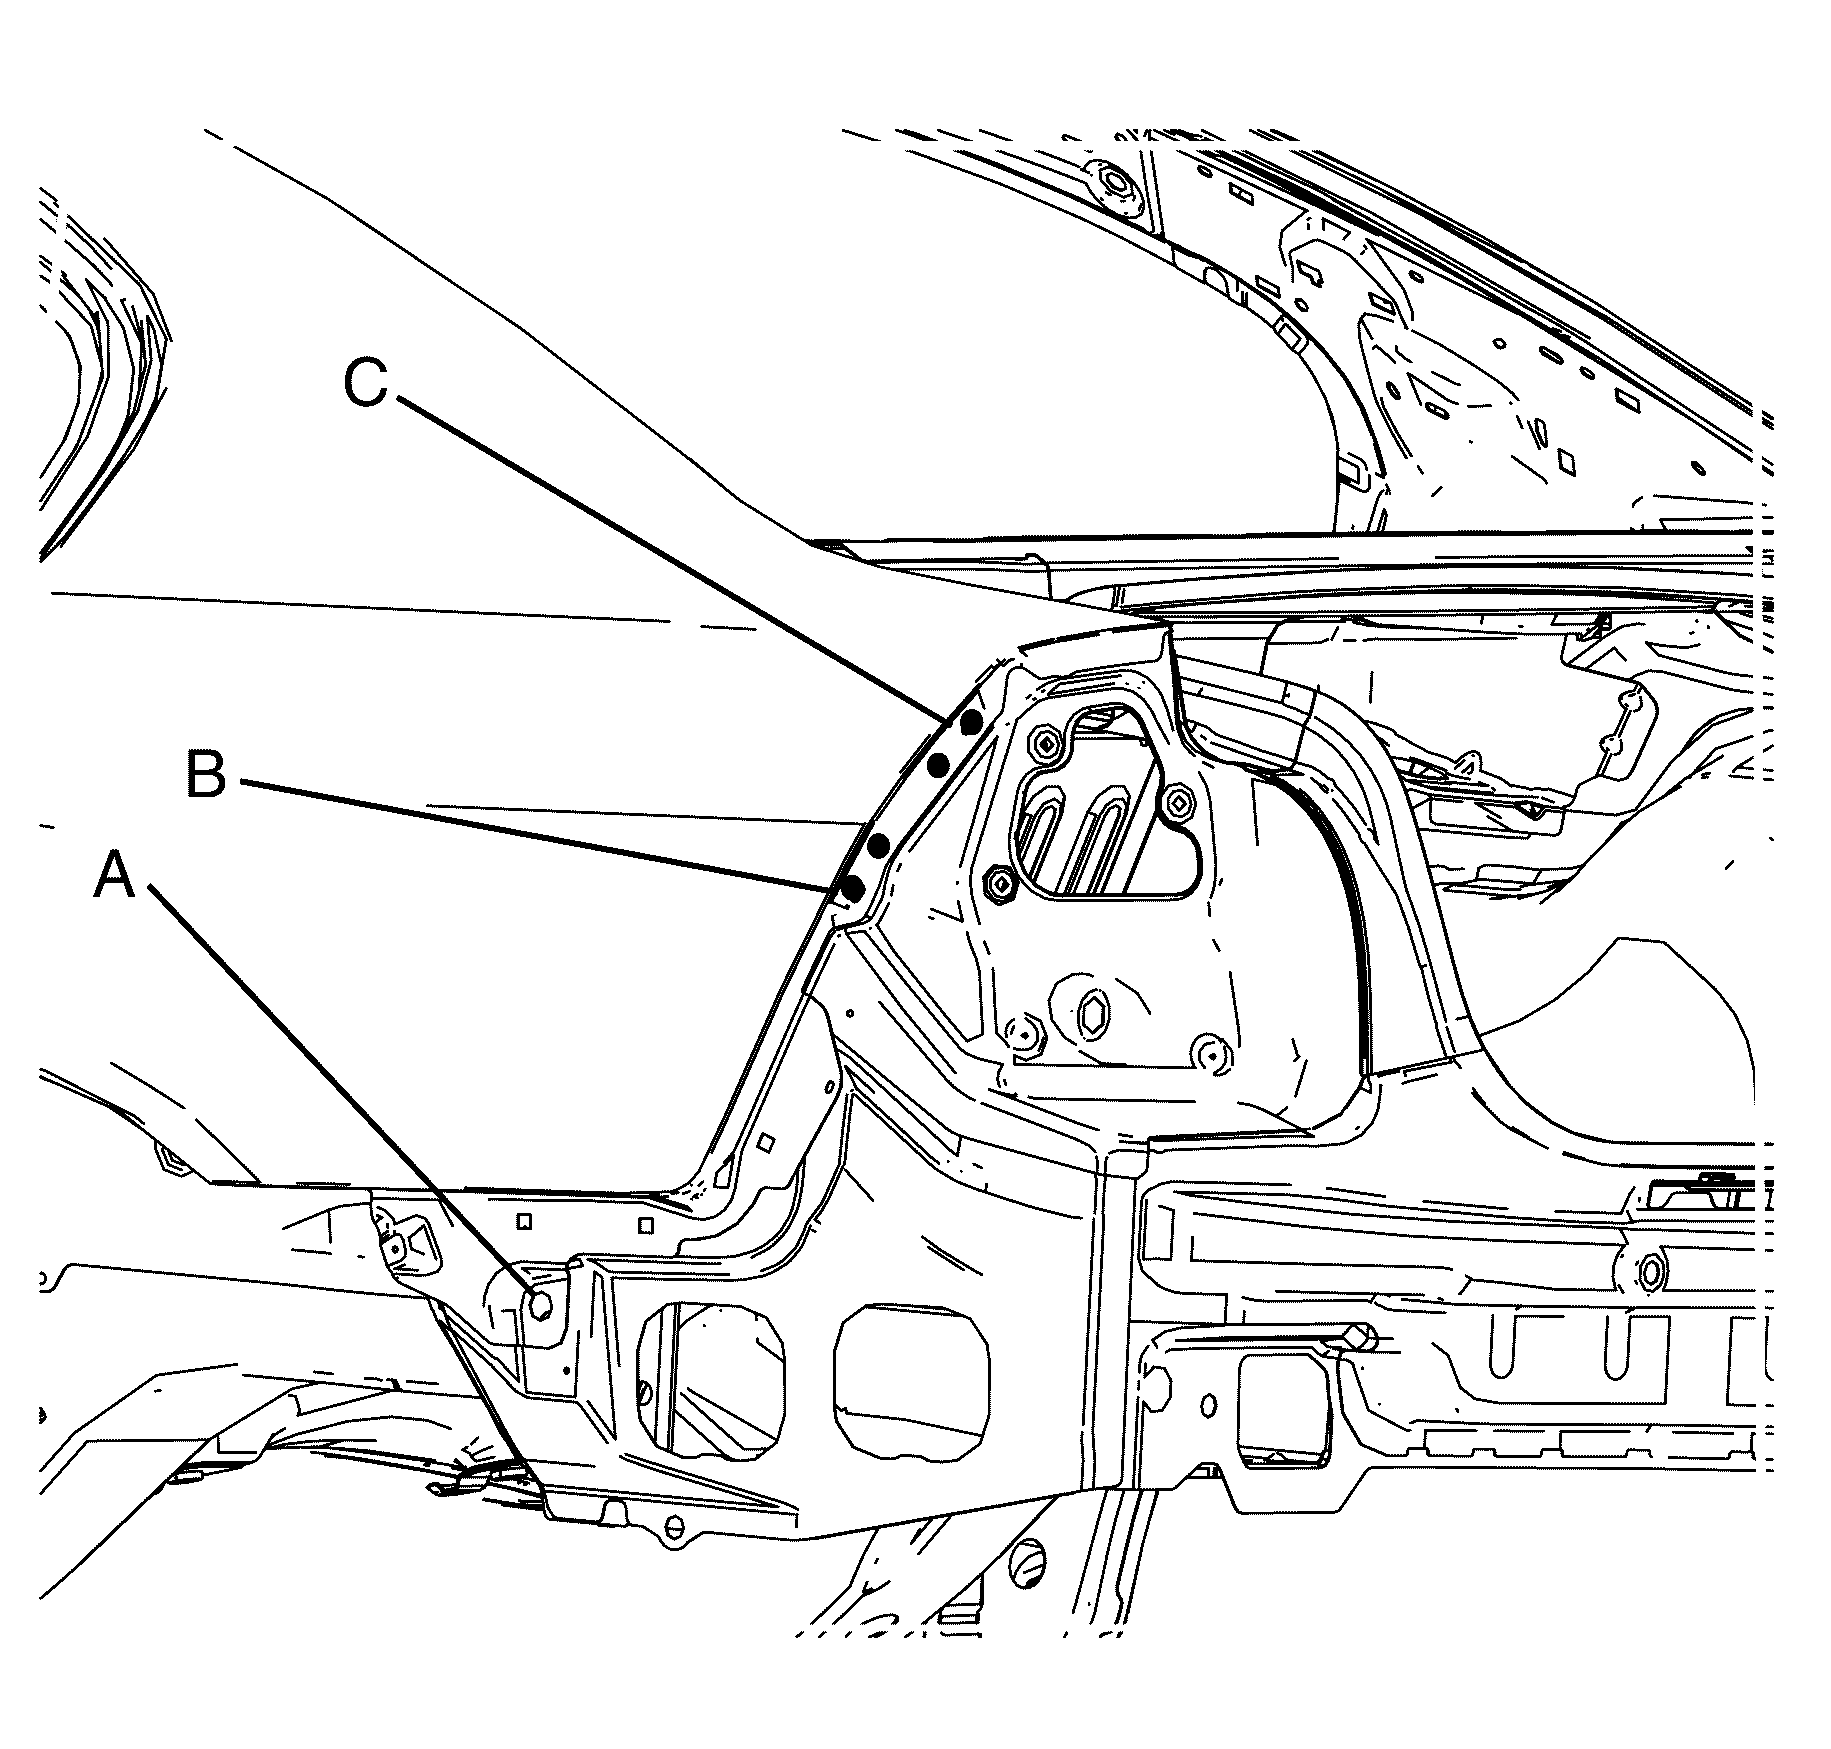
| • | Datum A is 4.1 mm |
| • | Datum B is 10.2 mm X 16.1 mm |
| • | Datum C is 10.5 mm |
Warning: Refer to Battery Disconnect Warning in the Preface section.
