Special Tools
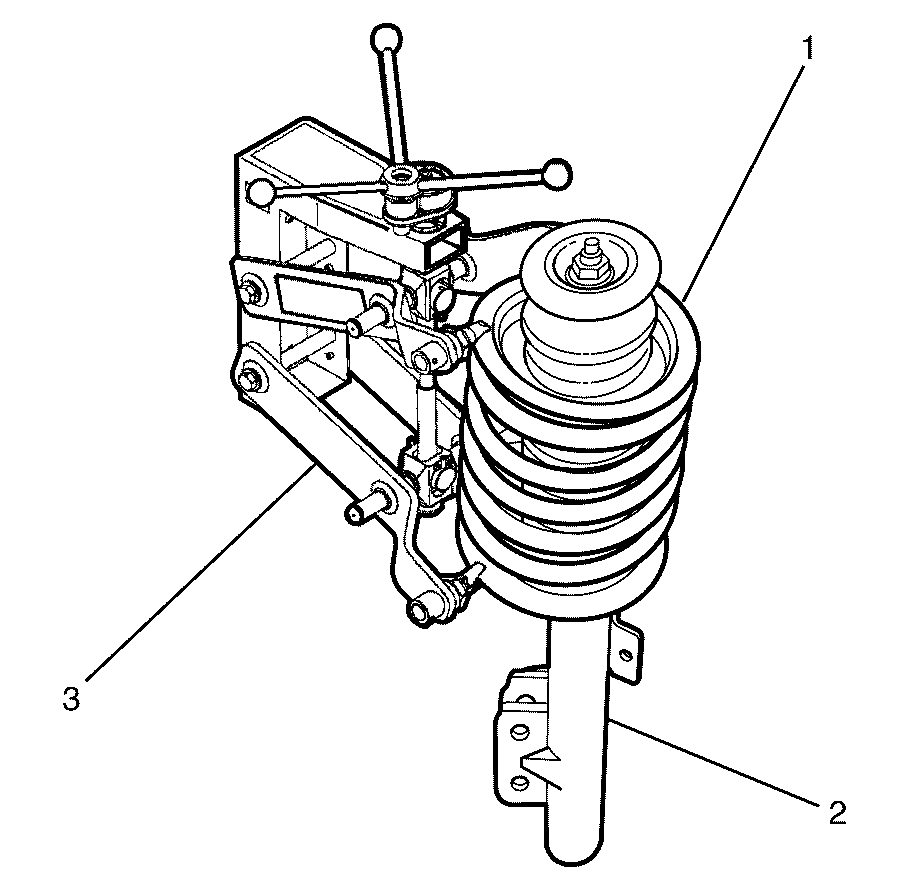
CH-48845 Spring Compressor
Removal Procedure
- Ignition OFF.
- Raise and support the vehicle. Refer to Lifting and Jacking the Vehicle in Preface.
- Remove the front wheel. Refer to Tire and Wheel Removal and Installation.
- Remove the front strut assembly. Refer to Strut Assembly Replacement.
- Support the front strut assembly (2) in a suitable device.
- Install the CH-48845 (2) to the coil spring (1).
- Compress the coil spring (1) using CH-48845 (3) until the front strut assembly (3) is free from the spring tension of the coil spring (1).
- Remove the front strut assembly support bearing and mount. Refer to Front Suspension Strut Mount and Bearing Replacement.
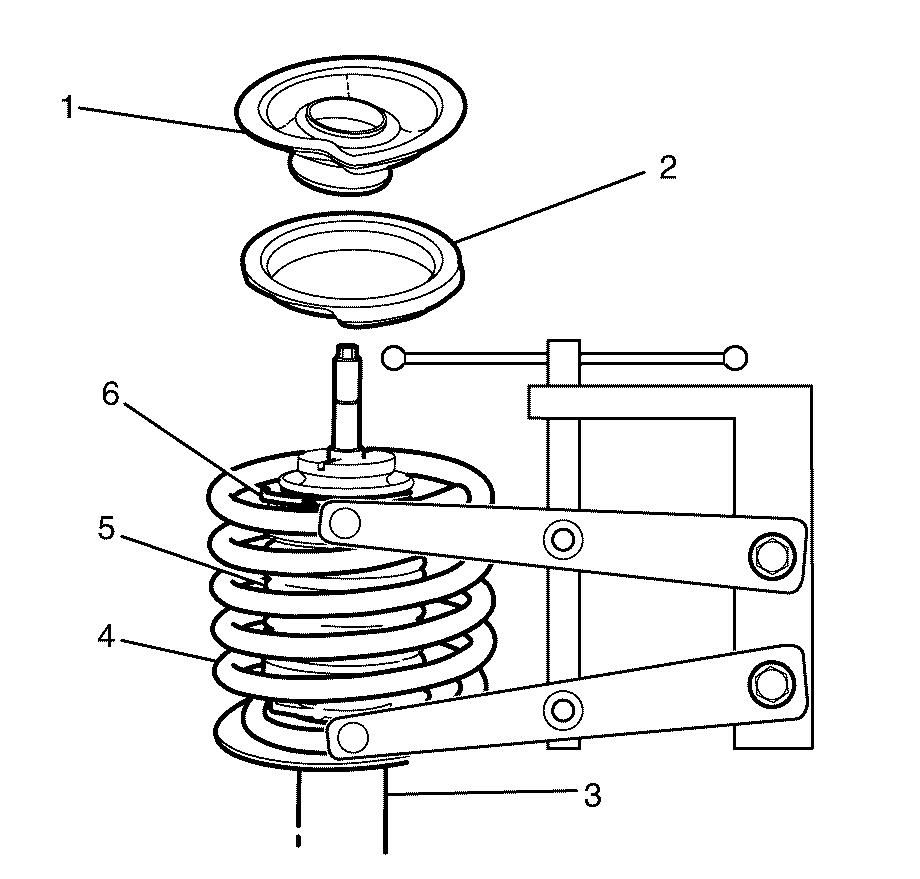
- Remove the dust boot upper retaining clamp (6).
- Discard the clamp (6).
- Detach and remove the coil spring seat (1) from the dust boot (5).
- Remove the coil spring insulator (2)
- Remove the coil spring (4) from the front strut assembly (3).
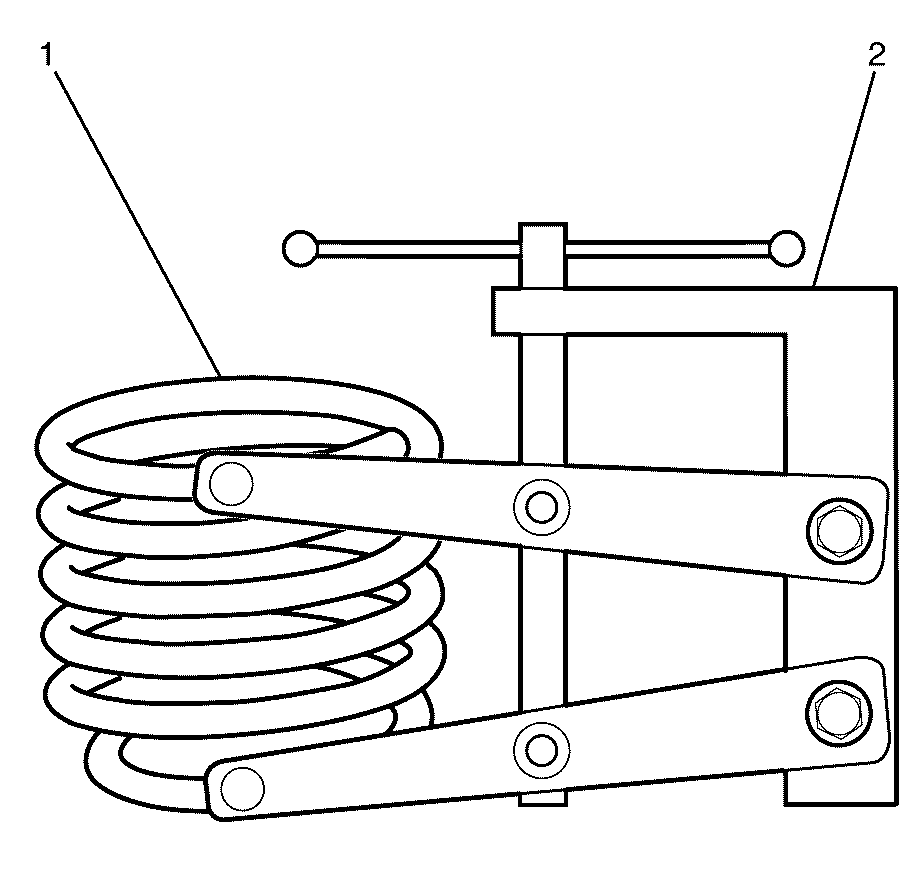
- Release the CH-48845 (2) from the coil spring (1).
Danger: To avoid any vehicle damage, serious personal injury or death when major components are removed from the vehicle and the vehicle is supported by a hoist, support the vehicle with jack stands at the opposite end from which the components are being removed and strap the vehicle to the hoist.
Warning: Refer to Safety Glasses Warning in the Preface section.

Warning: Use only the CH-48845 Spring Compressor when servicing suspension components on this vehicle. Other tools may not be strong enough for the springs on this vehicle and you could be injured if you do not use Special Tool CH-48845. Failure to do so could result in serious personal injury.
Note: Observe the operating instructions of CH-48845 (2).
Note: Only use hand tools to perform the following service procedure.
Warning: Do not over compress the spring. Severe overloading may cause tool failure which could result in bodily injury.


Installation Procedure
- Install the CH-48845 (2) to the NEW coil spring (1).
- Compress the NEW coil spring (1) with CH-48845 (2).
- Install the NEW coil spring (4) to the front strut assembly (3).
- Install the NEW coil spring insulator (2).
- Install the coil spring seat (1)
- Position the dust boot (5) to the coil spring seat (1).
- Install a new dust boot upper retaining clamp (6).
- Install the front strut assembly support bearing and mount. Refer to Front Suspension Strut Mount and Bearing Replacement.
- Make sure that the coil spring (1) is correctly positioned to the front strut assembly (2).
- Release the CH-48845 (3) from the coil spring (1).
- Install the front strut assembly. Refer to Strut Assembly Replacement.
- Install the front wheel. Refer to Tire and Wheel Removal and Installation
- Lower the vehicle to the ground.

Note: Observe the operating instructions of CH-48845 (2).
Warning: Do not over compress the spring. Severe overloading may cause tool failure which could result in bodily injury.

Note: The coil spring insulator (2) and coil spring seat (1) have a step which locates on to the straight projecting end of the spring. The step must be correctly orientated in relation to the spring.

