For 1990-2009 cars only
Special Tools
| • | C-4150-C Press Tool. |
| • | KM-468 Holding Bar. |
Removal Procedure
- Raise and support the vehicle. Refer to Lifting and Jacking the Vehicle.
- Remove the front wheel. Refer to Tire and Wheel Removal and Installation.
- Remove the brake disc. Refer to Front Brake Rotor Replacement.
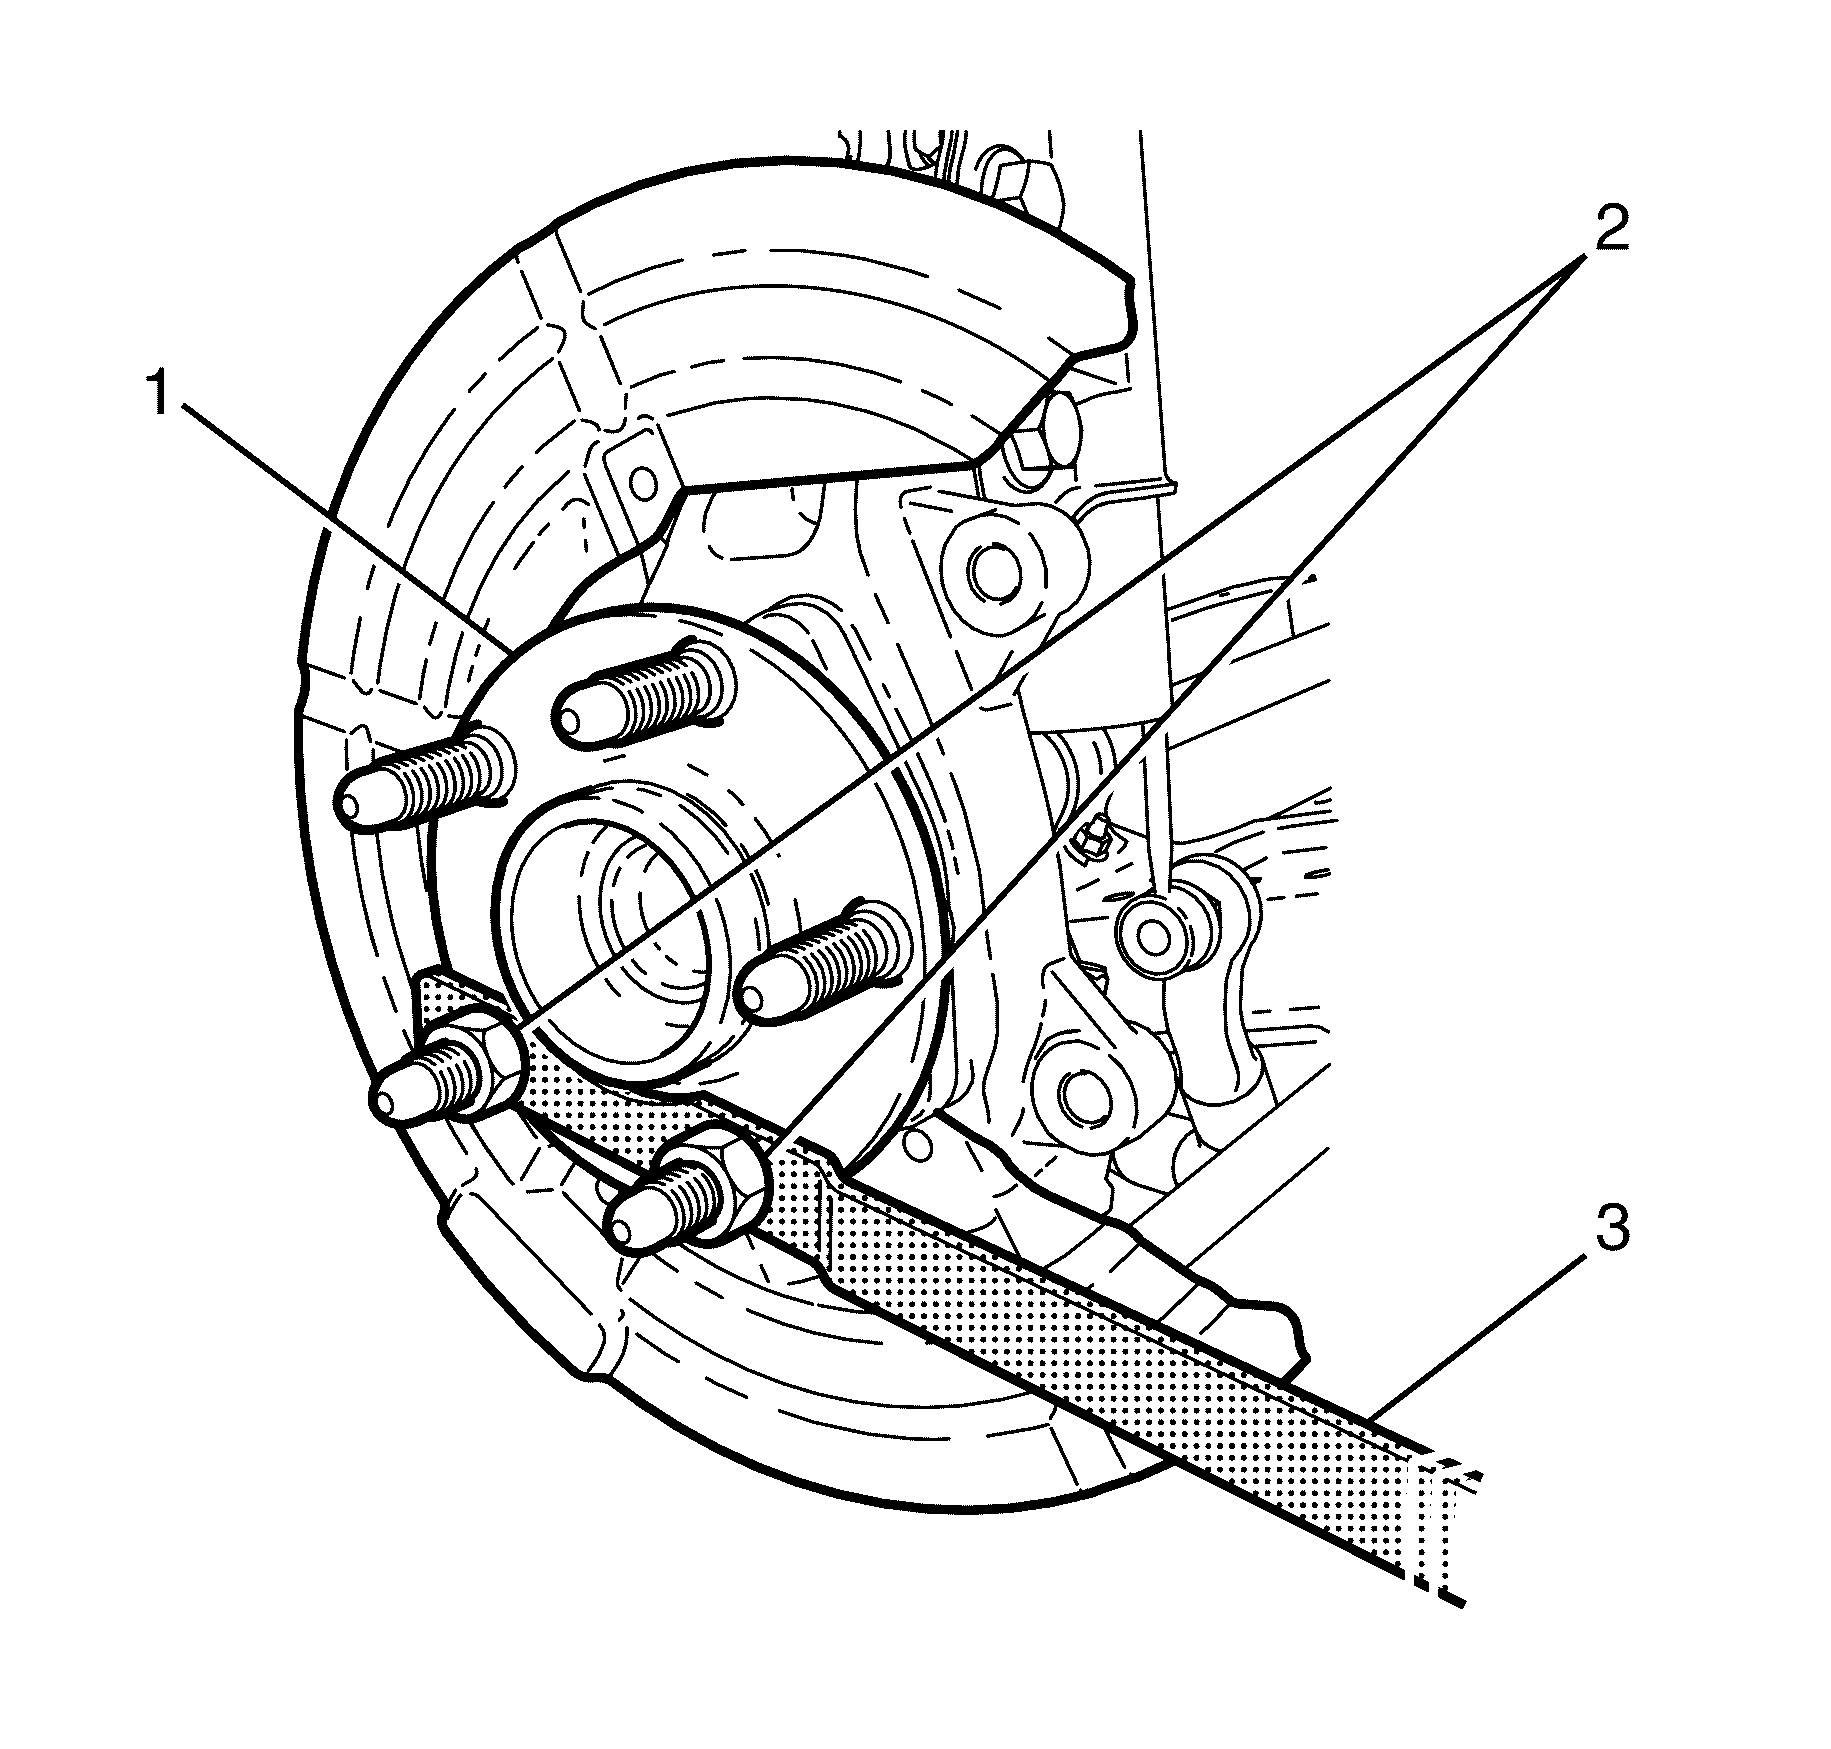
- Attach the KM-468 (3), to the wheel hub (1) using two inverted wheel nuts (2).
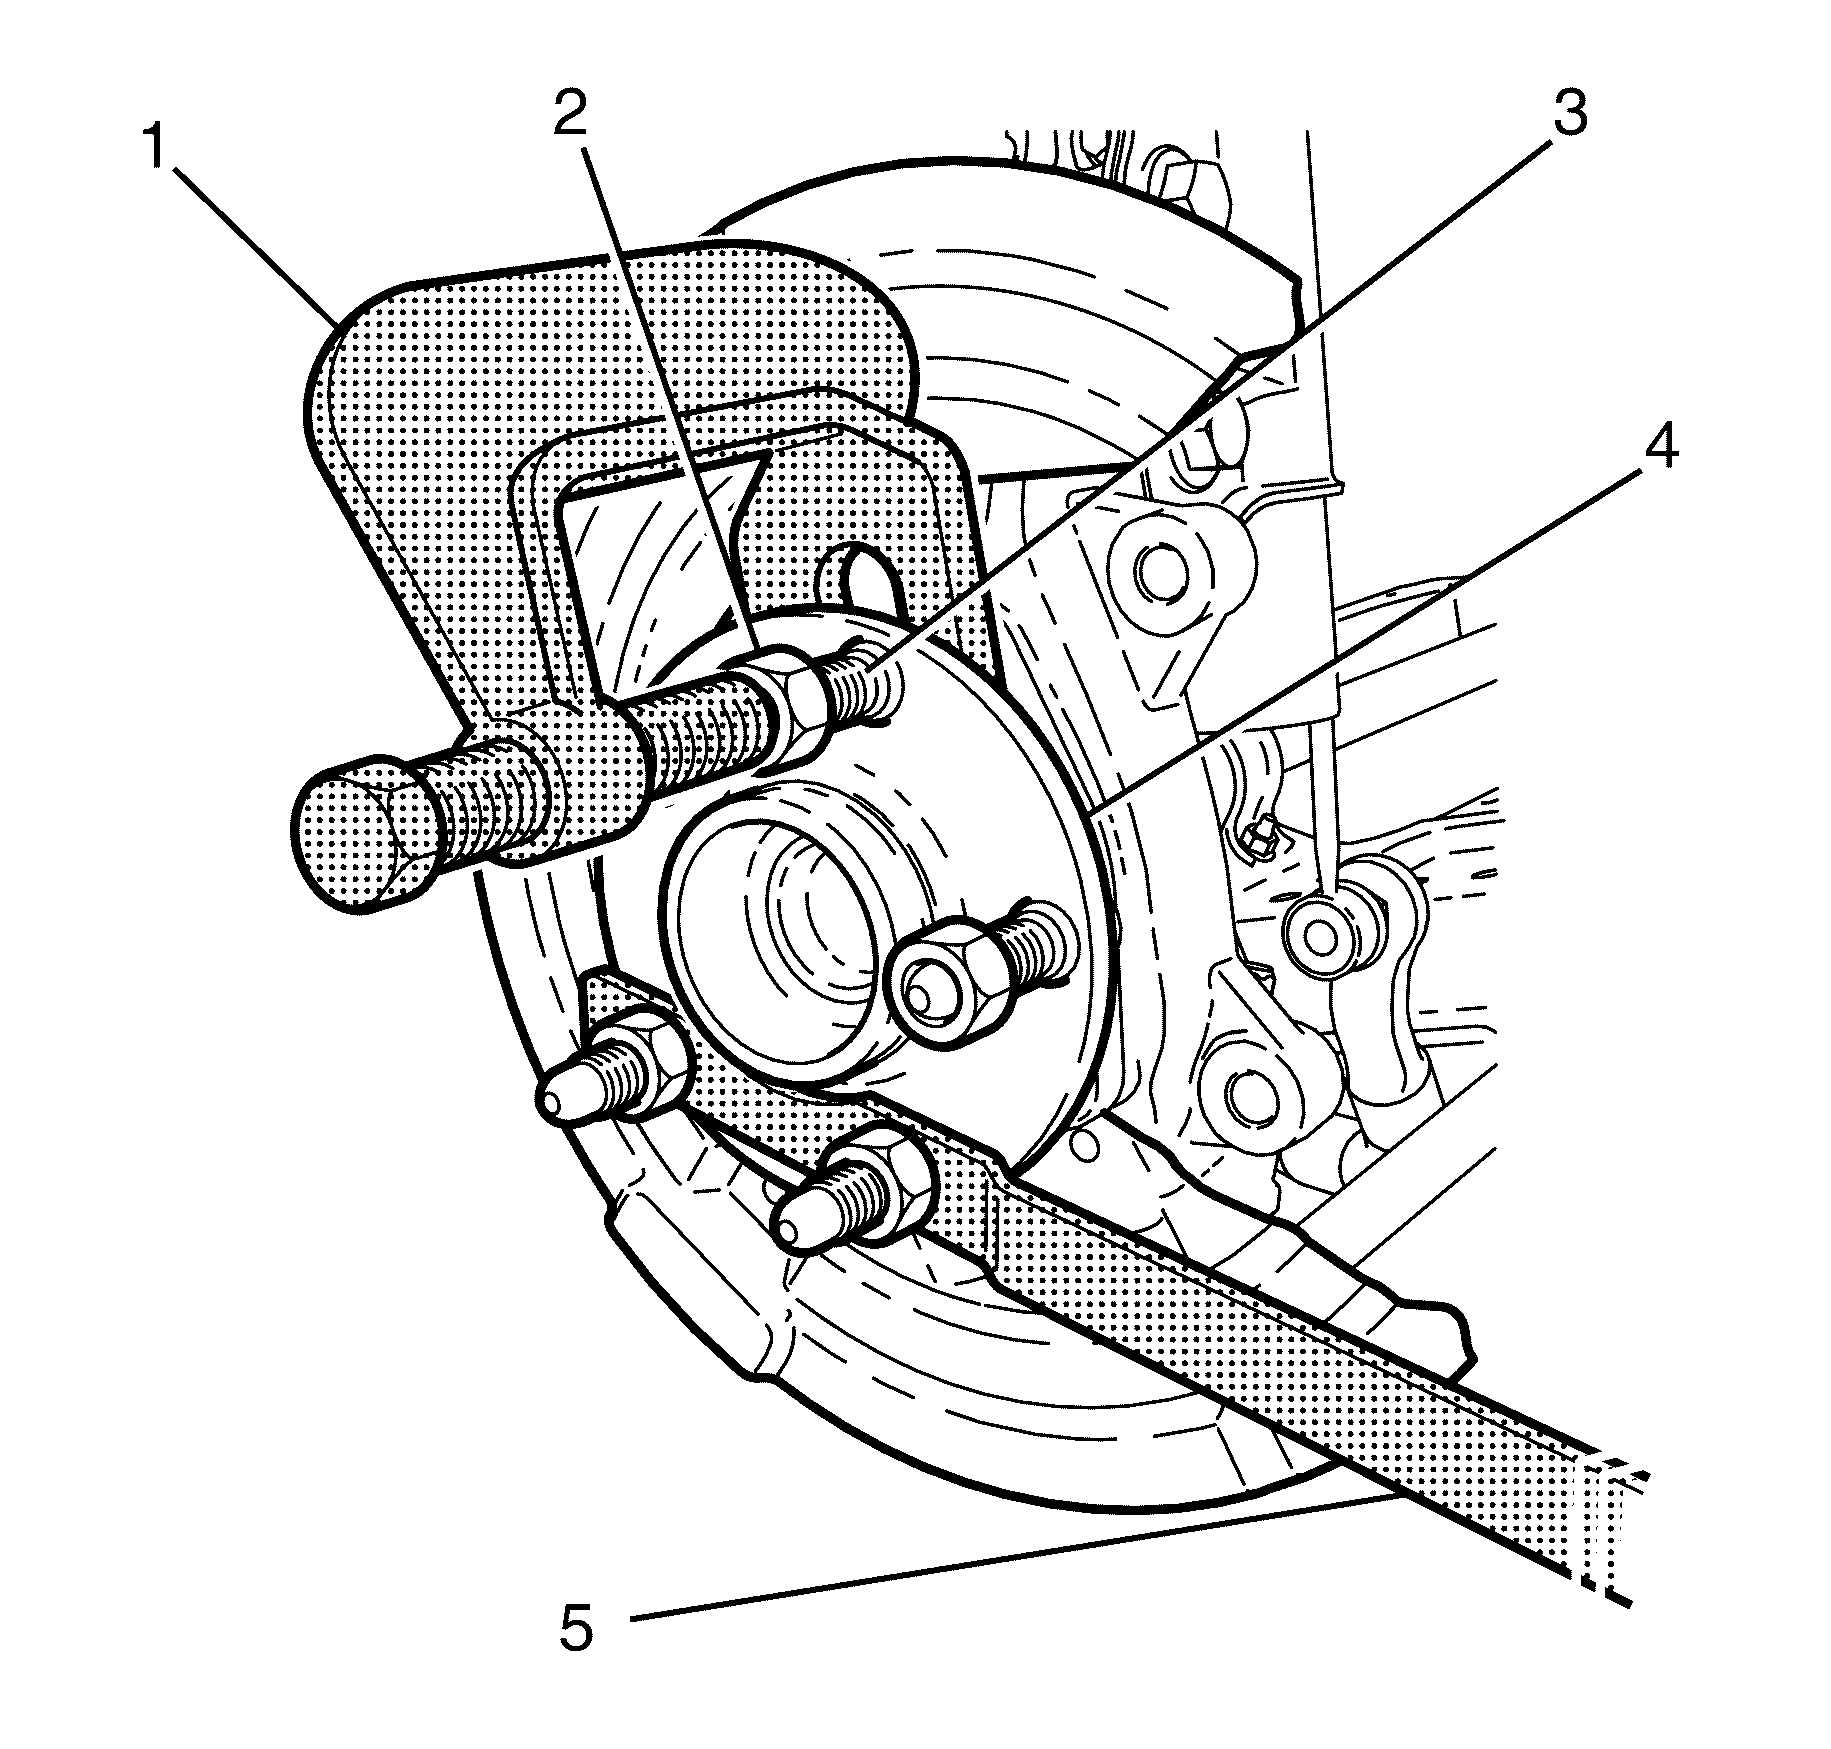
- Install a wheel nut (2) flush with the end of the wheel stud (3).
- Secure the KM-468 (5) and remove the wheel stud (3) from the wheel hub (4) using the C-4150-C (1).
- Repeat steps 5 and 6 for any additional wheel studs that require replacement.
Warning: Refer to Safety Glasses Warning in the Preface section.
Danger: To avoid any vehicle damage, serious personal injury or death when major components are removed from the vehicle and the vehicle is supported by a hoist, support the vehicle with jack stands at the opposite end from which the components are being removed and strap the vehicle to the hoist.


Installation Procedure
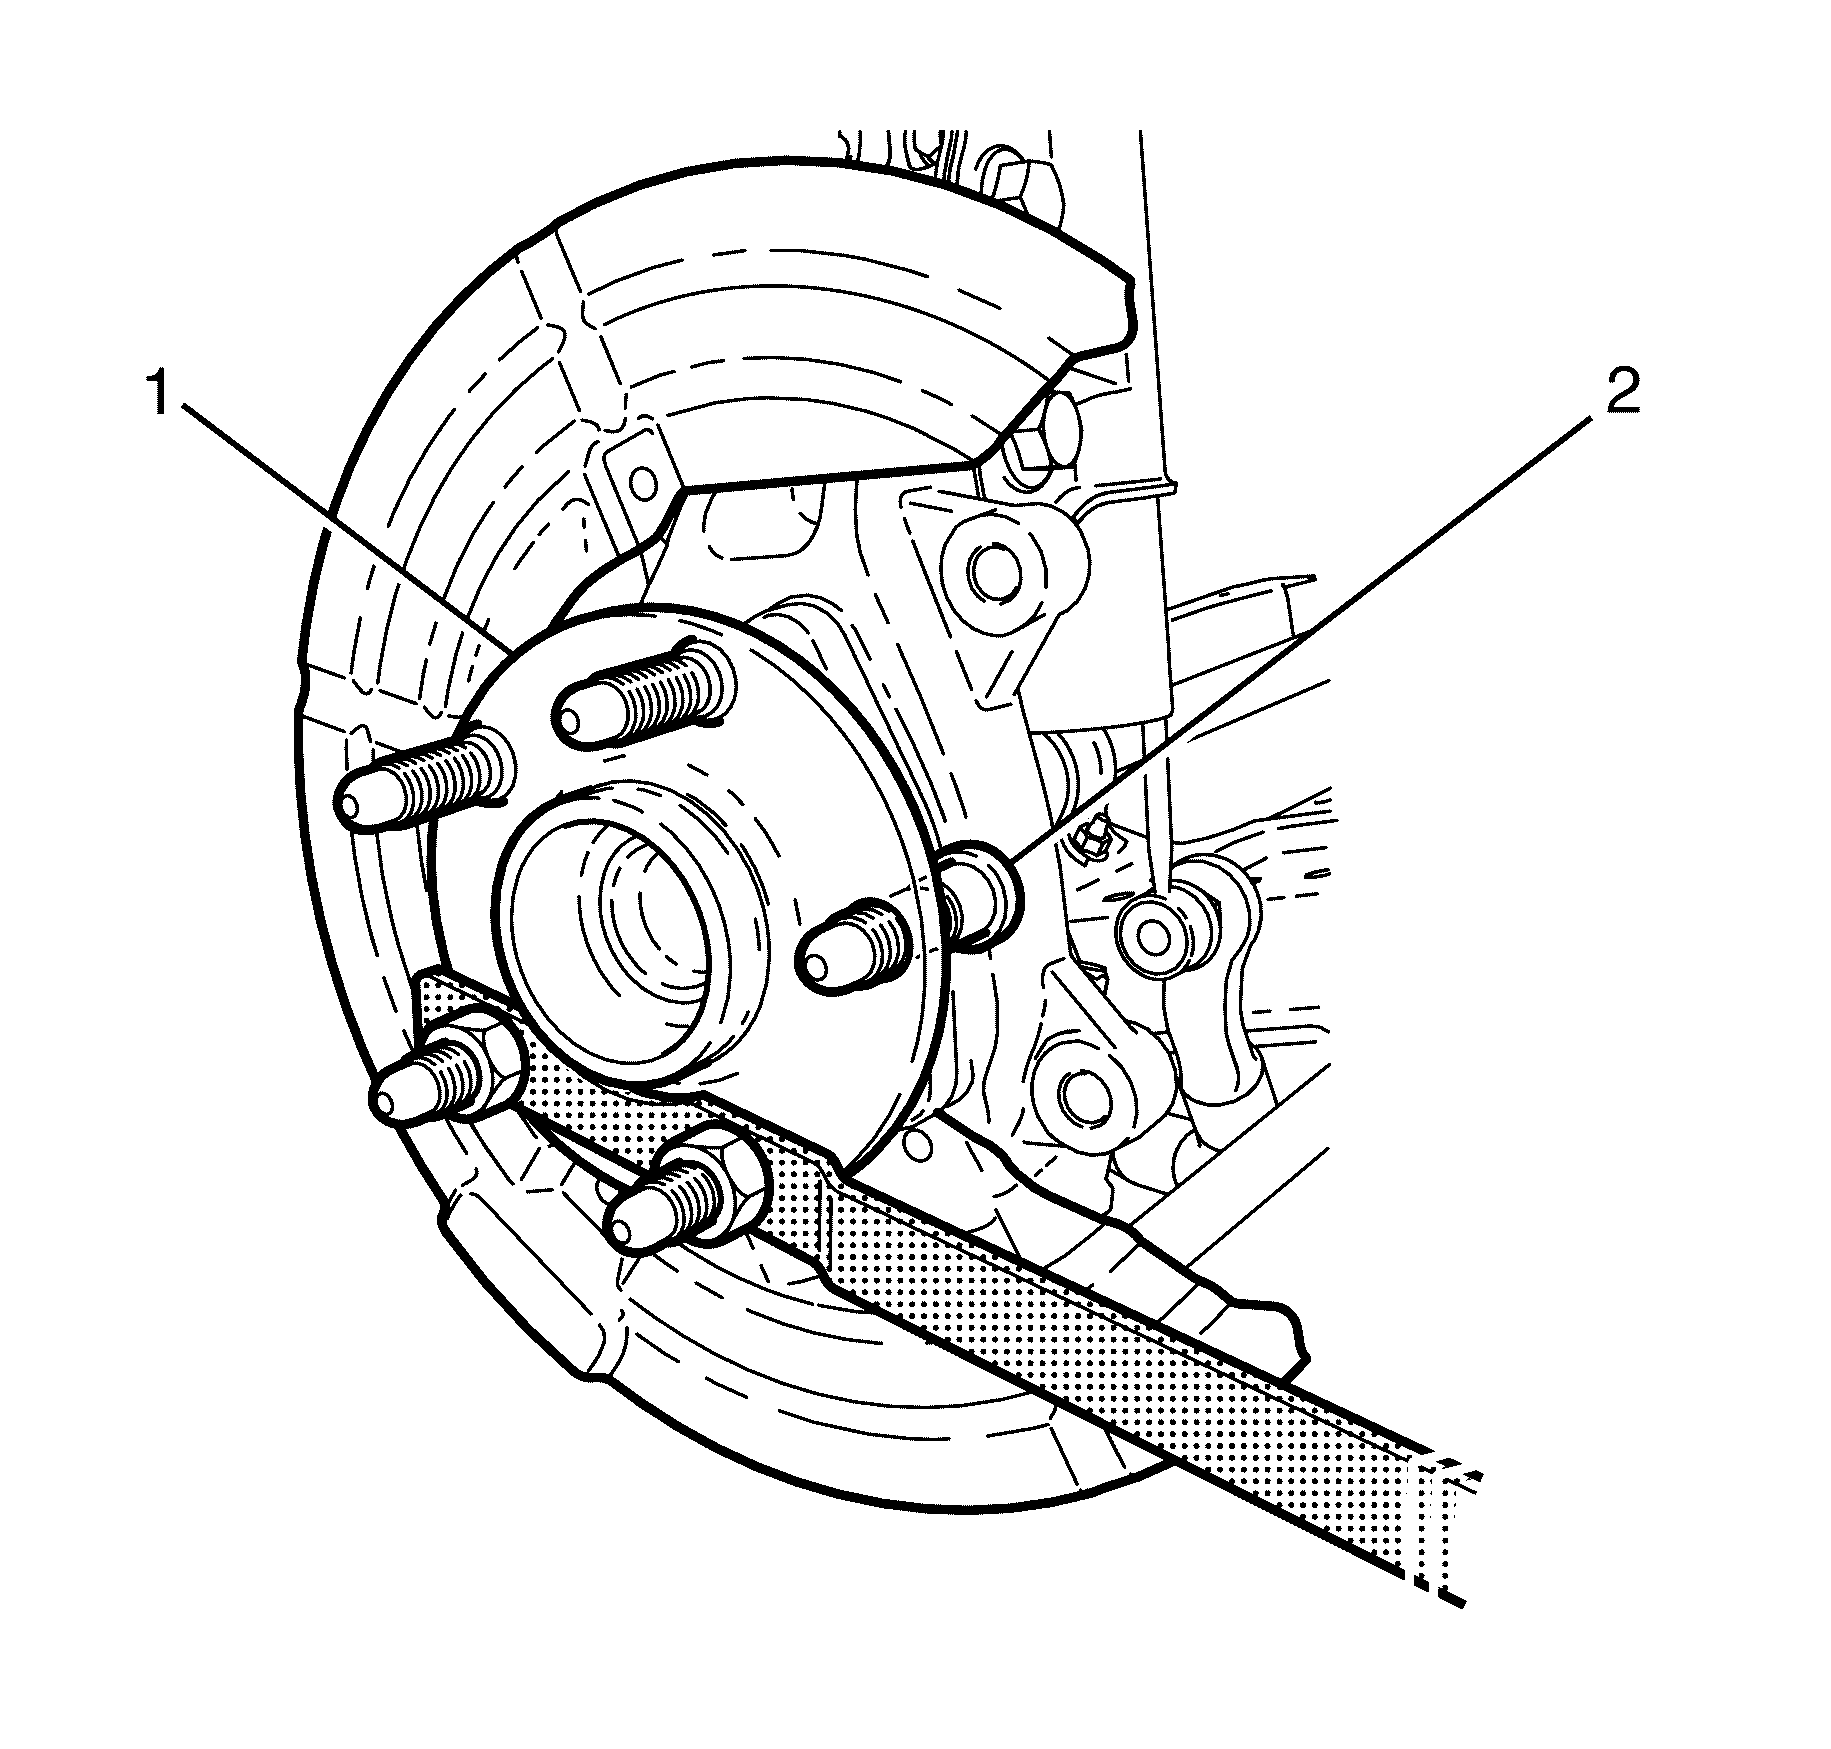
- Install the replacement wheel stud (2) to the wheel hub flange (1).
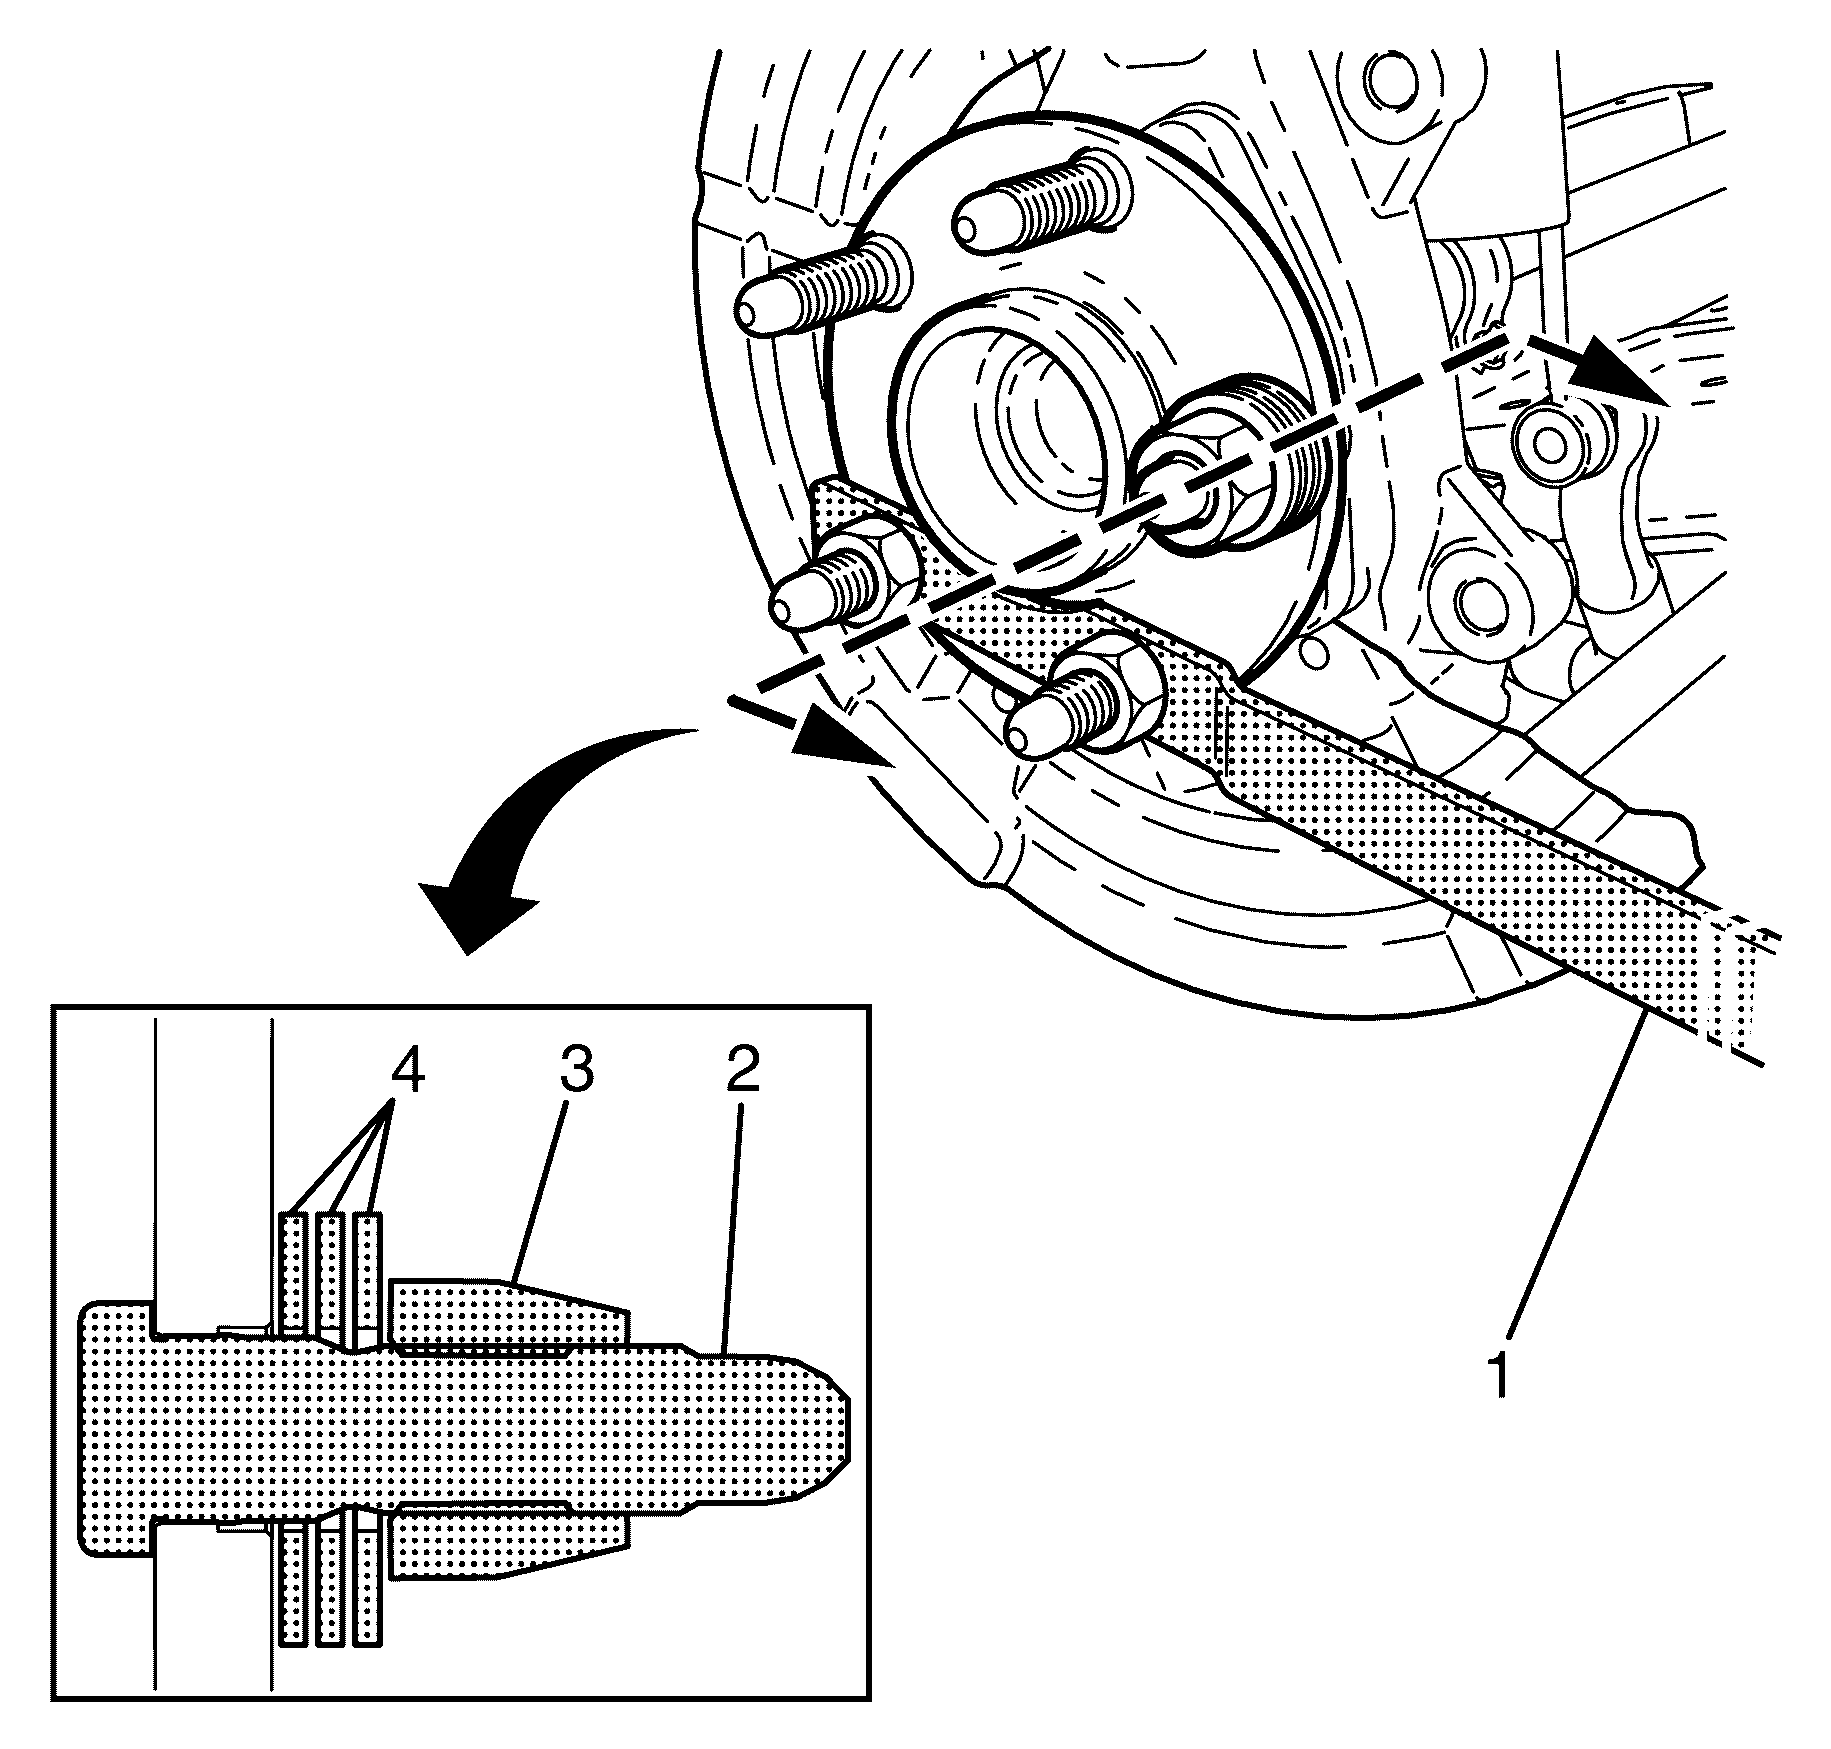
- Install spacing washers (4) and a inverted wheel nut (3) onto the replacement wheel stud (2).
- Secure the KM-468 (1) and tighten the wheel nut (3) to pull the wheel stud (2) into place.
- Remove the wheel nut (3) and spacing washers (4).
- Repeat steps 1 to 4 for any additional studs that require replacement.
- Remove the KM-468 (1).
- Install the brake disc. Refer to Front Brake Rotor Replacement.
- Install the front wheel. Refer to Tire and Wheel Removal and Installation.
- Remove the safety stands.
- Lower the vehicle to the ground.


Note: Suitable sized spacing washers (4) must be used to seat the wheel stud (2) fully.
