Headlamp Bulb Replacement Low Beam
Removal Procedure
- Disconnect the battery ground cable. Refer to Battery Negative Cable Disconnection and Connection.
- Remove the radiator air baffle and deflector. Refer to Radiator Air Upper Baffle and Deflector Replacement.
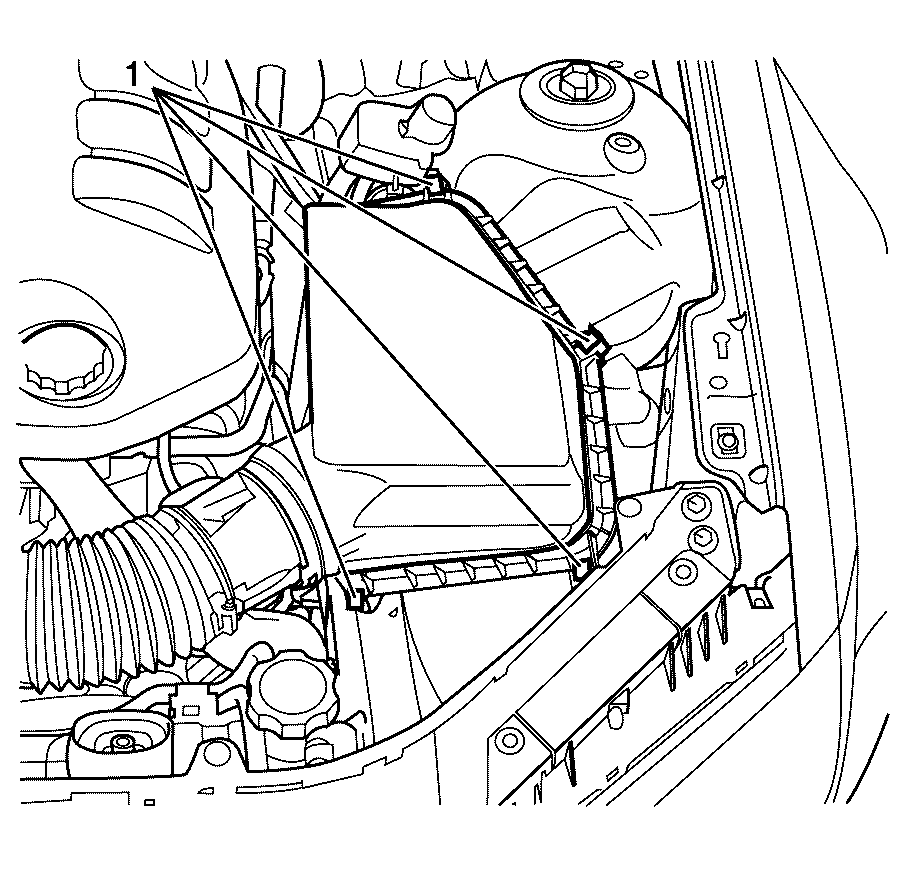
- For access to the left headlamp, release the air cleaner cover retaining clips (1).
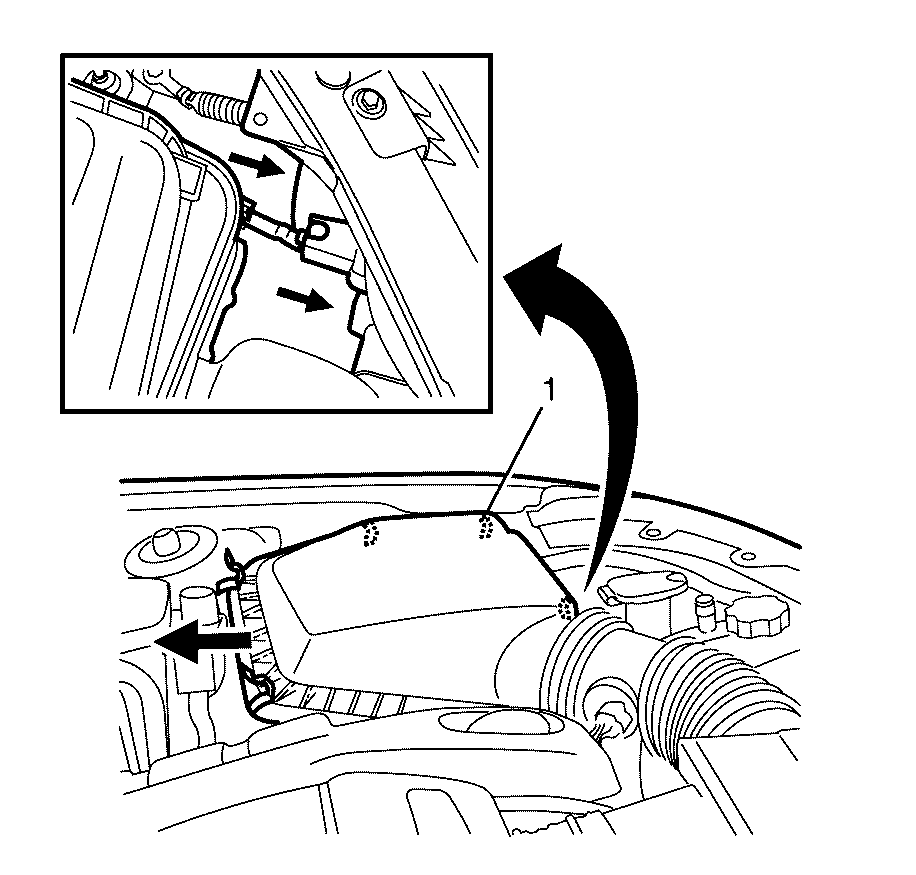
- Detach and move the air cleaner upper cover (1) rearward.
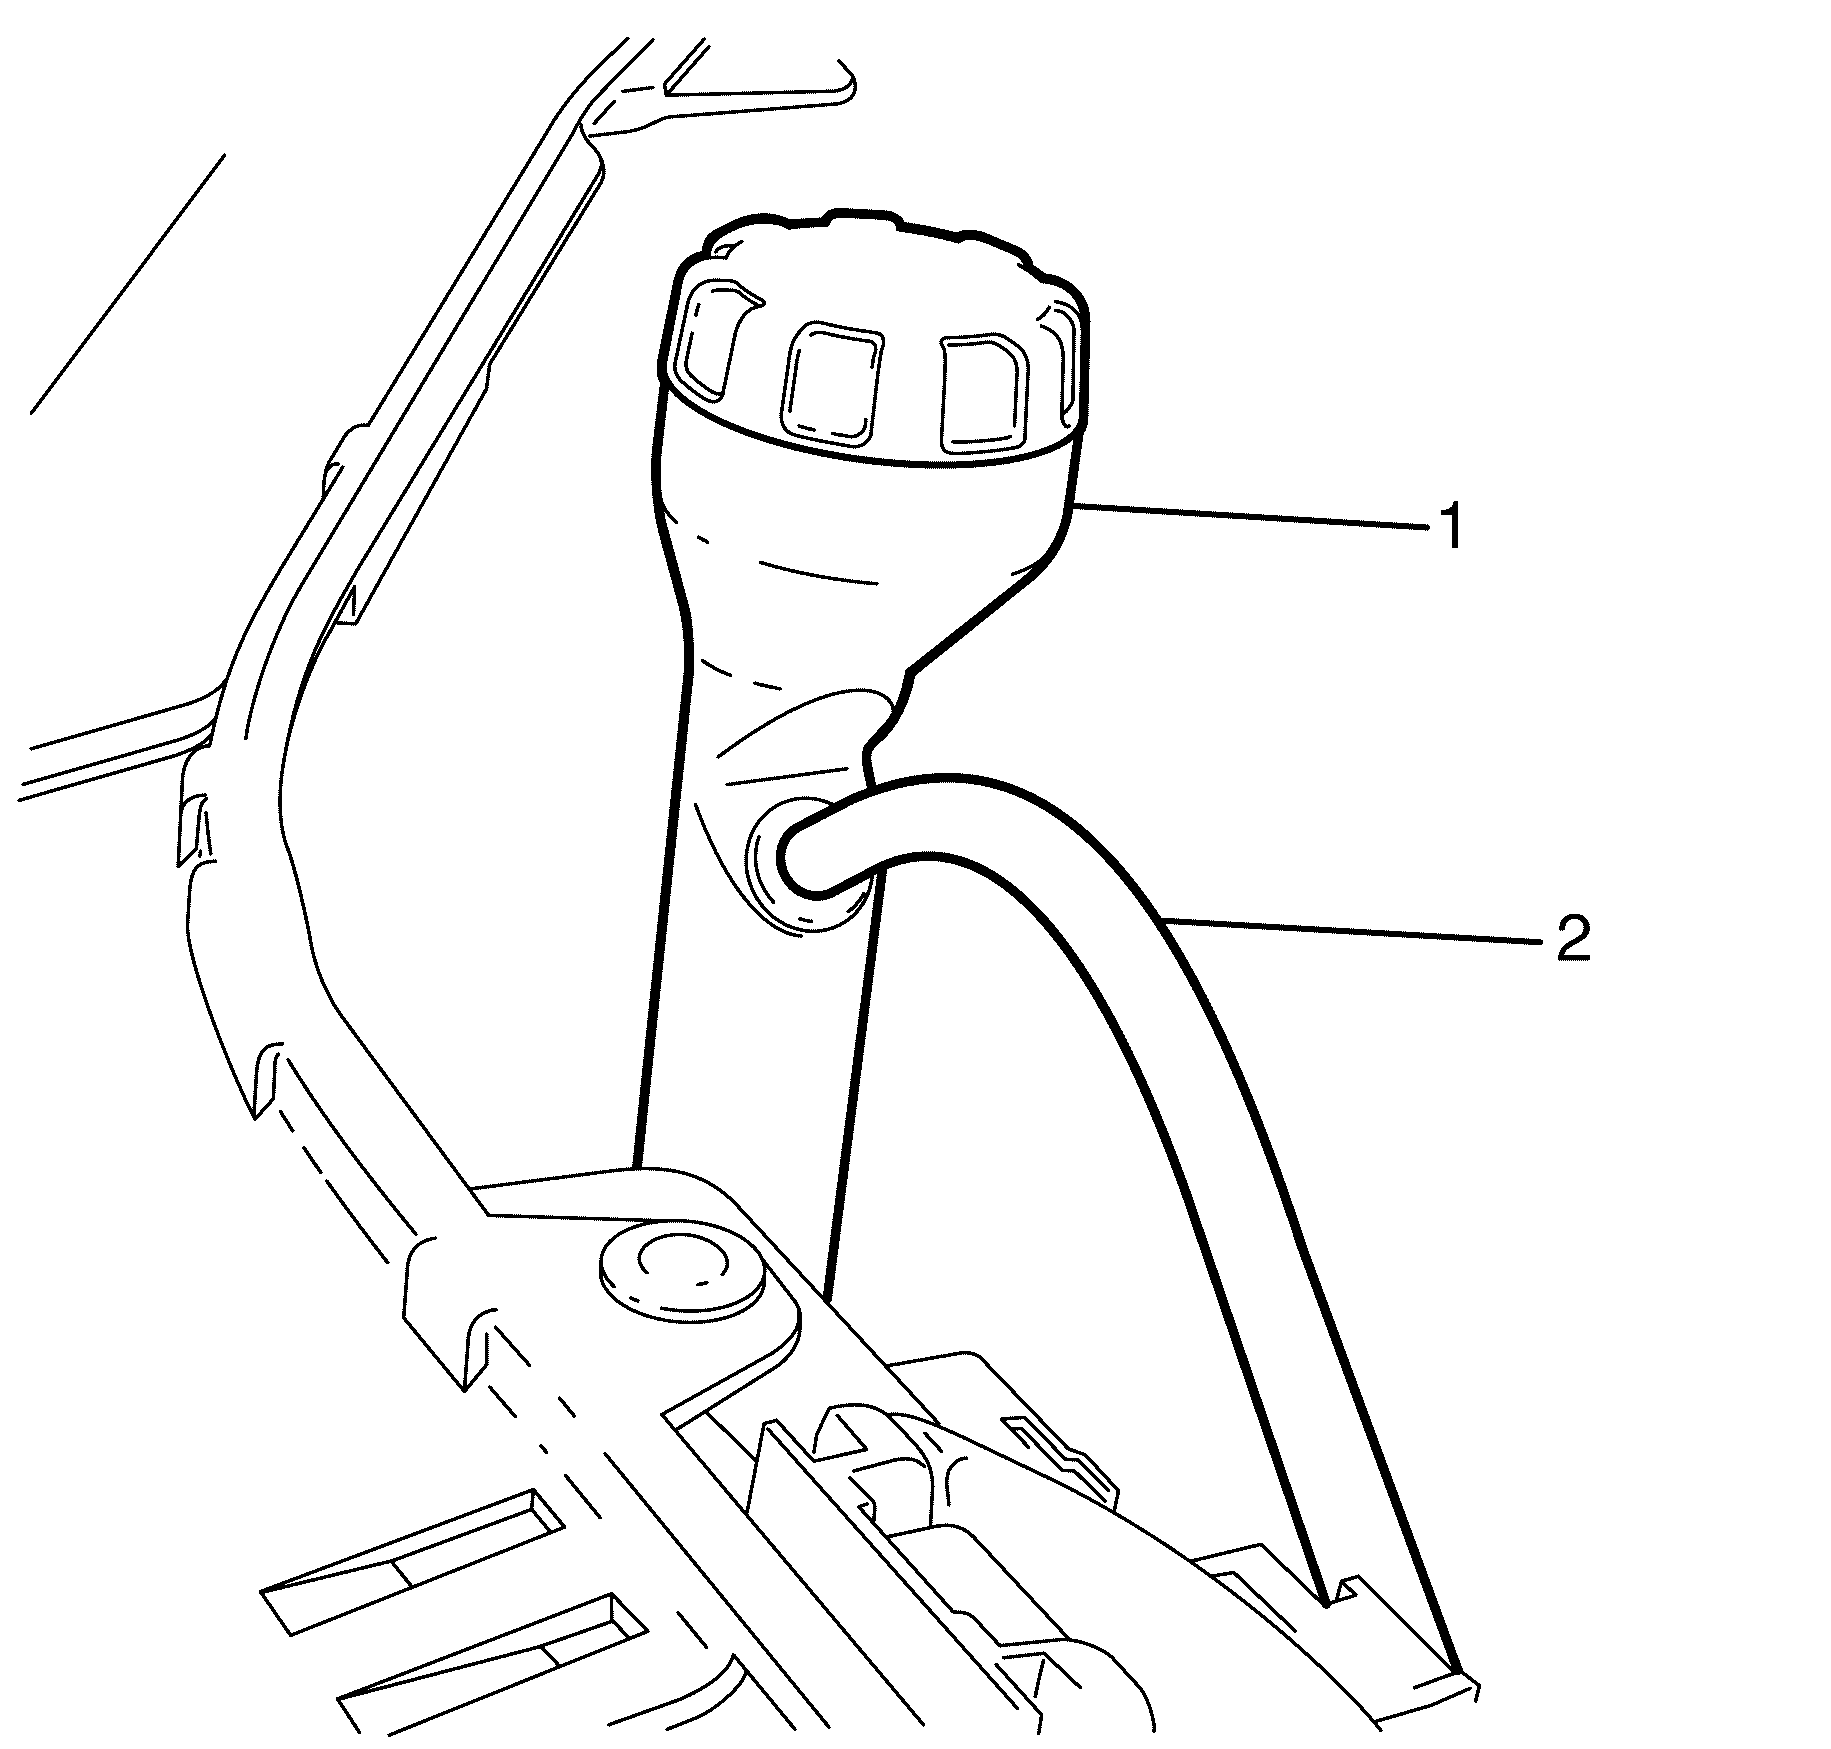
- For access to the right headlamp, disconnect the coolant recovery hose (2) from the coolant recovery reservoir filler neck (1).
- Remove the coolant recovery reservoir filler neck (1).
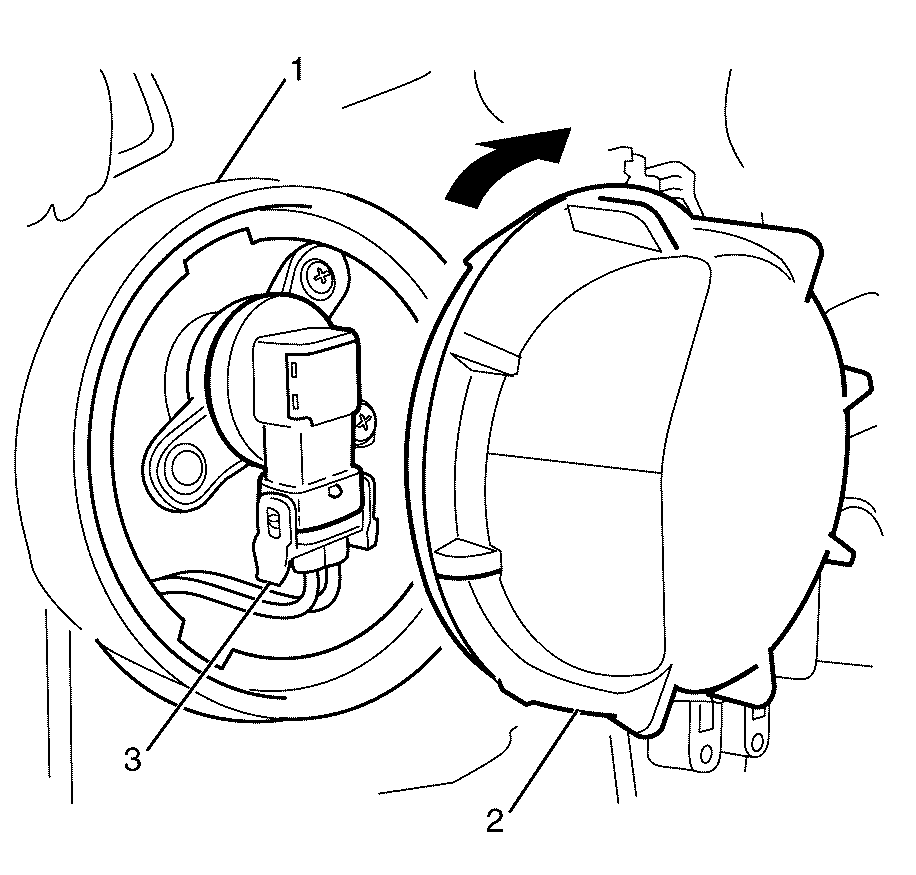
- Remove the low beam headlamp dust cap (2) from the headlamp assembly (1).
- Disconnect the low beam headlamp bulb electrical connector (3).
- Remove the low beam headlamp bulb (2) from the headlamp assembly (1).
Warning: Refer to Battery Disconnect Warning in the Preface section.
Warning: Halogen bulbs contain gas under pressure. Handling a bulb improperly could cause it to shatter into flying glass fragments. To help avoid personal injury:
• Turn off the lamp switch and allow the bulb to cool before changing the bulb. • Leave the lamp switch OFF until the bulb change is complete. • Always wear eye protection when changing a halogen bulb. • Handle the bulb only by its base. Avoid touching the glass. • Keep dirt and moisture off the bulb. • Properly dispose of the used bulb. • Keep halogen bulbs out of the reach of children.
Note: For left headlamp access, go to step 3. For right headlamp access, go to step 5.
Go to step 7.
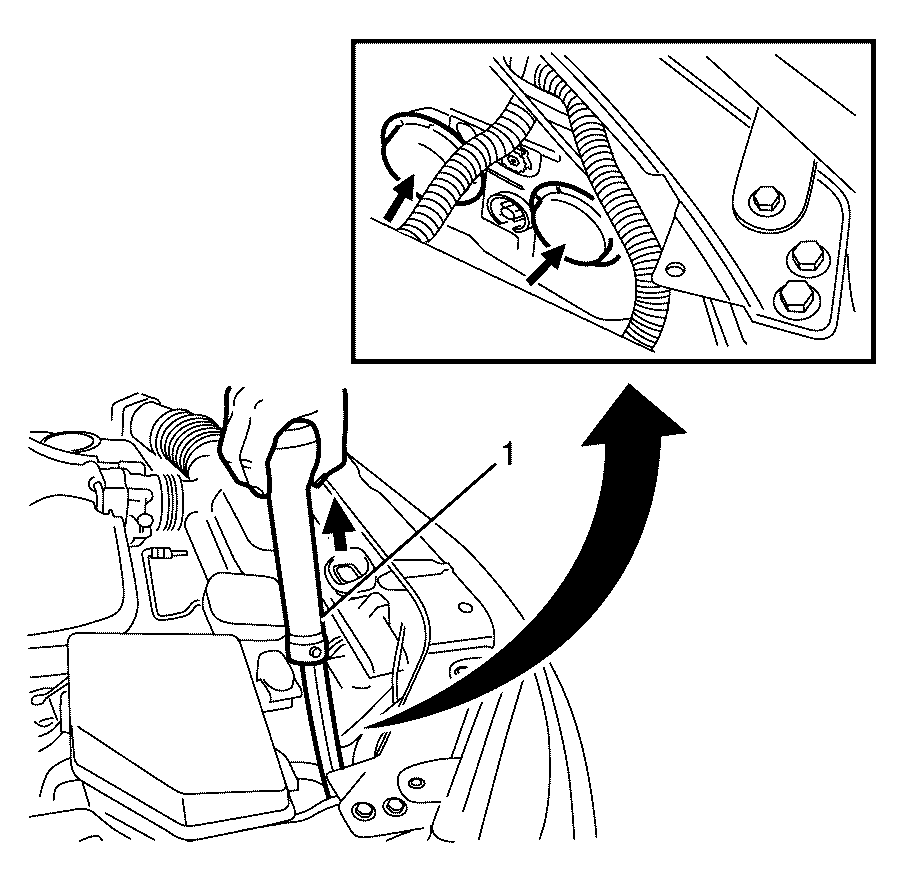
Note: Remove the coolant recovery reservoir filler neck by pulling upwards. Allow the coolant recovery reservoir filler neck to drain before completely removing it from the vehicle.
Note: Place a clean workshop cloth over the opening of the coolant recovery reservoir immediately after removing the coolant recovery reservoir filler neck to prevent contamination of the coolant.
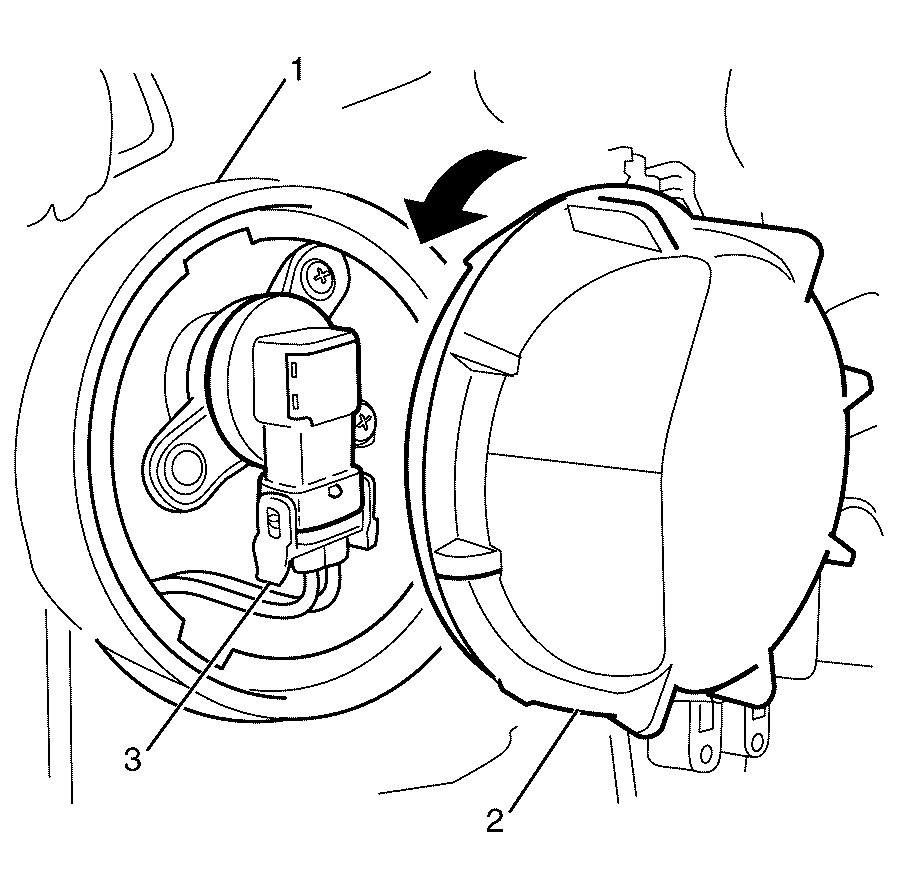
Note: Note the orientation of the low beam headlamp dust cap (2) and tabs on the headlamp assembly (1) for installation.
Note: Rotate the low beam headlamp dust cap (2) counter-clockwise to remove.
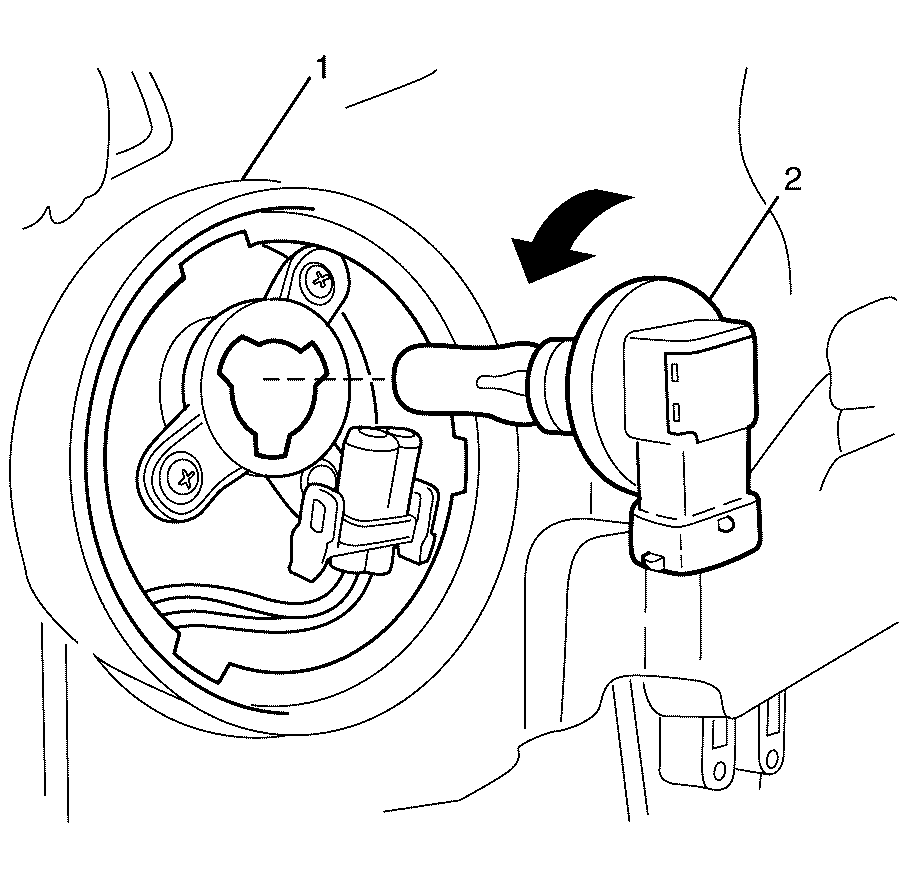
Note: Rotate the low beam headlamp bulb (2) counter-clockwise to remove.
Installation Procedure
- Install the NEW low beam headlamp bulb (3) into the headlamp assembly (1).
- Inspect the low beam headlamp dust cap seal (1) and replace if necessary.
- Connect the low beam headlamp bulb electrical connector (3).
- Install the low beam headlamp dust cap (2) to the headlamp assembly (1).
- Reposition the air cleaner upper cover and secure the air cleaner cover retaining clips (1).
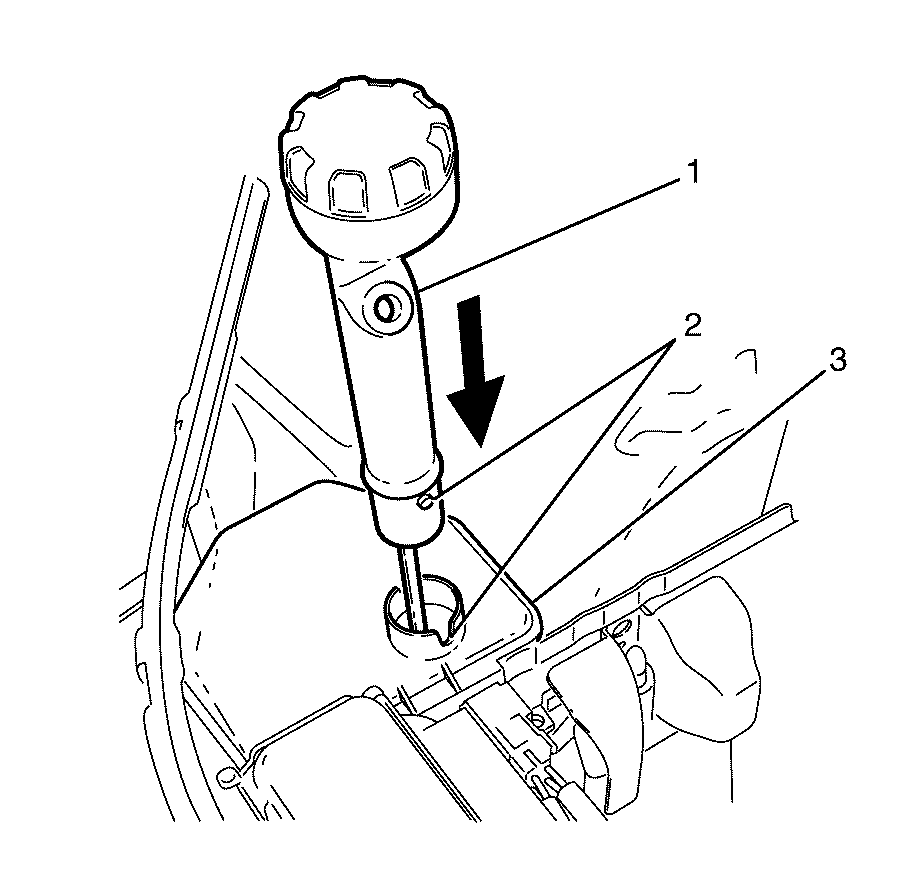
- Install the coolant recovery reservoir filler neck (1) into the coolant recovery reservoir (3).
- Connect the coolant recovery reservoir hose (2) to the coolant recovery reservoir filler neck (1)
- Install the radiator air baffle and deflector. Refer to Radiator Air Upper Baffle and Deflector Replacement.
- Connect the battery ground cable. Refer to Battery Negative Cable Disconnection and Connection.
- Check all vehicle lights for correct operation.
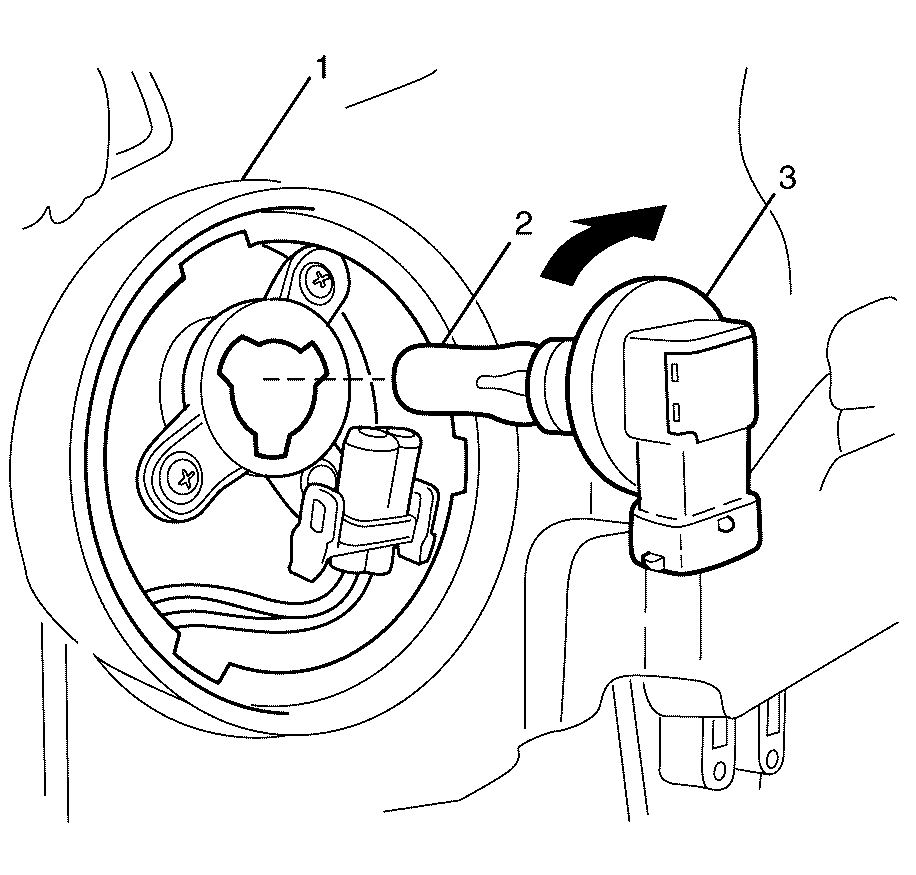
Note: The different-sized tabs on the bulb base and mating cut-outs in the headlamp assembly allow the bulb to seat correctly in one orientation position.
Note: Do not handle the quartz envelope (2) of the low beam headlamp bulb (3). Wipe the quartz envelope (2) immediately with methylated spirits if it is touched accidentally or the performance of the low beam headlamp bulb (3) will deteriorate.
Note: Rotate the NEW low beam headlamp bulb (3) clockwise to install.
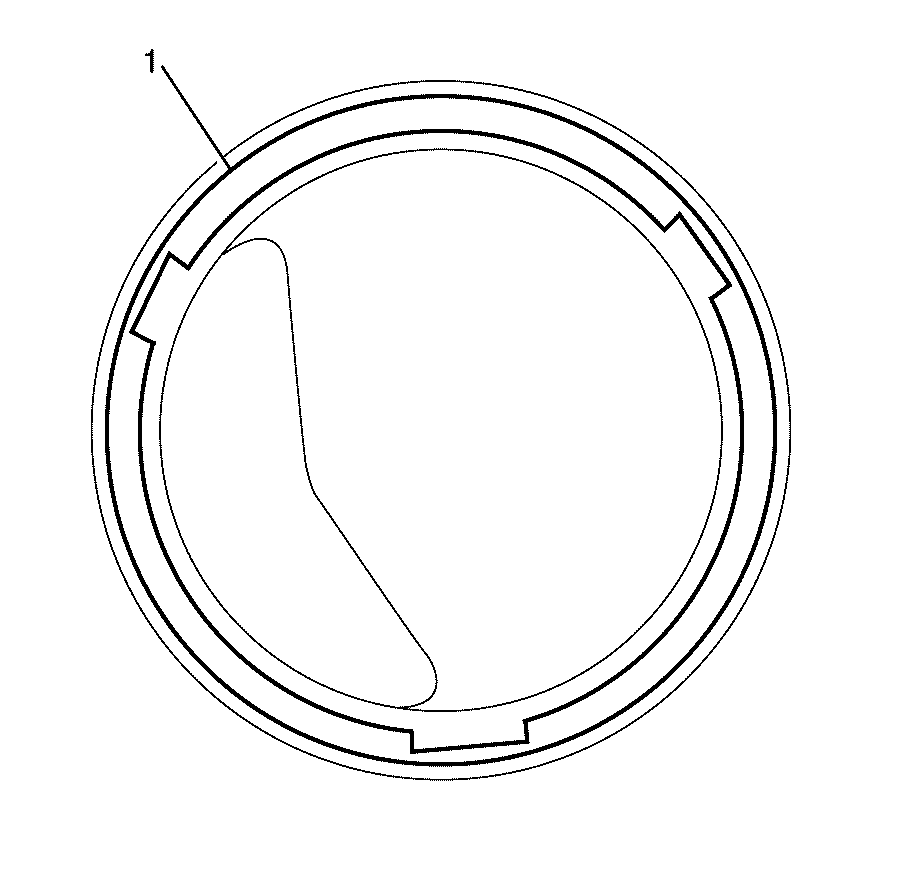
Note: Rotate the low beam headlamp dust cap (2) clockwise to install.

Note: Ignore step 5 if access to the right headlamp was required.
Note: Ignore steps 6 and 7 if access to the left headlamp was required.
Note: Align the tab and keyway (2) and push the coolant recovery reservoir filler neck down into the coolant recovery reservoir (3) to install.

Headlamp Bulb Replacement High Beam
Removal Procedure
- Disconnect the battery ground cable. Refer to Battery Negative Cable Disconnection and Connection.
- Remove the radiator air baffle and deflector. Refer to Radiator Air Upper Baffle and Deflector Replacement.
- For access to the left headlamp, release the air cleaner cover retaining clips (1).
- Detach and move the air cleaner upper cover (1) rearward.
- For access to the right headlamp, disconnect the coolant recovery hose (2) from the coolant recovery reservoir filler neck (1).
- Remove the coolant recovery reservoir filler neck (1).
- Remove the high beam headlamp dust cap (2) from the headlamp assembly (1).
- Disconnect the high beam headlamp bulb electrical connector (3).
- Remove the high beam headlamp bulb (2) from the headlamp assembly (1).
Warning: Refer to Battery Disconnect Warning in the Preface section.
Warning: Halogen bulbs contain gas under pressure. Handling a bulb improperly could cause it to shatter into flying glass fragments. To help avoid personal injury:
• Turn off the lamp switch and allow the bulb to cool before changing the bulb. • Leave the lamp switch OFF until the bulb change is complete. • Always wear eye protection when changing a halogen bulb. • Handle the bulb only by its base. Avoid touching the glass. • Keep dirt and moisture off the bulb. • Properly dispose of the used bulb. • Keep halogen bulbs out of the reach of children.
Note: For left headlamp access, go to step 3. For right headlamp access, go to step 5.


Go to step 7.


Note: Remove the coolant recovery reservoir filler neck by pulling upwards. Allow the coolant recovery reservoir filler neck to drain before completely removing it from the vehicle.
Note: Place a clean workshop cloth over the opening of the coolant recovery reservoir immediately after removing the coolant recovery reservoir filler neck to prevent contamination of the coolant.
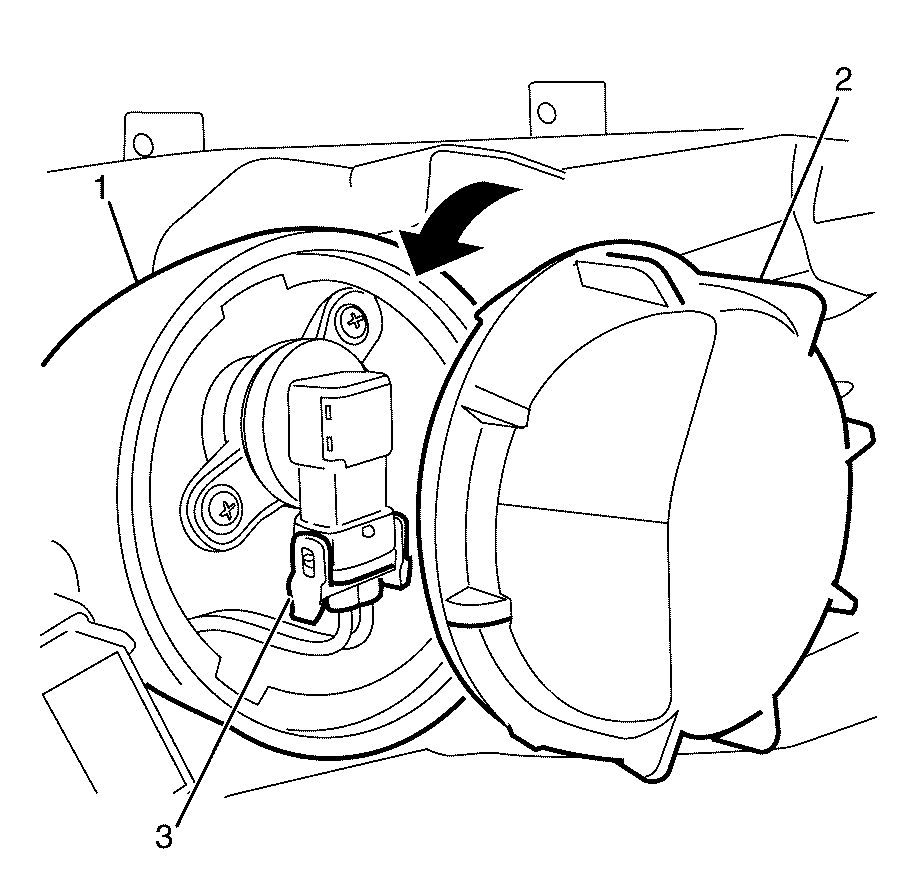
Note: Note the orientation of the high beam headlamp dust cap (2) and tabs on the headlamp assembly (1) for installation.
Note: Rotate the high beam headlamp dust cap (2) counter-clockwise to remove.
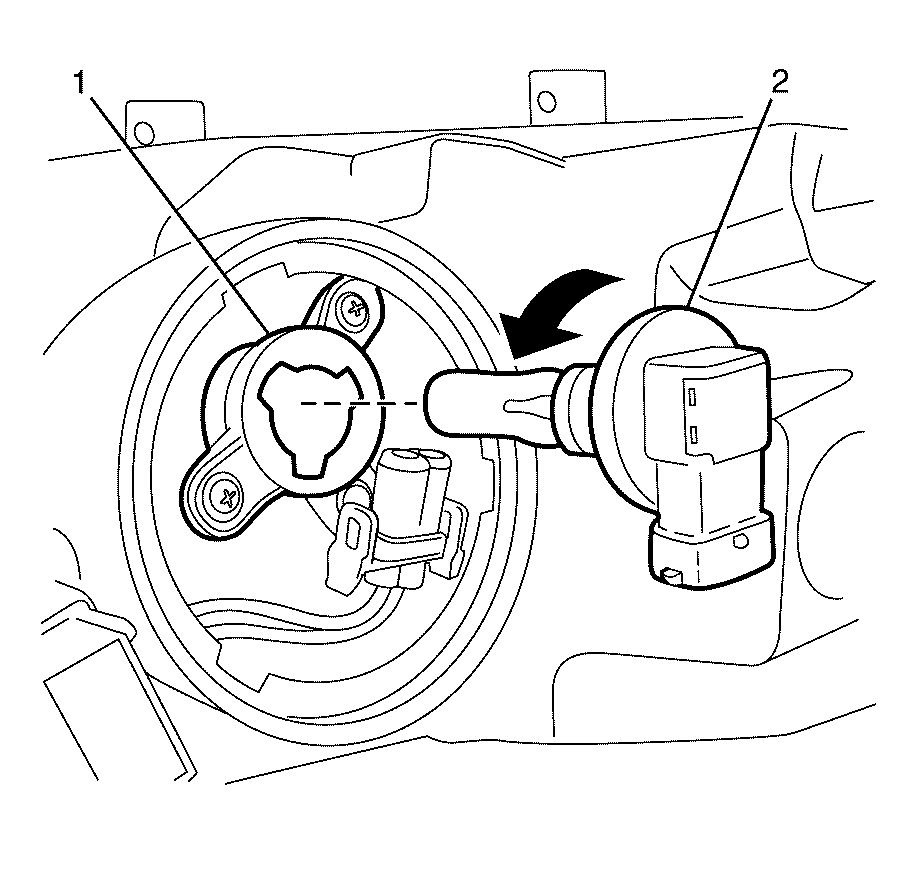
Note: Rotate the high beam headlamp bulb (2) counter-clockwise to remove.
Installation Procedure
- Install the NEW high beam headlamp bulb (3) into the headlamp assembly (1).
- Inspect the high beam headlamp dust cap seal (1) and replace if necessary.
- Connect the high beam headlamp bulb electrical connector (3).
- Install the high beam headlamp dust cap (2) to the headlamp assembly (1).
- Reposition the air cleaner upper cover and secure the air cleaner cover retaining clips (1).
- Install the coolant recovery reservoir filler neck (1) into the coolant recovery reservoir (3).
- Connect the coolant recovery reservoir hose (2) to the coolant recovery reservoir filler neck (1)
- Install the radiator air baffle and deflector. Refer to Radiator Air Upper Baffle and Deflector Replacement.
- Connect the battery ground cable. Refer to Battery Negative Cable Disconnection and Connection.
- Check all vehicle lights for correct operation.
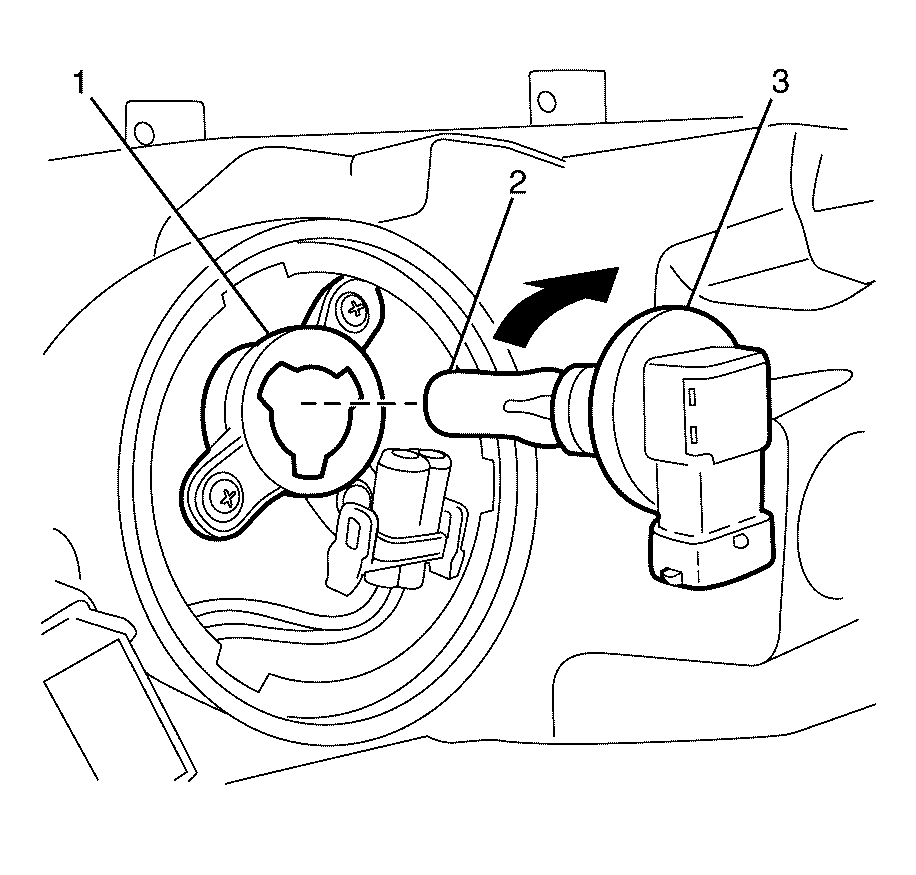
Note: The different-sized tabs on the bulb base and mating cut-outs in the headlamp assembly allow the bulb to seat correctly in one orientation position.
Note: Do not handle the quartz envelope (2) of the high beam headlamp bulb (3). Wipe the quartz envelope (2) immediately with methylated spirits if it is touched accidentally or the performance of the high beam headlamp bulb (3) will deteriorate.
Note: Rotate the NEW high beam headlamp bulb (3) clockwise to install.

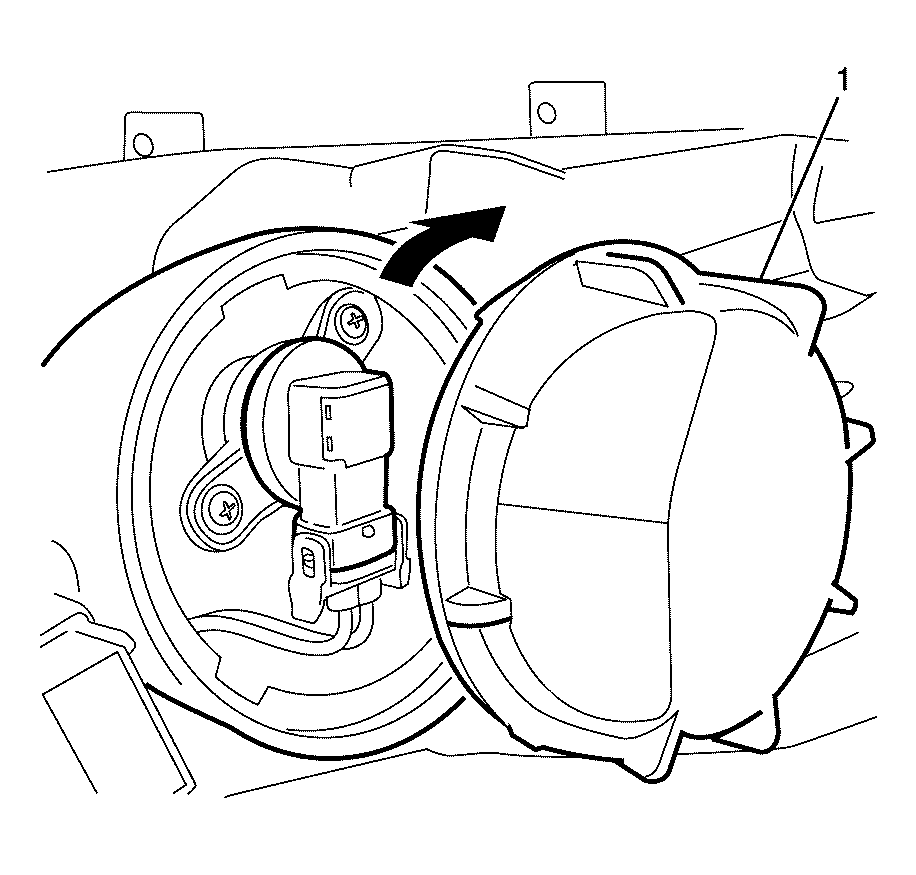
Note: Rotate the high beam headlamp dust cap (2) clockwise to install.

Note: Ignore step 5 if access to the right headlamp was required.

Note: Ignore Steps 6 and 7 if access to the left headlamp was required.
Note: Align the tab and keyway (2) and install the coolant recovery reservoir fill neck by pushing the neck (1) down into the coolant recovery reservoir (3).

