For 1990-2009 cars only
Special Tools
| • |
| • |
| • |
| • |
| • |
| • |
| • |
Removal Procedure
- Remove the crankshaft balancer. Refer to Crankshaft Balancer Replacement.
- Remove the engine front cover. Refer to Engine Front Cover Replacement.
- Remove the oil pump. Refer to Oil Pump, Screen, and Crankshaft Oil Deflector Replacement.
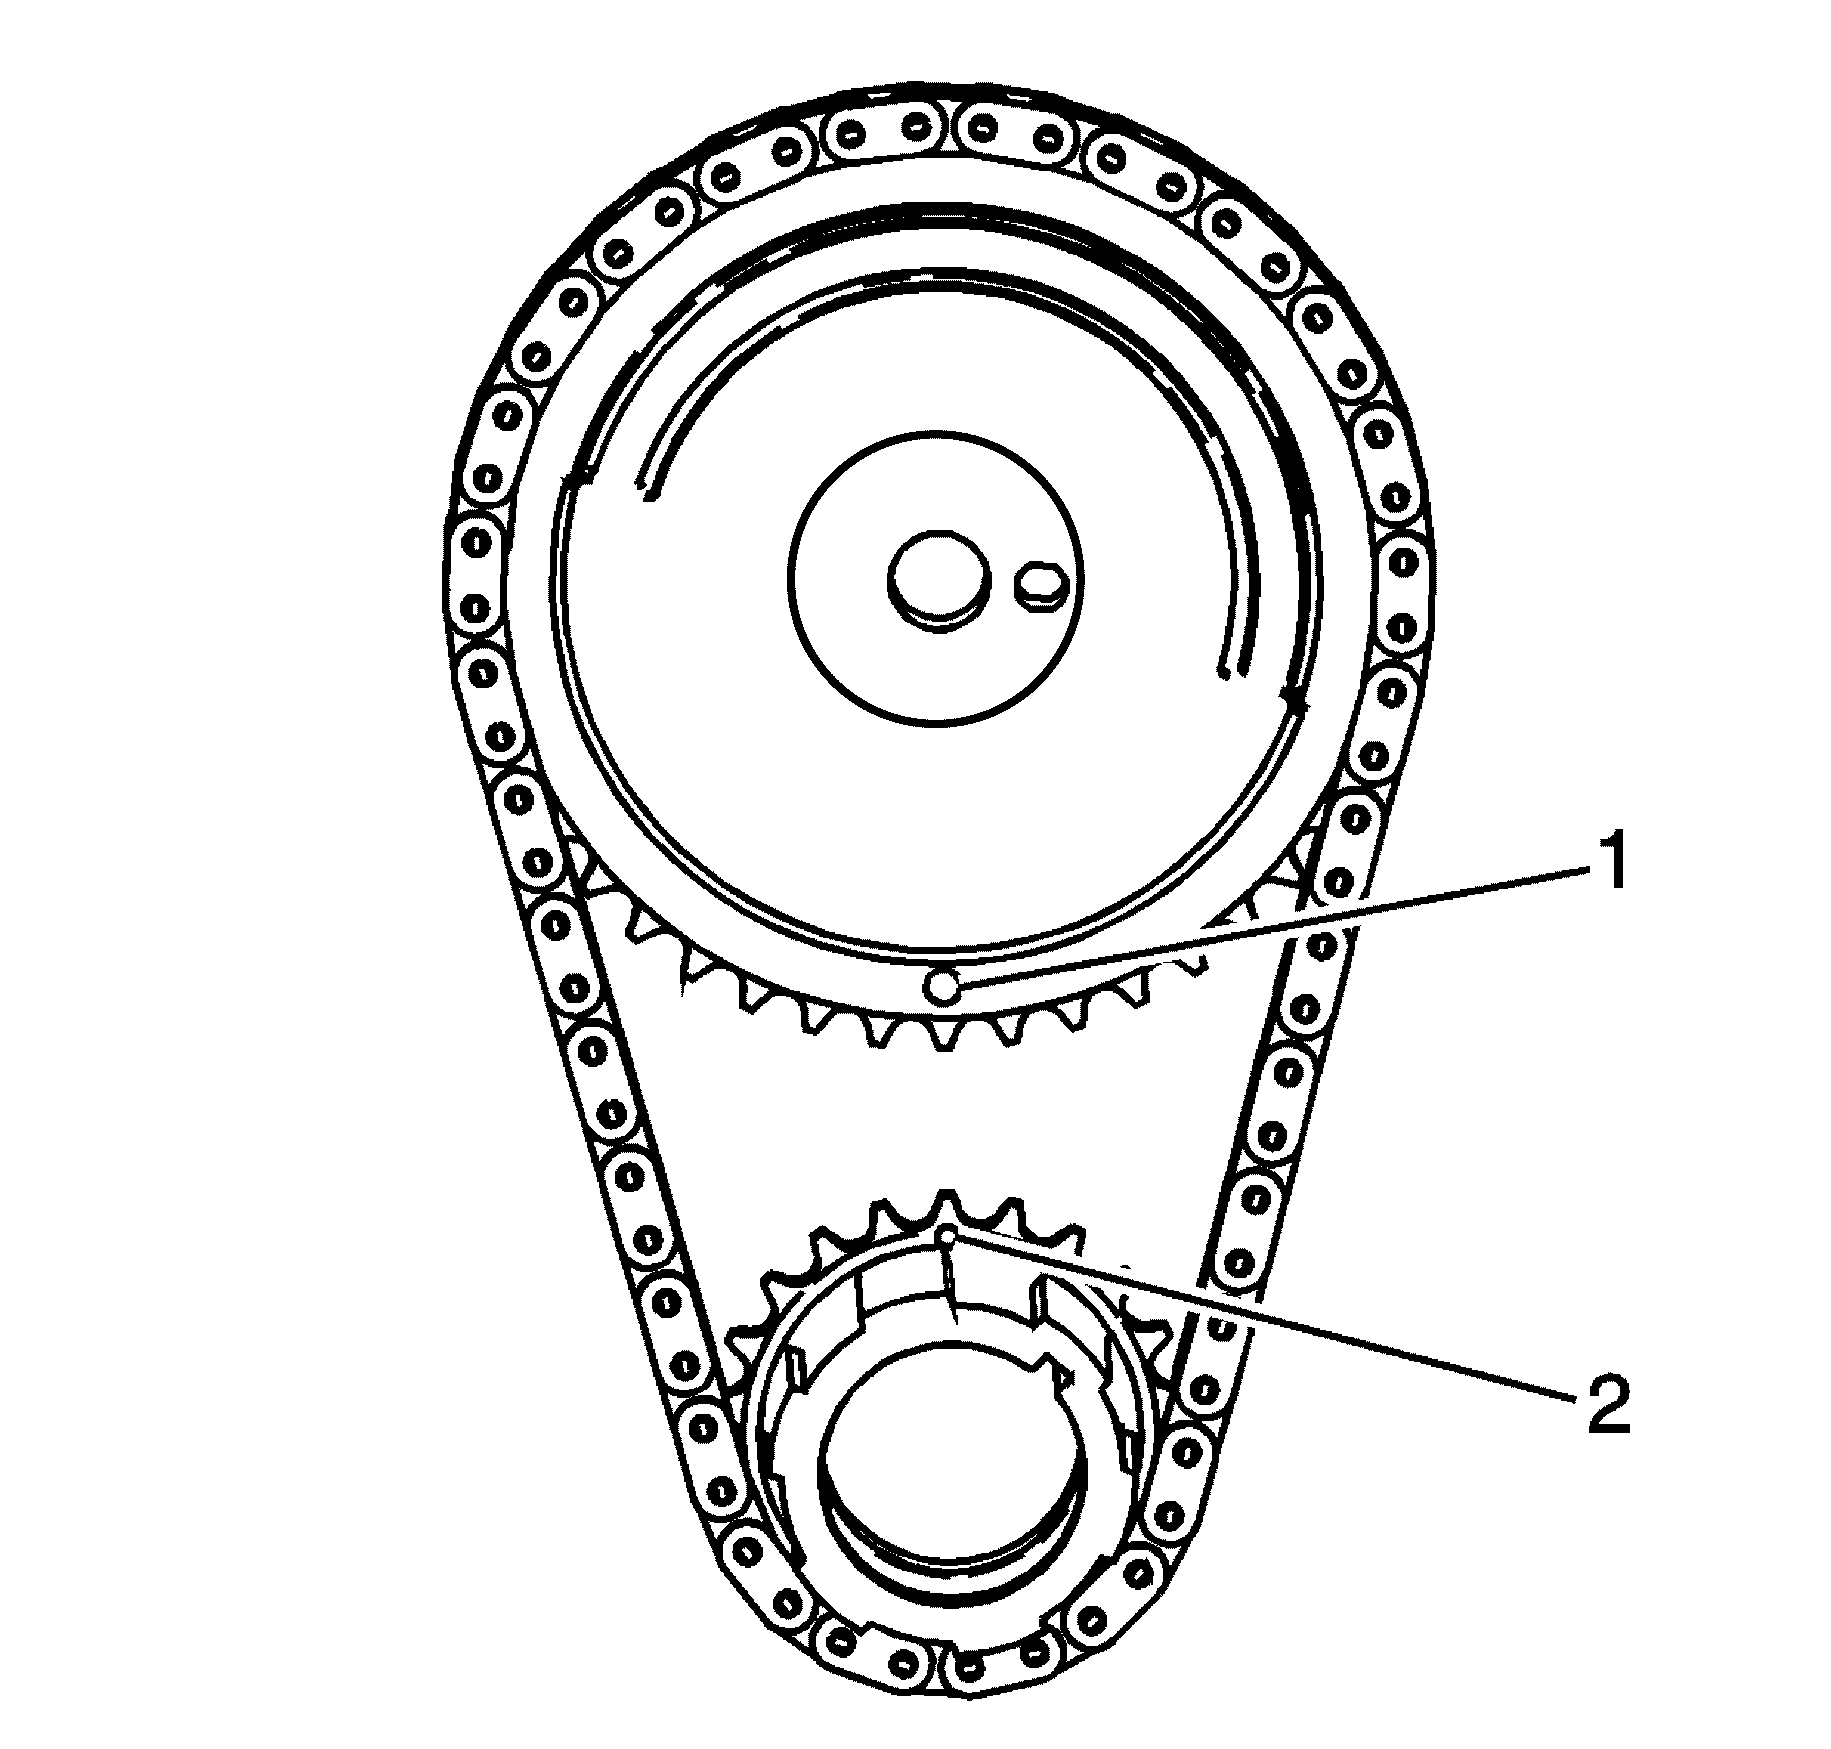
- Inspect the sprockets for correct alignment. The mark on the camshaft sprocket (1) should be located in the 6 o'clock position and the mark on the crankshaft sprocket (2) should be located in the 12 o'clock position.
- Remove the timing chain and sprockets. Refer to Timing Chain and Sprocket Removal.

Caution: Do not turn the crankshaft assembly after the timing chain has been removed in order to prevent damage to the piston assemblies or the valves.
Installation Procedure
- Install the timing chain and sprockets. Refer to Timing Chain and Sprocket Installation.
- Install the oil pump. Refer to Oil Pump, Screen, and Crankshaft Oil Deflector Replacement.
- Install the engine front cover. Refer to Engine Front Cover Replacement.
- Install the crankshaft balancer. Refer to Crankshaft Balancer Replacement.
