Special Tools
J 45747 Fuel Tank Sender Wrench
Removal Procedure
- Remove the fuel tank. Refer to Fuel Tank Replacement.
- Disconnect the electrical connector (1) from the primary fuel tank module.
- Remove the fuel supply tube. Refer to Plastic Collar Quick Connect Fitting Service.
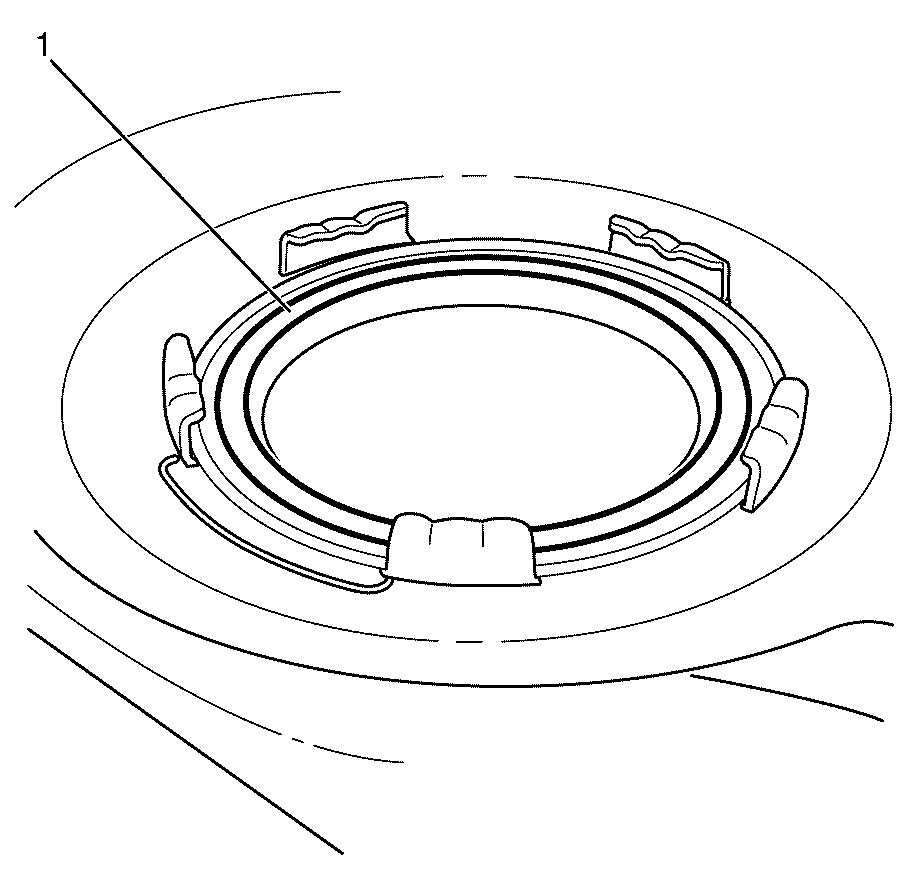
- Rotate the cam lock ring (1) counter-clockwise using the J 45747 .
- Remove the cam lock ring (1) from the fuel tank.
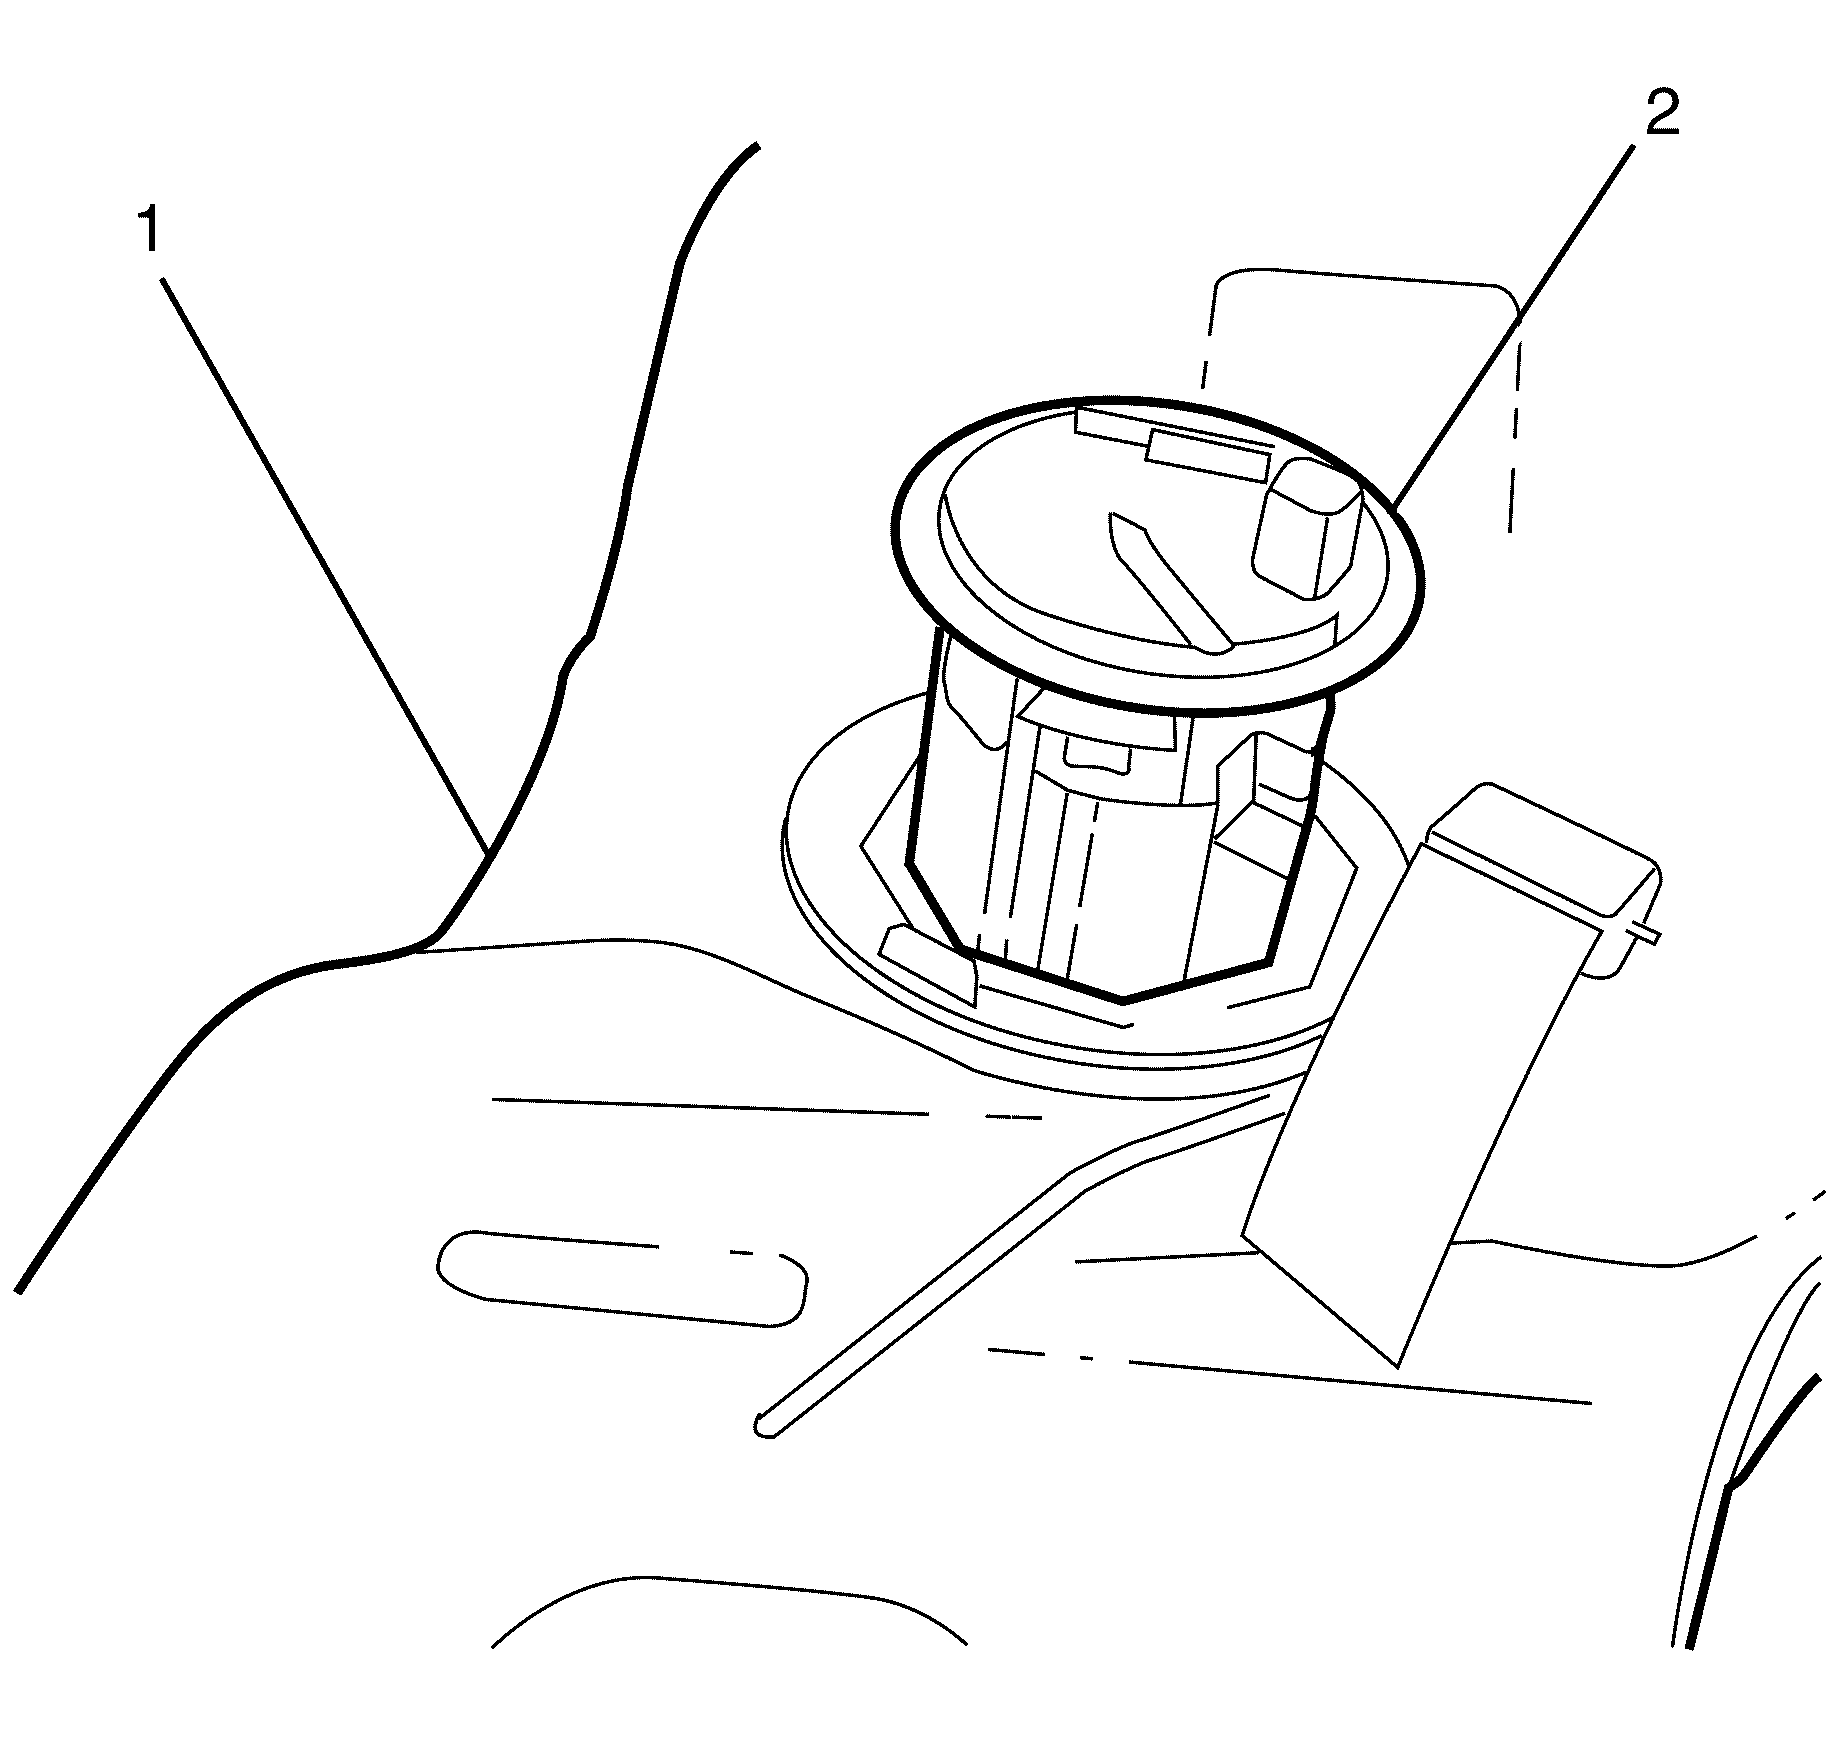
- Carefully lift the primary fuel tank module (1) from the fuel tank only enough to access the transfer tube (2).
- Disconnect the fuel transfer tube from the module assembly (2).
- Remove the primary fuel tank module (1) from the fuel tank (2).
- Remove the primary fuel tank module seal (1) from the primary fuel tank module.
Warning: Refer to Gasoline/Gasoline Vapors Warning in the Preface section.
Warning: Refer to Safety Glasses Warning in the Preface section.
Danger: To avoid any vehicle damage, serious personal injury or death when major components are removed from the vehicle and the vehicle is supported by a hoist, support the vehicle with jack stands at the opposite end from which the components are being removed and strap the vehicle to the hoist.
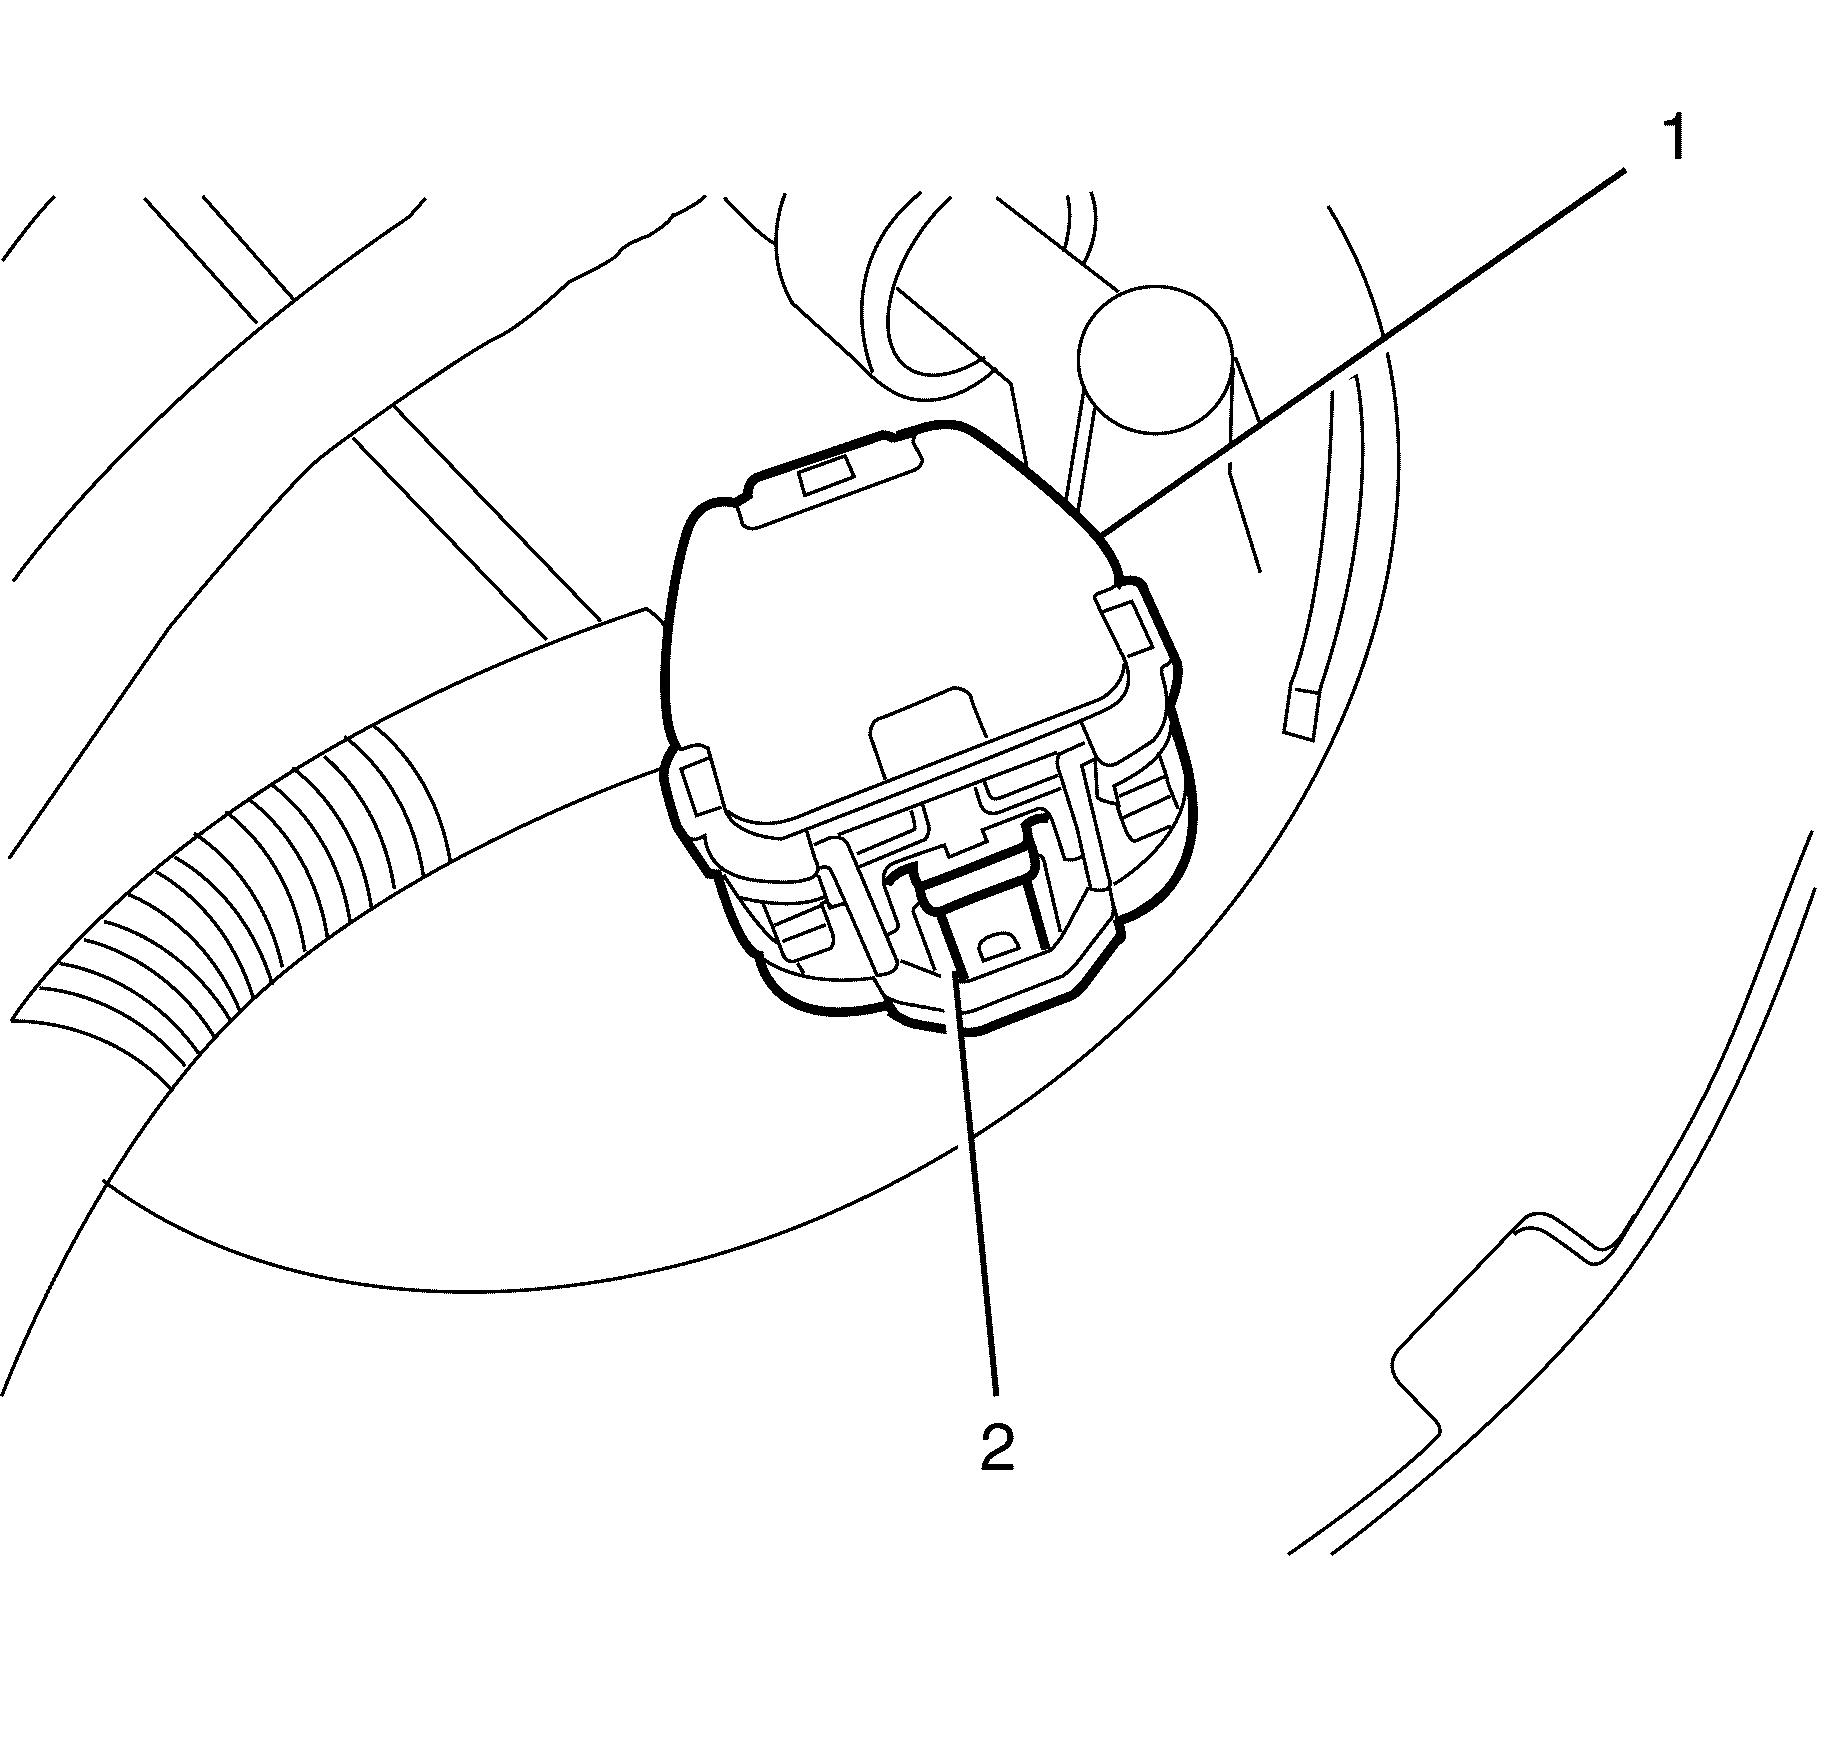
Note: Press release tab (2) on the electrical connector to release.
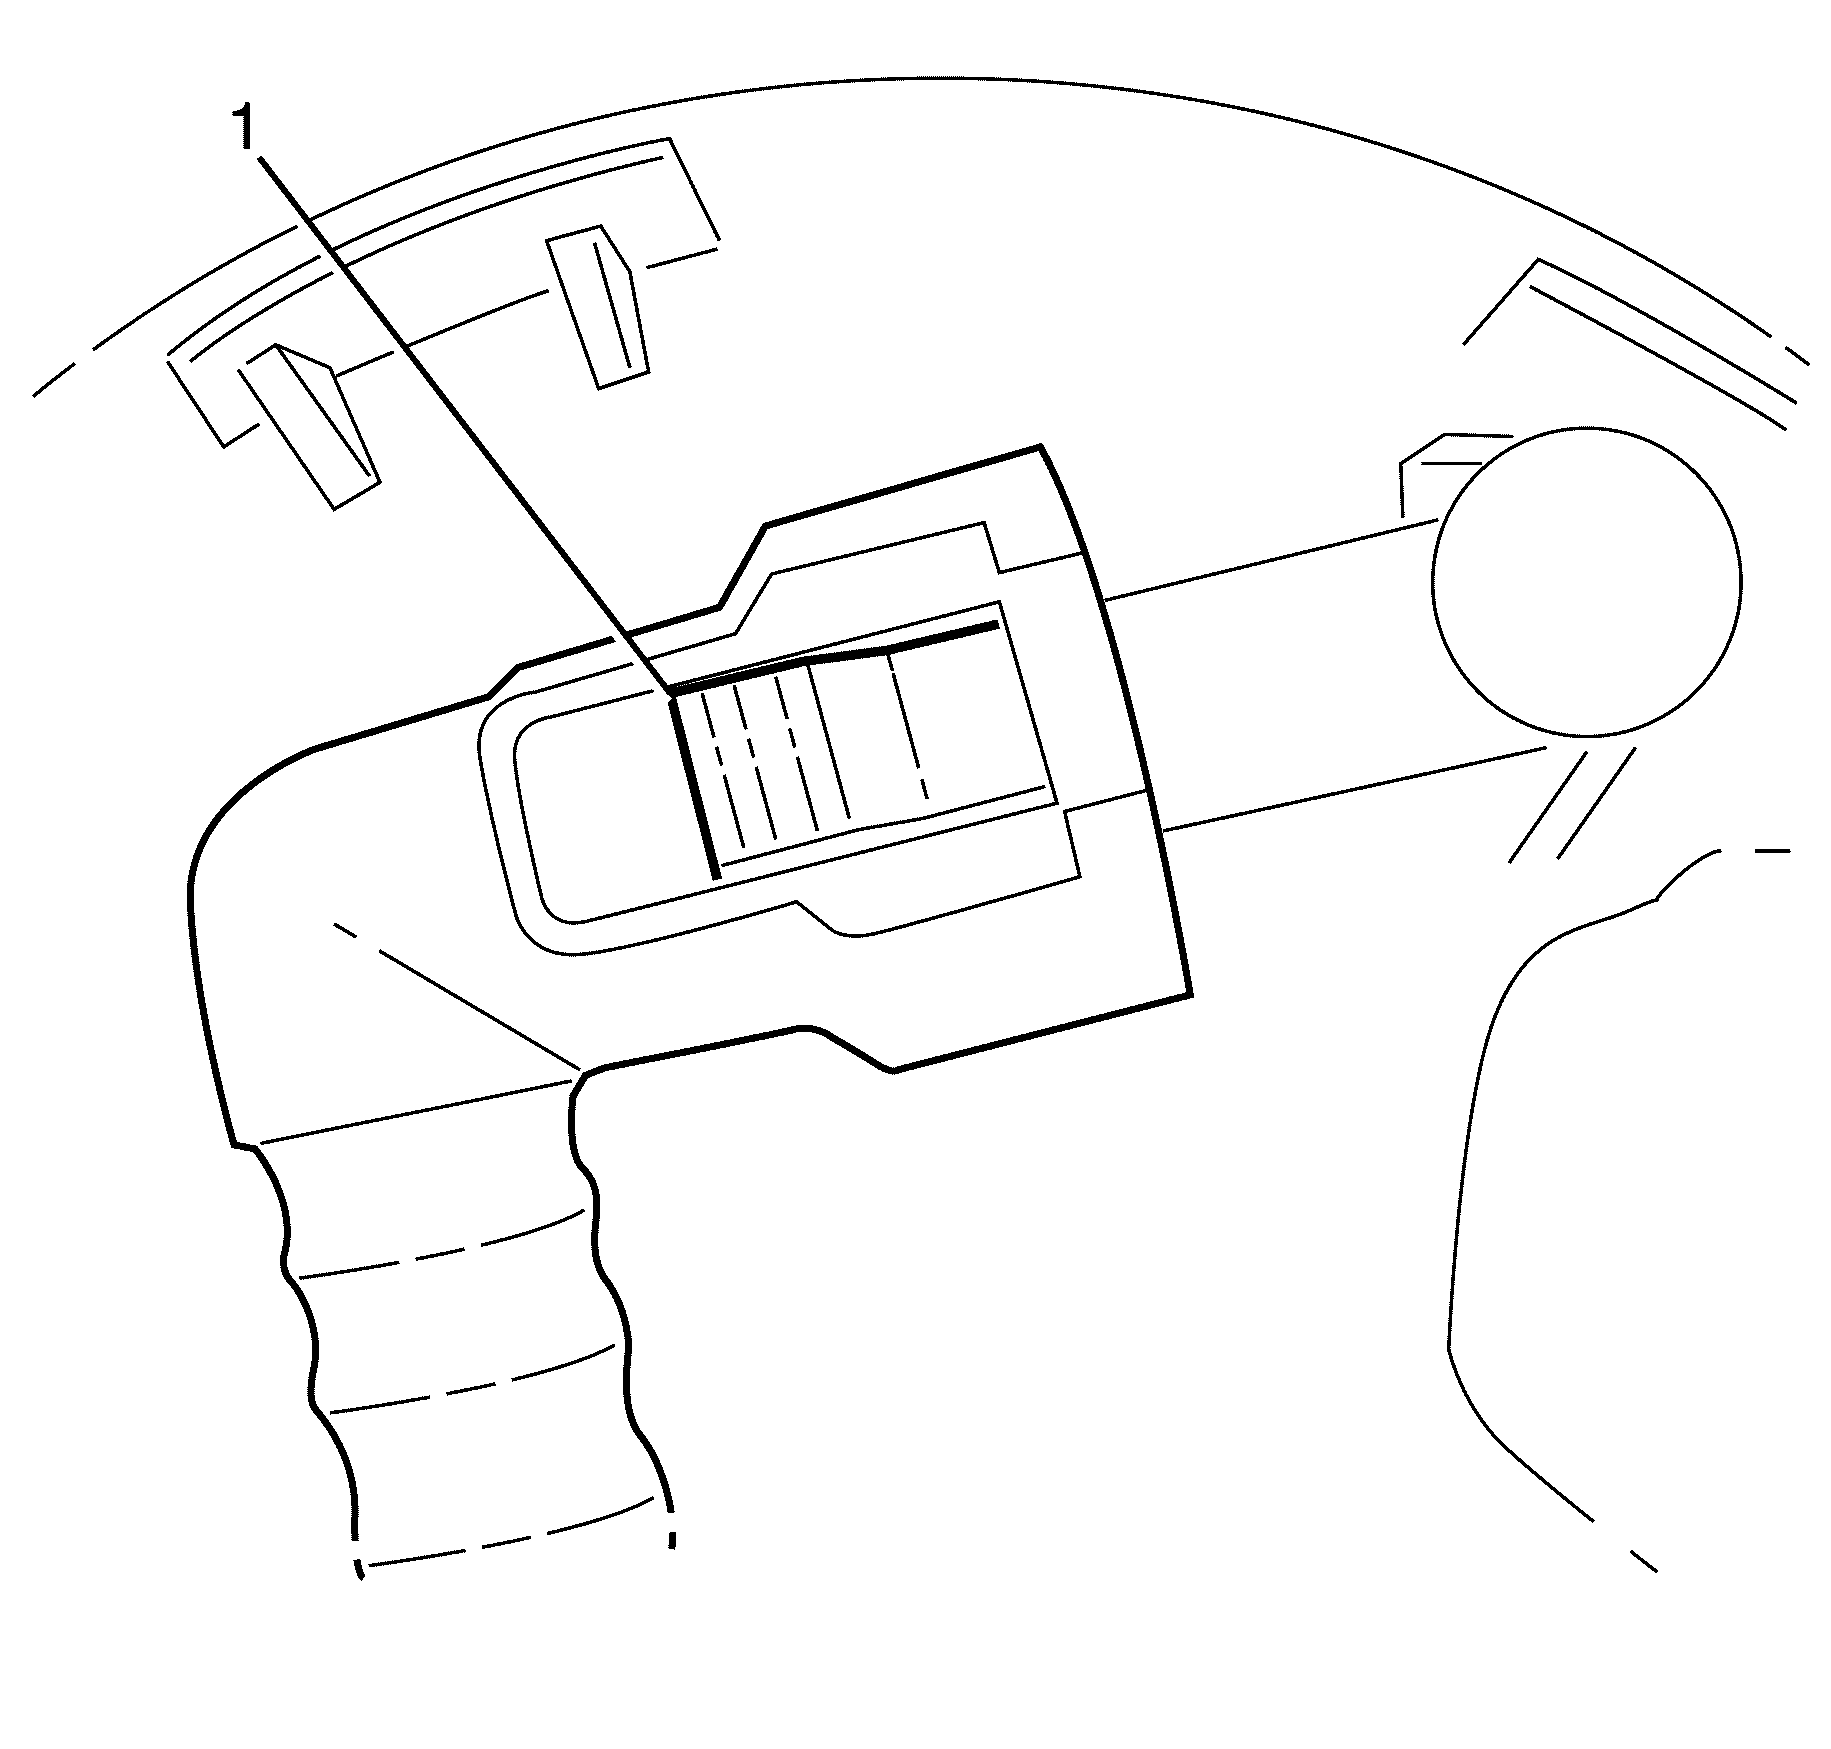
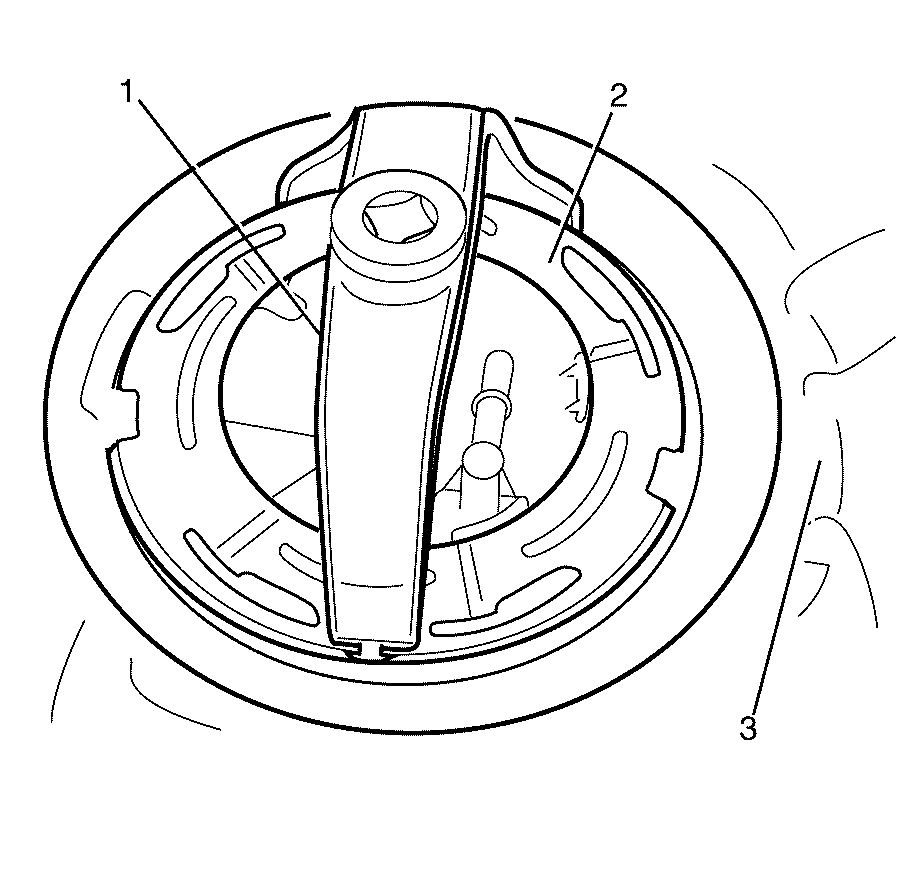
Note: Do not allow the tool to come in contact with the fuel pipes while unlocking the cam lock ring.
Note: The cam lock ring (1) is a single use part and therefore must be discarded after removal.
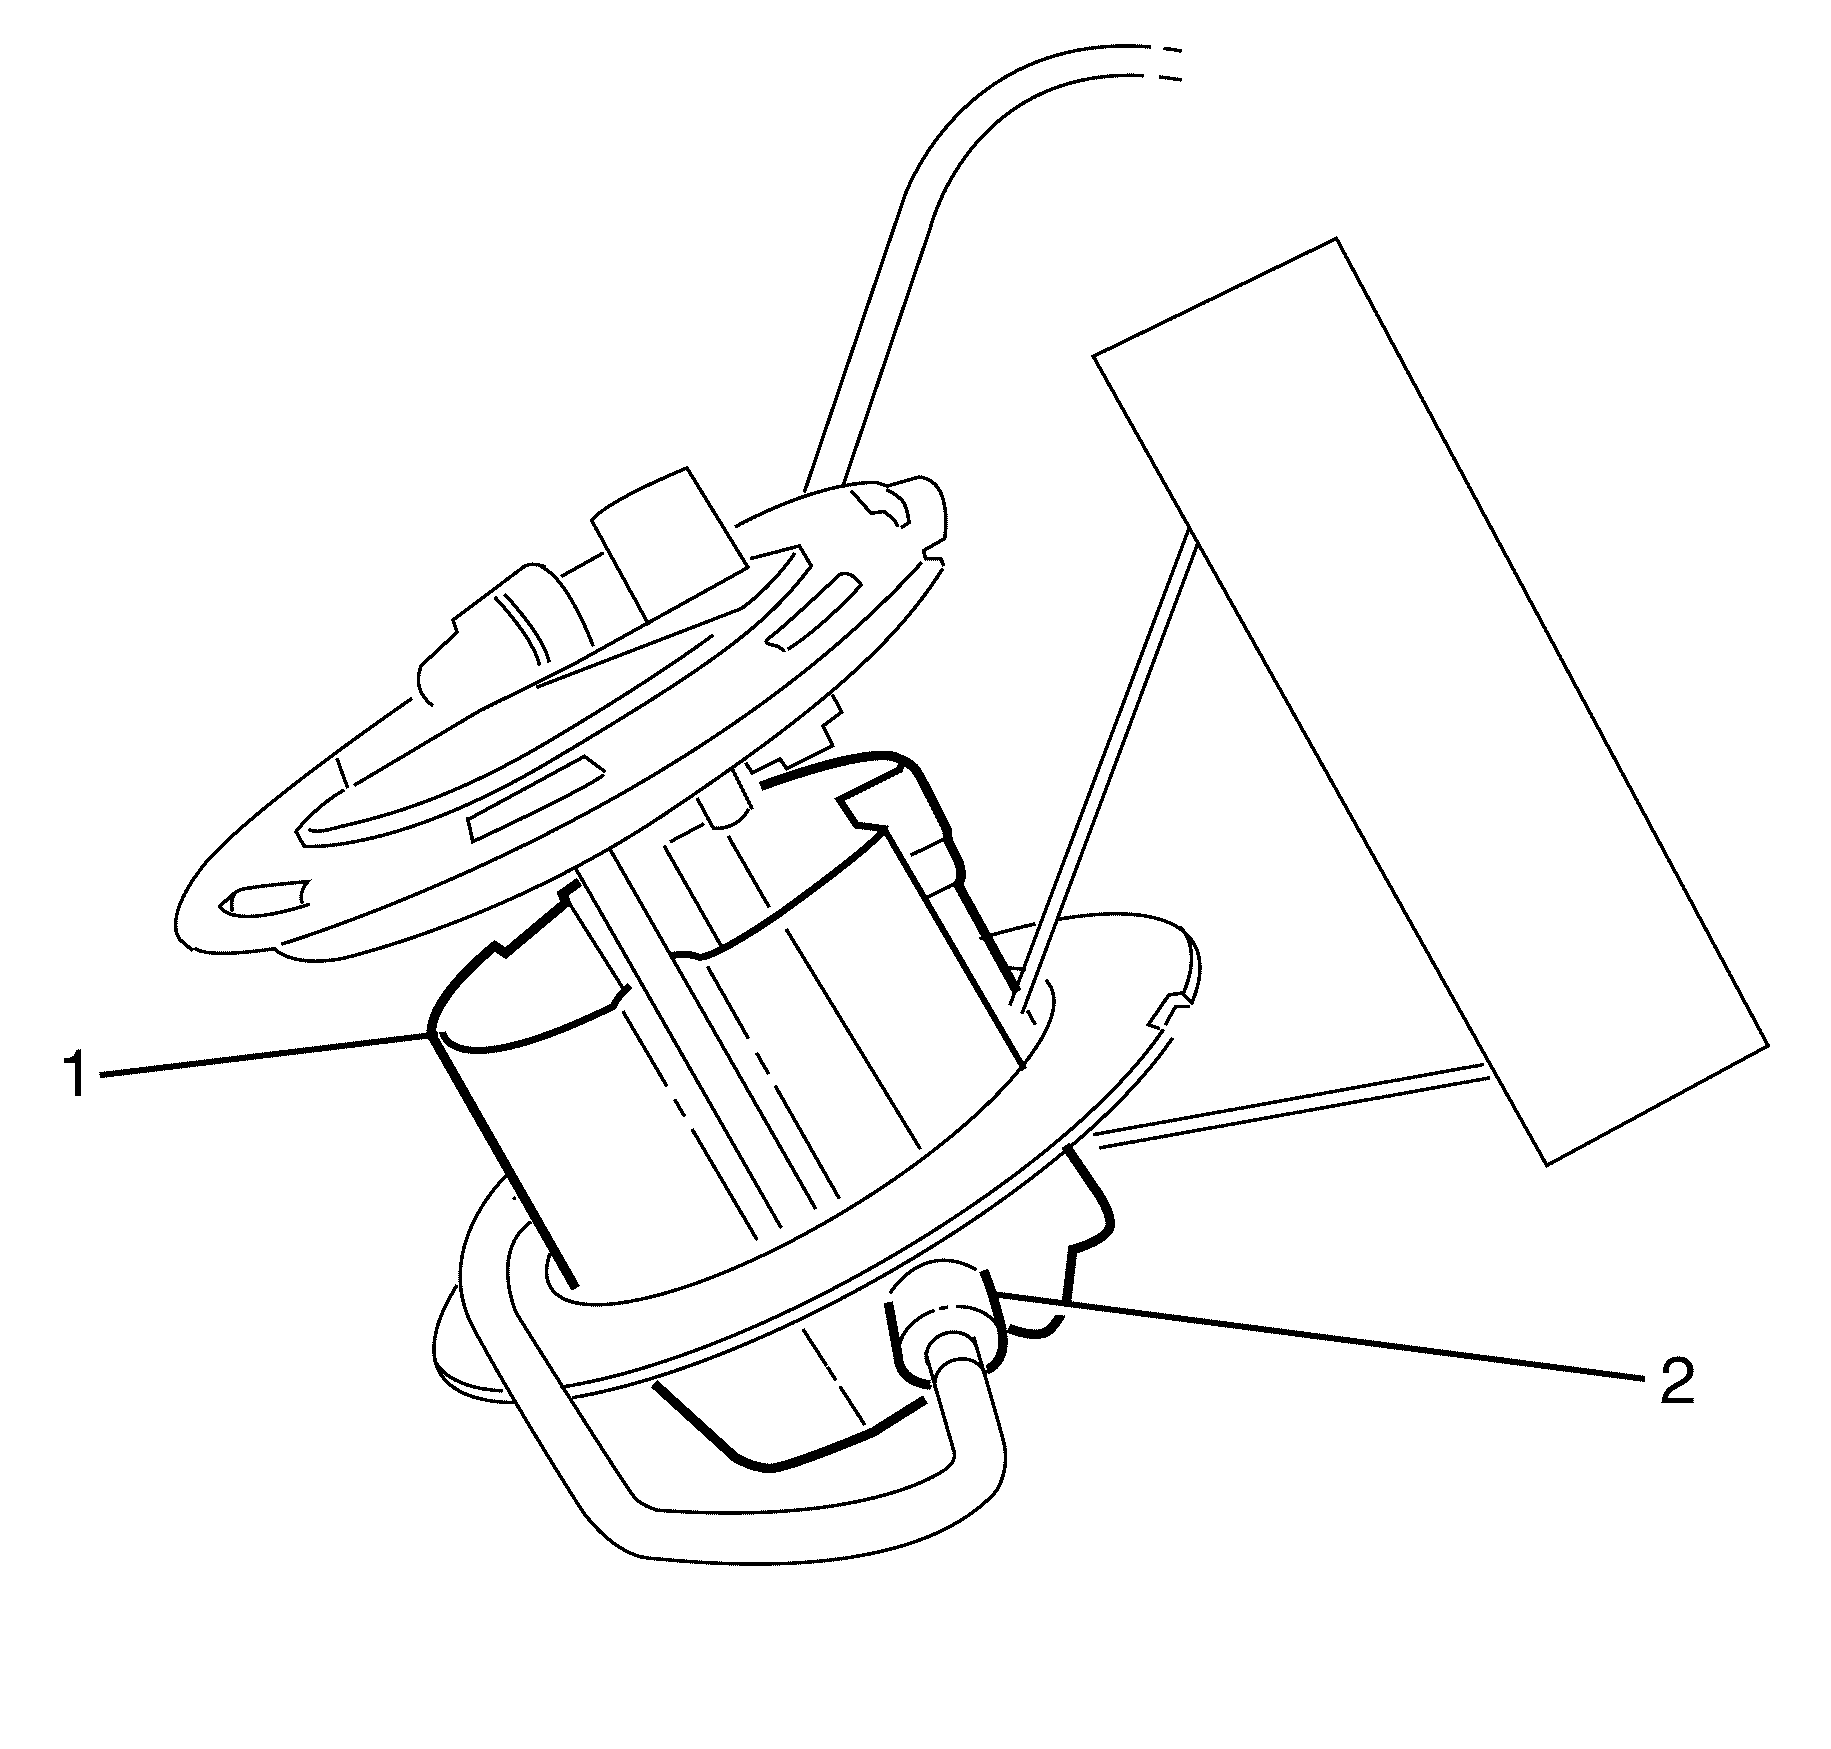
Note: The primary fuel tank module (1) is vertical in the installed position, but pivots for removal.
Discard the primary fuel tank module seal.
Installation Procedure
- Place a NEW primary fuel tank module seal (1) over the primary fuel tank module (2).
- Carefully install the primary fuel tank module (1) to the fuel tank only enough to access the transfer tube (2).
- Connect the fuel transfer tube to the primary fuel tank module assembly (2).
- Install the primary fuel tank module (1) to the fuel tank (2).
- Install a NEW cam lock ring (1) to the fuel tank.
- Rotate the cam lock ring (1) clockwise using the J 45747 until fully seated.
- Connect the electrical connector (1) to the primary fuel tank module.
- Install the fuel supply tube to the fuel tank module. Refer to Plastic Collar Quick Connect Fitting Service.
- Install the fuel tank. Refer to Fuel Tank Replacement.

Note: Make sure the seal bead is facing the fuel tank.
Note: Lubricate the seal before installation with an approved lubricant.

Note: The primary fuel tank module (1) is vertical in the installed position, but pivots for installation/removal.


Note: Do not allow the tool to come in contact with the fuel pipes while locking the cam lock ring.


