2-Way Remote Start and Door Lock Transmitter Package Installation AP3
Accessories Part Number
92213204
Kit Usage
This kit is designed to add 2-way remote start with extended range and enhanced functionality. It is for vehicles equipped with remote vehicle start from the factory (vehicles with option code AP3).
Qty | Description |
|---|---|
1 | 2-Way Remote Start and Information Display Receiver (2-Way RCDLR) |
1 | 2-Way Remote Start and Door Lock Transmitter (With Information Display) |
1 | Extended Range Antenna |
1 | 2-Way Advanced Remote Start Owner Manual |
1 | Parts Bag |
Special Tools
| • | Scan Tool with capability of communicating on GMLAN |
| • | Service Programming System (SPS - TIS2WEB or equivalent) |
| • | J-46079 Tire Pressure Monitor Diagnostic Tool (if the vehicle is equipped with the Tire Pressure Monitoring System (TPMS)) |
| • | Surface Cleaner (50 percent isopropyl alcohol, FS-1082 hi-flash naphtha or equivalent) |
| • | Adhesion Promoter GM P/N 12378462 (Canadian P/N 10953554) |
Procedure
- Replace the factory Remote Control Door Lock Receiver (RCDLR) with the 2-way RCDLR included in the kit. See Remote Control Door Lock Receiver and Theft Deterrent Module Replacement. Do not reassemble yet.
- Remove the passenger side "C" pillar trim. See Quarter Upper Trim Panel Replacement.
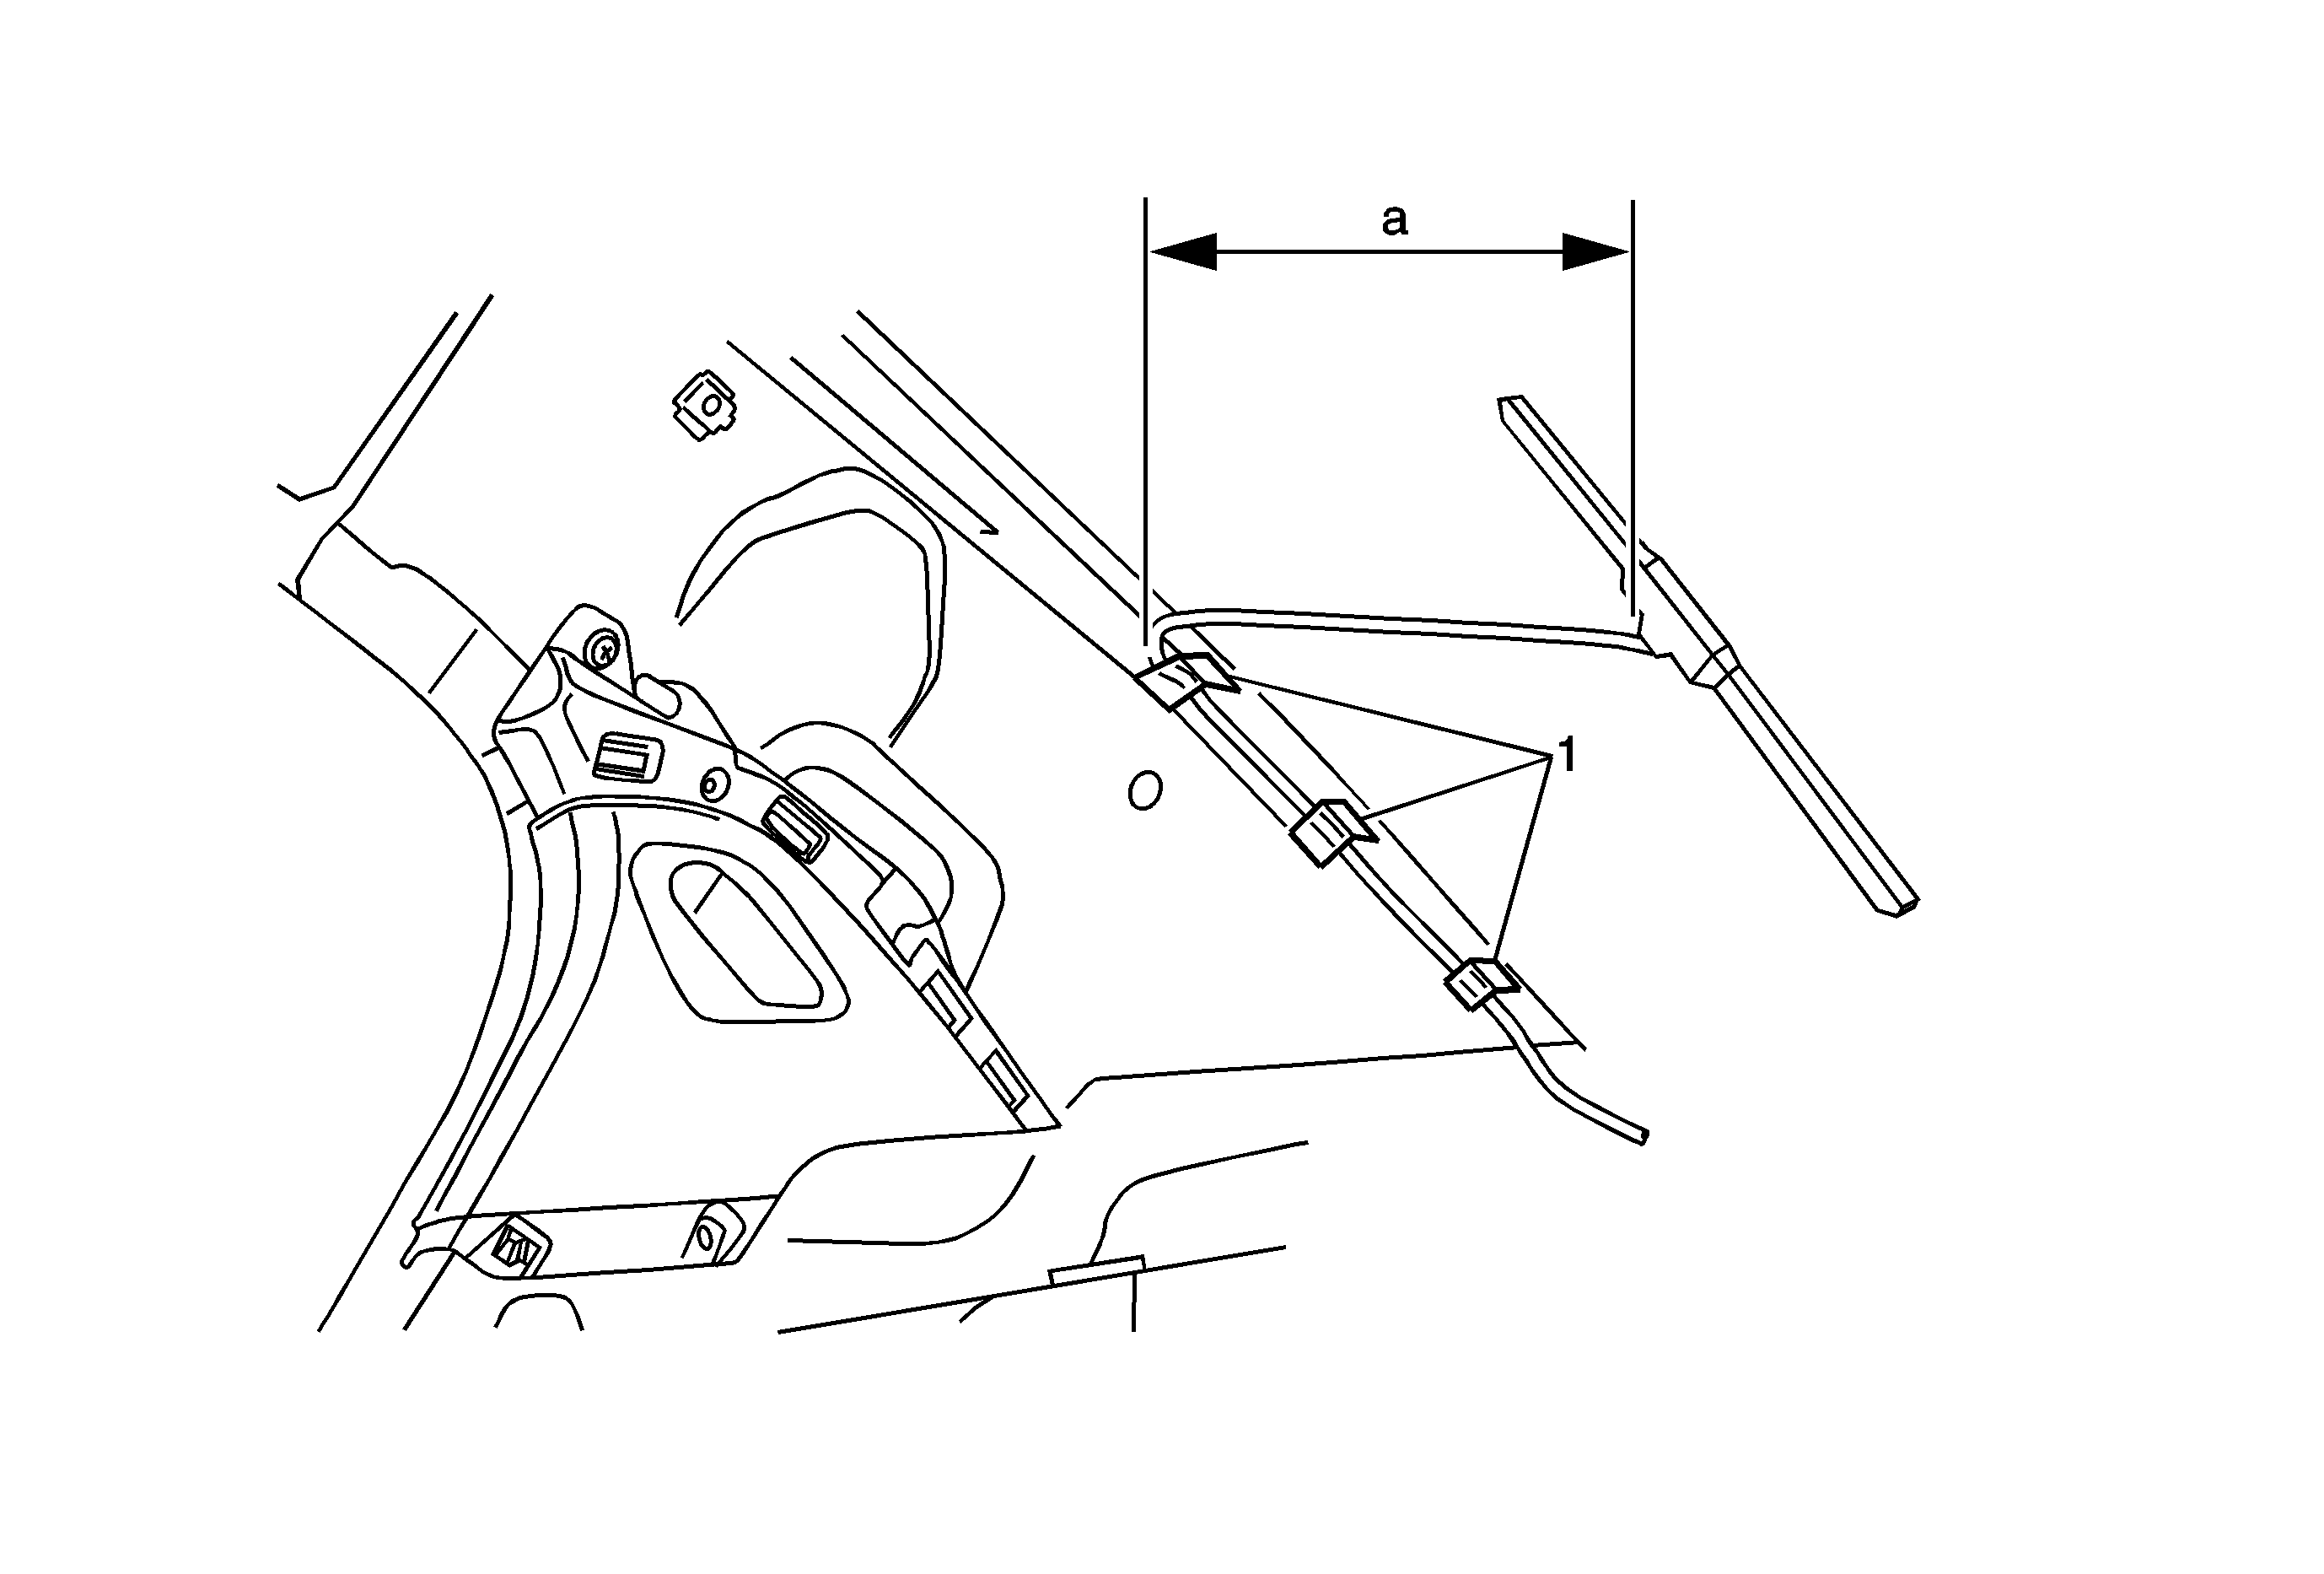
- Secure the antenna wire to the "C" pillar sheet metal using three Argent wire wraps (1) leaving 138 mm (5 7/16 in) (a) of wire from the antenna base to the first Argent wire wrap.
- Reassemble the passenger side "C" pillar trim.
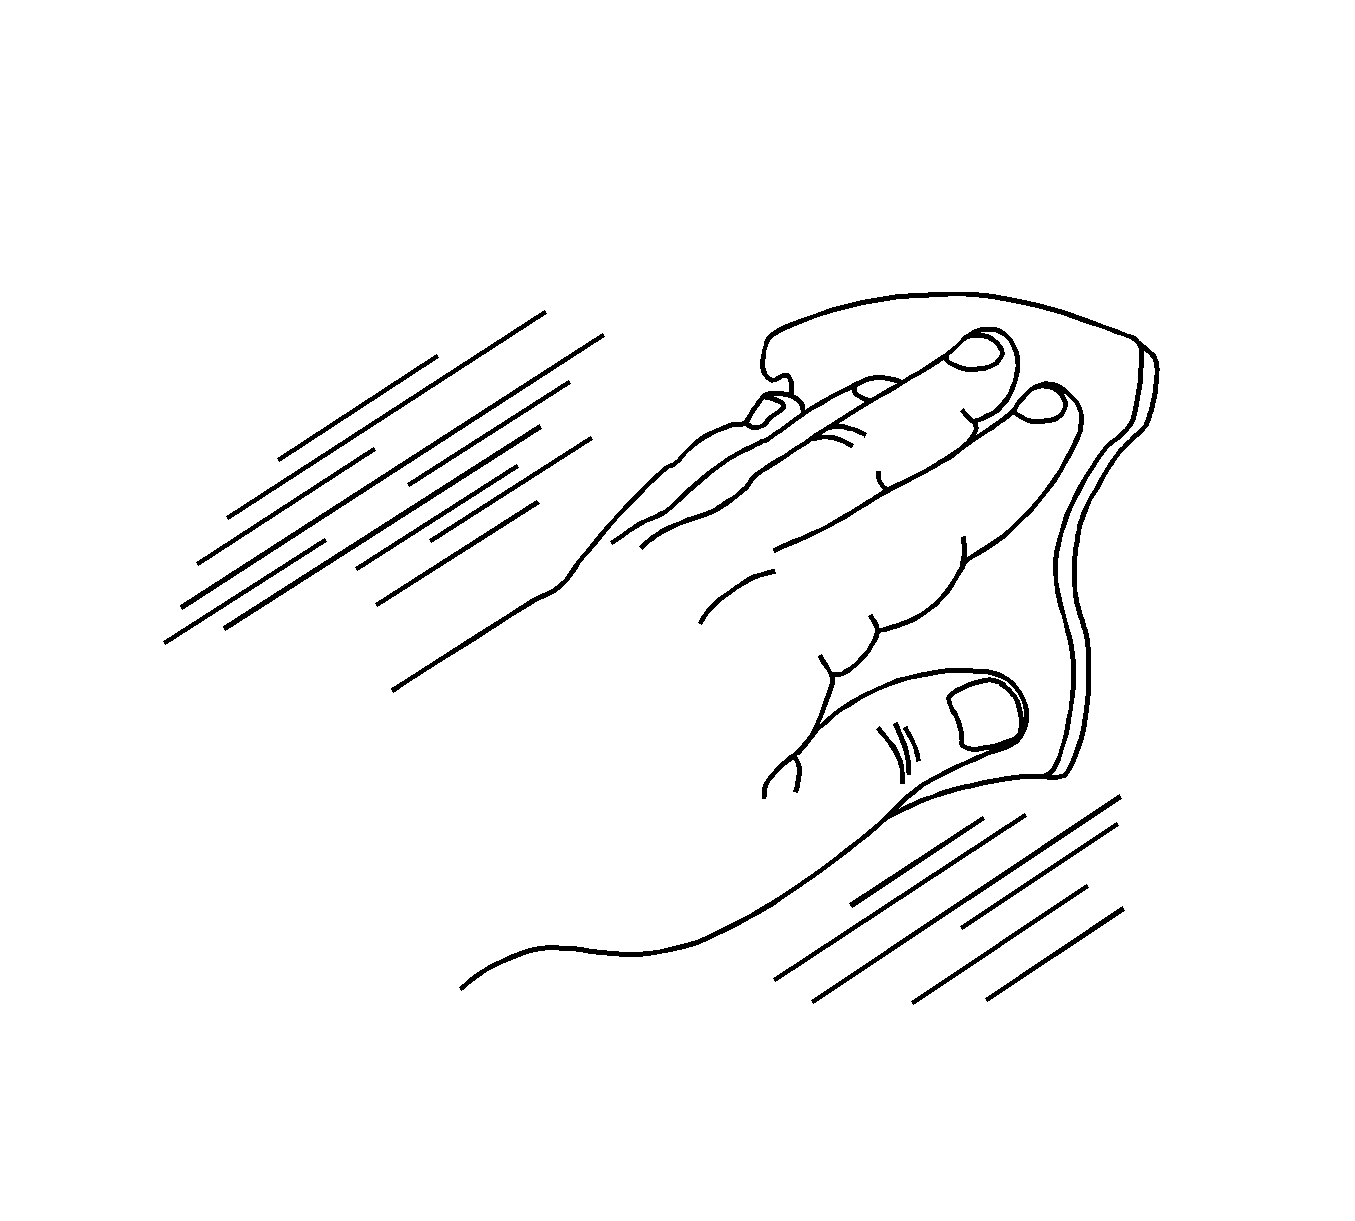
- Clean the antenna mounting location on the passenger side "C" pillar trim with an alcohol wipe.
- Dry the "C" pillar trim thoroughly using a lint free cloth.
- Apply Adhesion Promoter GM P/N 12378462 (Canadian P/N 10953554) to the area of the "C" pillar trim where the antenna will be mounted. Follow the adhesion promoter instructions on the product label.
- Remove the protective film from the adhesive pad on the antenna.
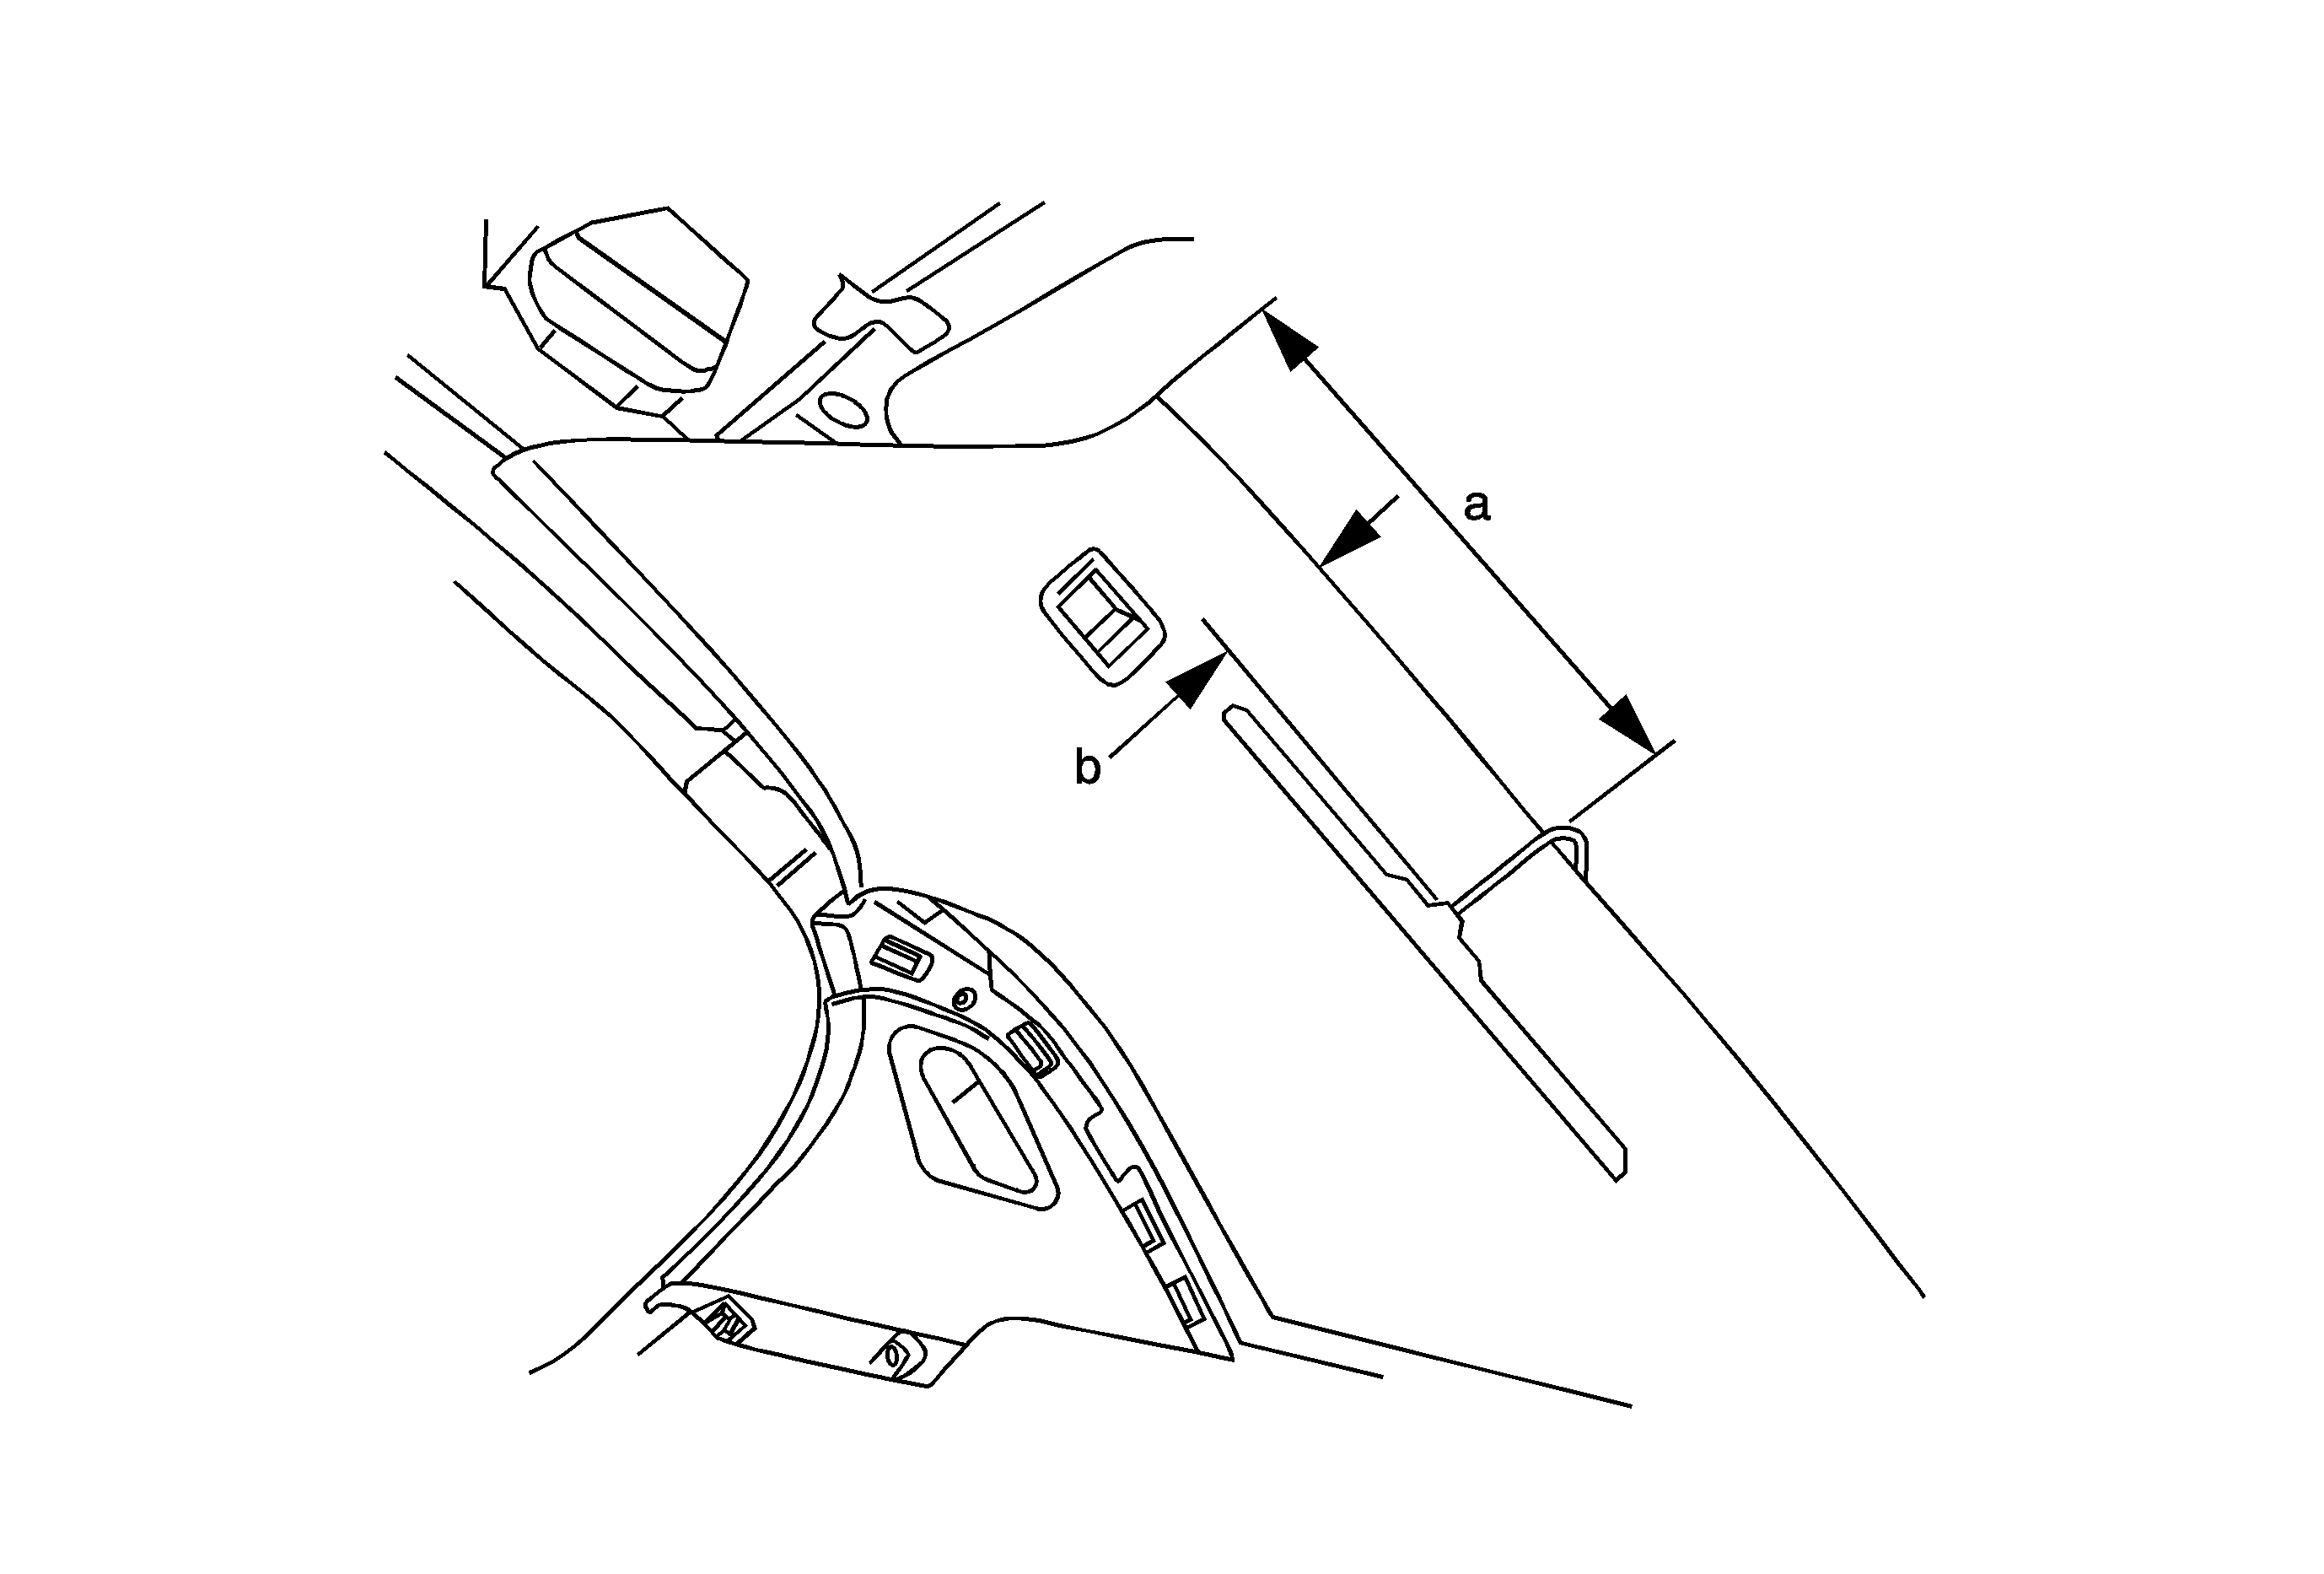
- Using the measurements , a=340 mm (13 3/8 in) and b=55 mm (2 3/16 in), attach the antenna to the passenger side "C" pillar trim.
- Press firmly on the antenna, including all four corners of the adhesive pad, in order to ensure proper adhesion to the trim panel.
- Hold pressure on the antenna for 10-30 seconds.
- Ensure that no gaps occur between the antenna adhesive pad and the "C" pillar trim.
- Secure antenna wire (1) with three wire wraps (2), to the existing factory harness (3).
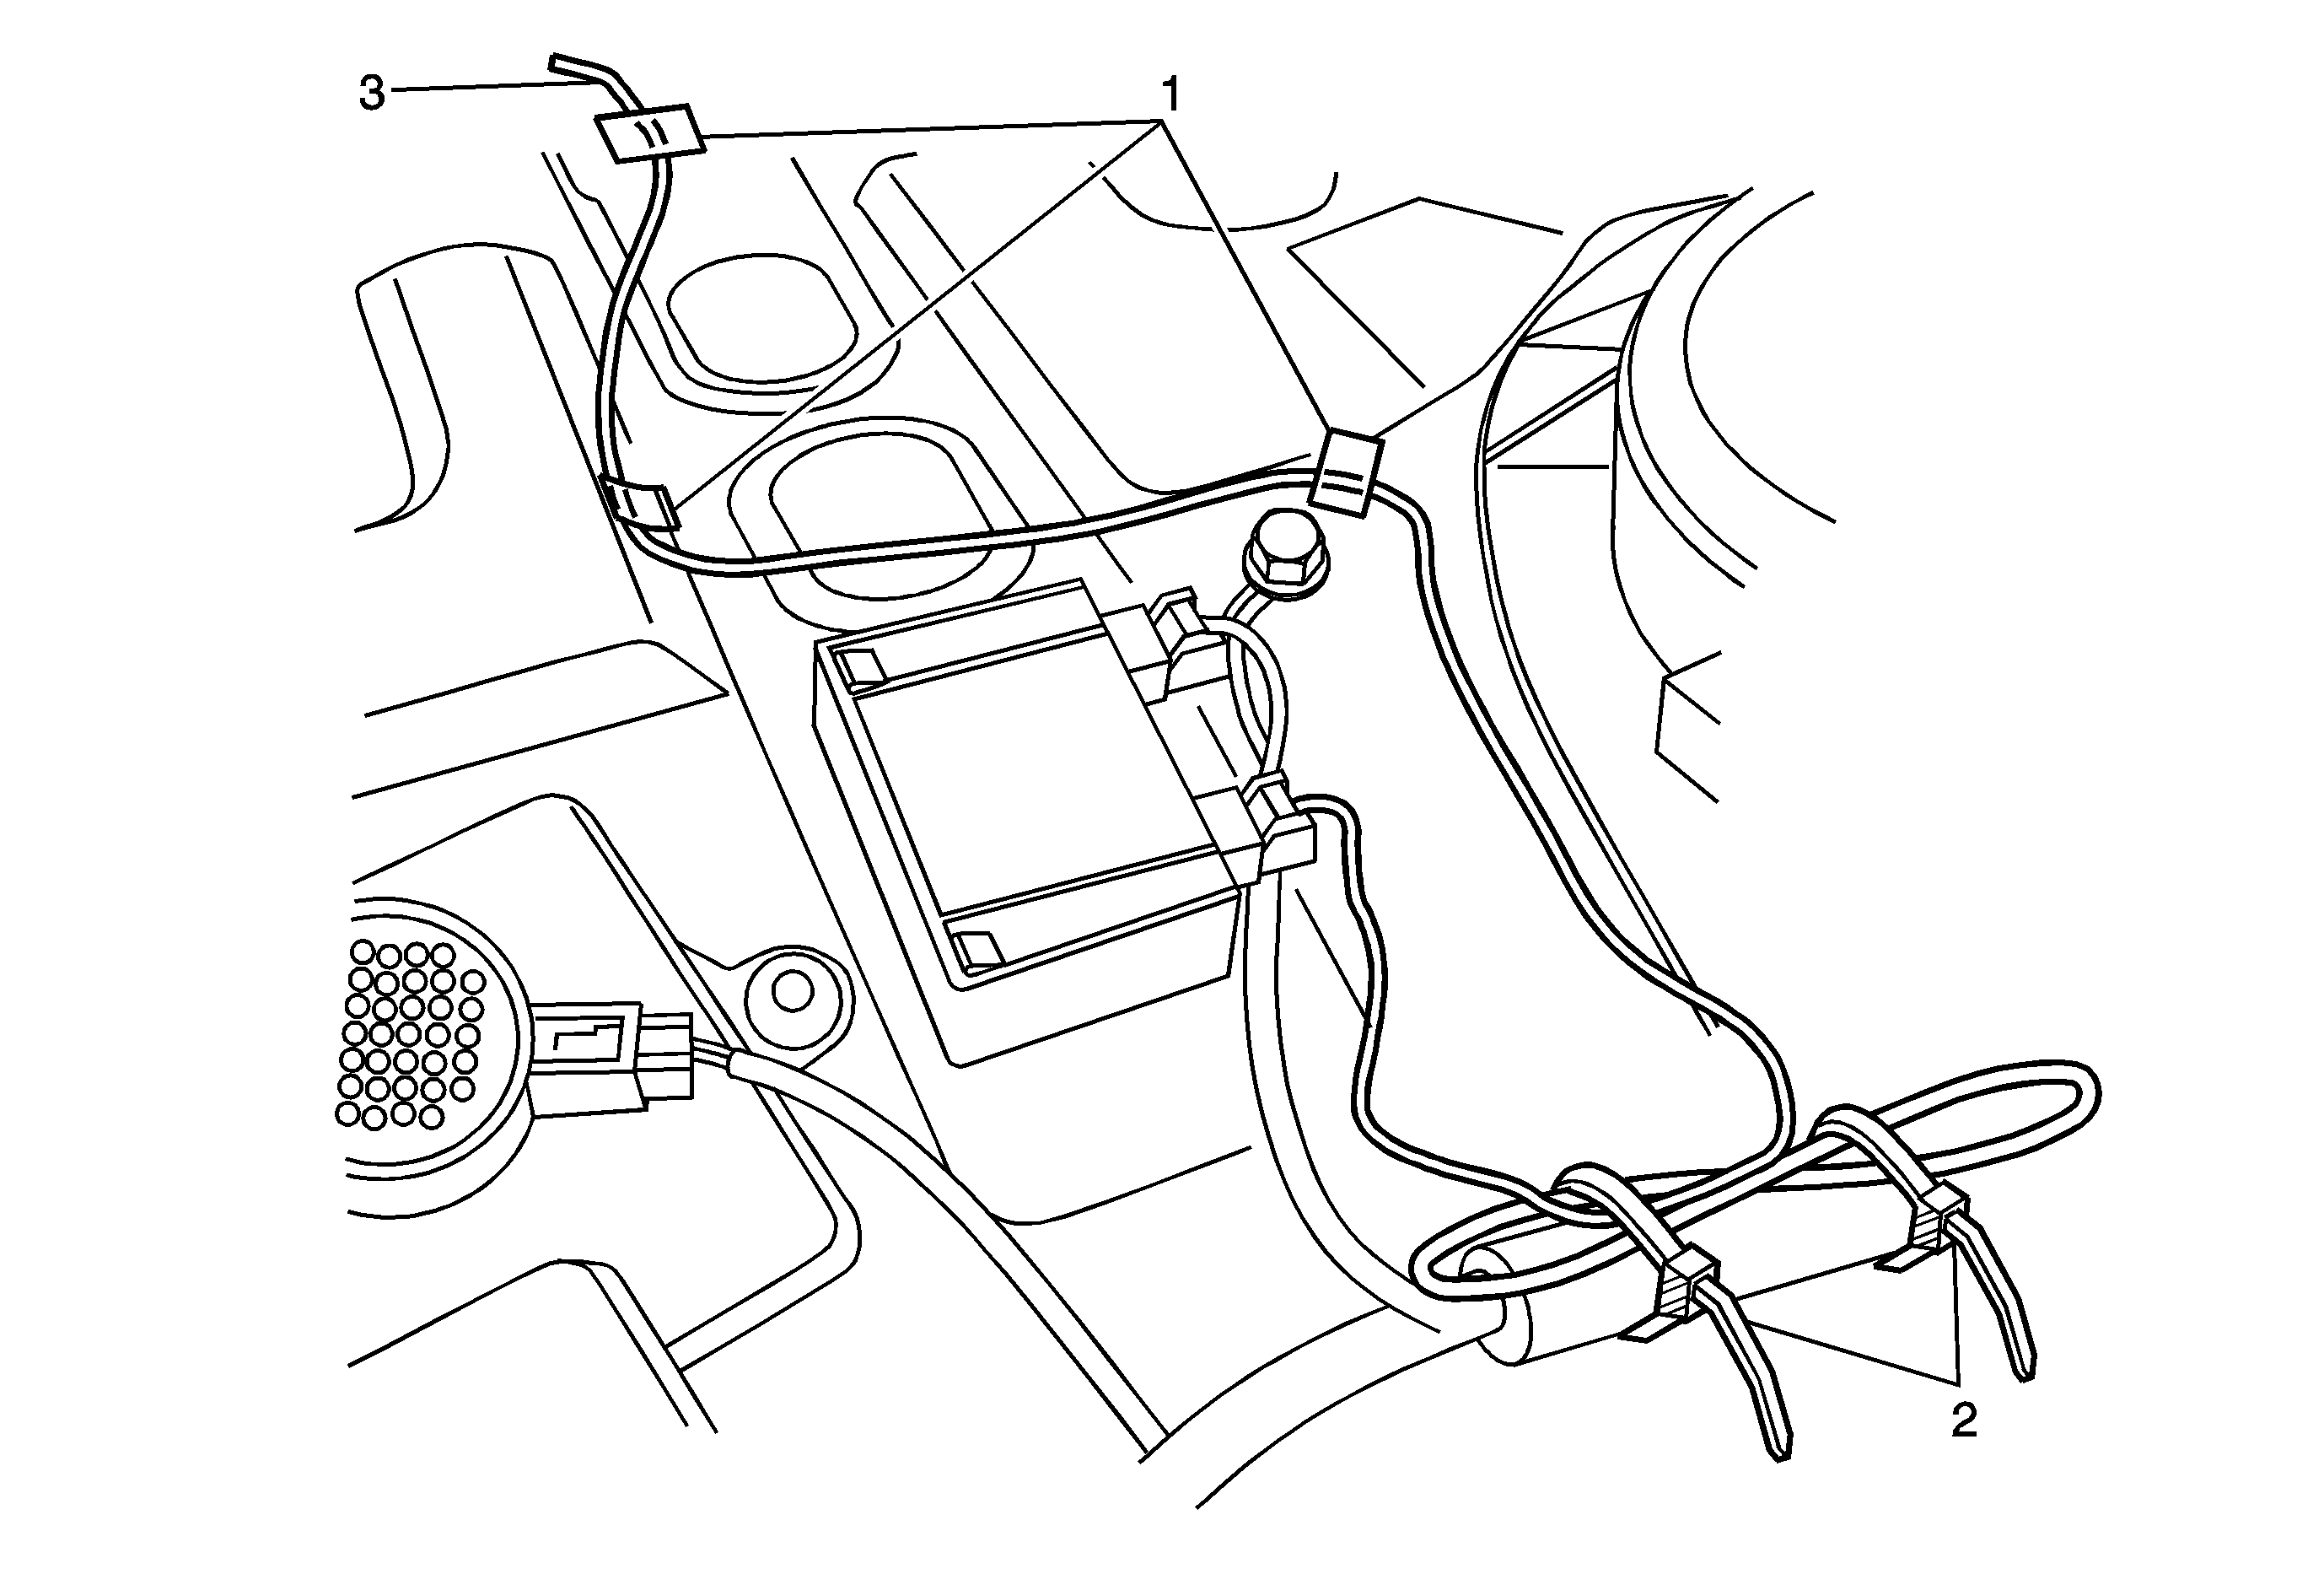
- Continue to route the antenna wire (3) towards the RCDLR, secure with three Argent wire wraps (1). Loop the excess antenna wire in a "Figure 8" and secure to the existing wire harness with two wire wraps (2).
- Remove the factory keyless entry antenna.
- Connect the antenna to the RCDLR.
- Program the new RCDLR. See Remote Control Door Lock Receiver Programming and Setup.
- Using the scan tool, retrieve any Diagnostic Trouble Codes (DTCs) from all of the modules.
- Clear all DTCs.
- Remove the scan tool.
- Drive the vehicle above 25 mph for at least two minutes. This is to update the tire pressure displays.
- Operate the 2-way and factory transmitters in order to verify correct system operation. See Keyless Entry System Description and Operation. Press a command button with the vehicle ignition ON in order to synchronize the 2-way transmitter clock to the vehicle clock.
- Add the transmitters to the customer key rings.
- Place the 2-Way Advanced Remote Start Owner Manual in the instrument panel compartment.
- Keep the vehicle dry. Allow 6-8 hours, at 15°C (60°F), for the antenna adhesive to cure after installation.
Note: Please review this entire procedure before trying to perform it.
Note:
• The adhesion promoter must be used to assure adequate bonding of the antenna. • Mask off or protect areas before applying the adhesion promoter. • Position the antenna according to the figure provided.
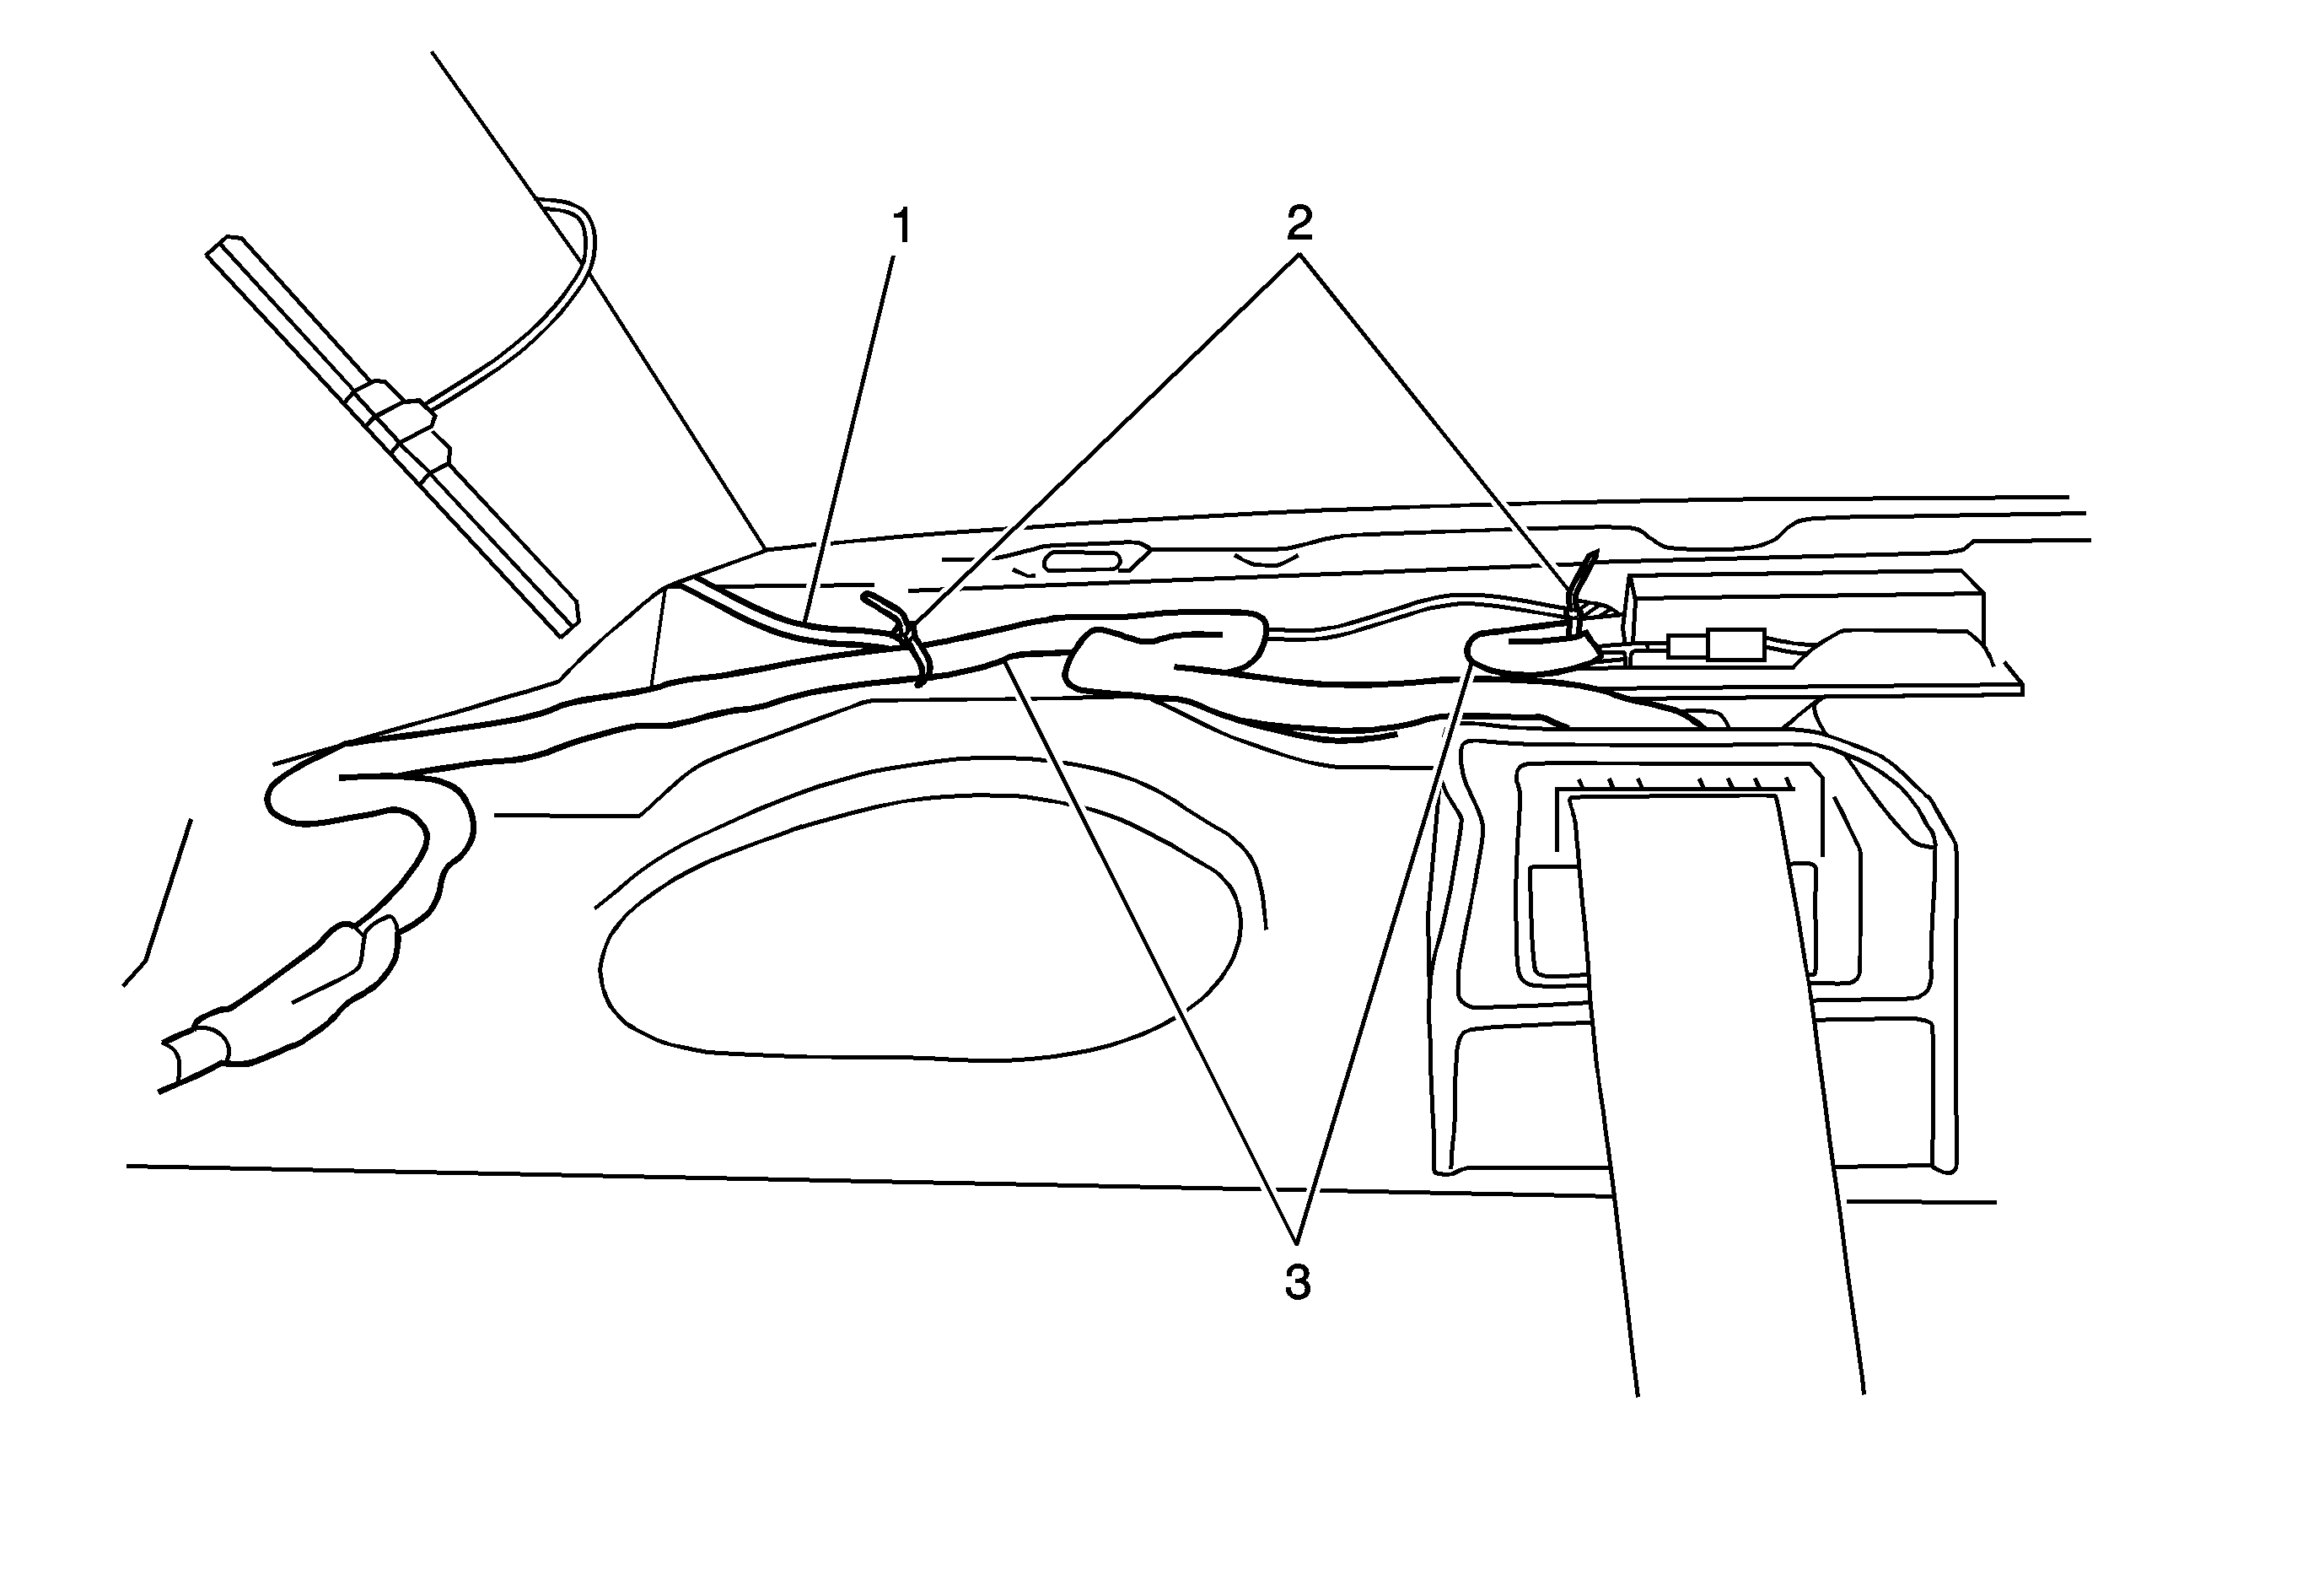
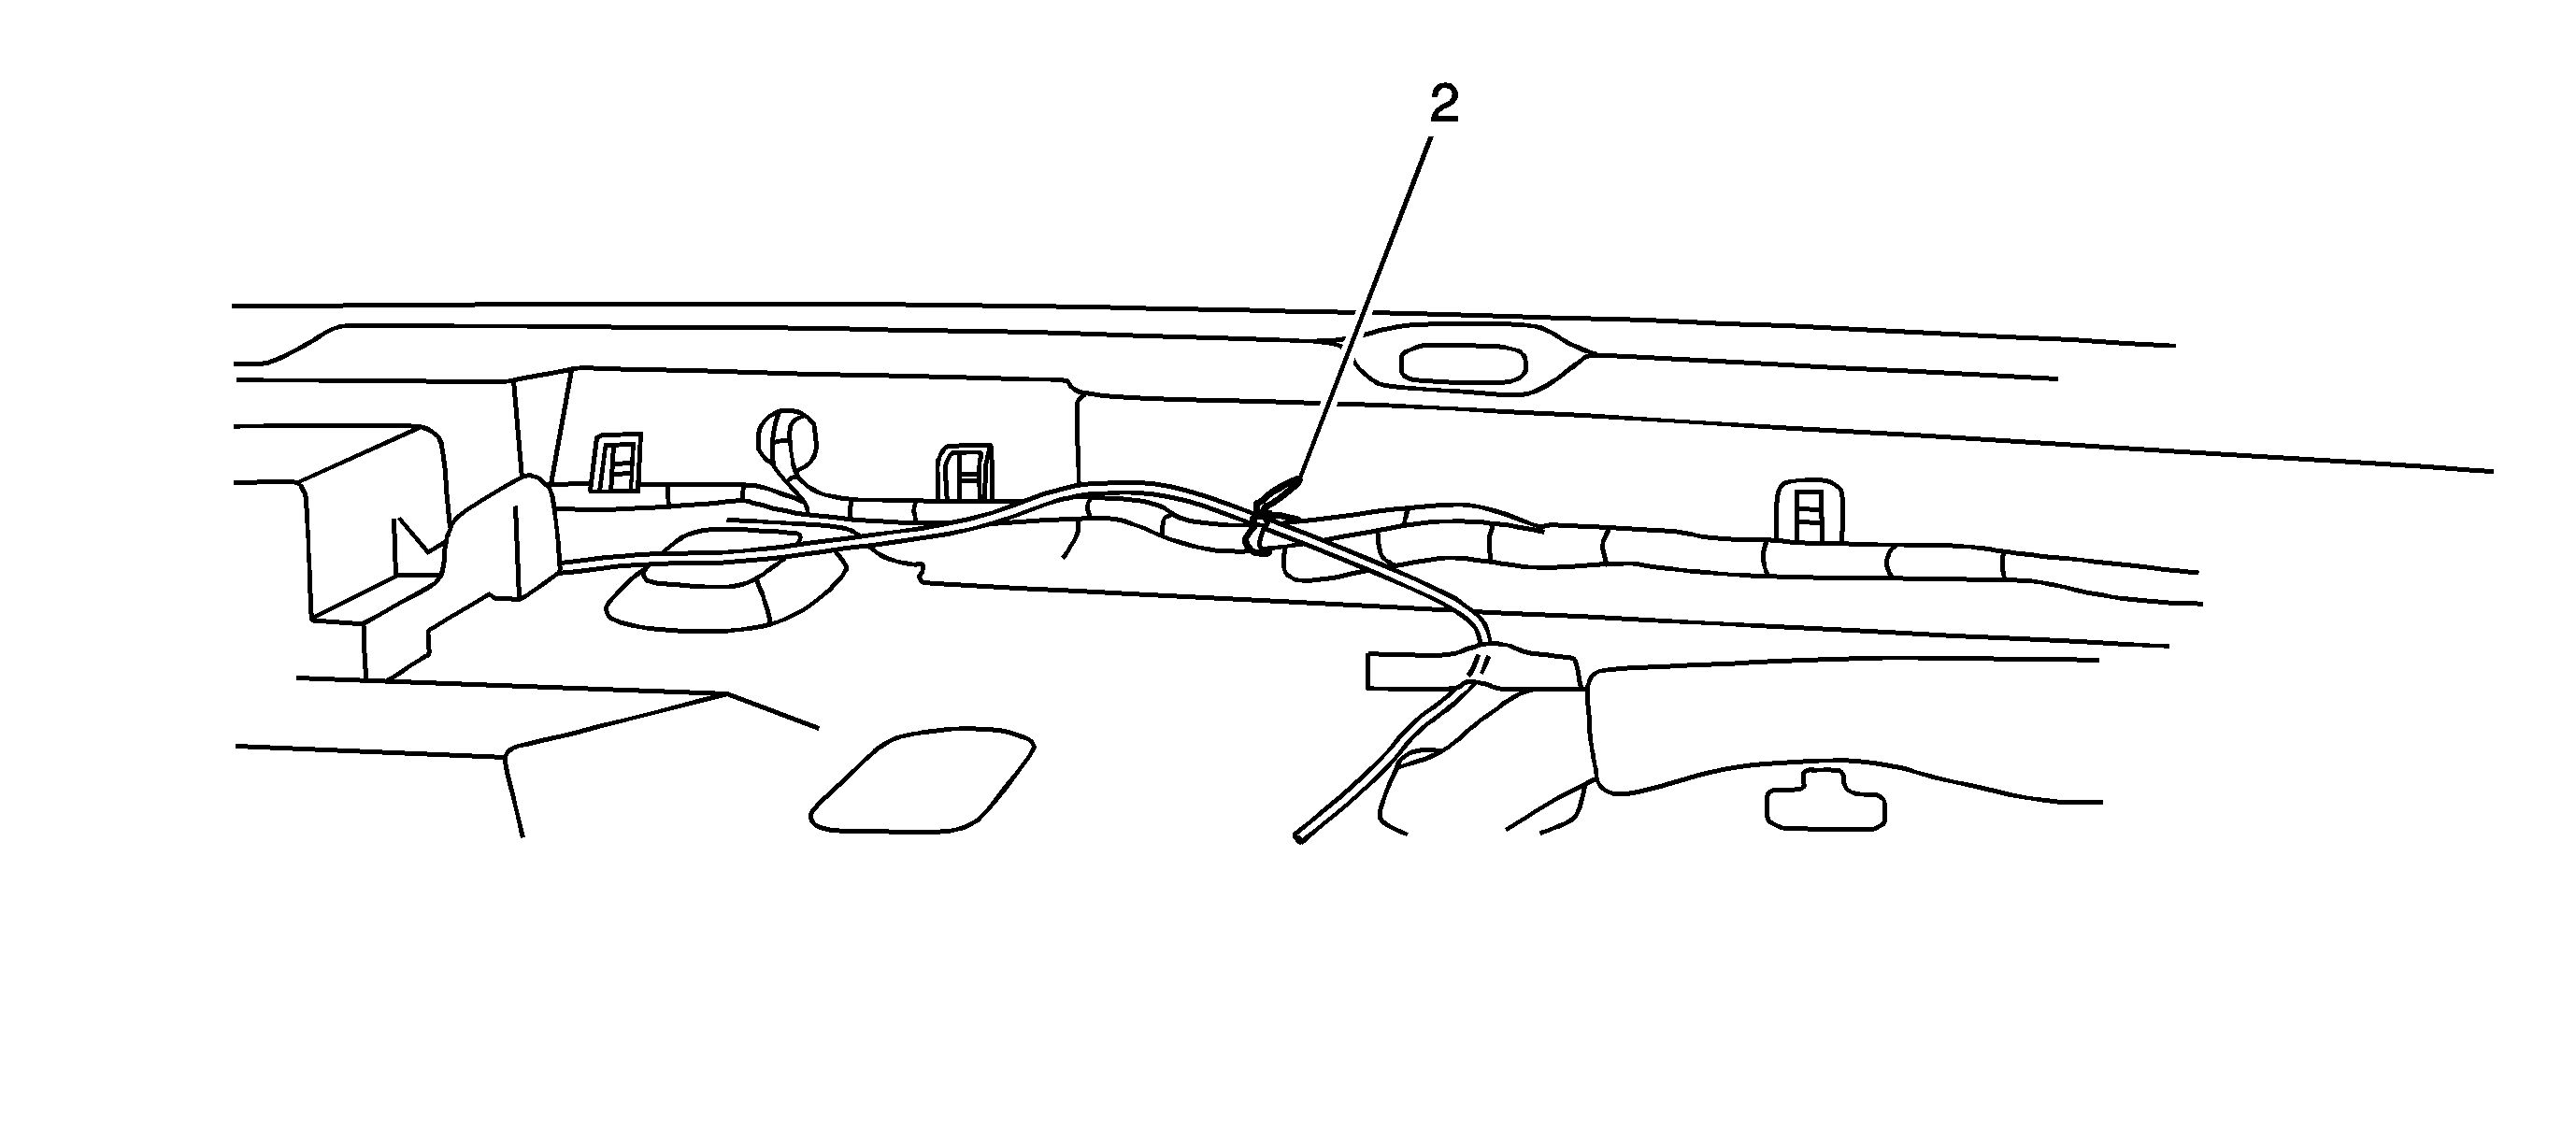
Note: If the harness is not present to secure the cable to, re-locate it from its tied back position to the body harness and clip in place. Secure the loose connectors to the foam wrapped harness with a wire wrap.
Note: Excess wire must be looped in a "Figure 8" no less than 100 mm (4 in) in length, failure to do this will reduce the performance of the system.
