For 1990-2009 cars only
Front Door Glass Position Too Low
Condition: The up/down penetration to the seal of the door glass is too low.Repair: Adjust the door glass for proper penetration to the seal.
- Remove the front side door trim panel. Refer to Front Side Door Trim Panel Replacement.
- With the aid of an assistant on the inside of the vehicle loosen and retighten the window clamps (1) when the other technician will reposition the window from outside the vehicle.
- Reposition the window clamps (1) to the bottom edge of glass to ensure the glass position is maintained.
- Reinitialize the power window. Refer to Power Window Reinitialization.
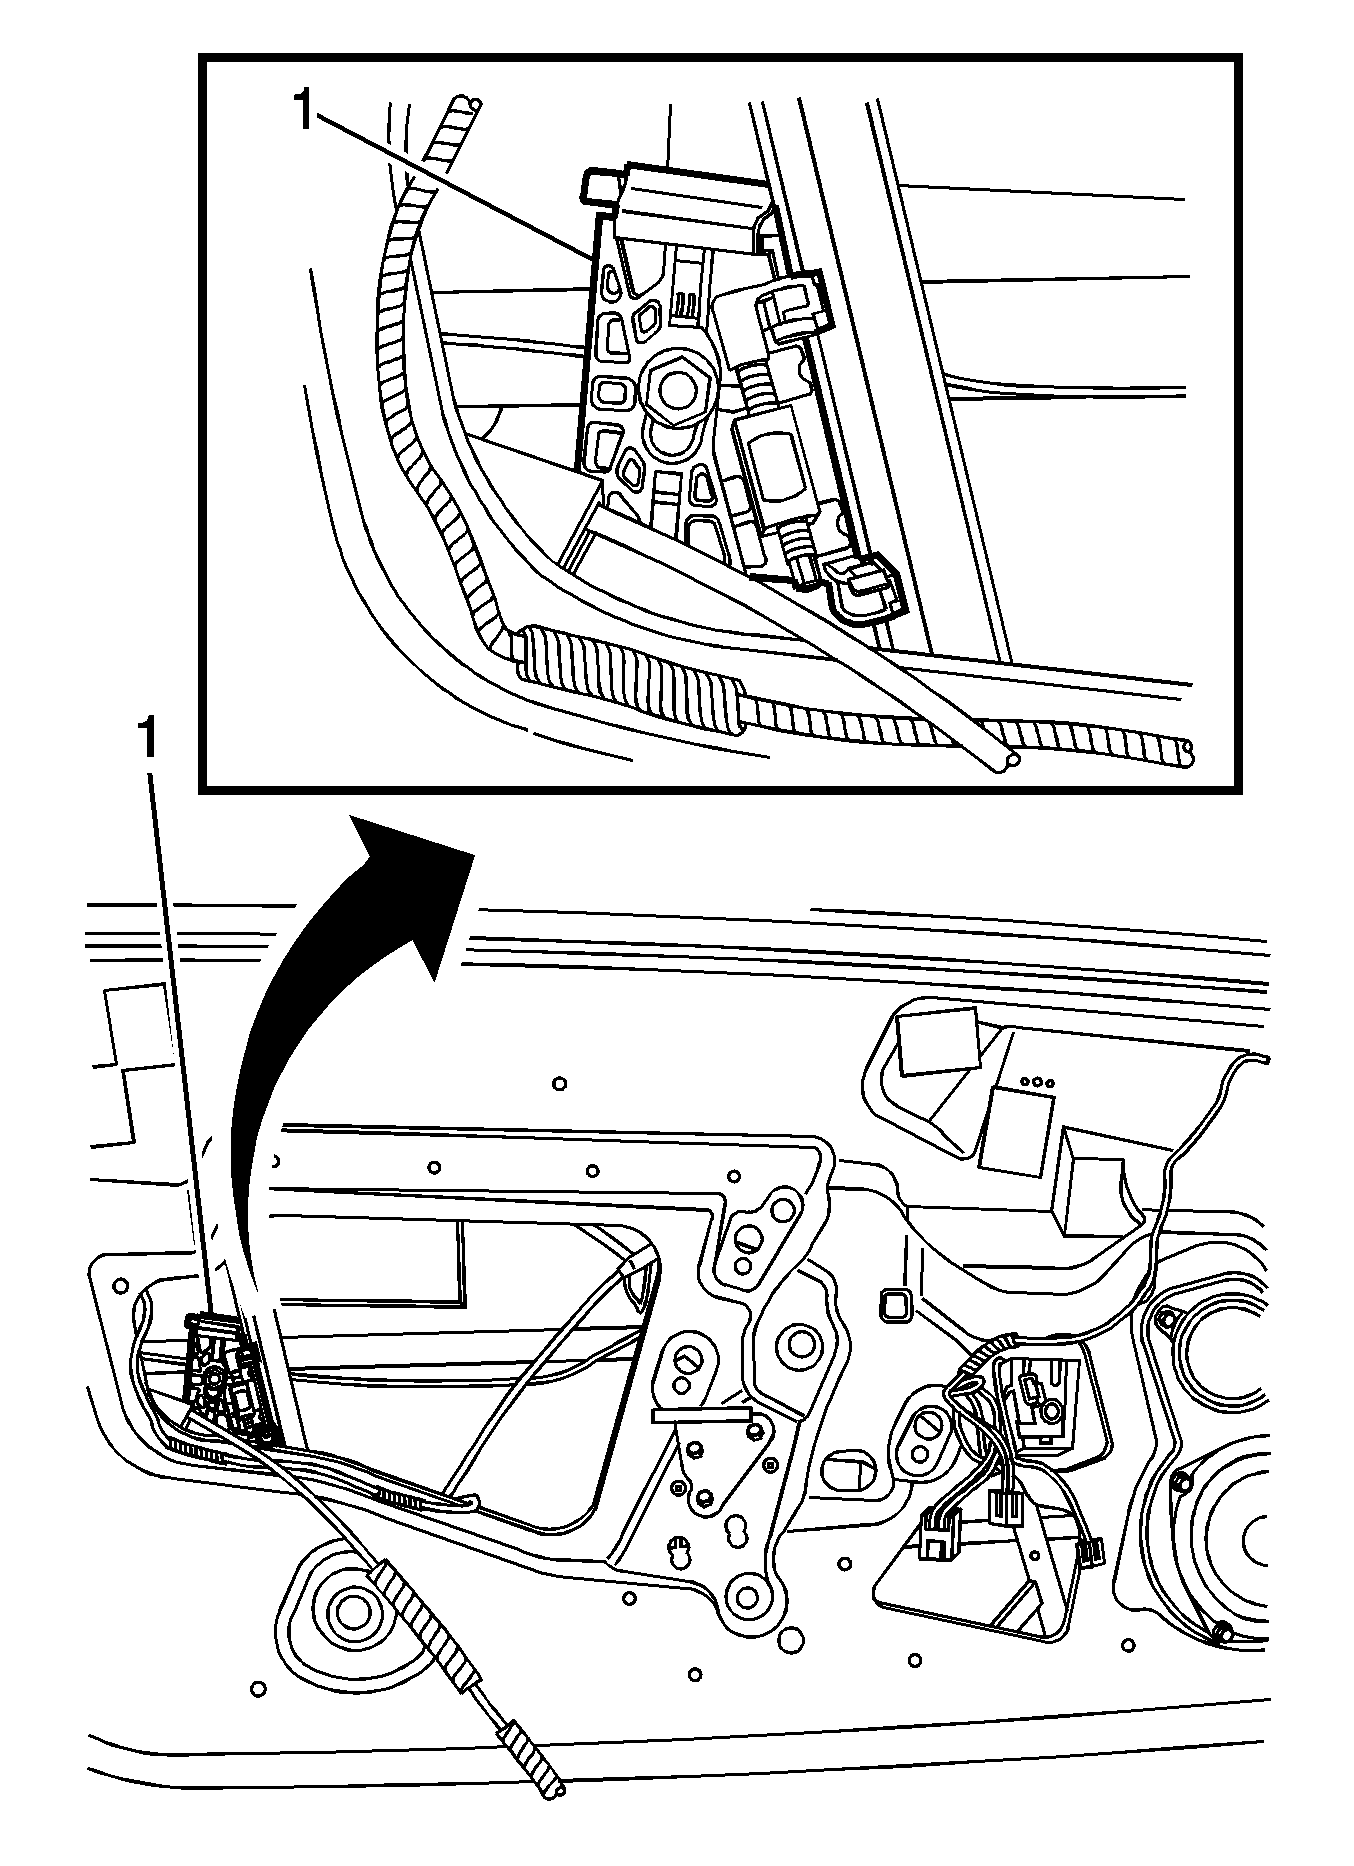
The use of suction cups will aid in the repositioning of the window.
Caution: Refer to Fastener Caution in the Preface section.
Tighten
Tighten the clamp to 16 N·m (12 lb ft).
Scissoring of Door Glass to Quarter Glass
Condition: The door glass wants to travel to the wrong side of the sash seal when door glass is raised.Repair: Decrease the tip of the door glass until scissoring effect is remedied.
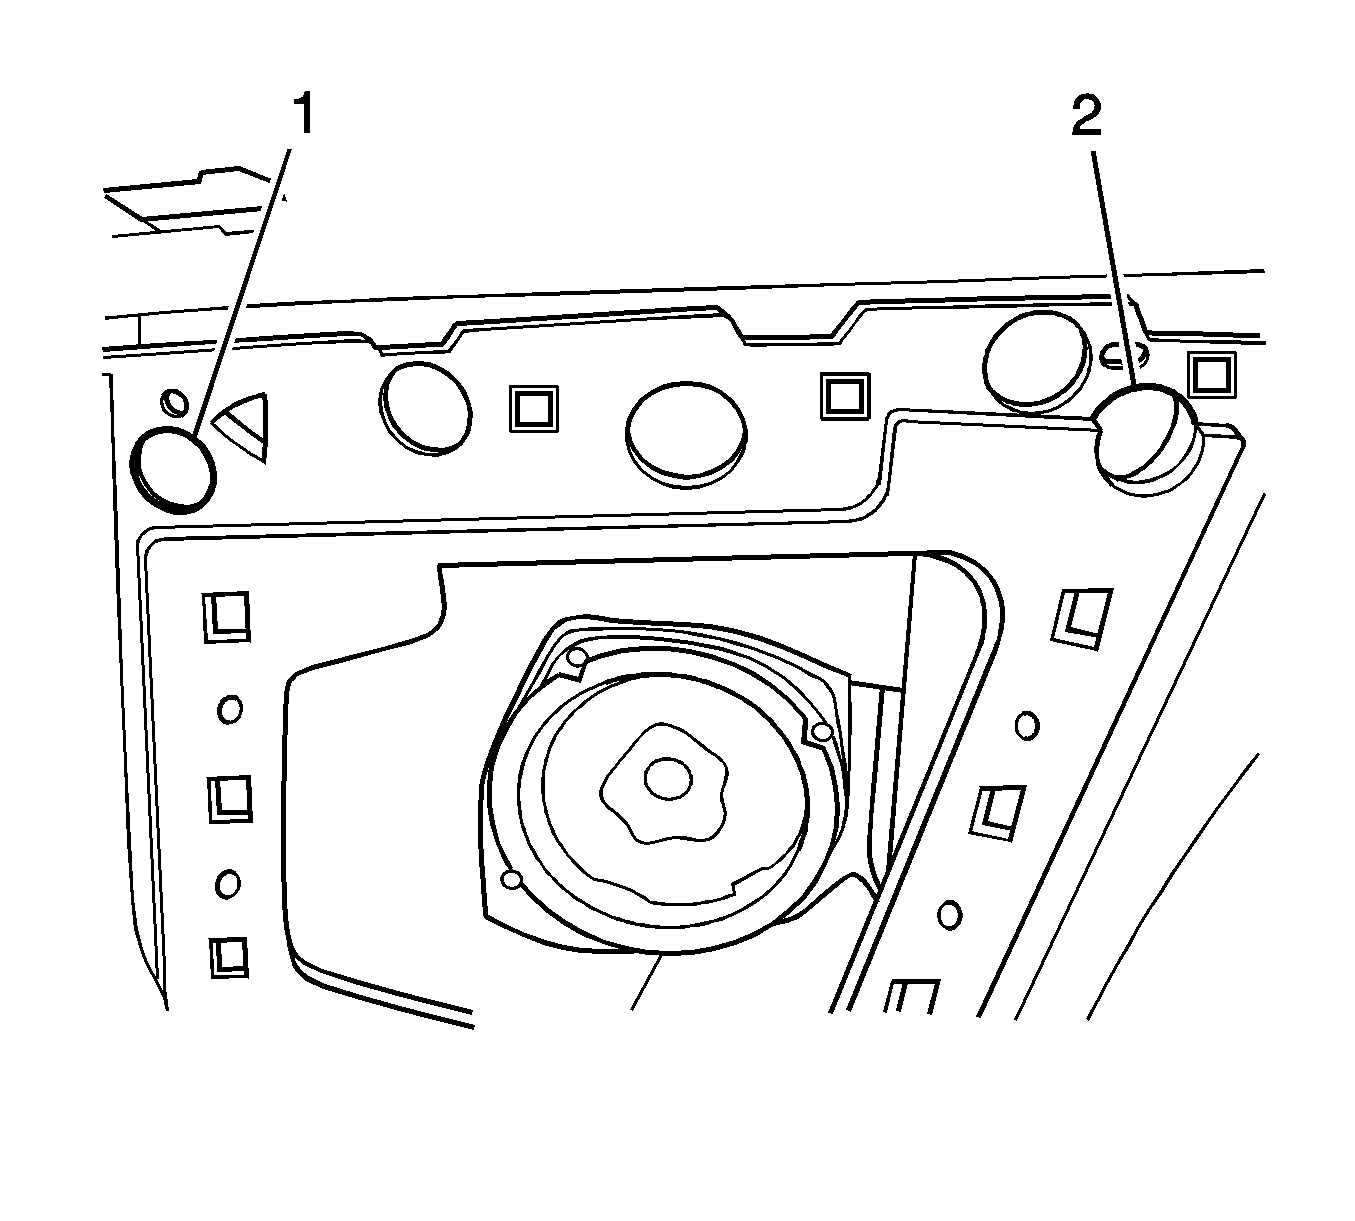
- Remove the access plug from the bottom of door to access the front rail on the window regulator (2).
- Loosen the lock nut and move rail toward you and retighten.
- Remove the reflector (3) at the back of the door trim panel.
- Loosen the lock nut.
- Replace the reflector (3) to the door trim panel.
- Reinitialize the power window. Refer to Power Window Reinitialization.
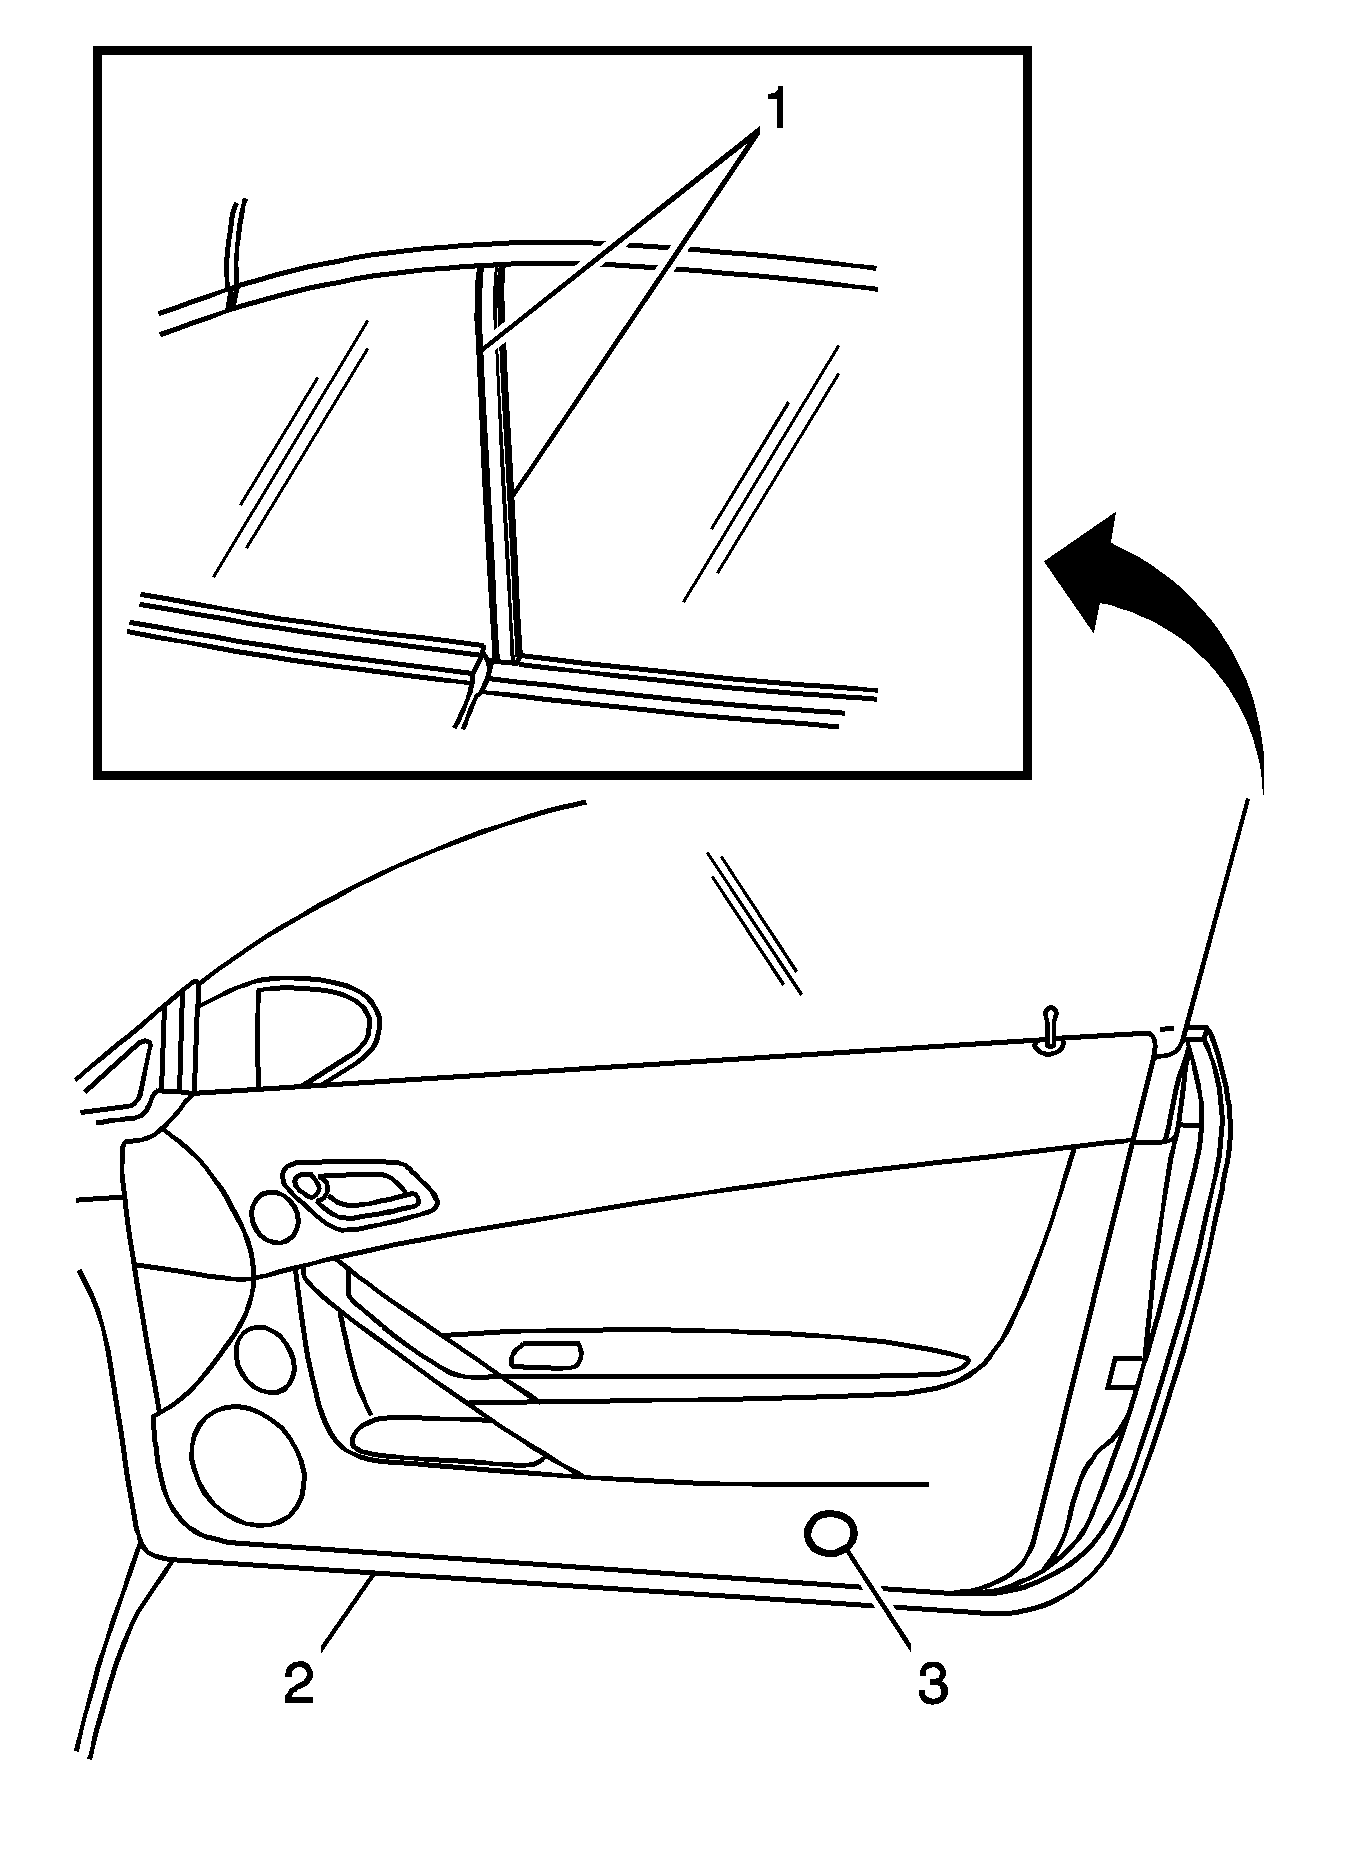
Tighten
Tighten the nut to 10 N·m (89 lb in).
Note: If scissoring effect (1) remains go to the next step.
Tighten
| • | Turn the 4 mm jackscrew clockwise 5-7 complete turns. |
| • | Retighten the nut to 10 N·m (89 lb in). |
No Contact Between Door Glass and Sash Seal
Condition: The front side door glass has little or no contact to the sash seal at the bottom of the sash seal.Repair: Adjust the quarter window regulator front upper jackscrew to push the sash seal outboard to seal against the door glass.
- Remove the body lock pillar lower trim panel. Refer to Body Lock Pillar Lower Trim Panel Replacement.
- Using a 13 mm socket, loosen the lock nut on the forward jackscrew (1).
- Using a 6 mm socket, turn the jackscrew (1) counterclockwise until the sash seal has contact to the front door window. DO NOT turn the jackscrew more than 3 full turns.
- Tighten the lock nut.
- Reinitialize the power window. Refer to Power Window Reinitialization.
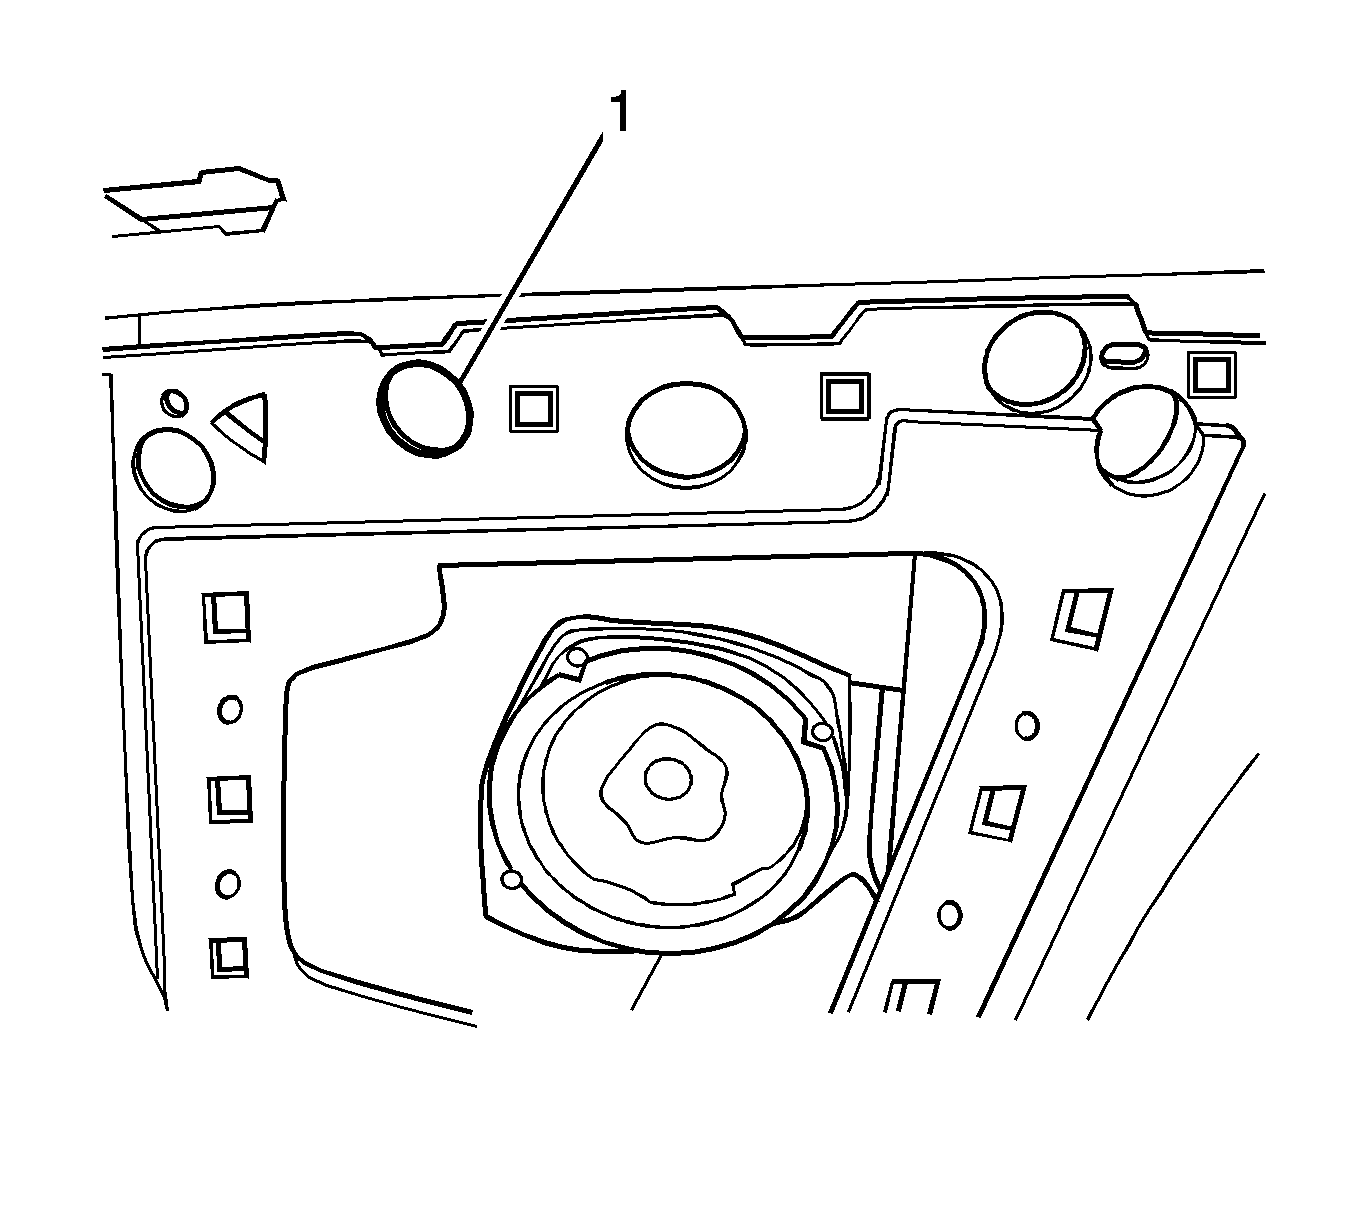
Tighten
Tighten the nut to 25 N·m (18 lb ft).
Measurement Locations for Checking Quarter Glass
- Check the door glass for FORE/AFT (2) position.
- Be sure to trigger the latch to allow the glass to index up.
- Open the door.
- Scribe mark should be 5-8 mm (0.20-0.31 in) below the very top edge of the glass.
- Reinitialize the power window. Refer to Power Window Reinitialization.

Glass MUST be in FULL UP position.
Check the door glass for up/down (1) penetration to scalp molding.
Quarter Glass Adjustment
Condition: The quarter glass fit is low/high or gap to the door glass is incorrect.Repair: Adjust the quarter glass for proper penetration to the seals.
- Access through rear trim for adjusting the rear quarter glass.
- Remove the body lock pillar lower trim panel. Refer to Body Lock Pillar Lower Trim Panel Replacement.
- With the aid of an assistant on the inside of the vehicle loosen and retighten the window clamps (1, 2) when the other technician will reposition the window from outside the vehicle.
- Reposition and tighten the window clamps (1, 2) to the bottom edge of the glass to ensure the glass position is maintained.
- Reinitialize the power window. Refer to Power Window Reinitialization.
The use of suction cups will aid in the repositioning of the window.
Tighten
Tighten the clamps to 16 N·m (12 lb ft).
Too Much Contact Between Door Glass and Sash Seal
Condition: The front side door glass has too much contact to seal at the bottom of the sash seal causing excessive seal compression.Repair: Adjust the quarter window regulator front upper jack screw to pull the sash seal inboard away from the door glass.
- Remove the body lock pillar lower trim panel. Refer to Body Lock Pillar Lower Trim Panel Replacement.
- Using a 6 mm socket, turn the jackscrew (1) clockwise until the sash seal has light contact to the front door glass. DO NOT turn the jackscrew more than 3 full turns.
- Tighten the lock nut.
- Reinitialize the power window. Refer to Power Window Reinitialization.

Using a 13 mm socket, loosen the lock nut on the forward jackscrew (1).
Tighten
Tighten the nut to 25 N·m (18 lb ft).
Location of Marks for Checking Up/Down Penetration
- Check the door glass for FORE/AFT (1) position.
- Be sure to trigger the latch to allow the glass to index up.
- Mark door glass for up/down penetration to scalp molding.
- With the door closed and glass full up, scribe the mark at the lower edge of scalp molding onto the glass at two places:
- Check the door glass for up/down penetration to scalp molding.
- Open the door.
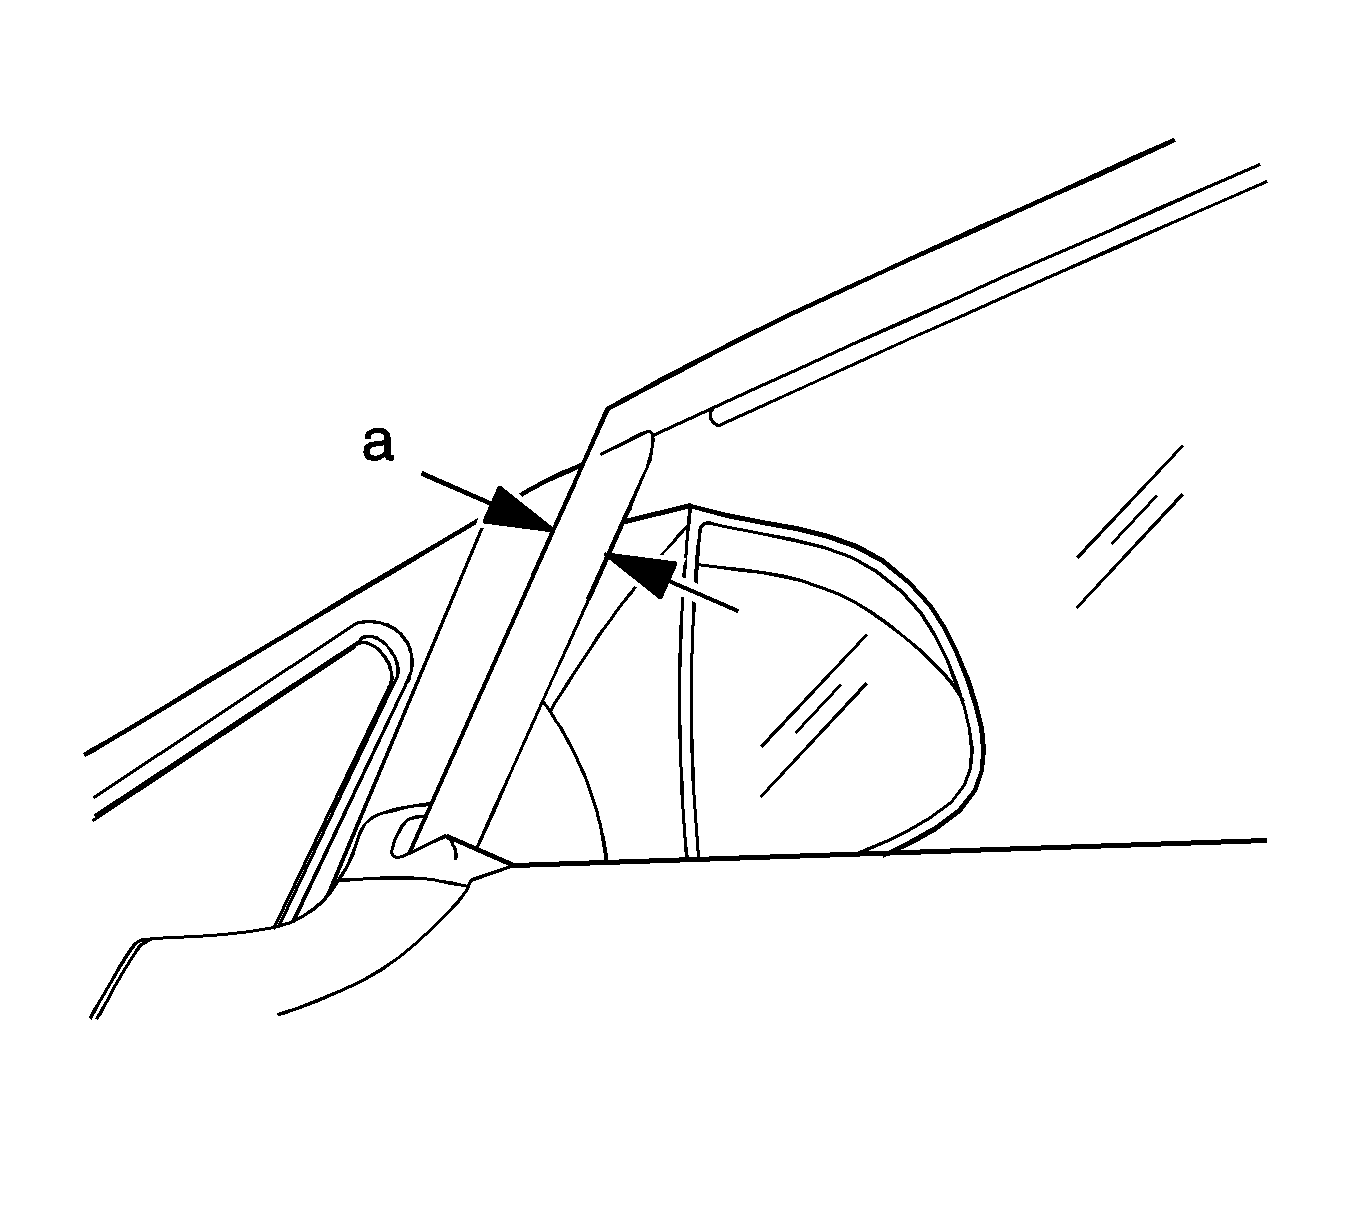
- Scribe mark should be 5-8 mm (0.20-0.31 in) (a) below the very top edge of the glass.
- If scribe marks are not within specifications, return to step 2.
- Reinitialize the power window. Refer to Power Window Reinitialization.
Glass MUST be in FULL UP position.

| 4.1. | Scribe mark behind mirror patch 10.2 cm (4.0 in). |
| 4.2. | Scribe mark forward of the rear edge of glass 4.6 cm (3.0 in). |
