Generator Replacement LE5
Removal Procedure
- Disconnect negative battery cable. Refer to Battery Negative Cable Disconnection and Connection.
- Remove the drive belt. Refer to Drive Belt Replacement.
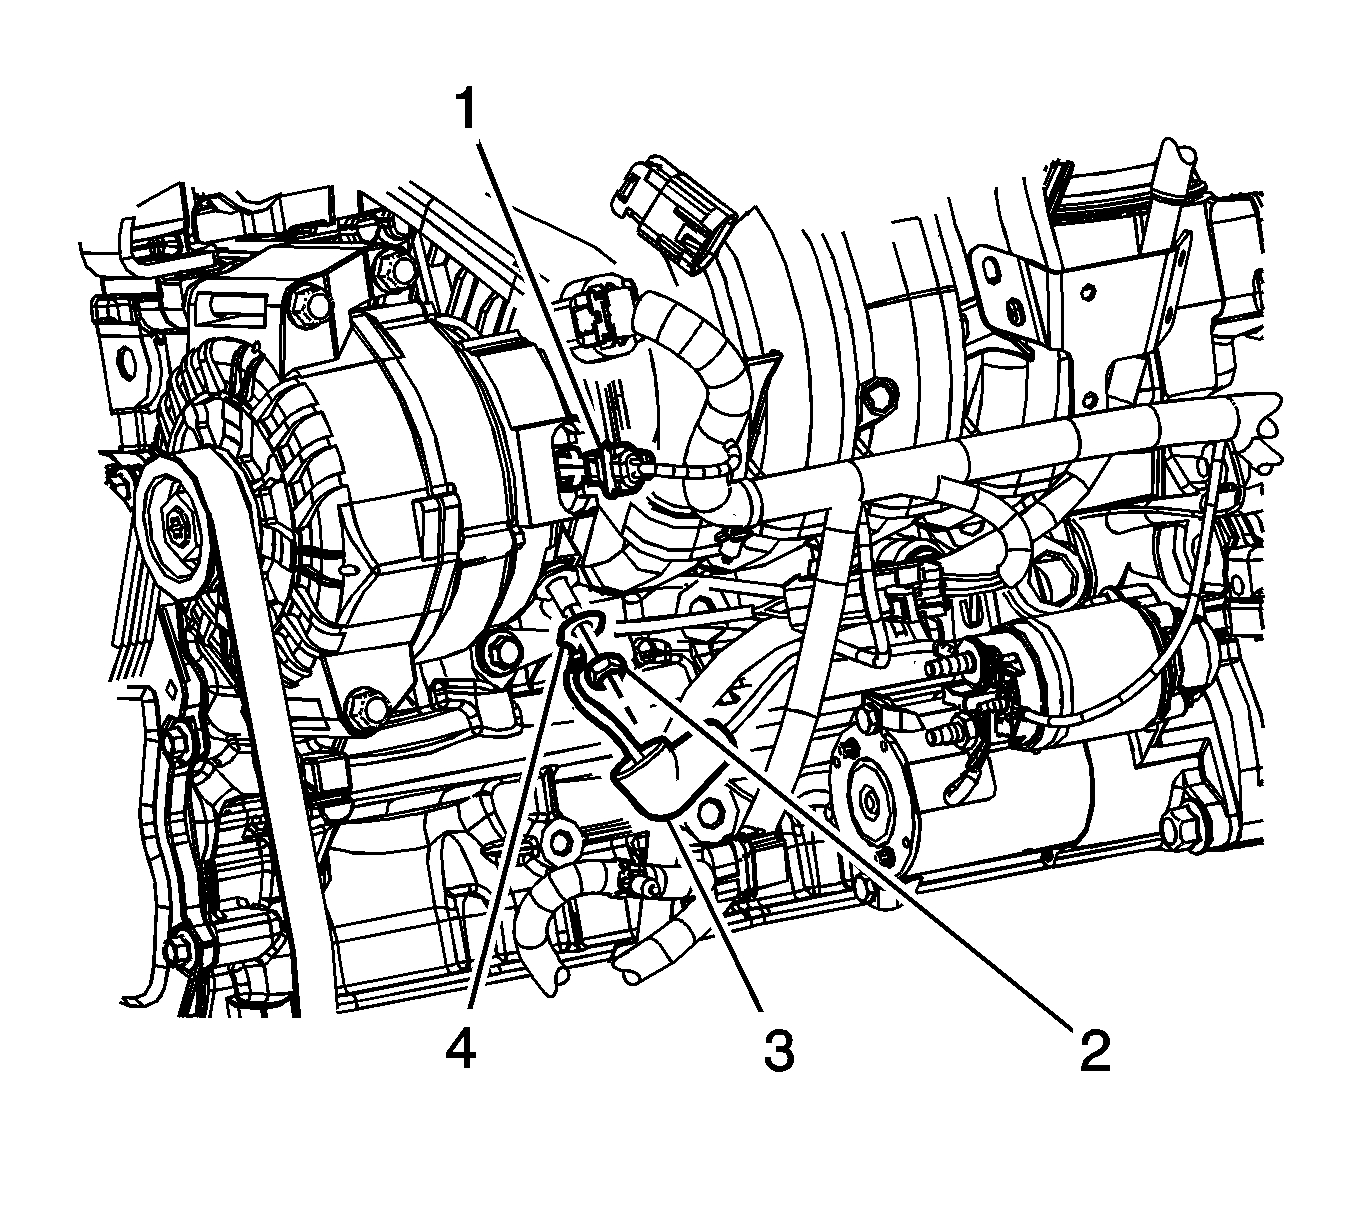
- Disconnect the generator electrical connector (1).
- Reposition the rubber boot (3).
- Remove the engine harness terminal lead to generator nut (2).
- Remove the engine harness terminal (4) from the generator stud.
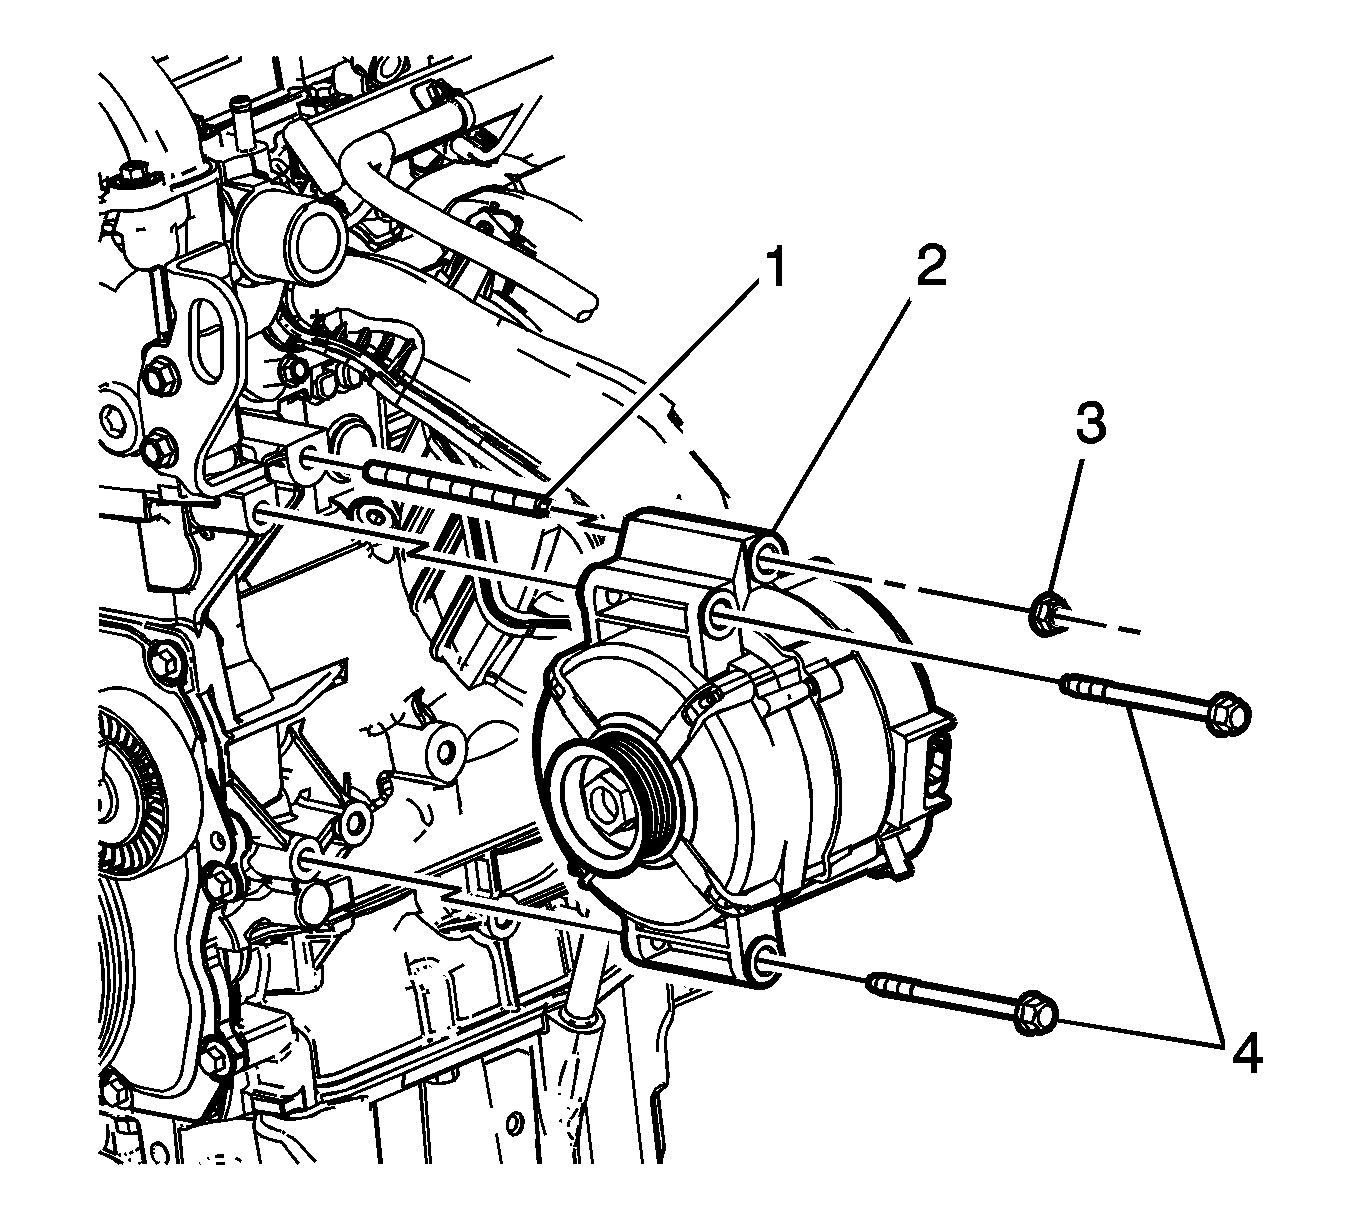
- Remove the generator fasteners (1,3, 4).
- Remove the generator.
Installation Procedure
- Position the generator to the engine block.
- Install the generator fasteners (4) loosely.
- Install the fastener (1) and tighten to 10 N·m (89 lb in).
- Install the fastener (3) and tighten to 22 N·m (16 lb ft).
- Tighten the fasteners (4) to 22 N·m (16 lb ft).
- Install the engine harness terminal (4) to the generator stud.
- Install the engine harness terminal lead to generator nut (2) and tighten to 20 N·m (15 lb ft).
- Position the rubber boot (3) over the stud.
- Connect the generator electrical connector (1).
- Install the drive belt. Refer to Drive Belt Replacement.
- Connect negative battery cable. Refer to Battery Negative Cable Disconnection and Connection.

Caution: Refer to Fastener Caution in the Preface section.

Generator Replacement LY7
Removal Procedure
- Disconnect the negative battery cable. Refer to Battery Negative Cable Disconnection and Connection.
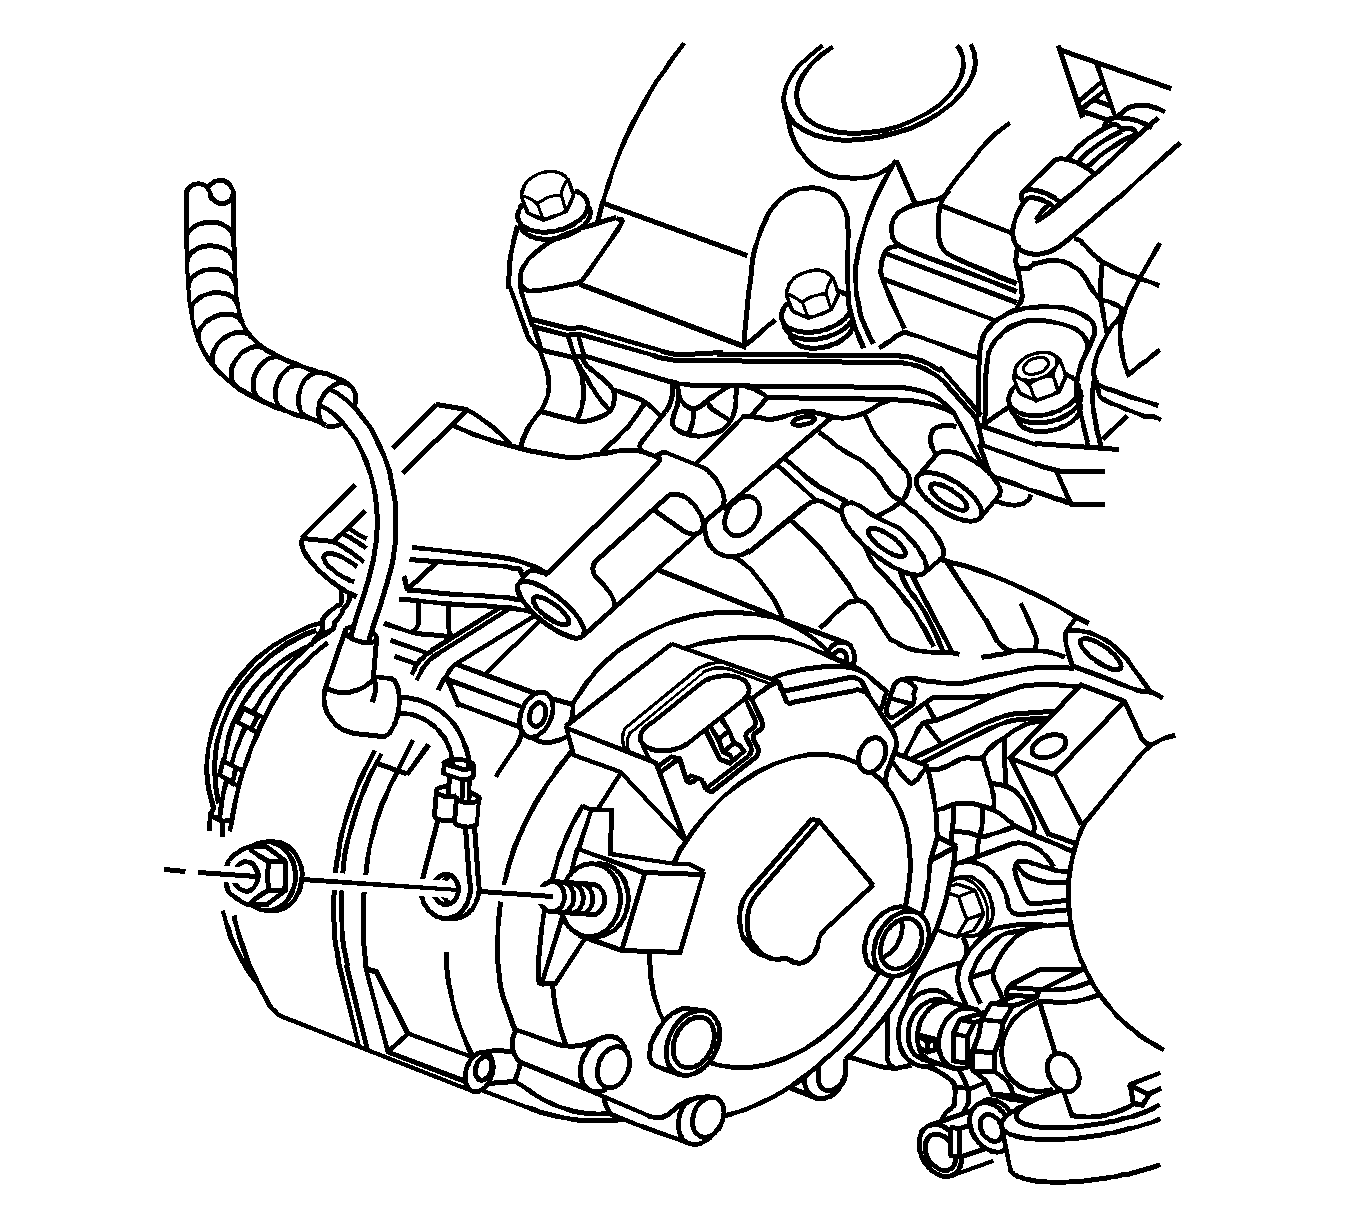
- Reposition the positive battery cable boot at the generator terminal.
- Remove the positive battery cable nut at the generator.
- Remove the positive battery cable terminal from the generator.
- Disconnect the engine harness electrical connector from the generator.
- Remove the drive belt. Refer to Drive Belt Replacement.
- Remove the idler pulley. Refer to Drive Belt Idler Pulley Replacement.
- Remove the generator bolts.
- Remove the generator.
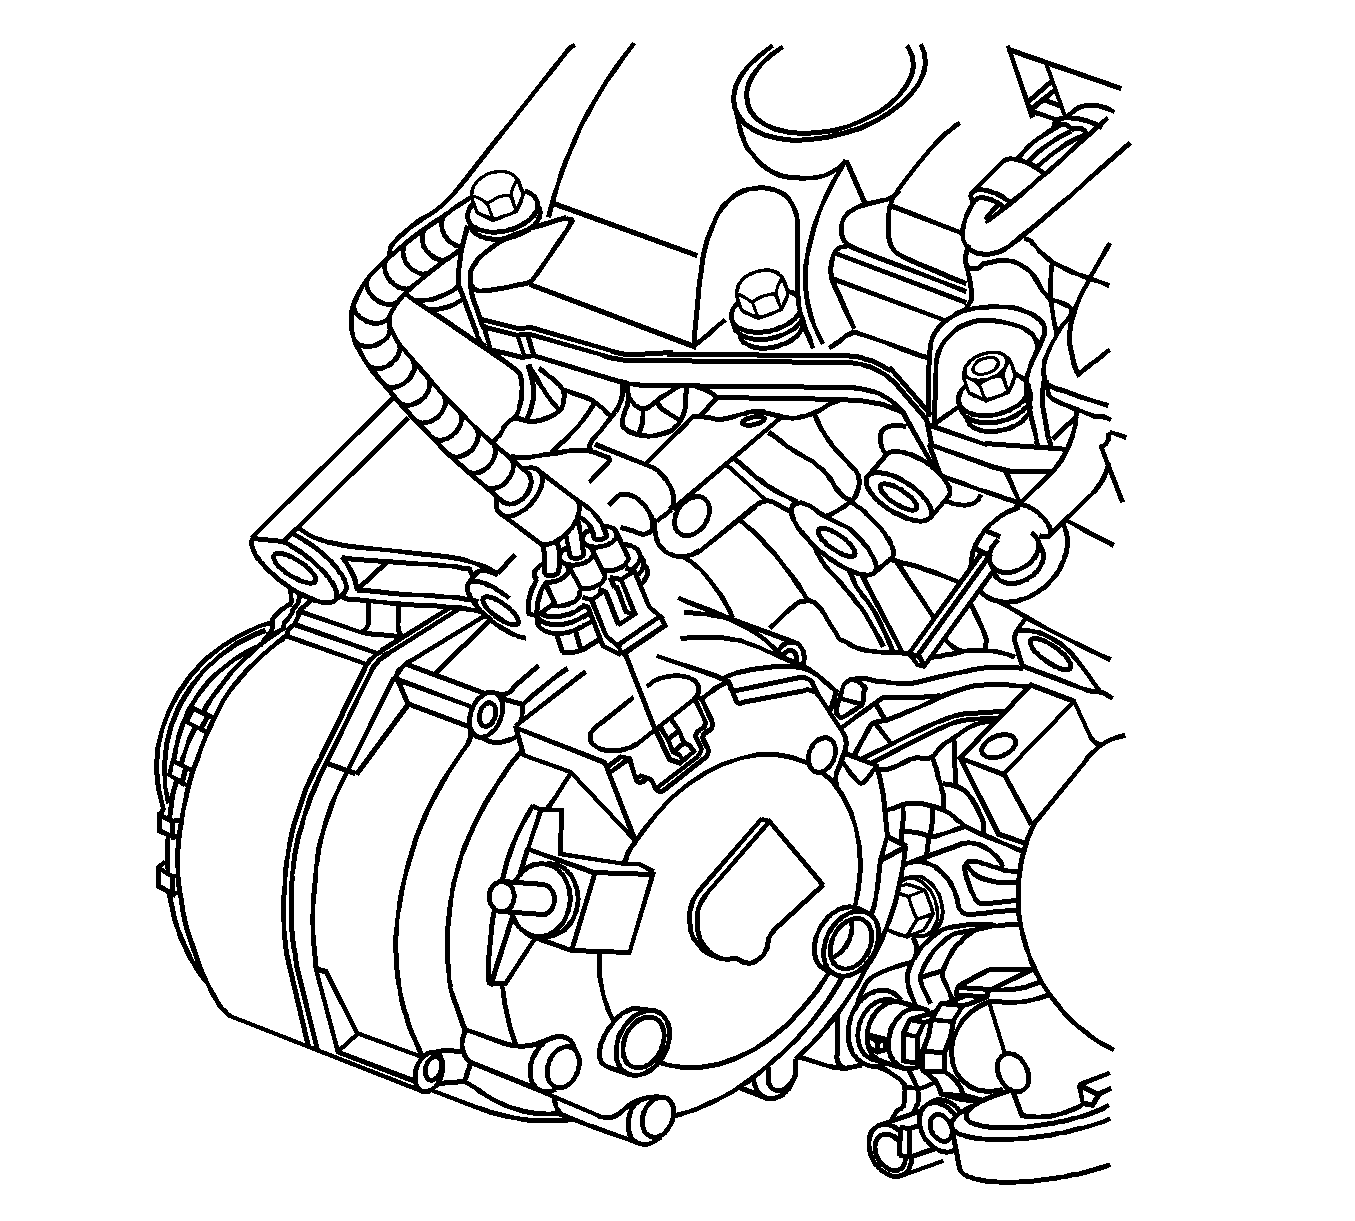
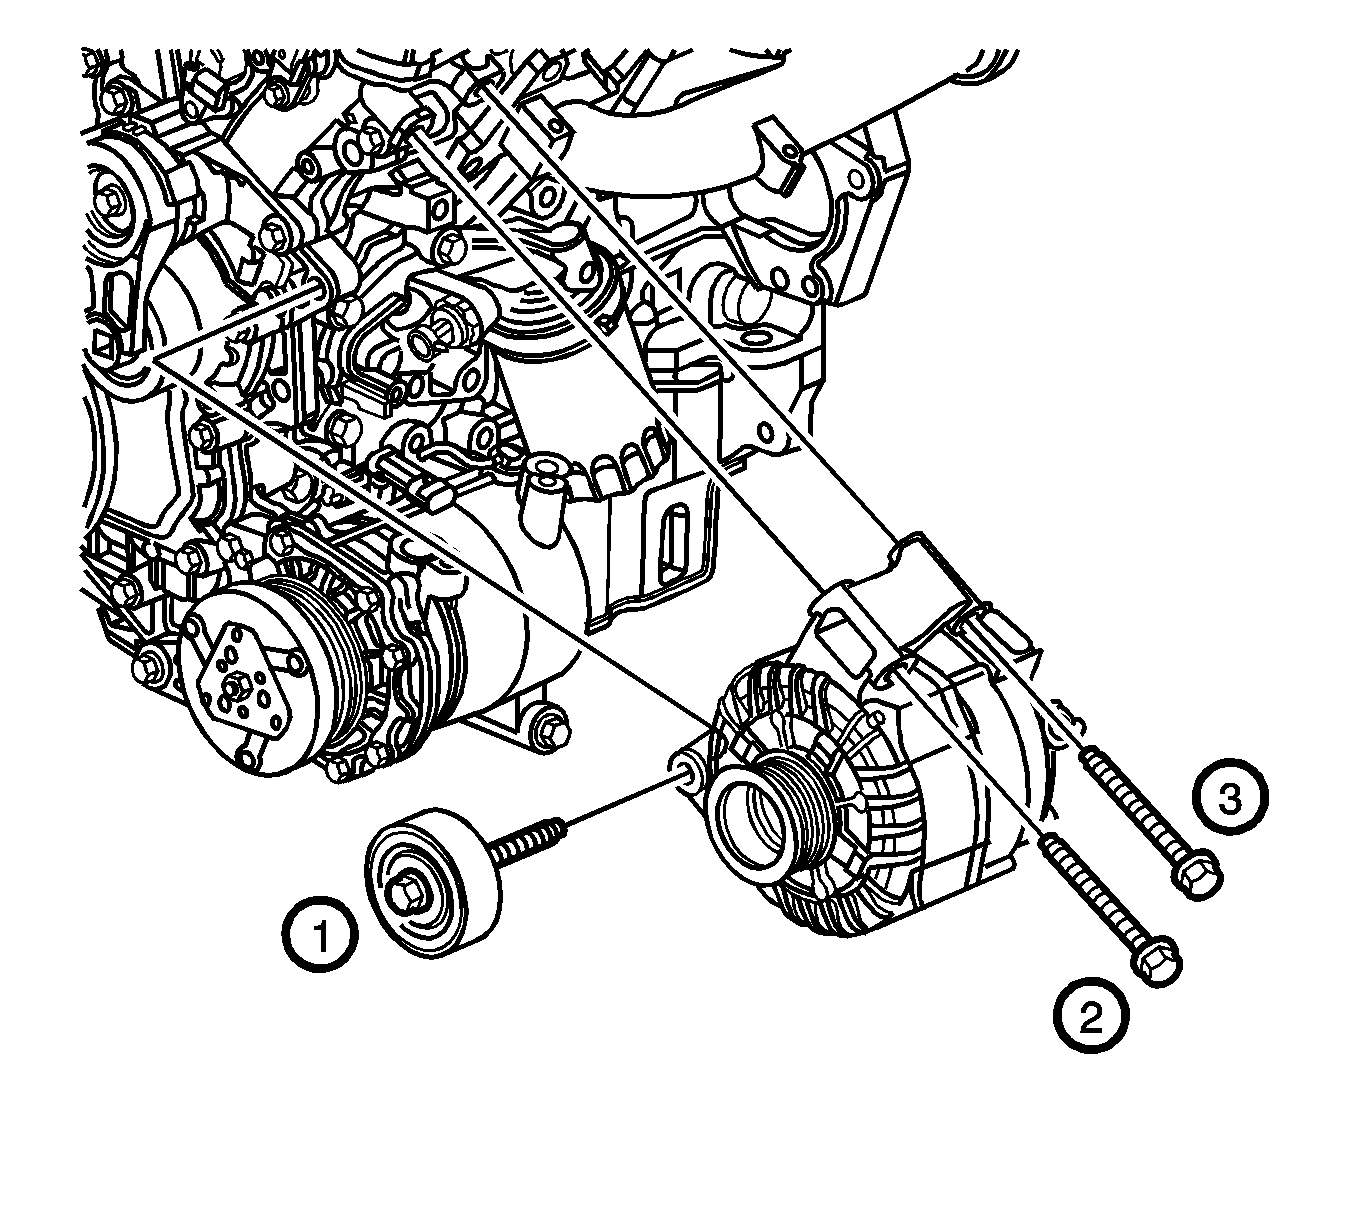
Note: When removing the generator from the vehicle, it may be necessary to maneuver the generator to remove it from the vehicle.
Installation Procedure
- Position the generator to the engine.
- Loosely install the generator bolts.
- Install the idler pulley. Refer to Drive Belt Idler Pulley Replacement.
- Tighten the generator bolts in the sequence shown to 50 N·m (37 lb ft).
- Install the drive belt. Refer to Drive Belt Replacement.
- Connect the engine harness electrical connector to the generator.
- Install the positive battery cable terminal to the generator.
- Install the positive battery cable nut at the generator and tighten to 20 N·m (15 lb ft).
- Position the positive battery cable boot at the generator terminal.
- Connect the negative battery cable. Refer to Battery Negative Cable Disconnection and Connection.

Caution: Refer to Fastener Caution in the Preface section.


Generator Replacement LZ4
The generator does not require periodic lubrication. The rotor shaft is mounted on bearings. Each bearing contains a permanent grease supply. Periodically check the mounting bolts for tightness, and the drive belt tension. The drive belt is self-adjusting, within the operating limits of the tensioner. Refer to Engine Mechanical for tensioner information.
Removal Procedure
Note: Service the generator as a complete unit.
- Disconnect the negative battery cable. Refer to Battery Negative Cable Disconnection and Connection.
- Remove the drive belt. Refer to Drive Belt Replacement.
- Remove the generator electrical connections.
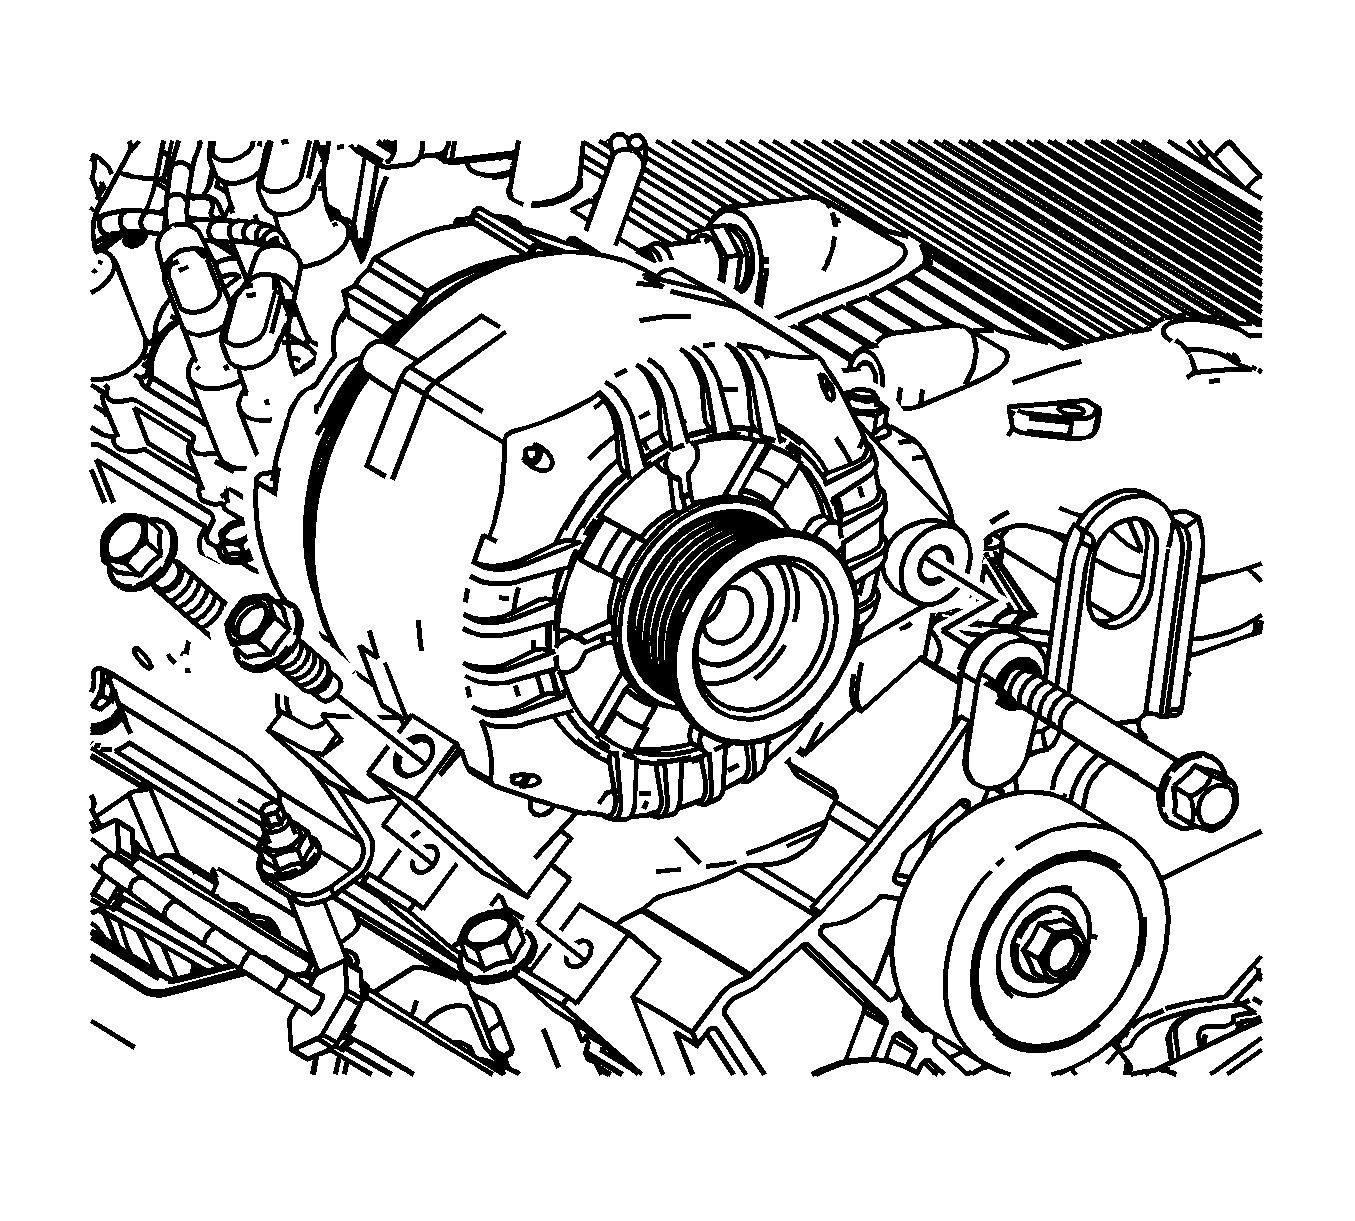
- Remove the generator mounting nuts and bolts.
- Remove the generator.
Installation Procedure
- Install the generator.
- Install the generator electrical connections.
- Install the drive belt. Refer to Drive Belt Replacement.
- Connect the negative battery cable. Refer to Battery Negative Cable Disconnection and Connection.
Caution: Refer to Fastener Caution in the Preface section.

Tighten
| • | Tighten the bolts to 50 N·m (37 lb ft). |
| • | Tighten the nuts to 30 N·m (22 lb ft). |
Generator Replacement LZ9
Removal Procedure
- Disconnect the negative battery cable. Refer to Battery Negative Cable Disconnection and Connection.
- Remove the drive belt. Refer to Drive Belt Replacement.
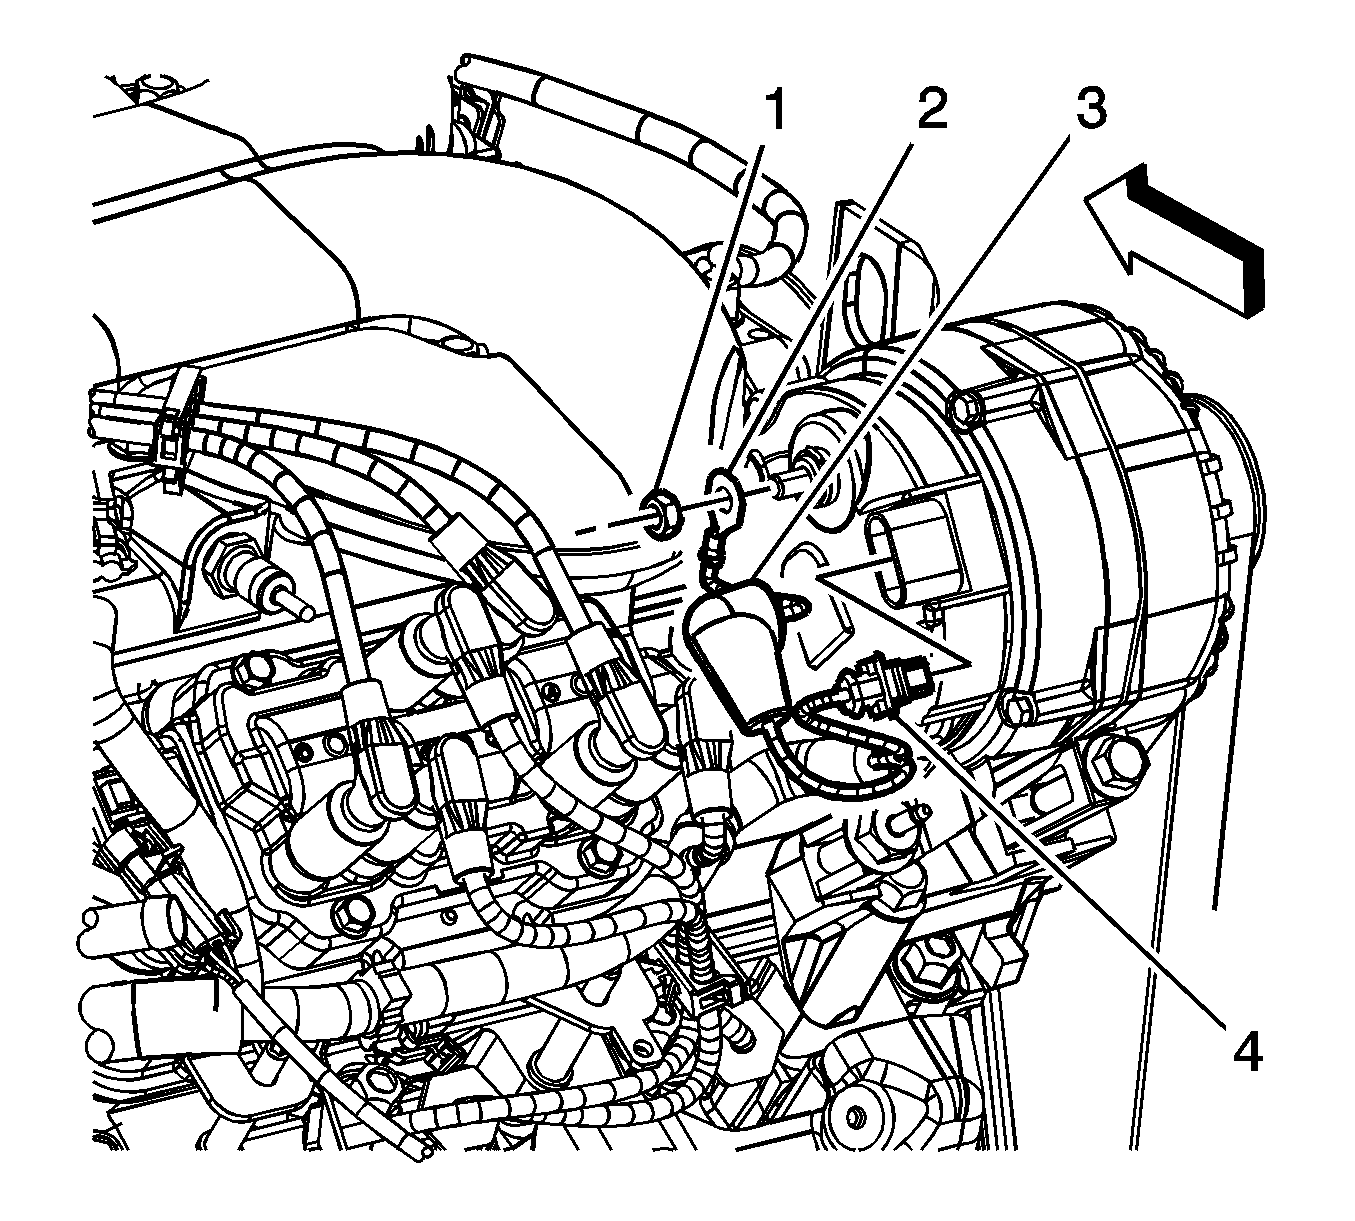
- Disconnect the engine harness electrical connector.
- Reposition the generator rubber boot (3).
- Remove the engine harness terminal nut (1).
- Remove the engine harness terminal (2).
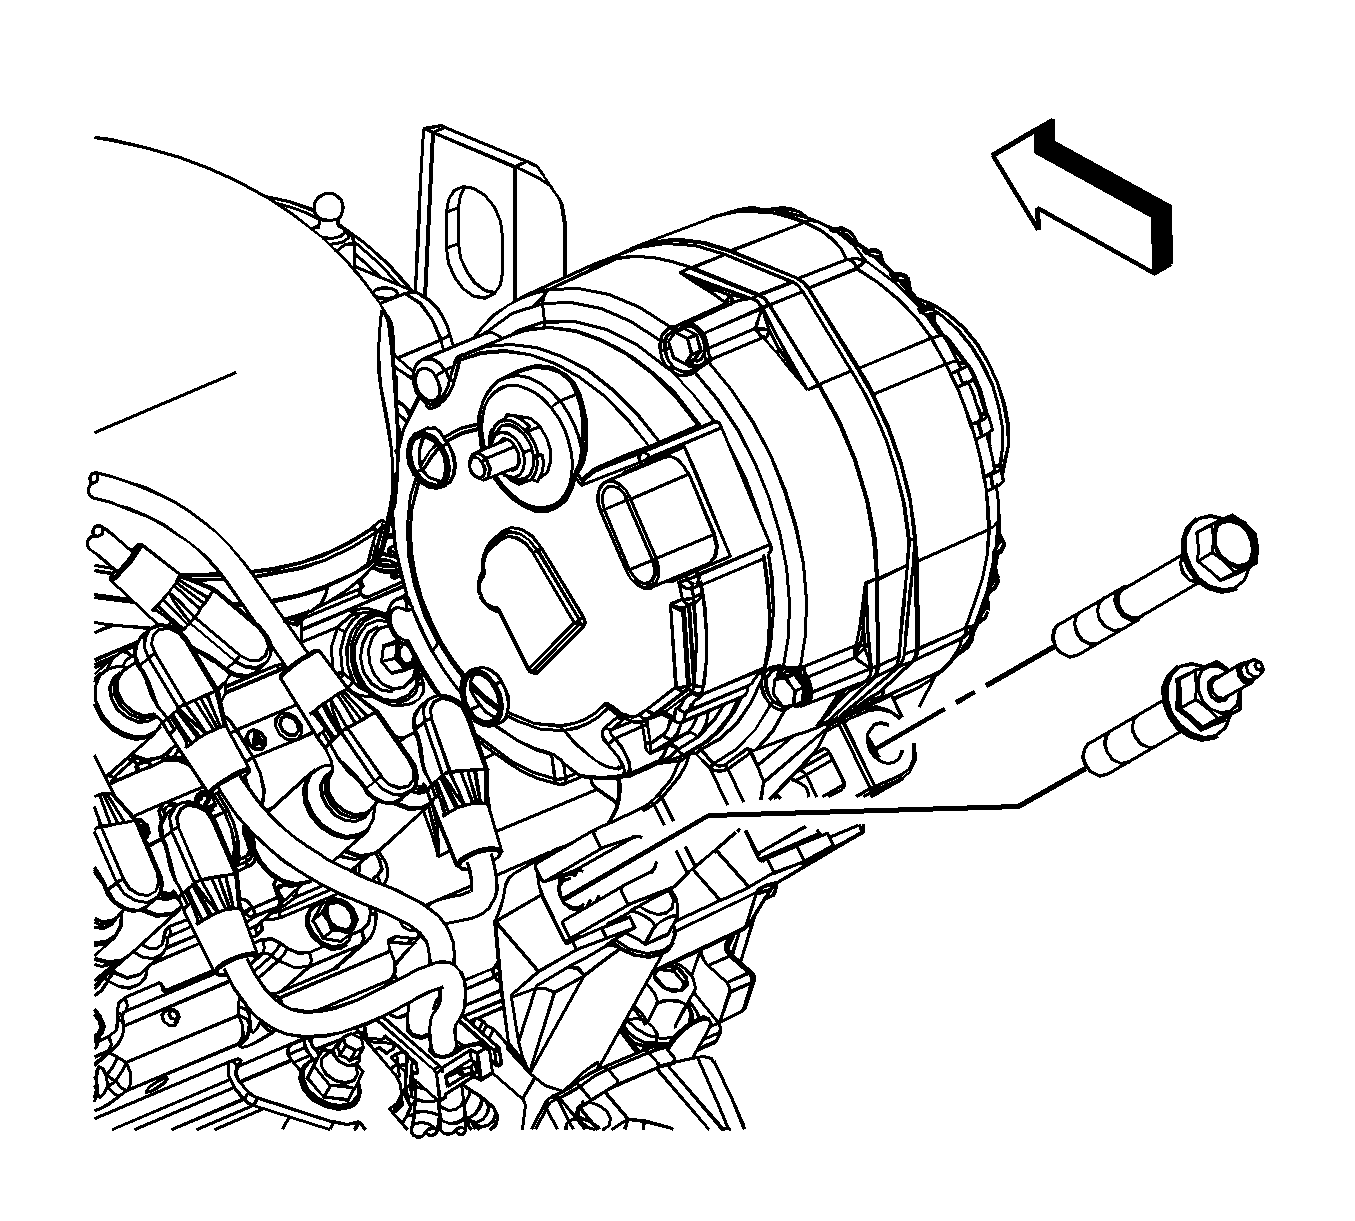
- Remove the generator lower bolt and stud.
- Remove the generator upper bolt.
- Remove the generator.
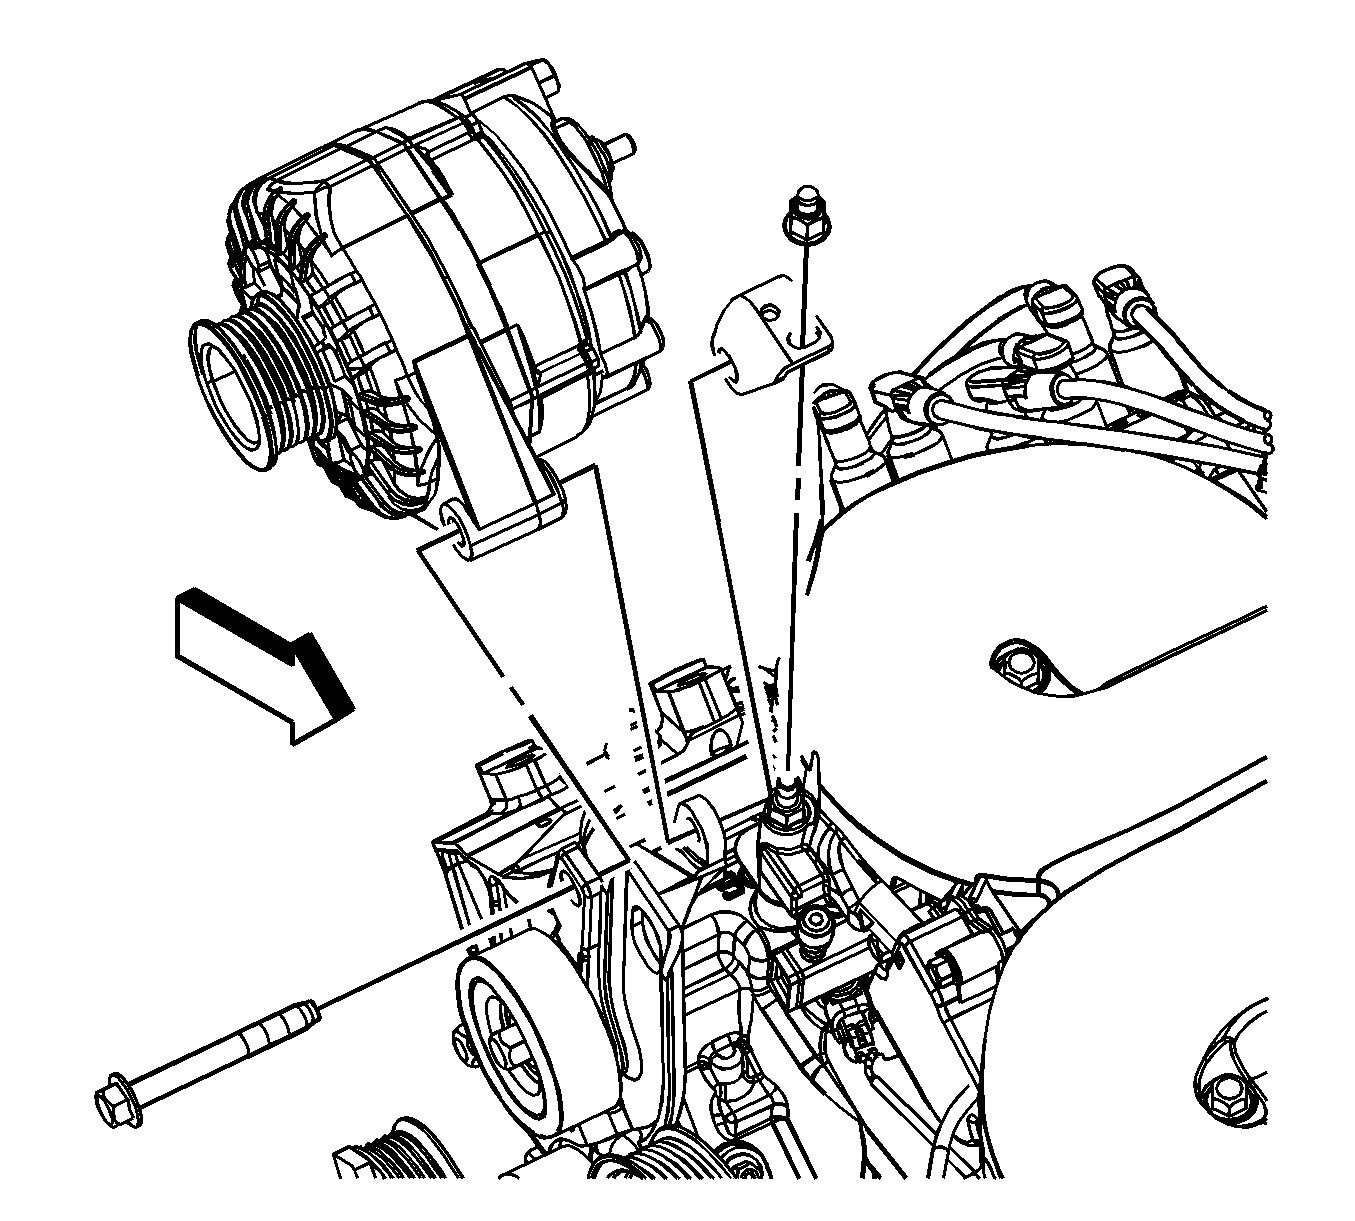
Installation Procedure
- Install the generator.
- Install the generator lower bolt and stud until snug.
- Install the generator upper bolt.
- Install the engine harness terminal (2).
- Install the engine harness terminal nut (1).
- Position the generator rubber boot (3).
- Connect the engine harness electrical connector.
- Install the drive belt. Refer to Drive Belt Replacement.
- Connect the negative battery cable. Refer to Battery Negative Cable Disconnection and Connection.

Caution: Refer to Fastener Caution in the Preface section.

Tighten
Tighten the bolts/stud to 50 N·m (37 lb ft).

Tighten
Tighten the nut to 30 N·m (22 lb ft).
