For 1990-2009 cars only
Removal Procedure
- Remove the console. Refer to Console Replacement .
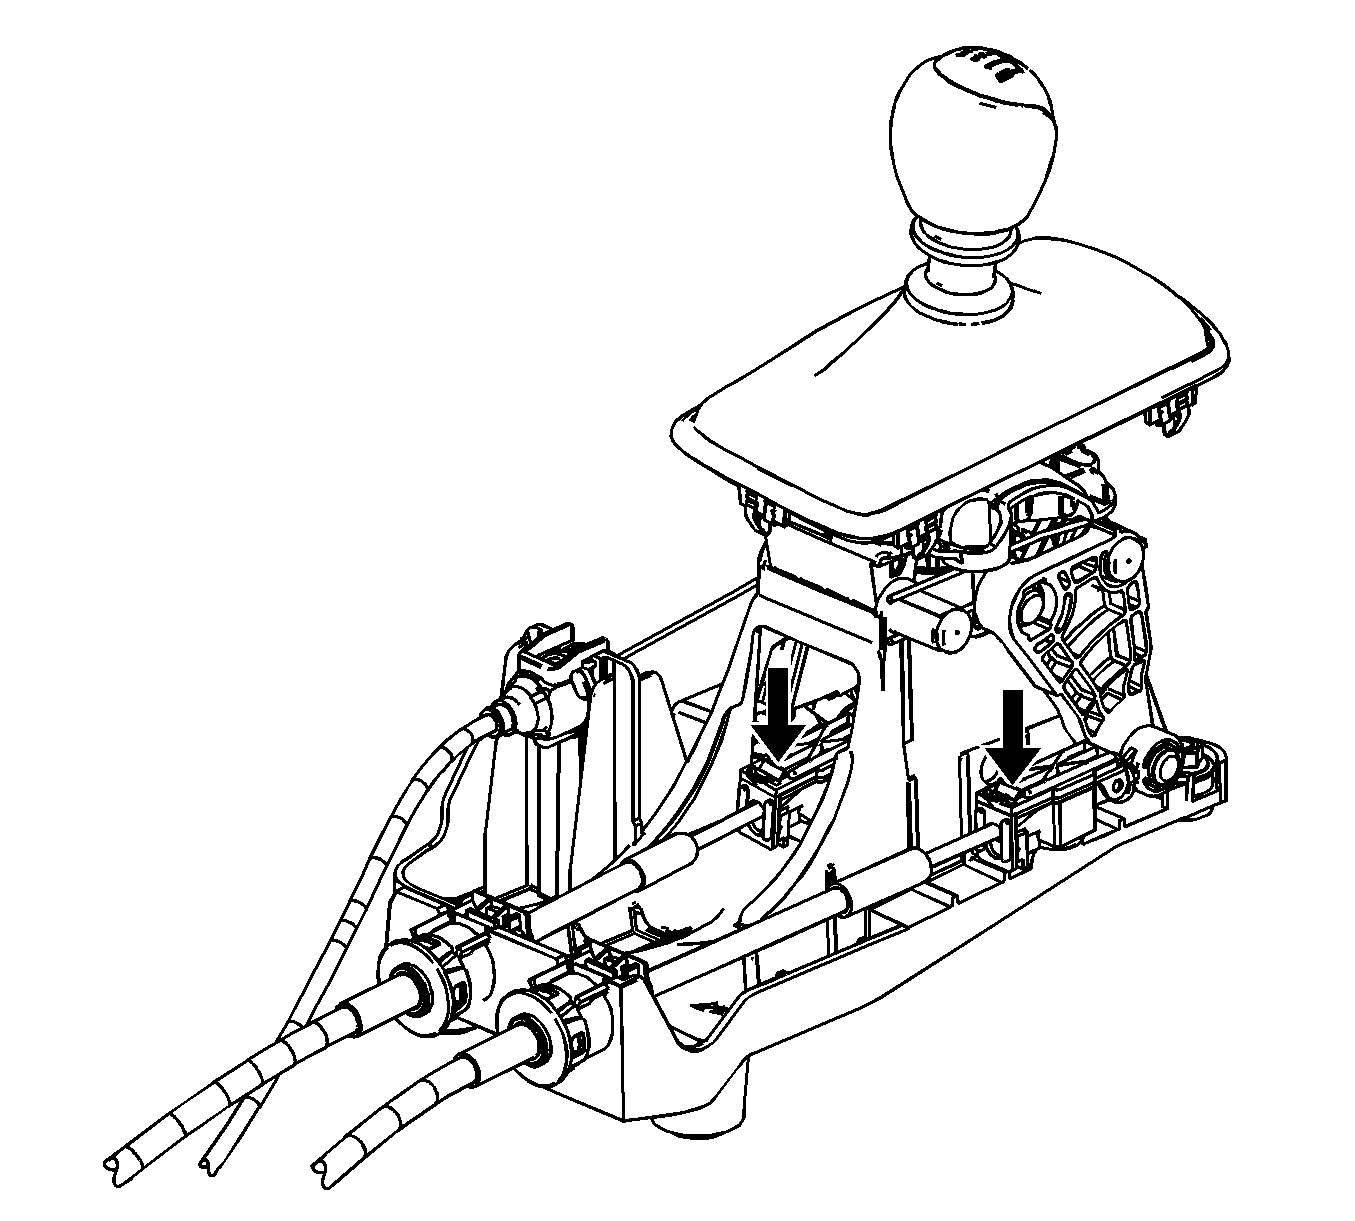
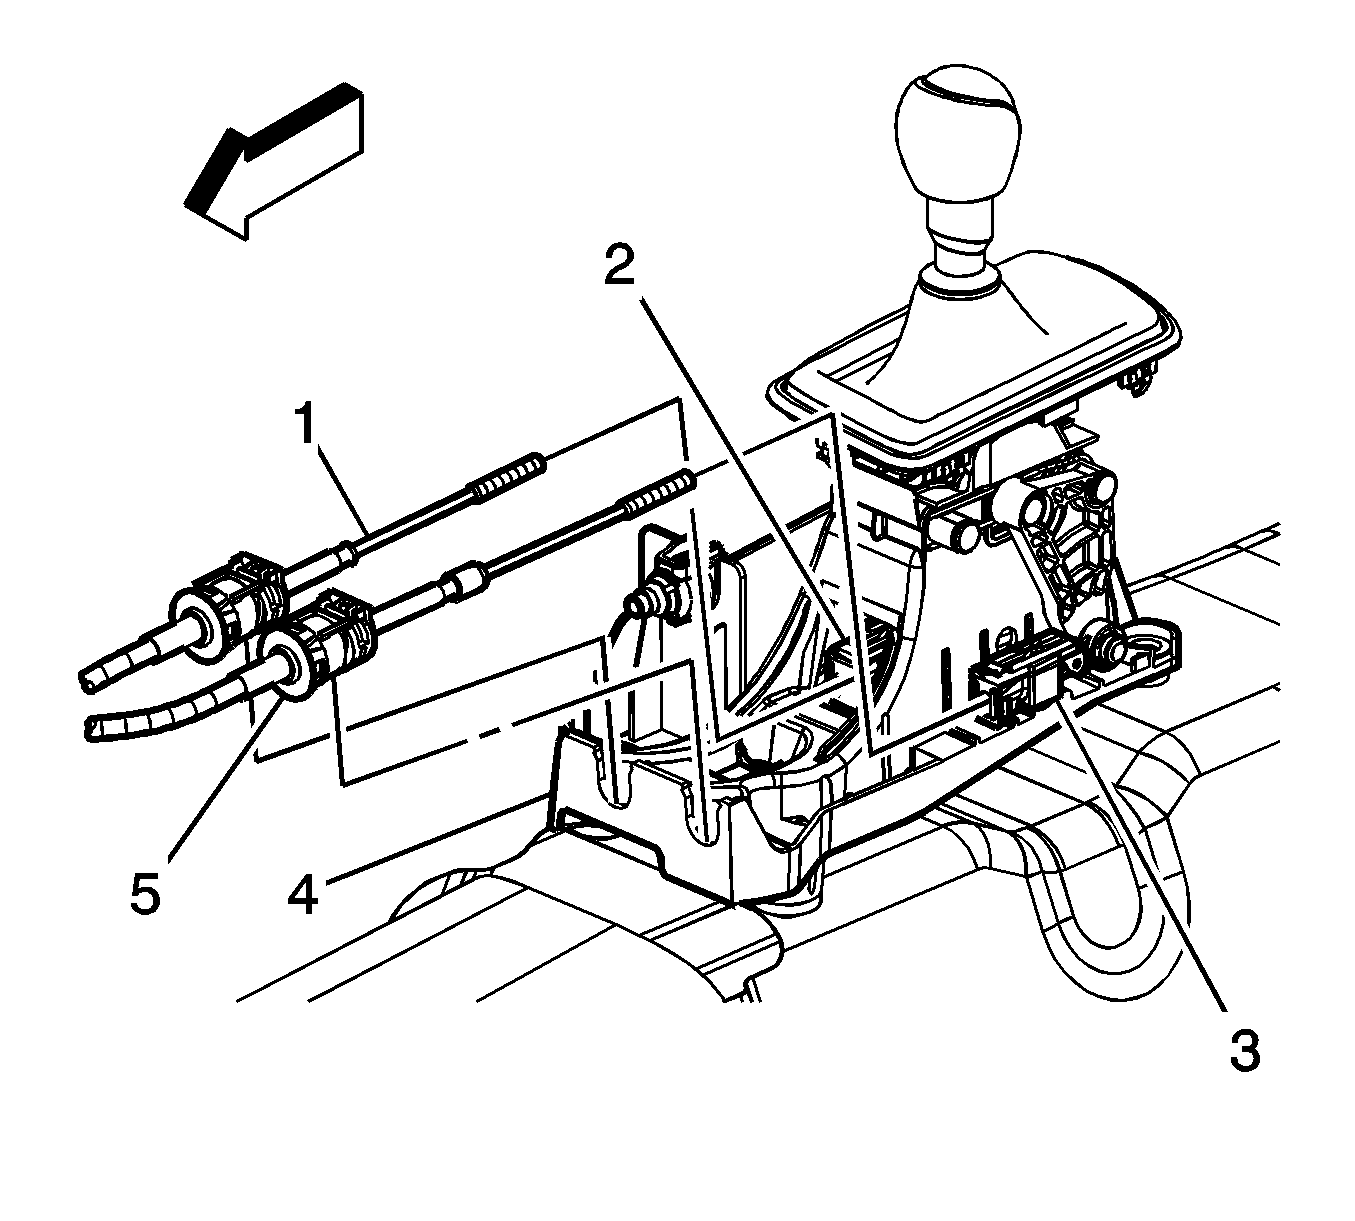
- Lift up on the cable retainers (2, 3).
- Remove the cables (1, 5) from the shifter (4).
- Remove the air cleaner outlet duct. Refer to Air Cleaner Outlet Duct Replacement .
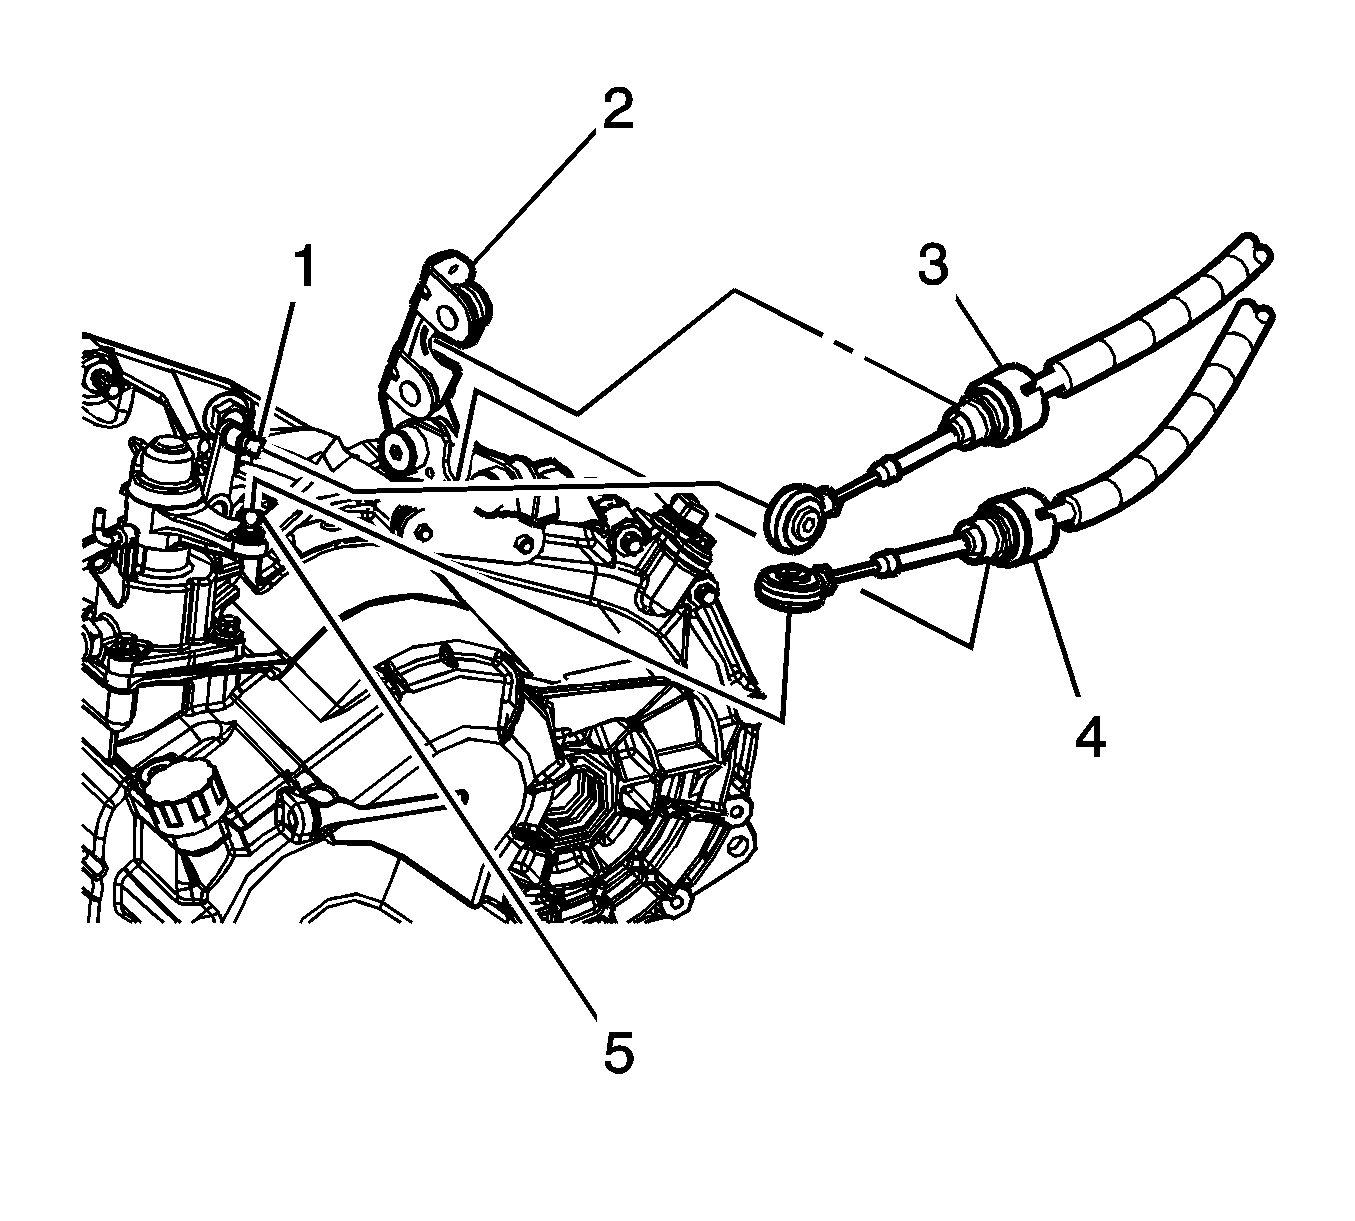
- Disconnect the select cable (3) from the transaxle select lever (1).
- Disconnect the shift cable (4) from the transaxle shift lever (5).
- Remove both cables from the underhood cable bracket (2).
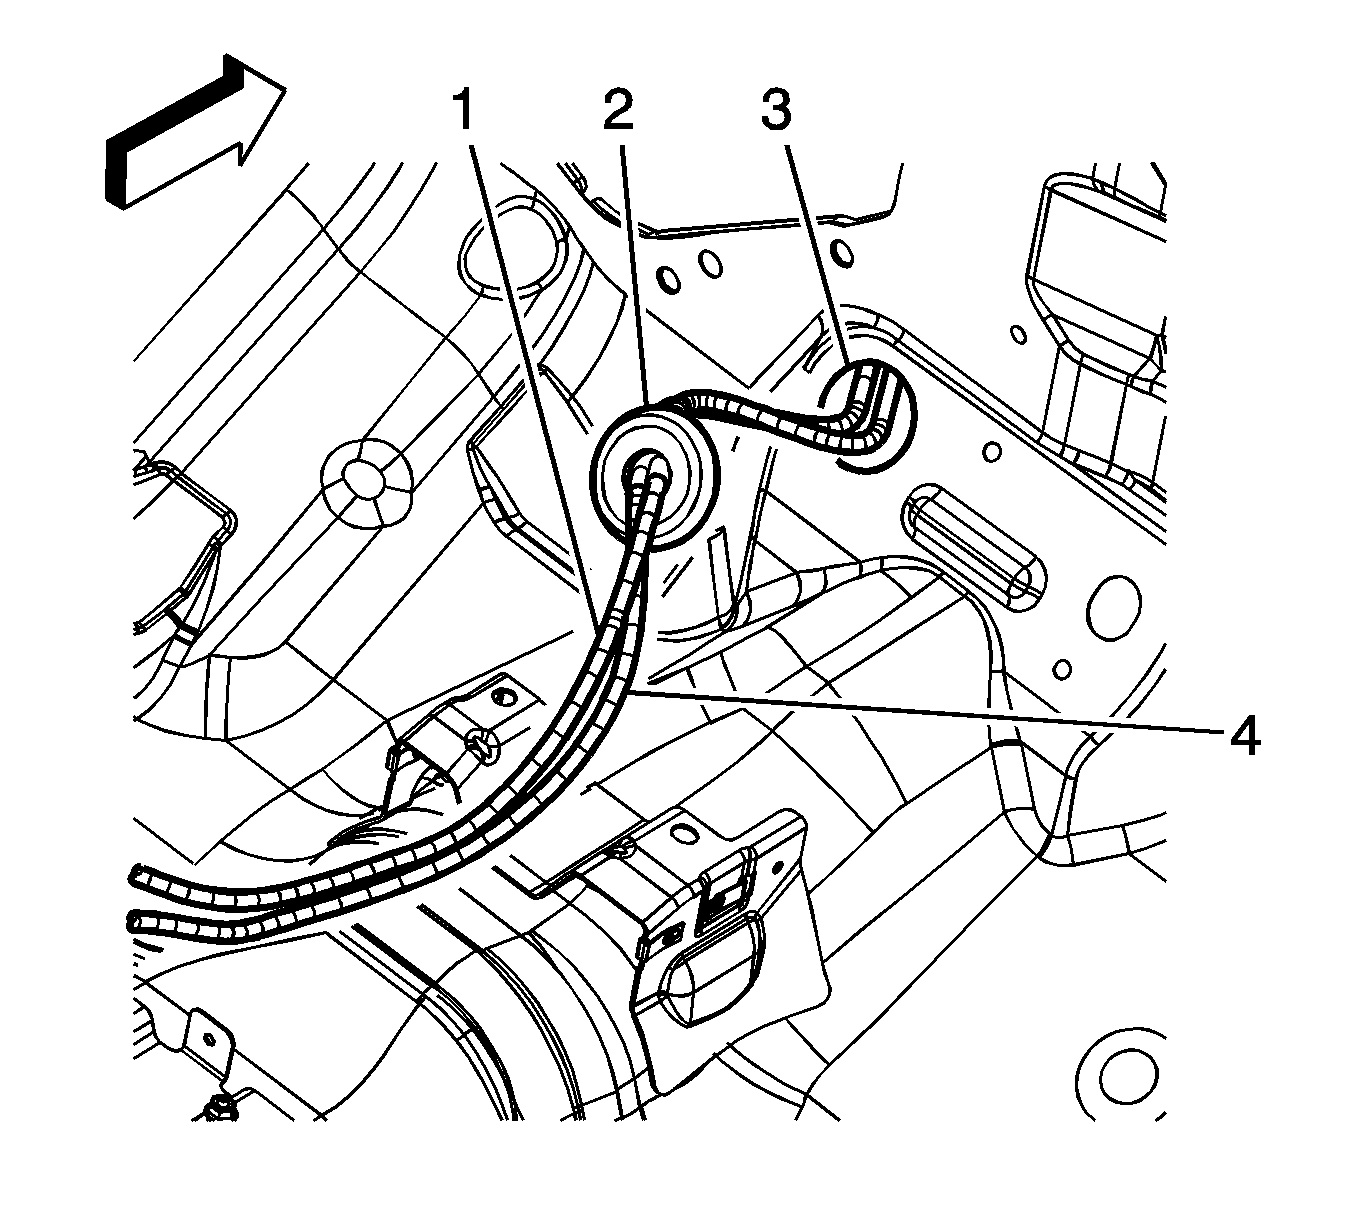
- Separate the grommet (2) from the cowl (3).
- Pull the cables (1, 4) through the cowl opening.
Installation Procedure
- Insert the cables (1, 4) through the cowl opening.
- Install the grommet flush with the cowl opening.
- Install both cables into the underhood bracket (2).
- Connect the shift cable (4) to the transaxle shift lever (5).
- Connect the select cable (3) to the transaxle select lever (1).
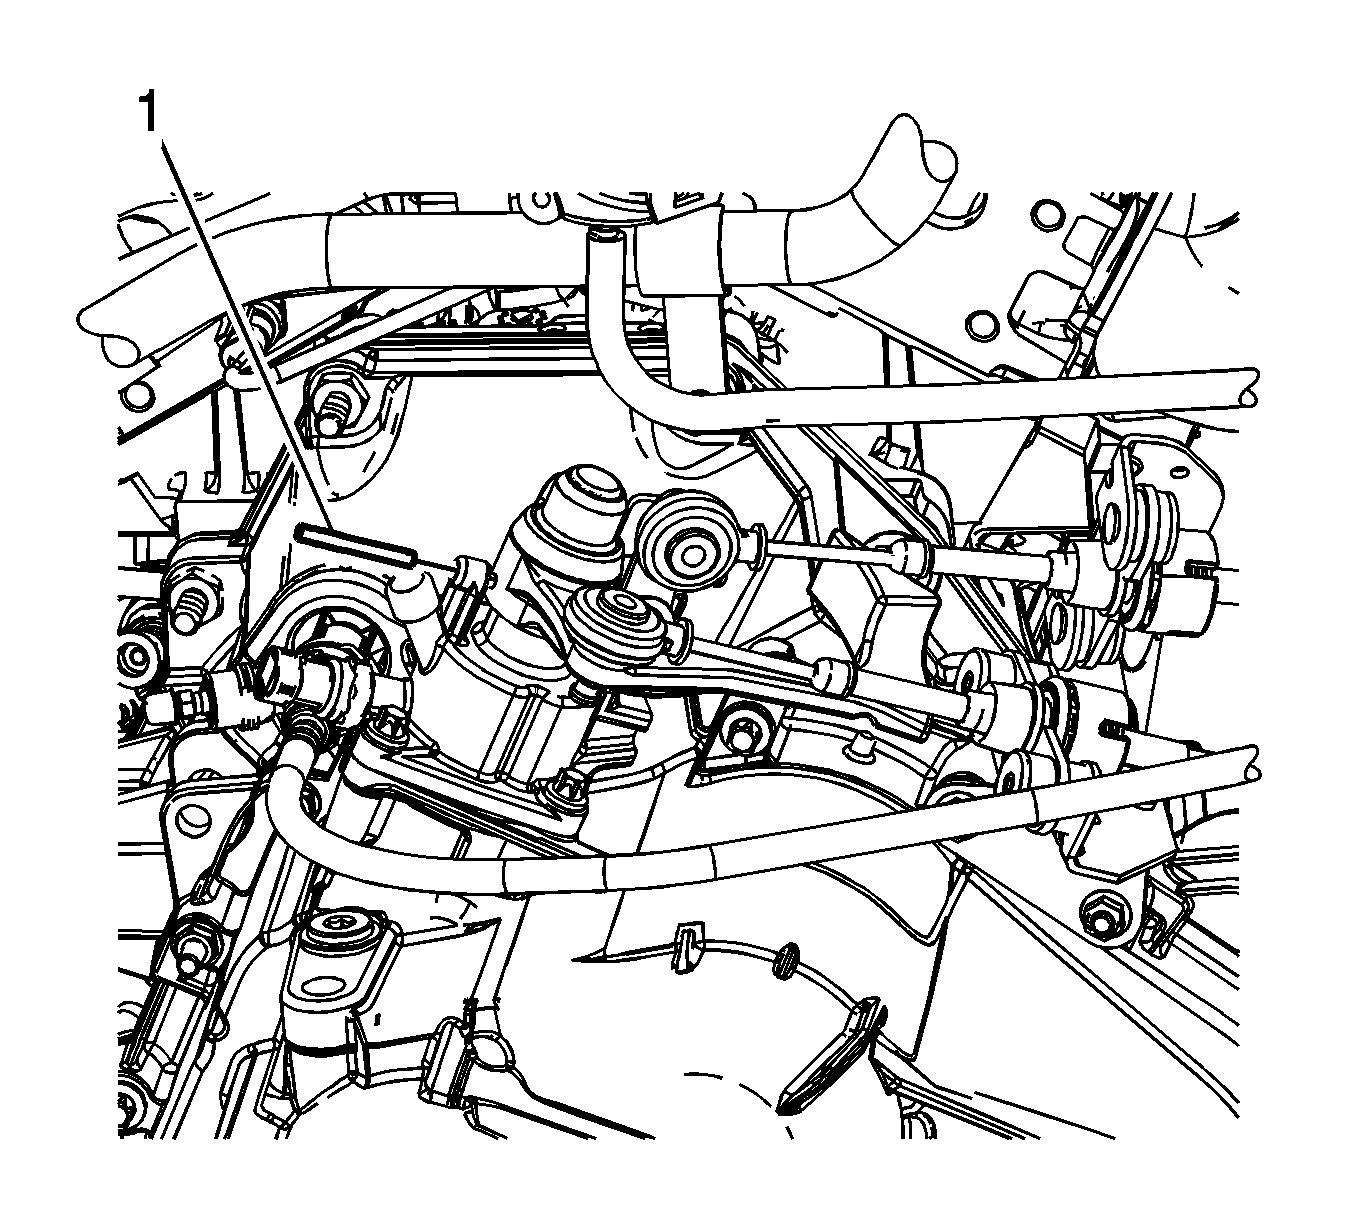
- Lift the selector shaft enough to insert a #11 drill bit (1) or equivalent into the transaxle shift alignment holes.
- Insert the cables (1, 5) into the cable retainers (2, 3).
- Install the cables (1, 5) to the shifter (4).
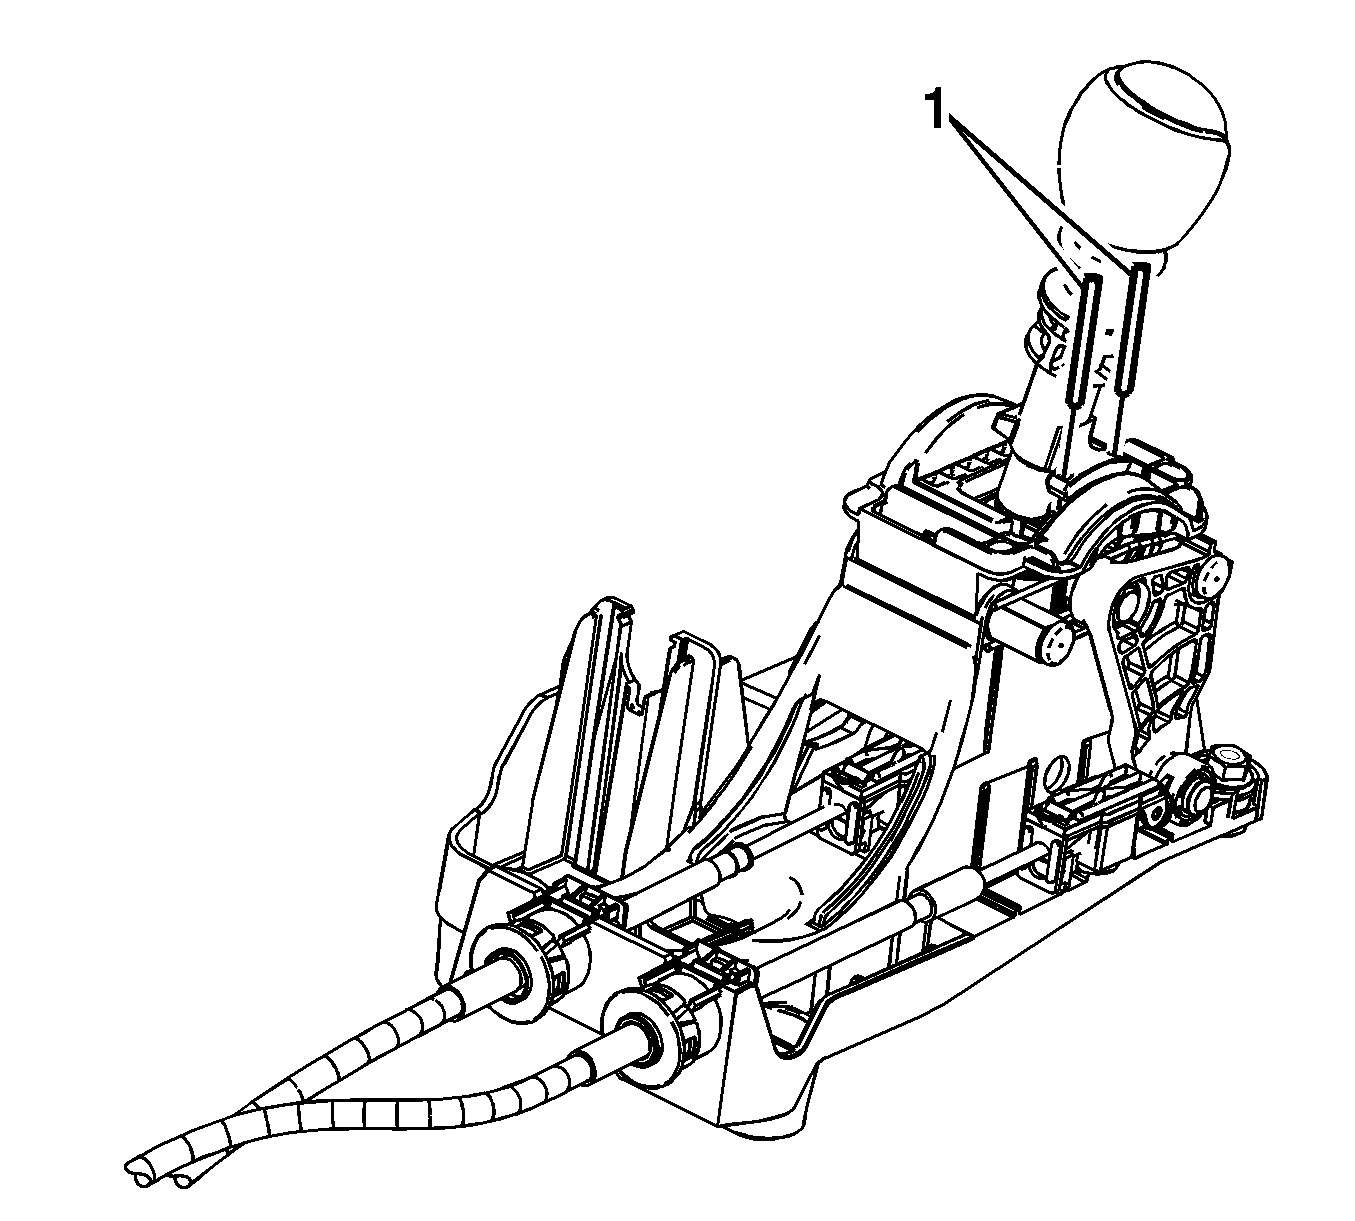
- Insert two #22 drill bits (1) or equivalent into the shift control assembly alignment holes.
- Press down on the cable retainers.
- Remove the two #22 drill bits (1) from the shift control assembly alignment holes.
- Install the console. Refer to Console Replacement .
- Remove the #11 drill bit (1) from the transaxle selector shaft alignment holes.
- Install the air cleaner outlet duct. Refer to Air Cleaner Outlet Duct Replacement .


