For 1990-2009 cars only
Removal Procedure
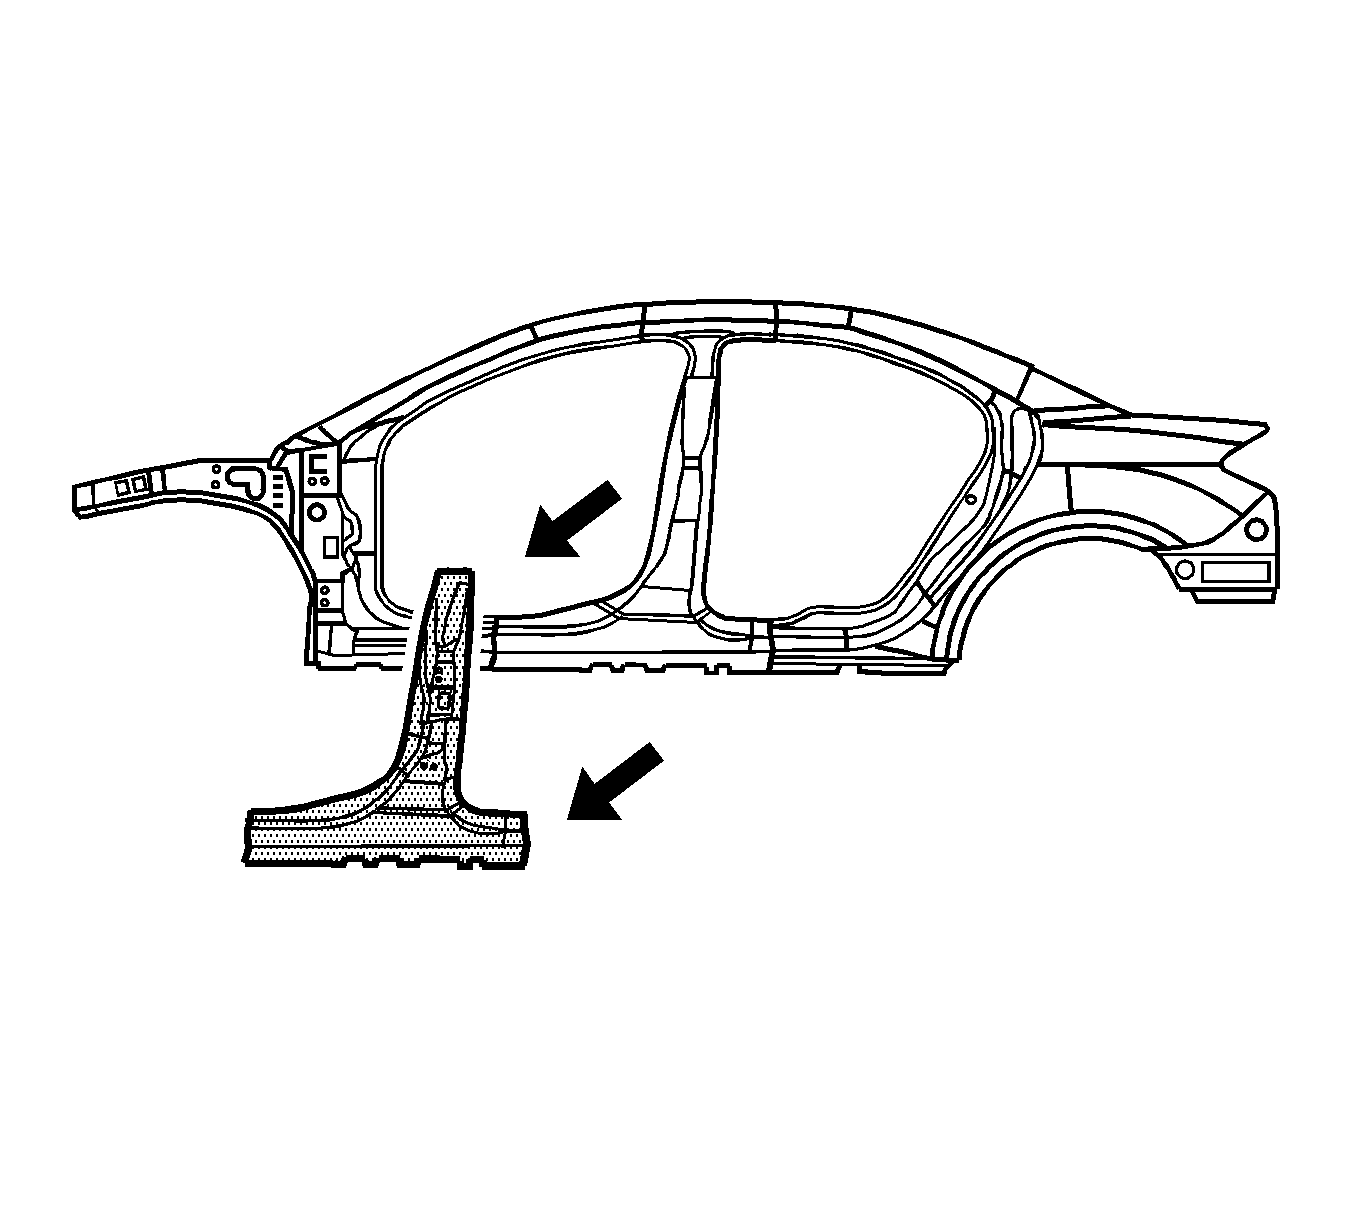
- The body side outer panel is available only in 1-piece side framer portions. The 2-piece side frame is no longer offered. You can perform any one of these replacement procedures separately or in any combination, depending upon the extent of the damage to the vehicle. Sectioning must take place in specified areas only.
- Disable the SIR system. Refer to SIR Disabling and Enabling in SIR.
- Disconnect the negative battery cable. Refer to Battery Negative Cable Disconnection and Connection in Engine Electrical.
- Remove the sealers and anti-corrosion materials from the repair area, as necessary, and note their location. Refer to Anti-Corrosion Treatment and Repair in Paint and Coatings.
- Repair as much of the damaged area as possible. Refer to Dimensions - Body .
- Note that the sectioning line high on the B-pillar, is 100 mm (4 in) below the upper side frame (a).
- From the top of the upper/side frame (a), measure down 100 mm (4 in) (b). Scribe a line. This is the cut location.
- Measure from any key feature in the panel. Lay out the cut line location on the body side panel.
- Create cut lines on the rocker panel within the approved sectioning locations, as needed.
- Cut the panel at the center pillar where the layout line was scribed.
- Cut the panel at the rocker panel area where sectioning is to be performed, within the straight sections only.
- Locate and drill out all factory welds. Note the number and location of welds for installation of the service part.
- Remove the damaged center pillar.
Caution: Refer to Approved Equipment for Collision Repair Caution in the Preface section.
Caution: Sectioning should be performed only in the recommended areas. Failure to do so may compromise the structural integrity of the vehicle and cause personal injury if the vehicle is in a collision.
Remove all related panels and components.
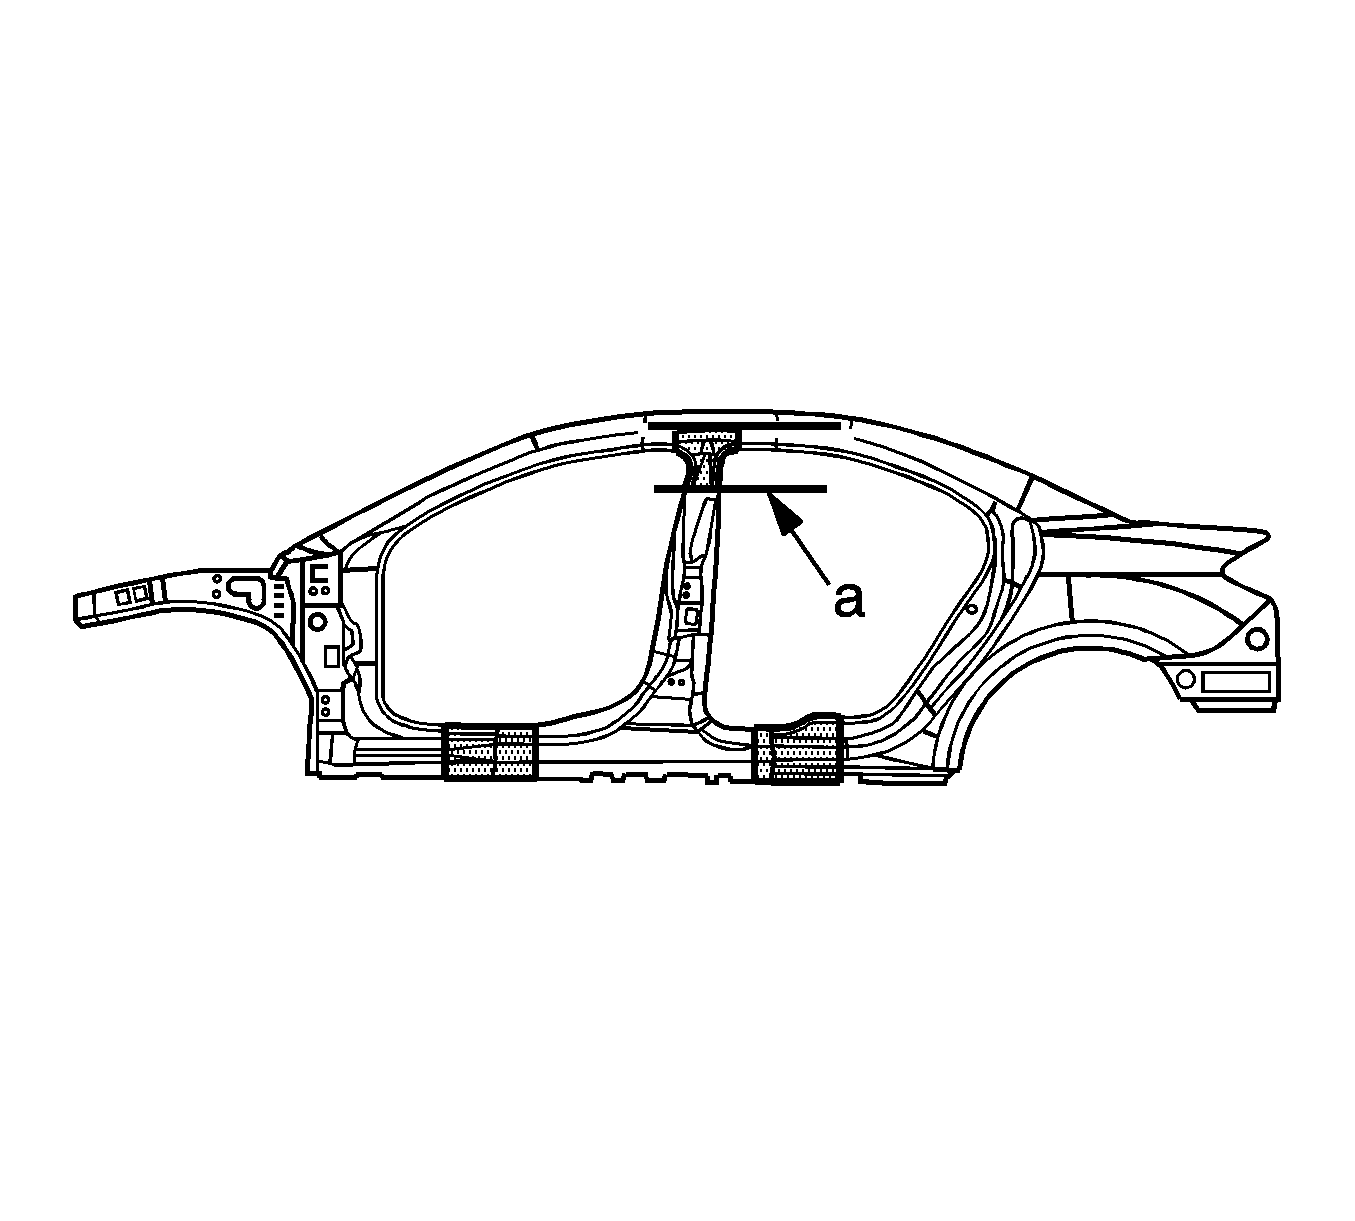
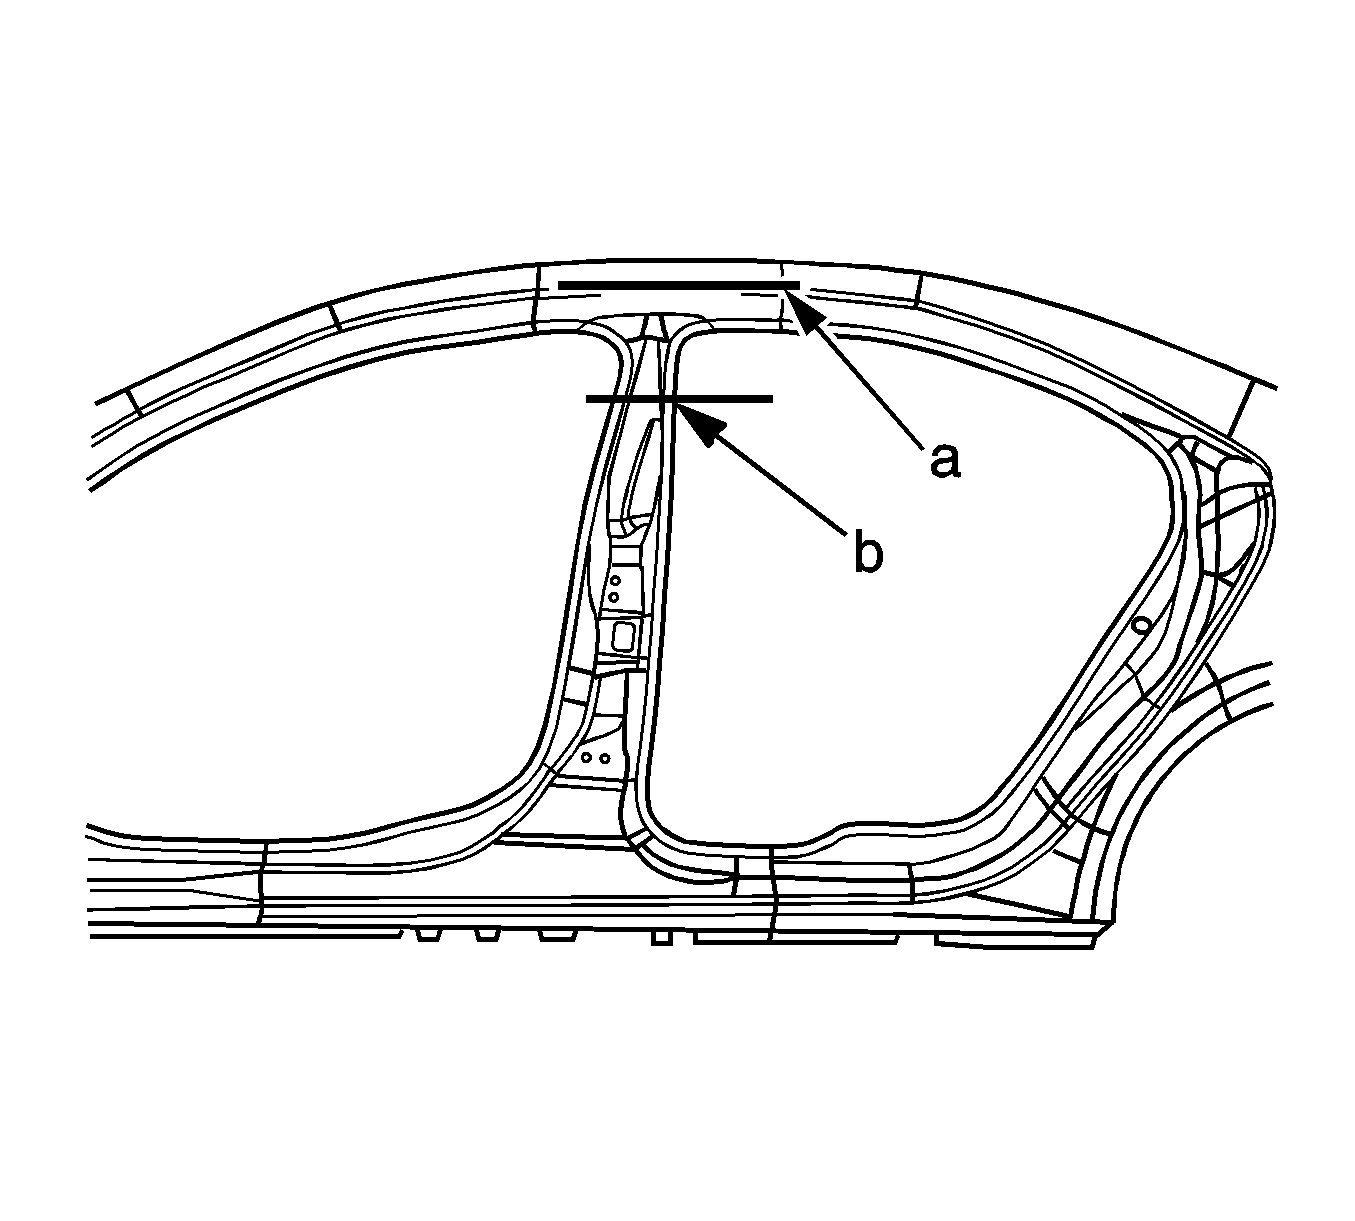
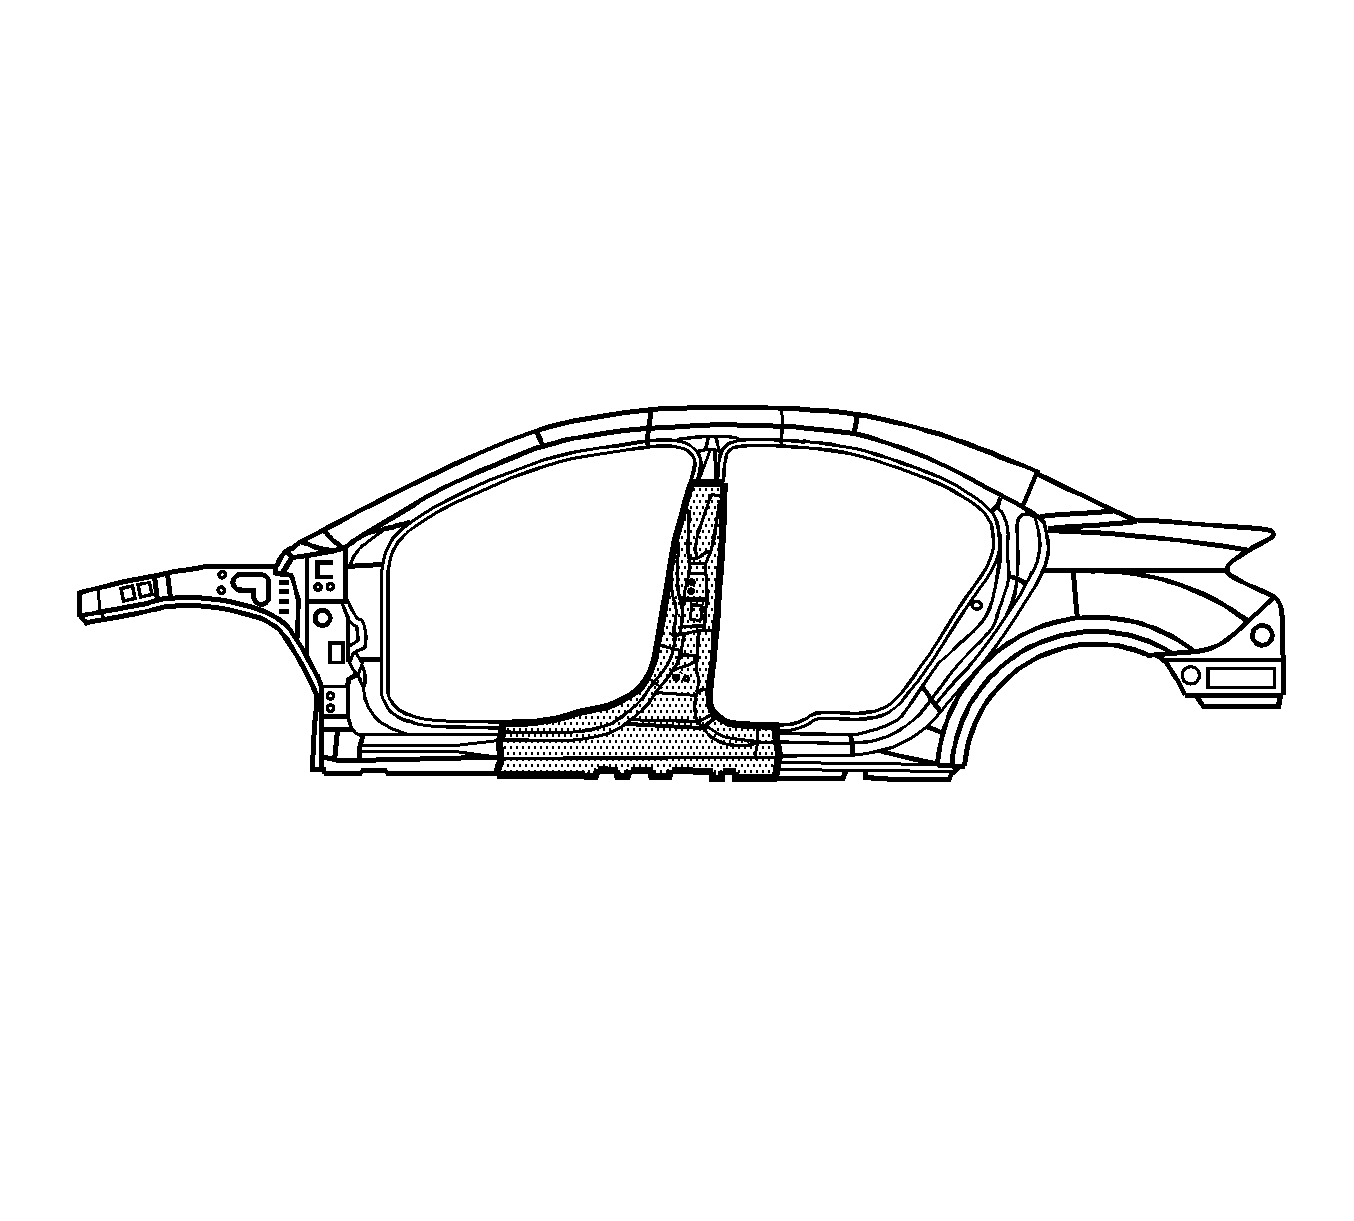
Important: Sectioning procedures can only take place in the straight areas of the body side panel.
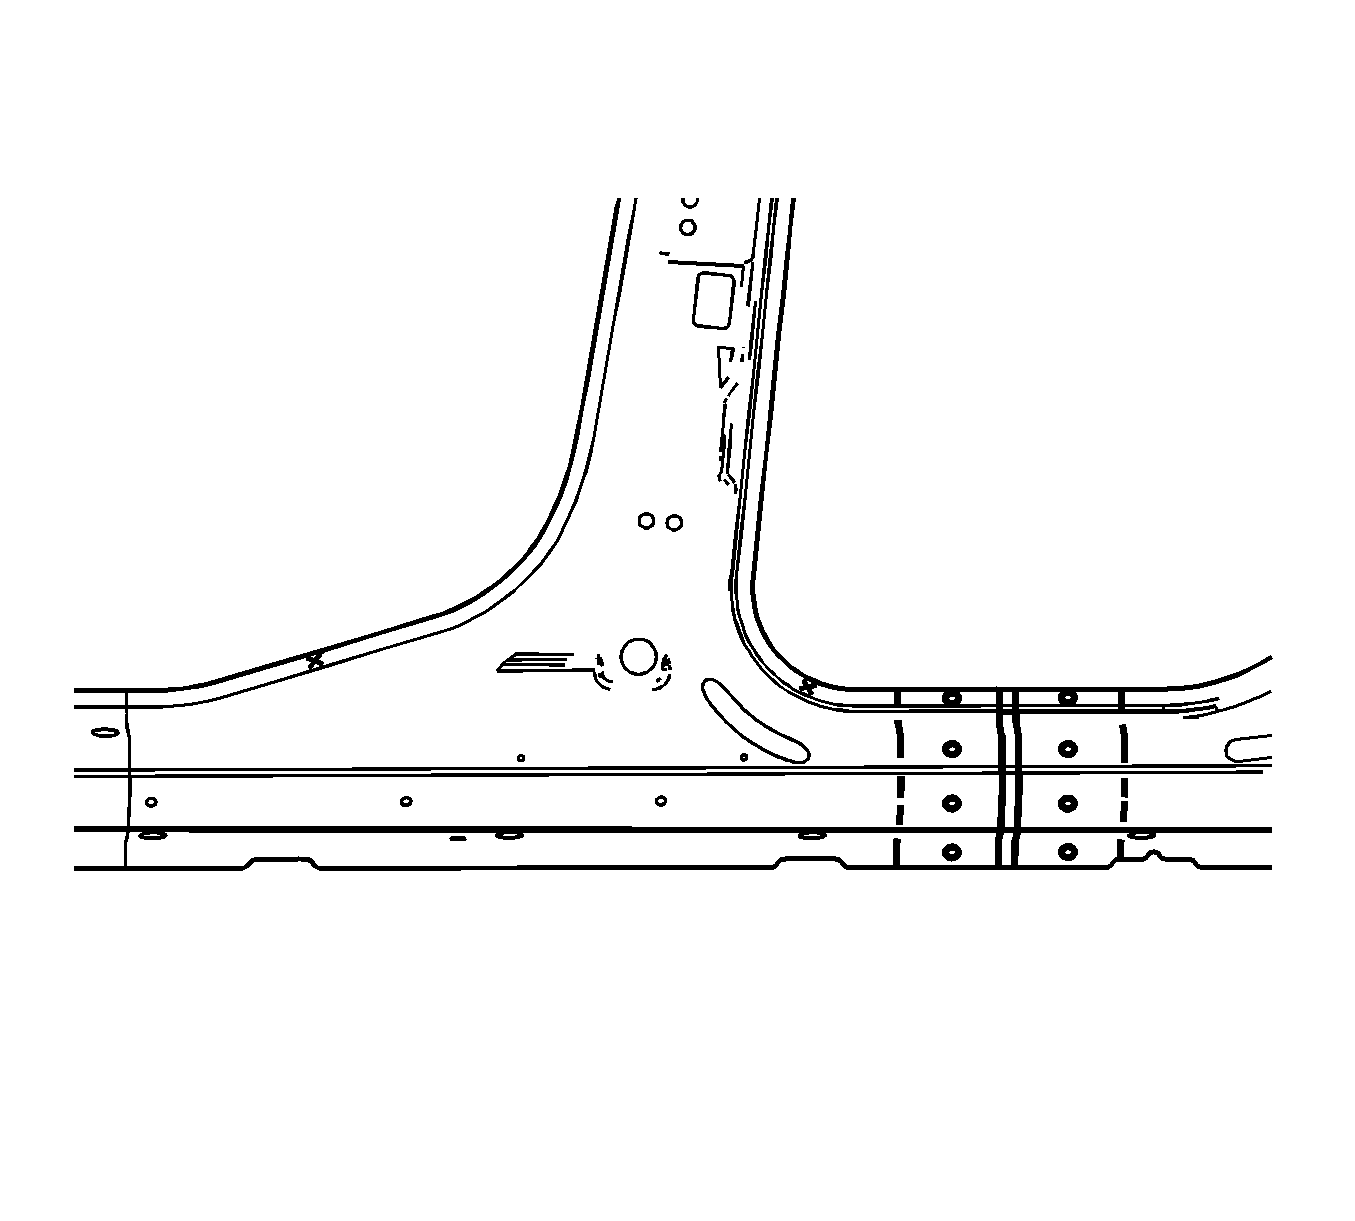
Installation Procedure
- Cut the outer center pillar in corresponding locations to fit the remaining original panel. The sectioning joint should be trimmed to allow a gap of 1½ times the metal thickness at the sectioning joint.
- In all the rocker panel areas, create a 100 mm (4 in) backing plate from the unused portion of the service part. Trim the backing plates, as necessary, to fit behind the sectioning joint.
- In the upper center pillar area, the inner reinforcement will be used as a backing plat (a).
- Drill 8 mm (5/16 in) along the sectioning cuts on the remaining original part. Locate these holes 13 mm (½ in) from the edge of the part and space 40 mm (1½ in) apart.
- Drill 8 mm (5/16 in) plug weld holes in the service part, as necessary, in the corresponding locations noted on the original panel.
- Prepare all mating surfaces for welding, as necessary.
- Apply 3M Weld-Thru Coating P/N 05916 or equivalent, to all mating surfaces.
- Fit the backing plates into the sectioning joints 50 mm (2 in) for the rocker section, for a total of 100 mm (4 in).
- Clamp the backing plates in place. Plug weld the backing plates to the vehicle.
- Position the outer center pillar to the vehicle using 3-dimensional measuring equipment. Clamp the pillar in place.
- Plug weld accordingly.
- To create a solid weld with minimum heat distortion, make a 25 mm (1 in) stitch weld along the seam with gaps of 25 mm (1 in). Go back and complete the stitch weld.
- Clean and prepare all of the welded surfaces.
- Apply the sealers and anti-corrosion materials to the repair area, as necessary. Refer to Anti-Corrosion Treatment and Repair in Paint and Coatings.
- Paint the repaired area. Refer to Basecoat/Clearcoat Paint Systems in Paint and Coatings.
- Install all of the related panels and components.
- Connect the negative battery cable. Refer to Battery Negative Cable Disconnection and Connection in Engine Electrical.
- Enable the SIR system. Refer to SIR Disabling and Enabling in SIR.
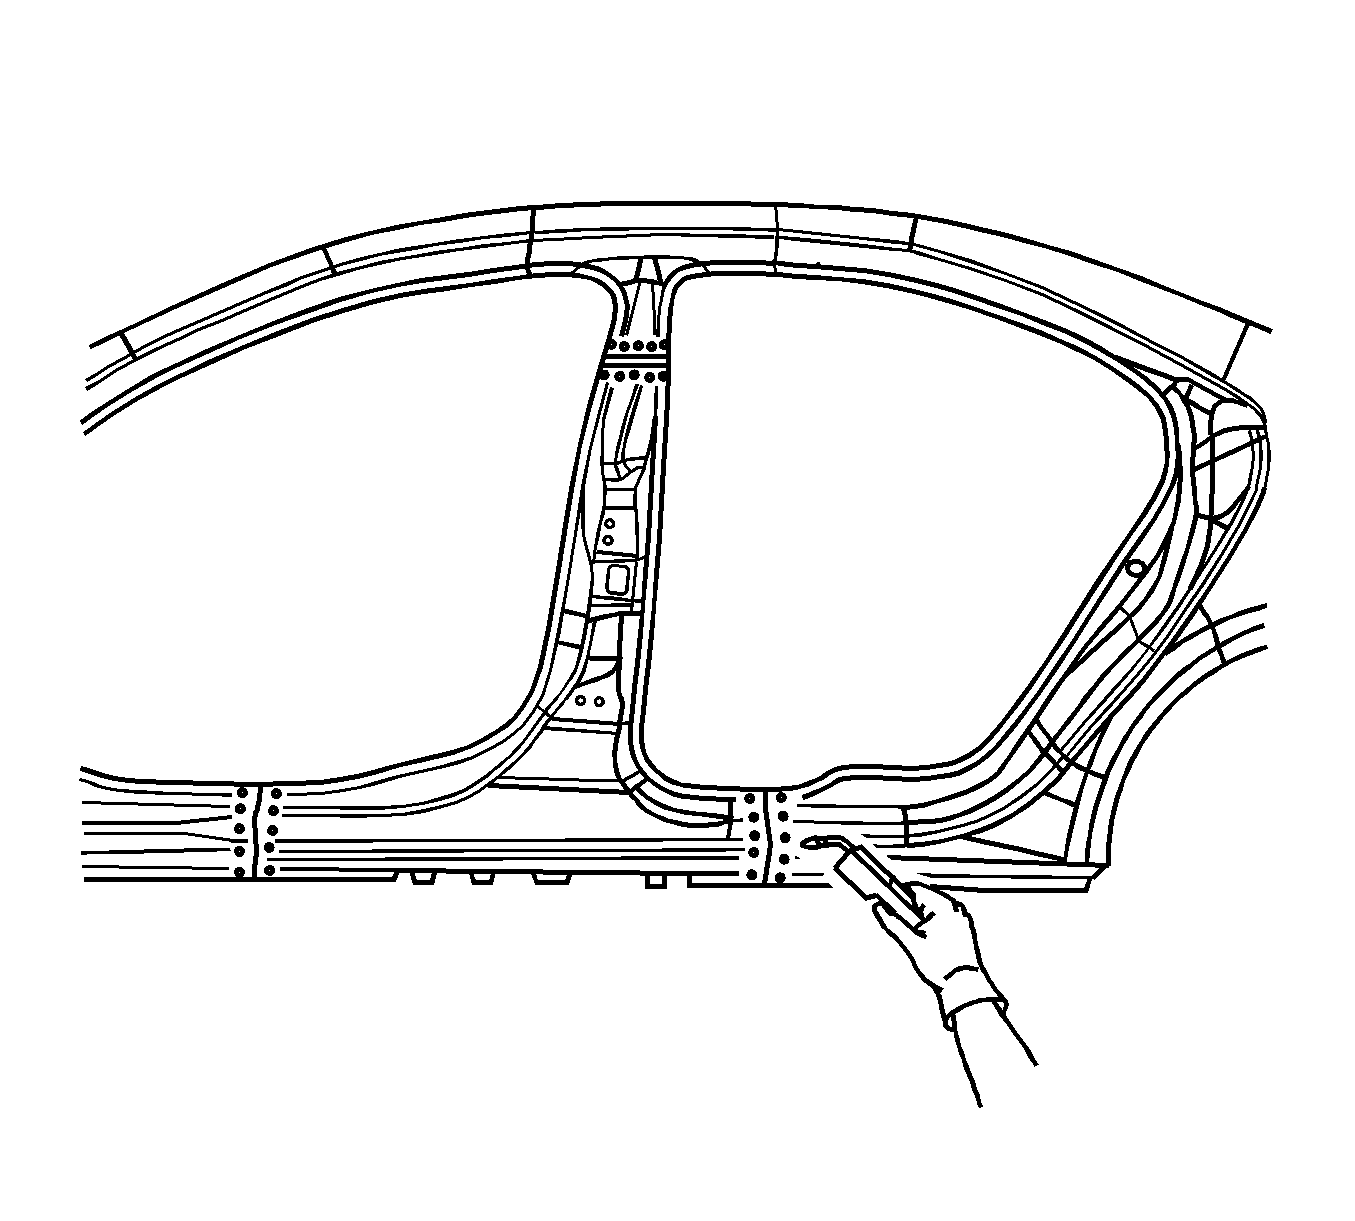
Important: If the location of the original plug weld holes cannot be determined, space the plug weld holes every 40 mm (1½ in) apart.

