For 1990-2009 cars only
Air Conditioning Evaporator Hose Assembly Replacement LSJ
Tools Required
J 39400-A Halogen Leak Detector
Removal Procedure
- Recover the refrigerant. Refer to Refrigerant Recovery and Recharging .
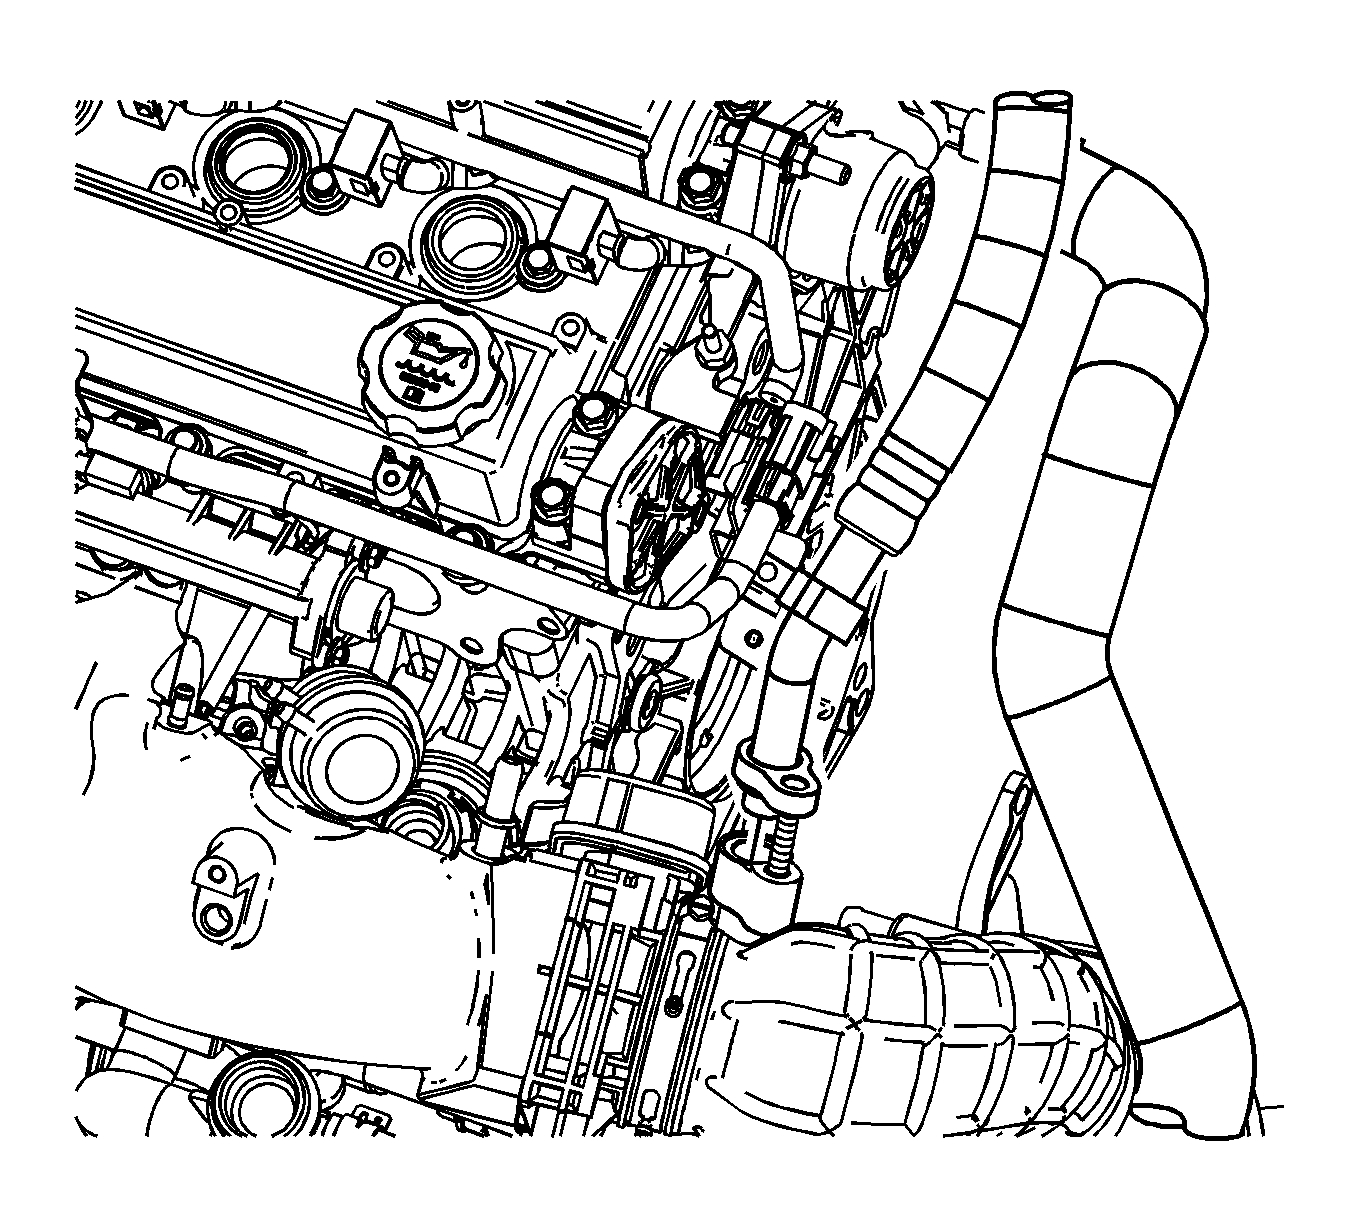
- Remove the compressor hose from the evaporator hose.
- Remove and discard the seal washer.
- Remove the retainer clamp from the evaporator hose.
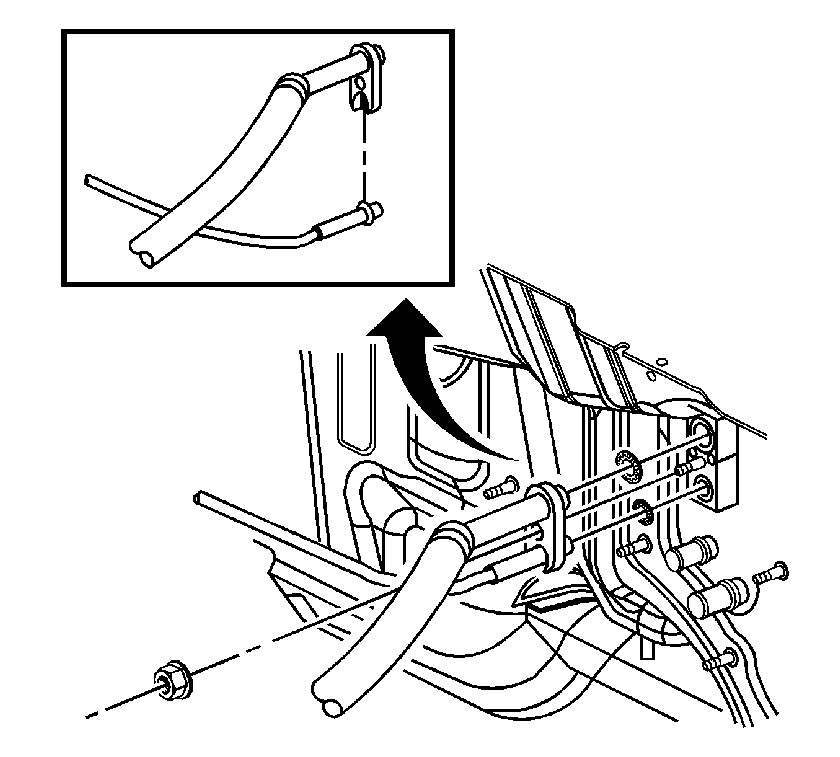
- Remove the condenser tube and the evaporator hose from the thermal expansion valve (TXV).
- Remove and discard the seal washers.


Important: You may have to position the wires aside to remove the evaporator hose.
Installation Procedure
- Install new sealing washers on the condenser tube and evaporator hose fittings. Refer to Sealing Washer Replacement .
- Install the condenser tube and evaporator hose to the TXV.
- Install the TXV nut.
- Install the new seal washer to the compressor hose. Refer to Sealing Washer Replacement .
- Install the compressor hose and nut to the evaporator hose.
- Install the retainer clamp to the evaporator hose.
- Evacuate and charge the refrigerant system. Refer to Refrigerant Recovery and Recharging .
- Leak test the fittings using the J 39400-A .

Notice: Refer to Fastener Notice in the Preface section.
Tighten
Tighten the nut to 20 N·m (15 lb ft).

Tighten
Tighten the nut to 20 N·m (15 lb ft).

Air Conditioning Evaporator Hose Assembly Replacement L61, LE5 - 1st Design
Special Tools
J 39400-A Halogen Leak Detector
Removal Procedure
- Recover the refrigerant. Refer to Refrigerant Recovery and Recharging.
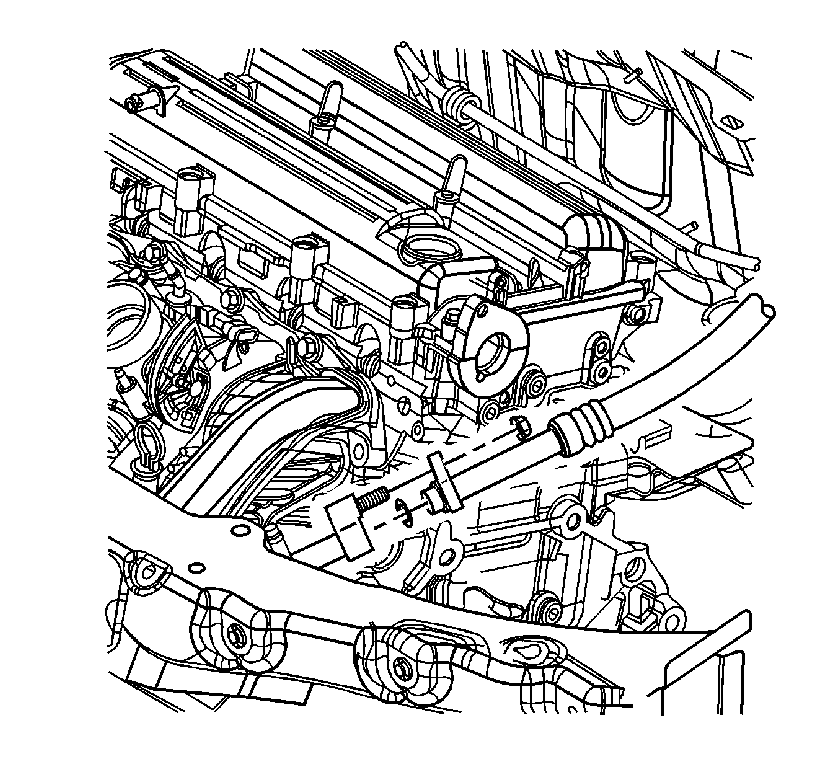
- Remove the compressor hose from the evaporator hose.
- Remove and discard the seal washer.
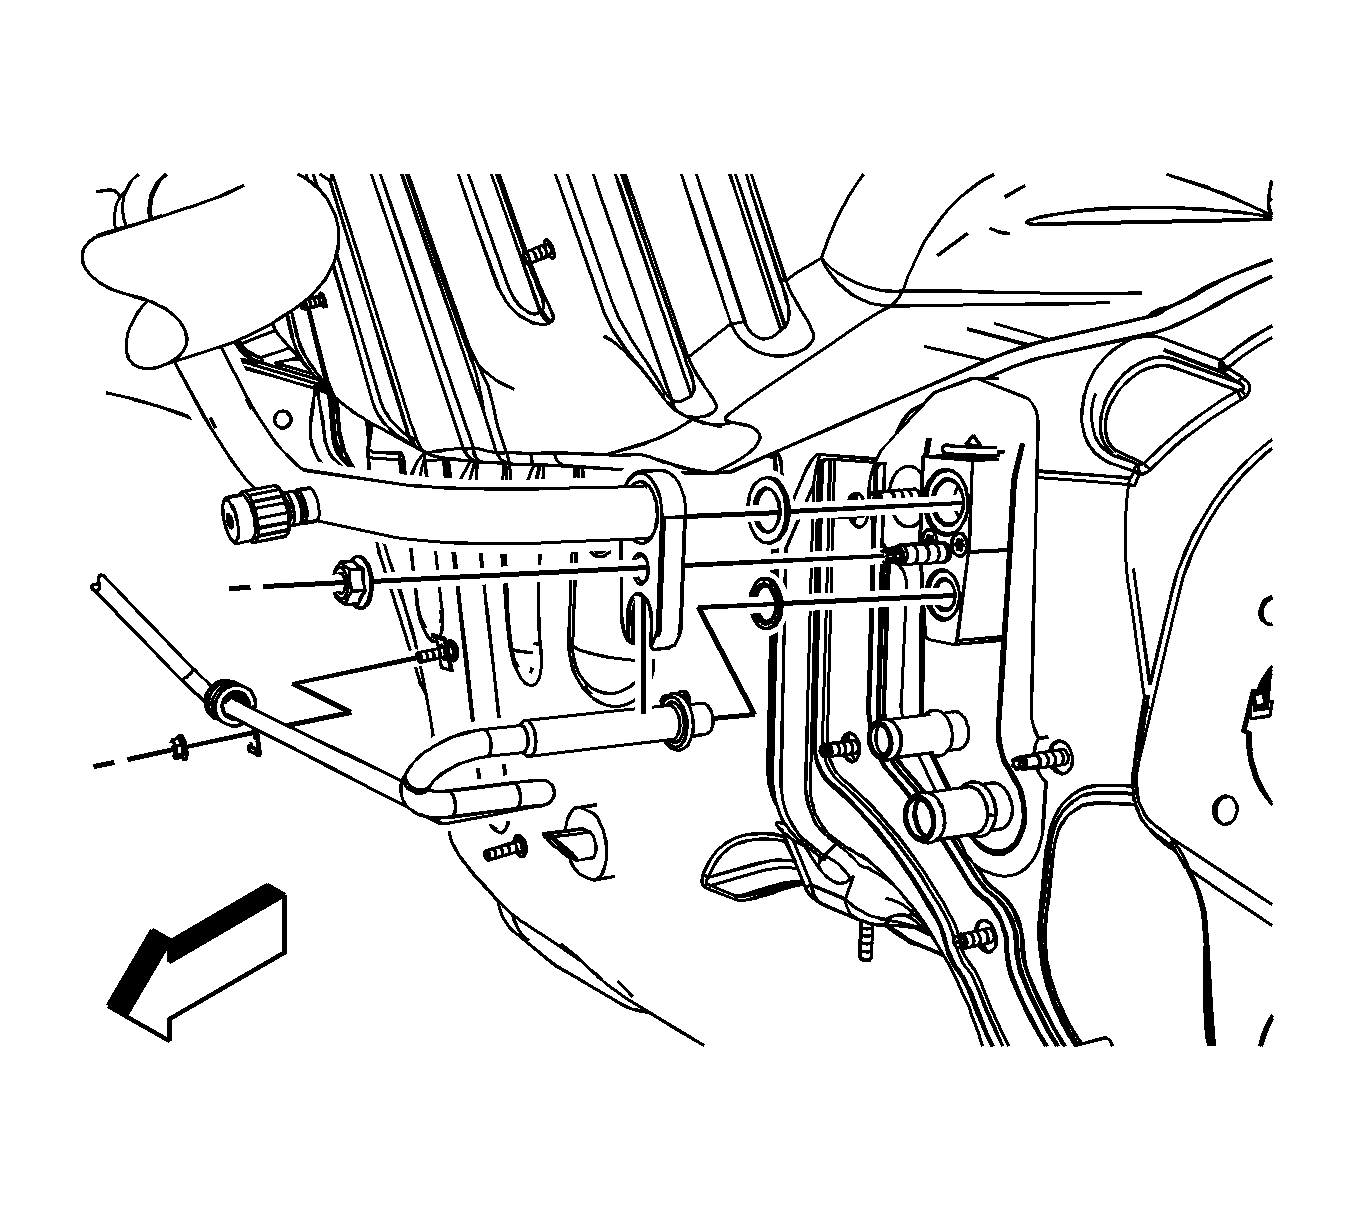
- Remove the condenser tube and evaporator hose from the thermal expansion valve (TXV).
- Remove and discard the seal washers.


Installation Procedure
- Install new sealing washers on the condenser tube and evaporator hose fittings. Refer to Sealing Washer Replacement.
- Install the condenser tube and evaporator hose to the TXV.
- Install the TXV nut.
- Install new seal washer to the compressor hose. Refer to Sealing Washer Replacement.
- Install the compressor hose and nut to the evaporator hose.
- Evacuate and charge the refrigerant system. Refer to Refrigerant Recovery and Recharging.
- Leak test the fittings using the J 39400-A .

Notice: Refer to Fastener Notice in the Preface section.
Tighten
Tighten the nut to 20 N·m (15 lb ft).

Tighten
Tighten the nut to 20 N·m (15 lb ft).
Air Conditioning Evaporator Hose Assembly Replacement L61, LE5 - 2nd Design
Tools Required
J 39400-A Halogen Leak Detector
Removal Procedure
- Recover the refrigerant. Refer to Refrigerant Recovery and Recharging .
- Remove the compressor hose from the evaporator hose.
- Remove and discard the seal washer.
- Remove the condenser tube and evaporator hose from the thermal expansion valve (TXV).
- Remove and discard the seal washers.


Installation Procedure
- Install new sealing washers on the condenser tube and evaporator hose fittings. Refer to Sealing Washer Replacement .
- Install the condenser tube and evaporator hose to the TXV.
- Install the TXV nut.
- Install new seal washer to the compressor hose. Refer to Sealing Washer Replacement .
- Install the compressor hose and nut to the evaporator hose.
- Evacuate and charge the refrigerant system. Refer to Refrigerant Recovery and Recharging .
- Leak test the fittings using the J 39400-A .

Notice: Refer to Fastener Notice in the Preface section.
Tighten
Tighten the nut to 20 N·m (15 lb ft).

Tighten
Tighten the nut to 20 N·m (15 lb ft).
