For 1990-2009 cars only
Caution: Gasoline or gasoline vapors are highly flammable. A fire could occur if an ignition source is present. Never drain or store gasoline or diesel fuel in an open container, due to the possibility of fire or explosion. Have a dry chemical (Class B) fire extinguisher nearby.
- Remove the fuel sender assembly from the fuel tank. Refer to Fuel Sender Assembly Replacement .
- Disconnect the electrical connector (1) from the fuel sender assembly.
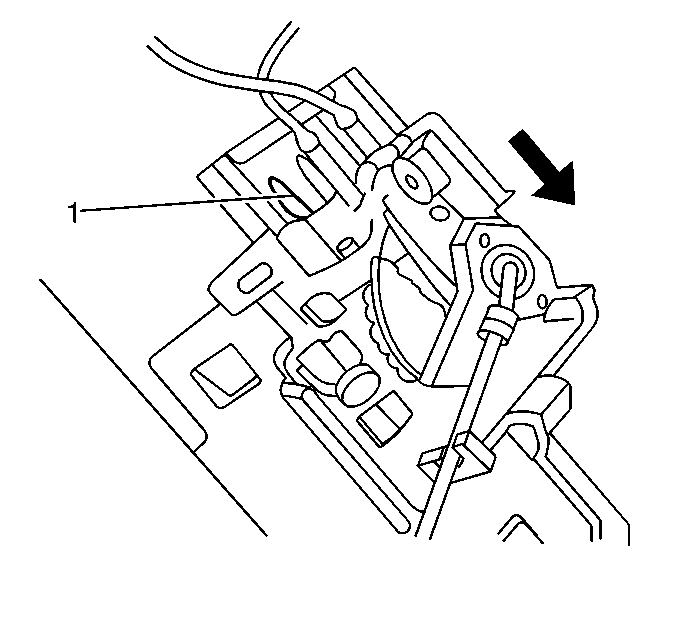
- Depress the retaining tab (1), and slide the fuel level sensor assembly down in order to remove the sensor from the fuel sender assembly.
- Remove the lower assembly end cap (1) by releasing the 3 snap-fit retainers with a screwdriver (2).
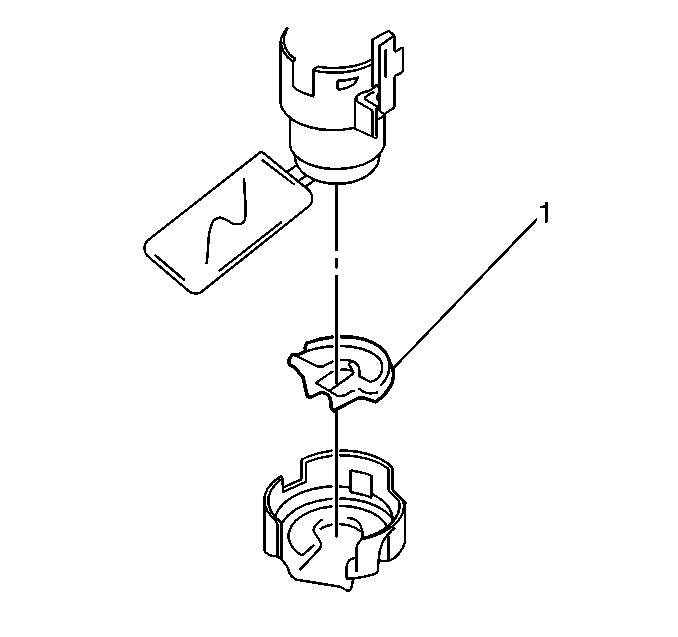
- Remove the fuel pump cushion (1).
- Disconnect the 2 fuel pump electrical connections (1) from the fuel sender sub-assembly.
- Pull the fuel pump (1) firmly down out of the fuel sender assembly housing (2).
- Release the 3 snap-fit retainers that secure the housing (2) to the fuel sender sub-assembly, and remove the housing.
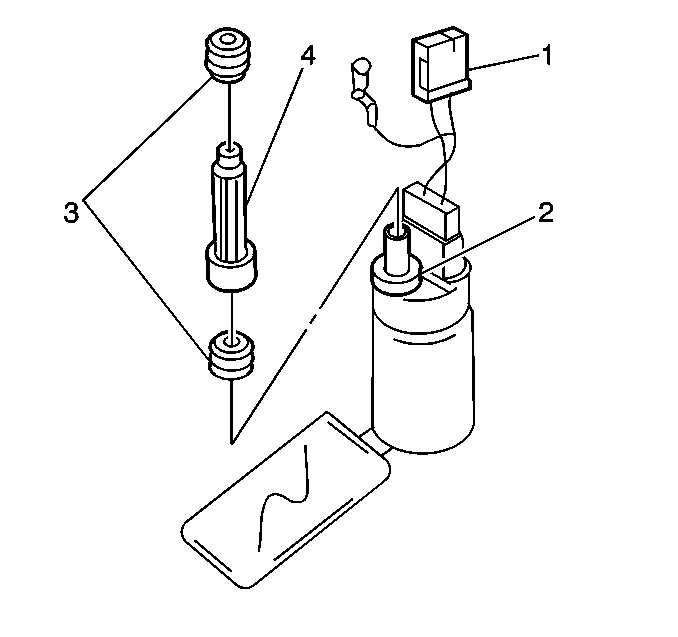
- Remove the fuel tube (4) and the 2 grommets (3) from the fuel sender sub-assembly. The fuel sender sub-assembly contains the fuel filter and must be serviced as an assembly.


Important: Do not apply pressure to the sensor resistor plate or to the float arm. Pressure can deform these parts and cause the parts to operate incorrectly.


Important: When removing the fuel tube and the grommets, be careful not to damage the sealing surfaces. If the sealing surfaces are damaged, a fuel leak may occur.
Important: Use of new grommets, new cushions, and new spacers is recommended in order to prevent failure and fuel pressure loss.
- Install the spacer (2) onto the fuel pump outlet pipe.
- Lubricate the grommets (3) with engine oil, and install the 2 grommets (3) and the fuel tube (4) into the fuel sender sub-assembly.
- Install the housing (2) to the fuel sender sub-assembly, and interlock the 3 snap-fit retainers.
- Install the fuel pump (1) through the housing (2) and into the fuel sender sub-assembly. Align the fuel pump outlet pipe with the fuel tube in the sub-assembly.
- Install the fuel pump cushion (1) between the fuel pump and the lower assembly end cap.
- Attach the lower assembly end cap to the housing, and interlock the 3 snap-fit retainers
- Connect the 2 fuel pump electrical connectors (1) to the fuel sender assembly.
- Insert the locating-tab (1) on the fuel level sensor assembly into the channel (2) on the fuel sender assembly. Slide the sensor assembly upward until the assembly is locked into place.
- Connect the electrical connector (1) to the fuel sender assembly.
- Install the fuel sender assembly into the fuel tank. Refer to Fuel Sender Assembly Replacement .


