Crankshaft Balancer Installation F Car
Tools Required
| • | J 41665 Crankshaft
Balancer and Sprocket Installer |

Notice: Use the correct fastener in the correct location. Replacement fasteners
must be the correct part number for that application. Fasteners requiring
replacement or fasteners requiring the use of thread locking compound or sealant
are identified in the service procedure. Do not use paints, lubricants, or
corrosion inhibitors on fasteners or fastener joint surfaces unless specified.
These coatings affect fastener torque and joint clamping force and may damage
the fastener. Use the correct tightening sequence and specifications when
installing fasteners in order to avoid damage to parts and systems.
Important:
| • | The crankshaft balancer installation and bolt tightening involves
a 4 stage tightening process. The first pass ensures that the balancer
is installed completely onto the crankshaft. The second, third and fourth
passes tighten the new bolt to the proper torque. |
| | The used crankshaft balancer bolt will be used only during the first
pass of the balancer installation procedure. Install a NEW crankshaft balancer
bolt and tighten as described in the second, third and fourth passes of
the balancer bolt tightening procedure. |
| • | Make sure the teeth of the tool engage the engine flywheel teeth. |
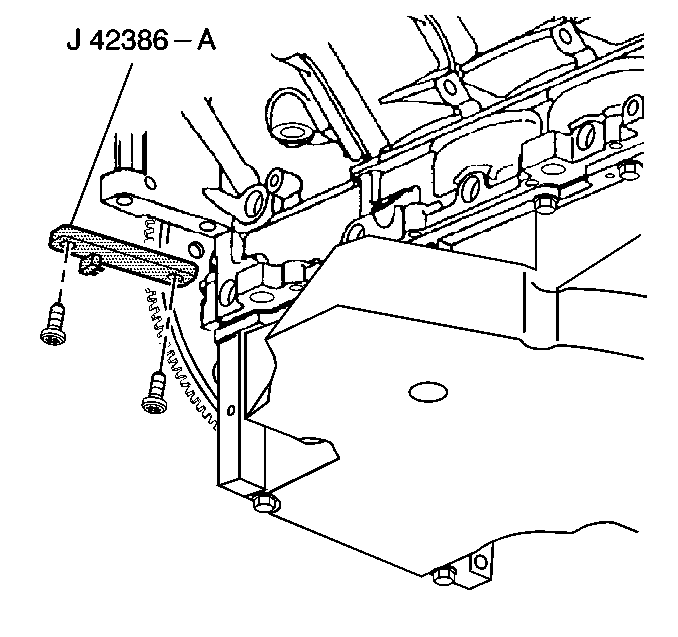
- Install the J 42386-A
and
bolts.
Use 1 M10-1.5 x 120 mm and one M10-1.5 x 45 mm
bolt for proper tool operation.
Tighten
Tighten the J 42386-A
bolts
to 50 N·m (37 lb ft).
Important: The balancer should be positioned onto the end of the crankshaft as
straight as possible prior to tool installation.
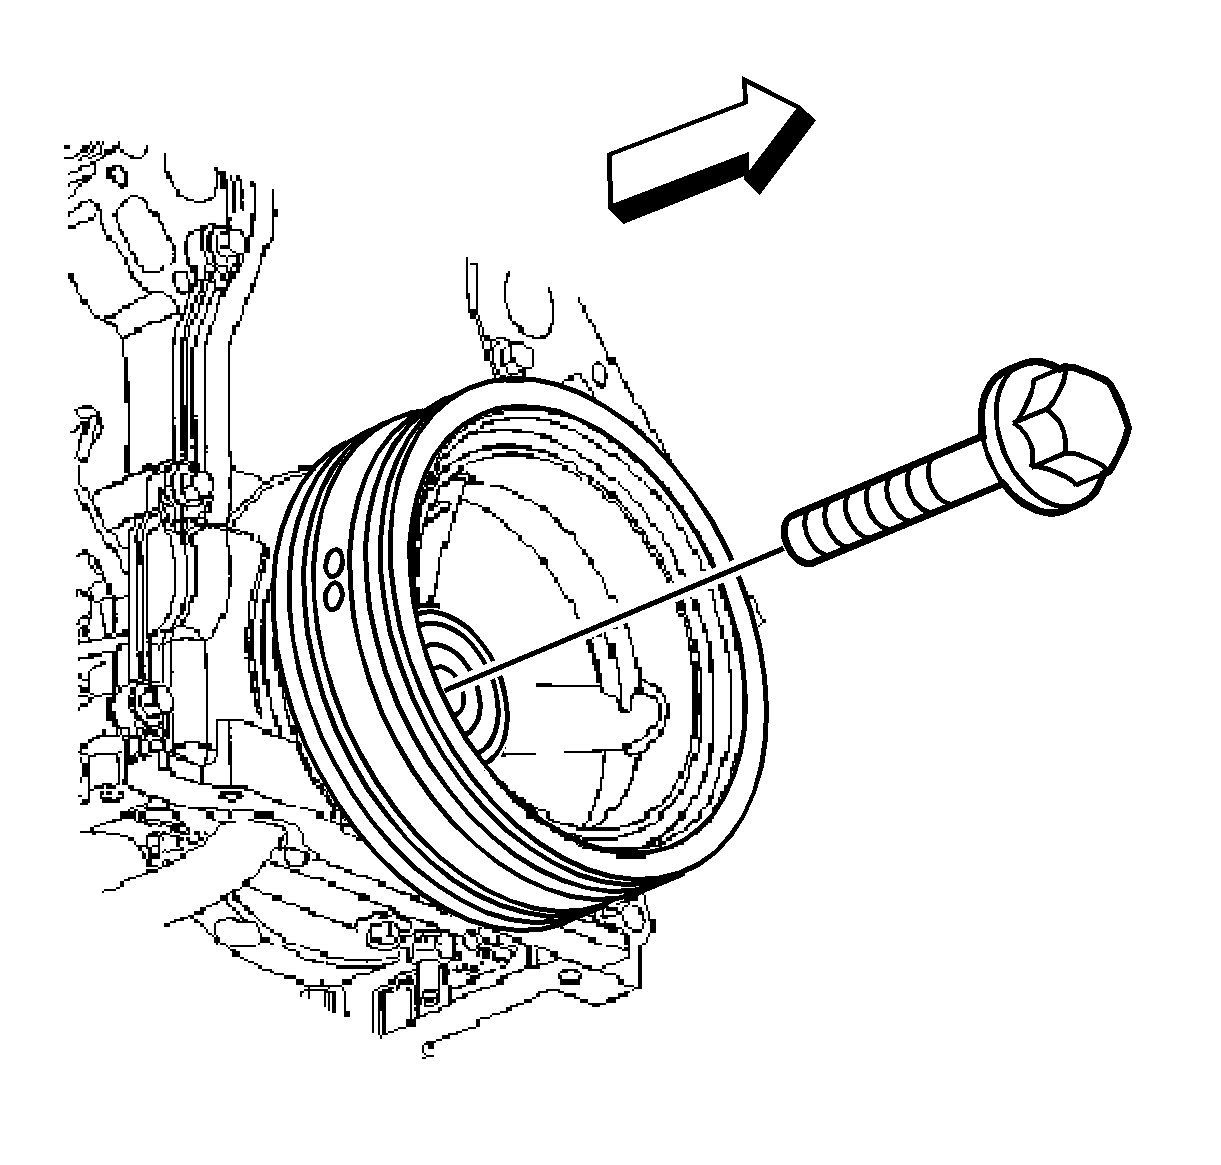
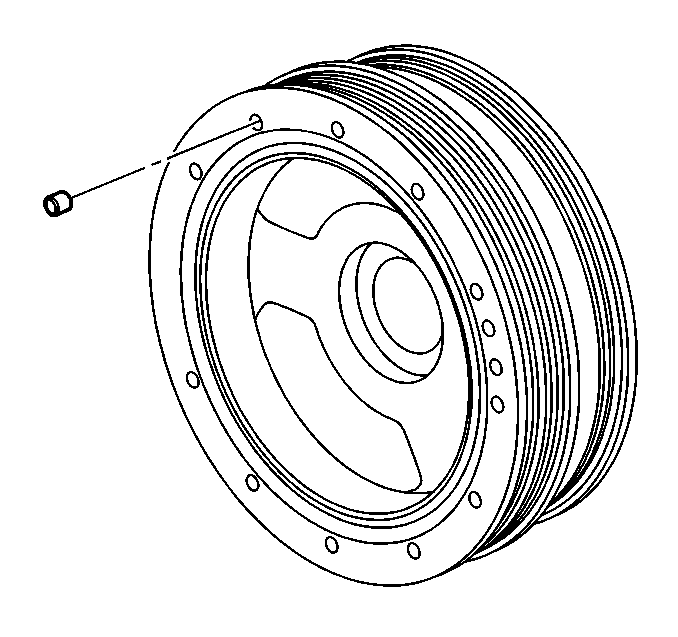
- Install the balancer onto the end of the crankshaft.

- Use the J 41665
in order to install the balancer.
| 3.1. | Assemble the threaded rod, nut, washer and installer. |
Insert the smaller end of the installer into the front of the balancer.
| 3.2. | Use a wrench and hold the hex end of the threaded rod. |
| 3.3. | Use a second wrench and rotate the installation tool nut clockwise
until the balancer is started onto crankshaft. |
| 3.4. | Remove and reverse the installation tool. |
Position the larger end of the installer against the front of the balancer.
| 3.5. | Use a wrench and hold the hex end of the threaded rod. |
| 3.6. | Use a second wrench and rotate the installation tool nut clockwise
until the balancer is installed onto the crankshaft. |
| 3.7. | Remove the balancer installation tool. |
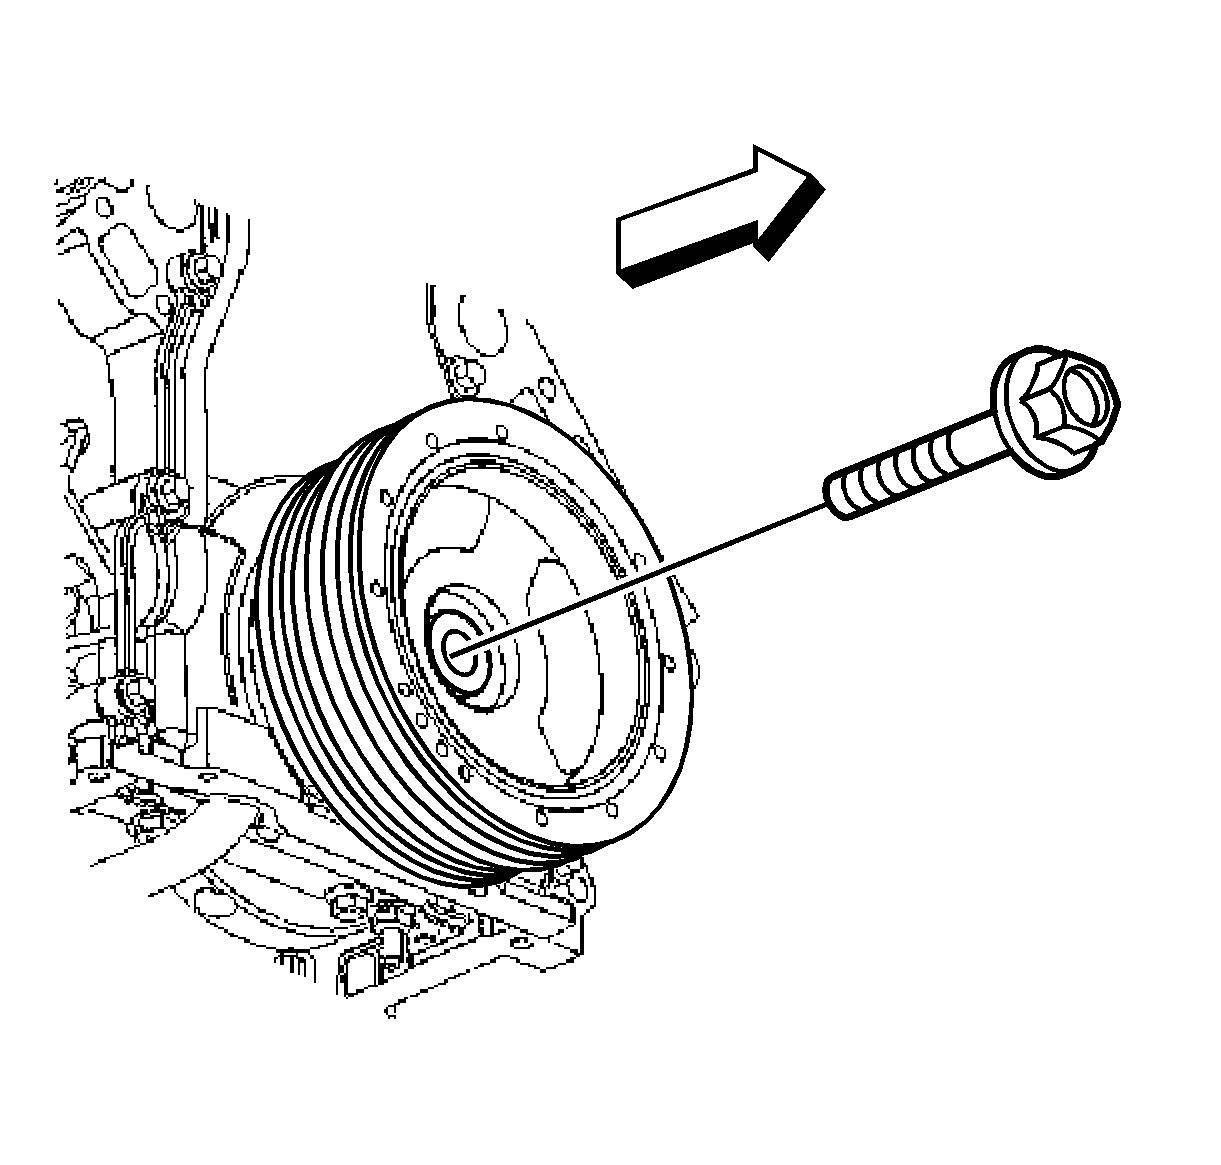
- Install the used crankshaft balancer bolt.
Tighten
Tighten the crankshaft balancer bolt to 330 N·m (240 lb ft).
- Remove the used crankshaft balancer bolt.
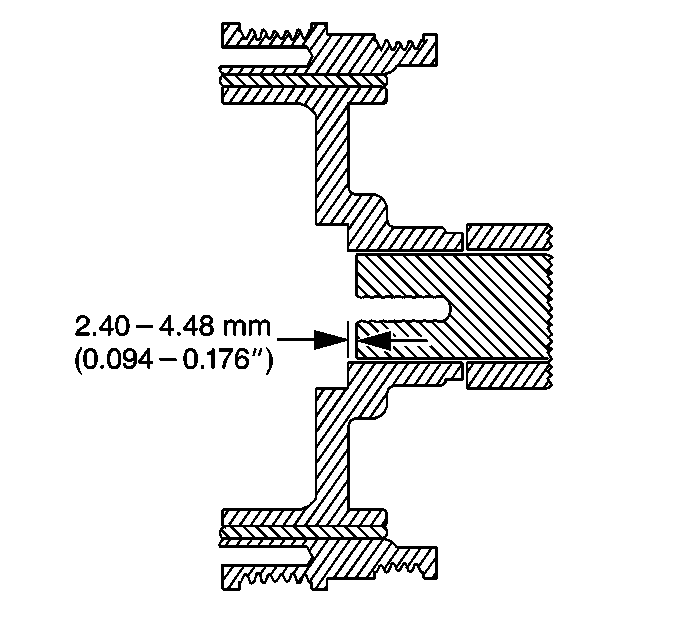
Important: The nose of the crankshaft should be recessed 2.40-4.48 mm
(0.094-0.176 in) into the balancer bore.
- Measure for a correctly installed balancer.
If the balancer is not installed to the proper dimensions, install the J 41665
and repeat the installation
procedure.
- Install the NEW crankshaft
balancer bolt.
Tighten
- Tighten the crankshaft balancer bolt a first pass to 50 N·m
(37 lb ft).
- Tighten the crankshaft balancer bolt a second pass to 140 degrees
using the J 36660-A
.
- Remove the J 42386-A
.
Crankshaft Balancer Installation Y Car
Tools Required
| • | J 41665 Crankshaft
Balancer and Sprocket Installer |
Notice: Use the correct fastener in the correct location. Replacement fasteners
must be the correct part number for that application. Fasteners requiring
replacement or fasteners requiring the use of thread locking compound or sealant
are identified in the service procedure. Do not use paints, lubricants, or
corrosion inhibitors on fasteners or fastener joint surfaces unless specified.
These coatings affect fastener torque and joint clamping force and may damage
the fastener. Use the correct tightening sequence and specifications when
installing fasteners in order to avoid damage to parts and systems.
Important:
| • | Note the position of the crankshaft balancer before removal, on manual
transmission applications. The balancer does not use a key or keyway for
positioning. Mark or scribe the end of the crankshaft and the balancer
before removal. The crankshaft balancer must be installed to the
original position. If replacing the crankshaft balancer, note the
location of any existing balance weights, if applicable. Install
new balance weights into the new crankshaft balancer, if applicable.
Crankshaft balancer weights must be installed into the new balancer
in the same location as the old balancer. A properly installed balance
weight will be either flush or below flush with the face of the balancer. |
| • | The crankshaft balancer installation and bolt tightening involves a
4 stage tightening process. The first pass ensures that the balancer
is installed completely onto the crankshaft. The second, third and
fourth passes tighten the new bolt to the proper torque. |
| • | The used crankshaft balancer bolt will be used only during the first
pass of the balancer installation procedure. Install a NEW crankshaft balancer
bolt and tighten as described in the second, third and fourth passes
of the balancer bolt tightening procedure. |
| • | Make sure the teeth of the tool engage the engine flywheel teeth. |
- Install the J 42386-A
and
the bolts.
Use 1 M10-1.5 x 120 mm
and 1 M10-1.5 x 45 mm bolt for proper
tool operation.
Tighten
Tighten the J 42386-A
bolts
to 50 N·m (37 lb ft).
- Using the old balancer
as a reference, mark or scribe the NEW balancer in the same location, if
required.
Install balance weights into the NEW balancer, if required.
Refer to
Engine Balancing
and
Crankshaft Balancer Cleaning and Inspection
.
Important: Align the scribe mark on the balancer with the scribe mark on the crankshaft.
The balancer should be positioned onto the end of the crankshaft as
straight as possible prior to tool installation.
- Install the balancer onto the end of the crankshaft.
- Use the J 41665
in order to install the balancer.
| 4.1. | Assemble the threaded rod, nut, washer and installer. |
Insert the smaller end of the installer into the front of the balancer.
| 4.2. | Use a wrench and hold the hex end of the threaded rod. |
| 4.3. | Use a second wrench and rotate the installation tool nut clockwise
until the balancer is started onto crankshaft. |
| 4.4. | Remove the tool and reverse the installation tool. |
Position the larger end of the installer against the front of the balancer.
| 4.5. | Use a wrench and hold the hex end of the threaded rod. |
| 4.6. | Use a second wrench and rotate the installation tool nut clockwise
until the balancer is installed onto the crankshaft. |
| 4.7. | Remove the balancer installation tool. |
- Install the used crankshaft
balancer bolt.
Tighten
Tighten the crankshaft balancer bolt to 330 N·m (240 lb ft).
- Remove the used crankshaft balancer bolt.
Important: The nose of the crankshaft should be recessed 2.40-4.48 mm
(0.094-0.176 in) into the balancer bore.
- Measure for a correctly installed balancer.
If the balancer
is not installed to the proper dimensions, install the J 41665
and repeat the installation procedure.
- Install the NEW crankshaft balancer bolt.
Tighten
- Tighten the crankshaft balancer bolt a first pass to 50 N·m
(37 lb ft).
- Tighten the crankshaft balancer bolt a second pass to 140 degrees
using the J 36660-A
.
- Remove the J 42386-A
.
