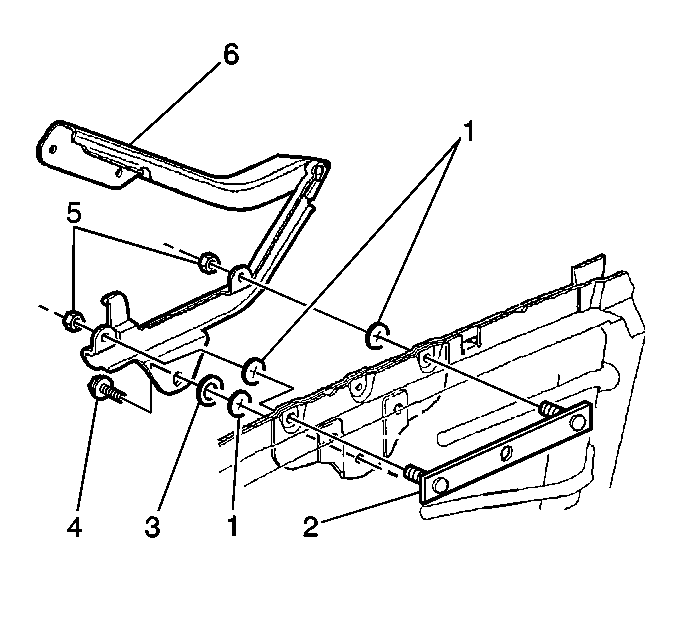
The following components can only be adjusted
minimally:
- Inspect the structural body for damage or misalignment. Refer
to
Alignment Checking
in Frame and
Underbody.
- Loosen the hood hinge bolts/screws and adjust the following components:
Raising or Lowering Rear Corners of Hood
Hood Adjust Front Bumper
- Close the hood firmly.
- Determine the amount of adjustment needed. The gap tolerance is
2-6 mm (0.08-0.24 in). The flush tolerance is -2.0
to +2.0 mm (-0.08 to +0.08 in).
- Open the hood.
- Change the height by turning the hood bumpers up or down.
- Repeat steps 1 through 4 until the hood is properly aligned.
Fore and Aft Adjustment

Important: Adjust one side at a time for the best appearance.
- Loosen the following components:
| 1.1. | The hood hinge to body bolts/screws (4) |
- Move the hood forward or rearward. The gap tolerance is 2-6 mm
(0.08-0.24 in). The flush tolerance is -2.0 to +2.0 mm
(-0.08 to +0.08 in).
Notice: Use the correct fastener in the correct location. Replacement fasteners
must be the correct part number for that application. Fasteners requiring
replacement or fasteners requiring the use of thread locking compound or sealant
are identified in the service procedure. Do not use paints, lubricants, or
corrosion inhibitors on fasteners or fastener joint surfaces unless specified.
These coatings affect fastener torque and joint clamping force and may damage
the fastener. Use the correct tightening sequence and specifications when
installing fasteners in order to avoid damage to parts and systems.
- Install the following
components:
Tighten
Tighten the hood hinge nuts (5) to 25 N·m (18 lb ft).
| 3.2. | The hood hinge to body bolts/screws (4) |
Tighten
Tighten the hood hinge to body bolts/screws (4) to 10 N·m
(89 lb in).

