Air Conditioning Compressor Replacement 3.8 L
Removal Procedure
Important: Compressor related noise is generally air conditioning (A/C) system related and not always caused by the compressor itself. Prior to replacing compressor, refer to Noise Diagnosis - Air Conditioning (A/C) System .
- Recover the refrigerant. Refer to Refrigerant Recovery and Recharging .
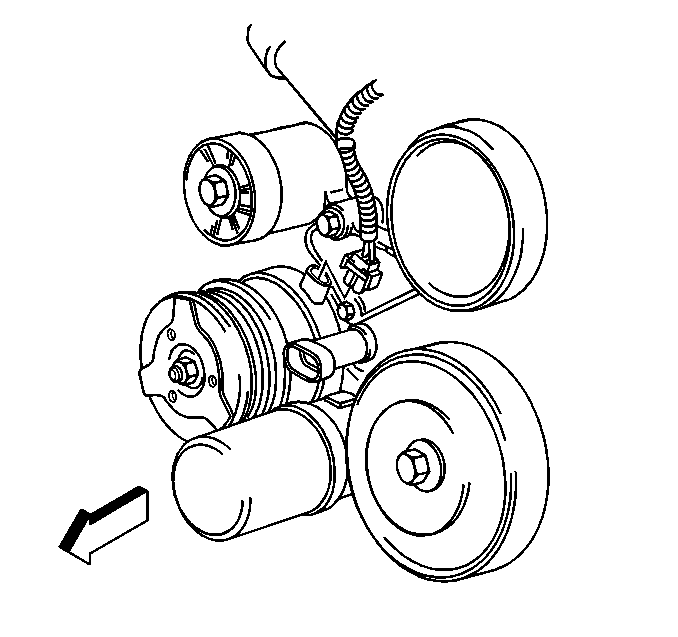
- Remove the serpentine drive belt. Refer to Drive Belt Replacement in Engine Mechanical - 3.8 L.
- Disconnect the electrical connector at the air conditioning (A/C) compressor.
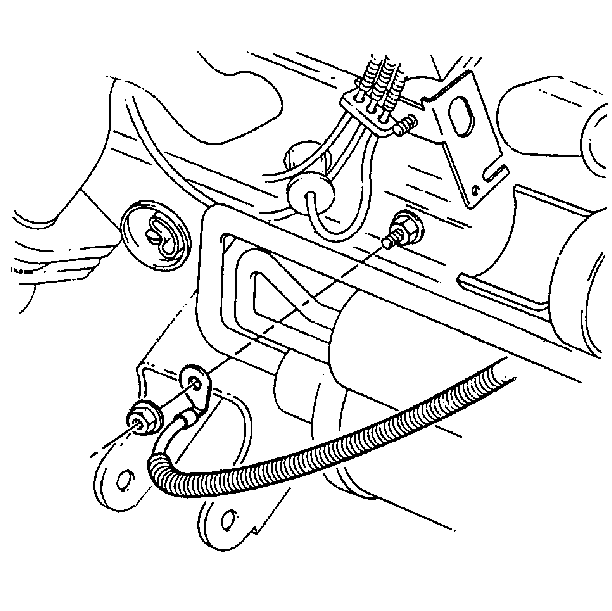
- Remove the negative battery cable nut from the engine block stud.
- Remove the negative battery cable from the stud.
- Raise and support the vehicle. Refer to Lifting and Jacking the Vehicle in General Information.
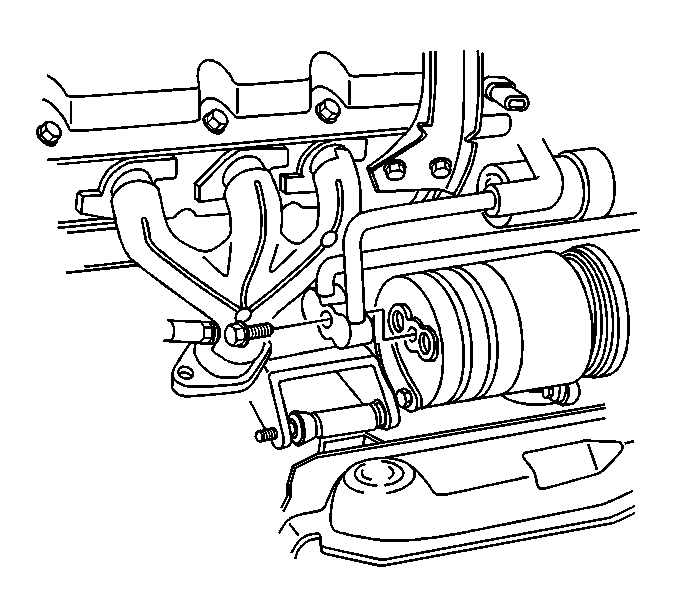
- Remove the A/C compressor and condenser hose bolt.
- Discard the O-ring.
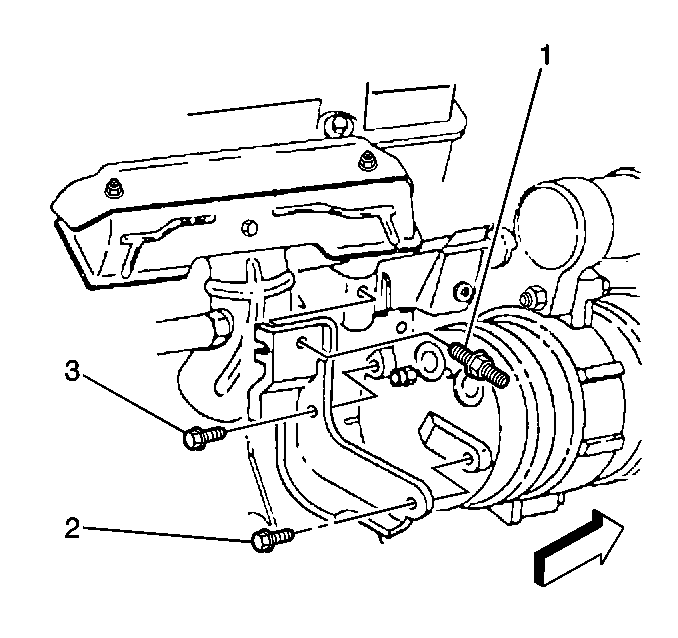
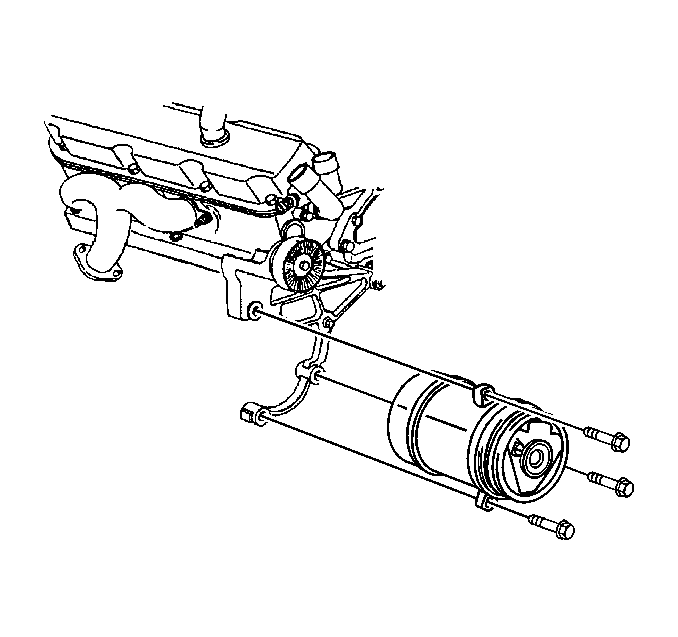
- Remove the A/C compressor rear bolts (2, 3).
- Remove the A/C compressor bolts.
- Remove the A/C compressor.
Installation Procedure
- If a NEW A/C compressor is being installed, add 60 ml (2 oz) of PAG oil to the compressor.
- If reinstalling the old A/C compressor perform the following:
- Install the A/C compressor.
- Install the A/C compressor bolts.
- Install the A/C compressor rear bolts (2, 3).
- Install a new O-ring.
- Install the A/C compressor and condenser hose bolt.
- Lower the vehicle.
- Install the negative battery cable to the stud.
- Install the negative battery cable nut to the engine block stud.
- Connect the electrical connector at the A/C compressor.
- Install the serpentine drive belt. Refer to Drive Belt Replacement in Engine Mechanical - 3.8 L.
- Charge the A/C system. Refer to Refrigerant Recovery and Recharging .
- Perform a leak test on the A/C system. Refer to Leak Testing .
Important: NEW A/C compressors are shipped WITHOUT poly-alkylene glycol (PAG) oil.

| 2.1. | Drain, measure and record the amount of PAG oil in the A/C compressor. |
| 2.2. | If the measured amount of PAG oil drained is less than or equal to 60 ml (2 oz), add 60 ml (2 oz) of new, clean PAG oil to the A/C compressor. |
| 2.3. | If the measured amount of PAG oil drained is greater than 60 ml (2 oz), add the same amount of new, clean PAG oil to the A/C compressor. |
| 2.4. | Install the compressor crankcase oil drain bolt to the replacement compressor. |
Tighten
Tighten the compressor crankcase oil drain bolt to 20 N·m
(15 lb ft).
Tighten
Tighten the A/C compressor bolts to 50 N·m (37 lb ft).

Tighten
Tighten the A/C compressor rear bolts (2, 3) to 30 N·m
(22 lb ft).

Lightly coat the O-ring with a mineral base 525 viscosity refrigerant oil.
Tighten
Tighten the A/C compressor and condenser hose bolt to 33 N·m
(24 lb ft).

Tighten
Tighten the negative battery cable nut to the engine block stud to 25 N·m
(18 lb ft).

Air Conditioning Compressor Replacement 5.7 L
Removal Procedure
Important: Compressor related noise is generally air conditioning (A/C) system related and not always the compressor itself. Prior to replacing the compressor, refer to Noise Diagnosis - Air Conditioning (A/C) System .
- Recover the refrigerant. Refer to Refrigerant Recovery and Recharging .
- Raise and suitably support the vehicle. Refer to Lifting and Jacking the Vehicle in General Information.
- Remove the serpentine drive belt. Refer to Air Conditioning Compressor Belt Replacement in Engine Mechanical - 5.7 L.
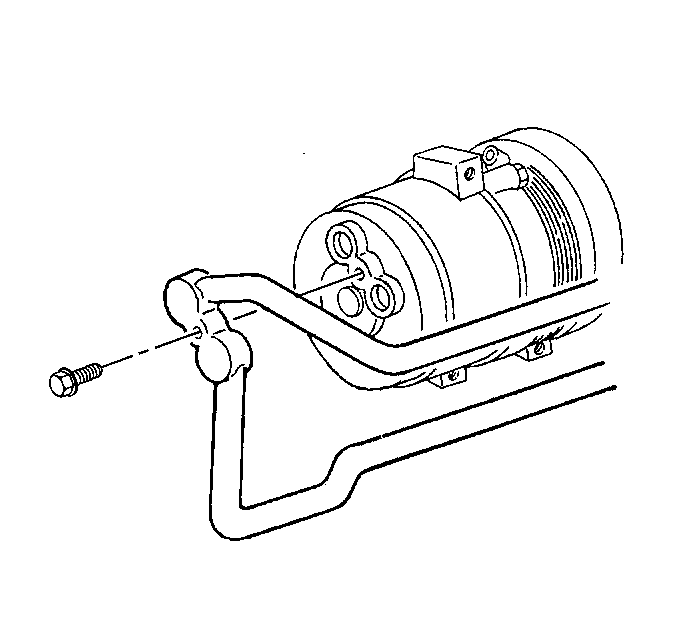
- Remove the air conditioning (A/C) compressor and condenser hose bolt.
- Discard the O-ring.
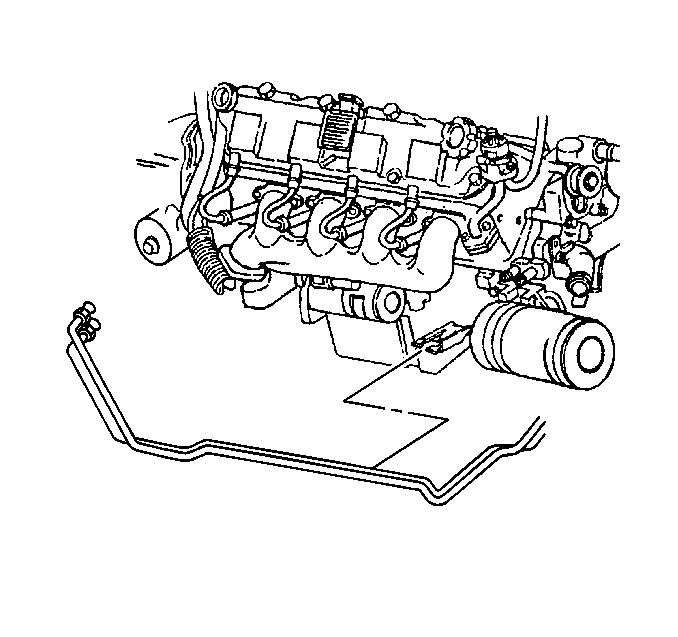
- Remove the transmission oil cooler pipes from the engine bracket, if necessary.
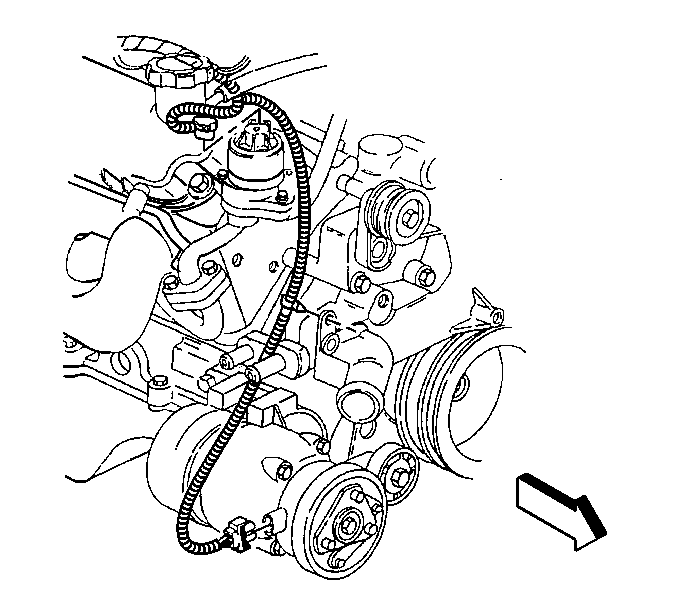
- Disconnect the electrical connector from the A/C compressor.
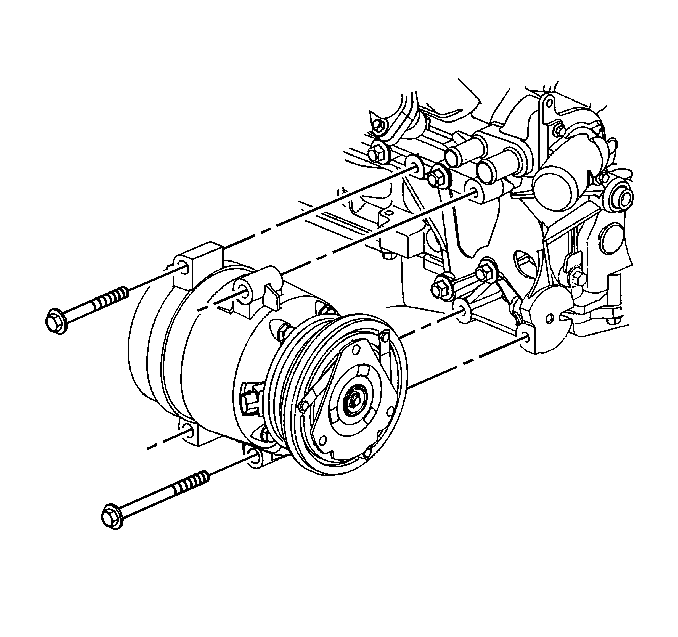
- Remove the A/C compressor bolts.
- Remove the A/C compressor.
Installation Procedure
- If a NEW A/C compressor is being installed, add 60 ml (2 oz) of PAG oil to the compressor.
- If reinstalling the old A/C compressor perform the following:
- Install the A/C compressor.
- Install the A/C compressor bolts.
- Connect the electrical connector to the A/C compressor.
- Install the transmission oil cooler pipes to the engine bracket, if removed.
- Install a new O-ring.
- Install the A/C compressor and condenser hose bolt.
- Install the serpentine drive belt. Refer to Air Conditioning Compressor Belt Replacement in Engine Mechanical 5.7 L.
- Lower the vehicle.
- Recharge the A/C system. Refer to Refrigerant Recovery and Recharging .
- Perform a leak test on the A/C system. Refer to Leak Testing .
Important: NEW A/C compressors are shipped WITHOUT poly-alkylene glycol (PAG) oil.

| 2.1. | Drain, measure and record the amount of PAG oil in the A/C compressor. |
| 2.2. | If the measured amount of PAG oil drained is less than or equal to 60 ml (2 oz), add 60 ml (2 oz) of new, clean PAG oil to the A/C compressor. |
| 2.3. | If the measured amount of PAG oil drained is greater than 60 ml (2 oz), add the same amount of new, clean PAG oil to the A/C compressor. |
| 2.4. | Install the compressor crankcase oil drain bolt (1) to the replacement compressor. |
Tighten
Tighten the compressor crankcase oil drain bolt (1) to 20 N·m
(15 lb ft).
Tighten
Tighten the A/C compressor bolts to 50 N·m (37 lb ft).


Lightly coat the O-ring with a mineral base 525 viscosity refrigerant oil.
Tighten
Tighten the A/C compressor and condenser hose bolt to 33 N·m
(24 lb ft).
