For 1990-2009 cars only
Tools Required:
| • | J 25025-B Guide Pin Set |
| • | J 36850 Transmission Assembly Lubricant |
Removal Procedure
- Remove the transmission oil pan and filter. Refer to Automatic Transmission Fluid and Filter Replacement .
- Remove the control valve body. Refer to Valve Body and Pressure Switch Replacement .
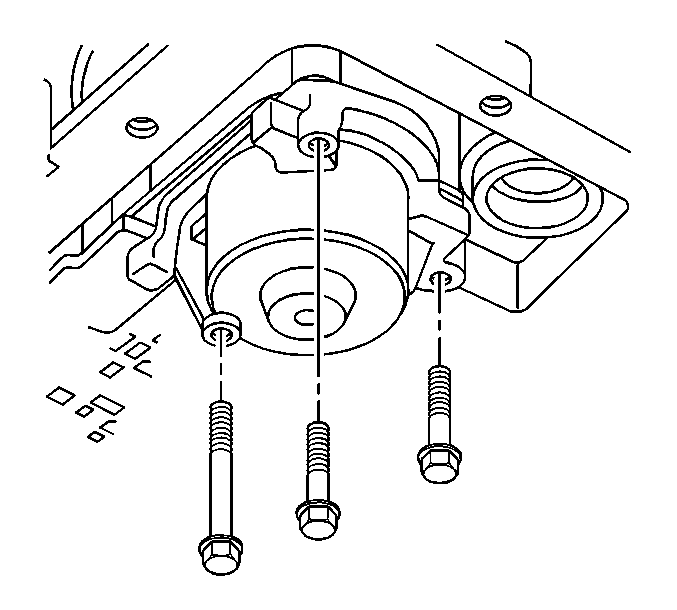
- Remove the accumulator cover retaining bolts.
- Remove the 1-2 accumulator cover and pin.
- Disassemble the 1-2 accumulator.
- Inspect the 1-2 accumulator inner and outer springs for cracks.
- Remove the 1-2 accumulator piston seal (1) from the 1-2 accumulator piston.
- Inspect the 1-2 accumulator piston for the following defects:
- Inspect the 1-2 accumulator cover for the following defects:
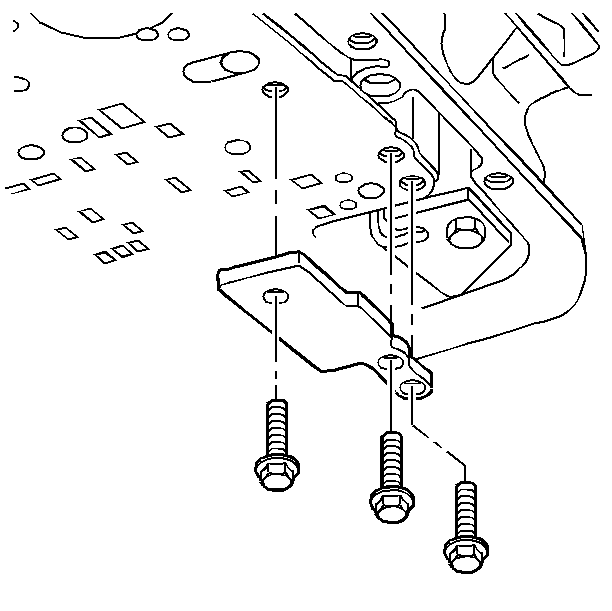
- Remove the spacer plate support retaining bolts.
- Remove the spacer plate support.
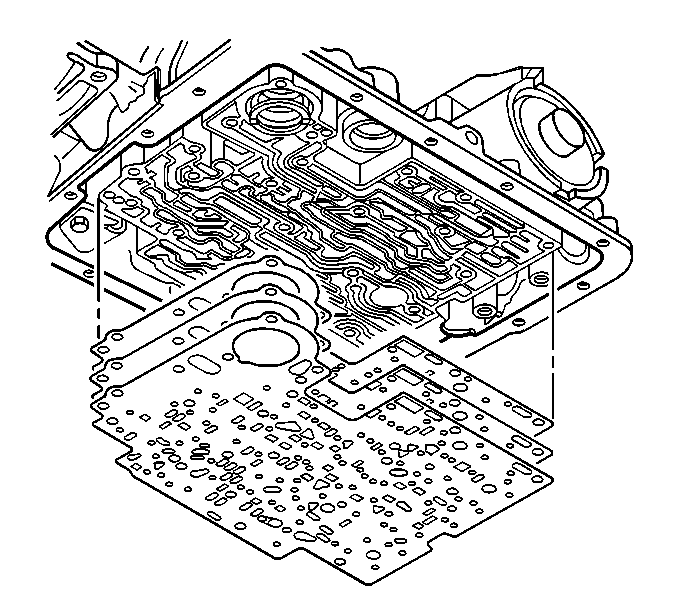
- Remove the spacer plate to valve body gasket, the spacer plate and the spacer plate to transmission case gasket.
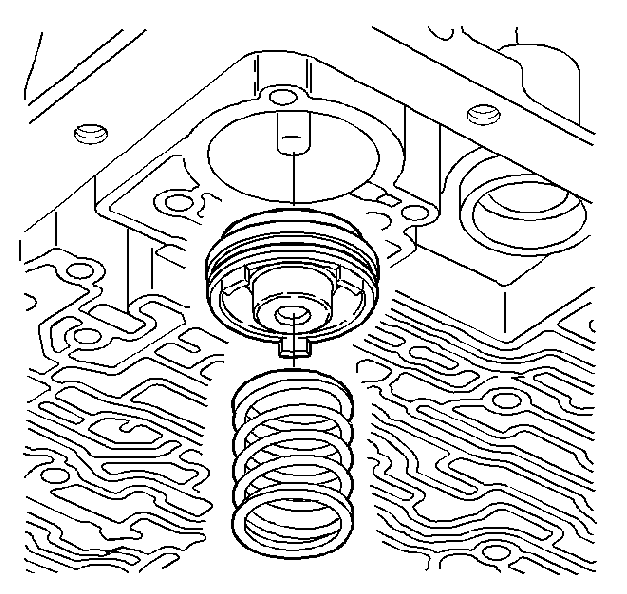
- Remove the 3-4 accumulator spring and the 3-4 accumulator piston.
- Inspect the 3-4 accumulator spring for cracks.
- Remove the 3-4 accumulator piston seal (1) from the 3-4 accumulator piston.
- Inspect the 3-4 accumulator piston for the following defects:
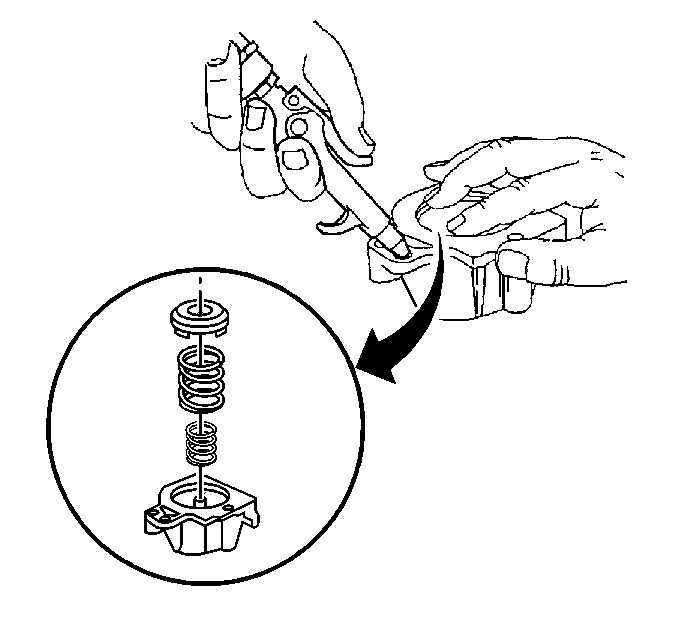
| 5.1. | Blow compressed air into the 1-2 accumulator cover, as shown, to remove the 1-2 accumulator piston. |
| 5.2. | Remove the 1-2 accumulator inner and outer springs. |
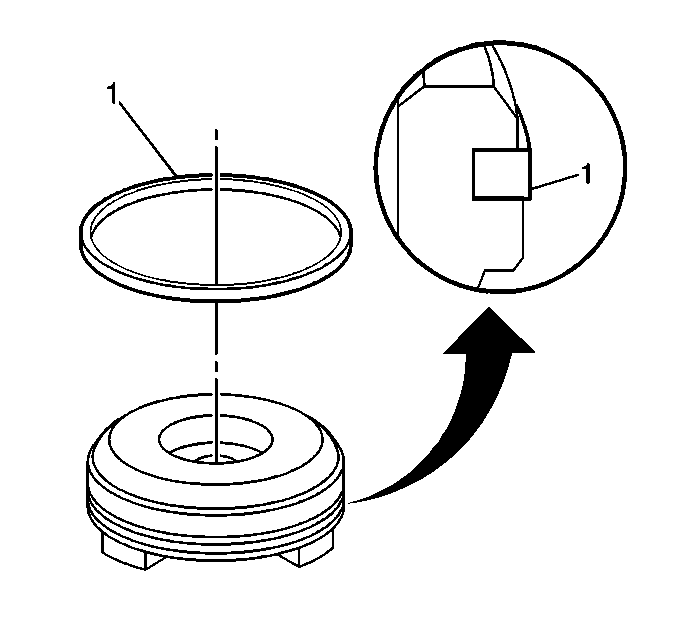
| • | Porosity |
| • | Cracks |
| • | Scoring |
| • | Nicks and scratches |
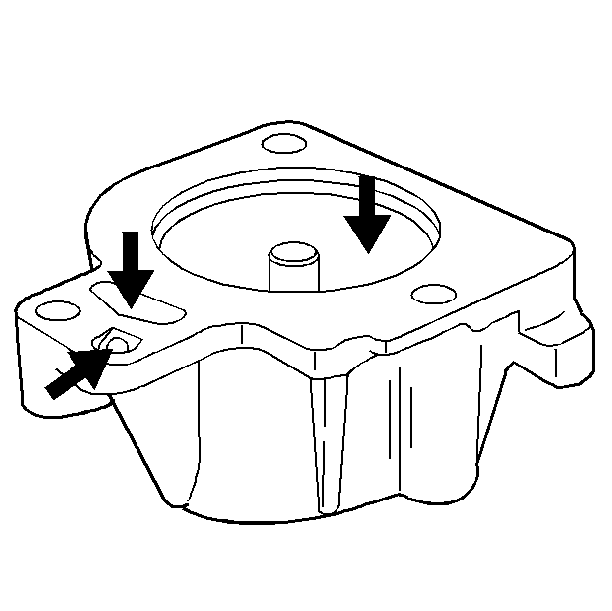
| • | Porosity |
| • | Cracks |
| • | Scoring |
| • | Nicks and scratches |

| • | Porosity |
| • | Cracks |
| • | Scoring |
| • | Nicks and scratches |
Installation Procedure
- Install a new 3-4 accumulator piston seal (1) to the 3-4 accumulator piston.
- Install the 3-4 accumulator piston onto the pin in the transmission case.
- Install the 3-4 accumulator piston spring.
- Install the J 25025-B to the transmission case.
- Install the spacer plate to transmission case gasket and the spacer plate to valve body gasket to the spacer plate; use the J 36850 in order to retain the gaskets to the spacer plate.
- Install the spacer plate to transmission case gasket, the spacer plate and the spacer plate to valve body gasket to the transmission case.
- Install the spacer plate support and the spacer plate support retaining bolts.
- Install a new 1-2 accumulator piston seal (1) to the 1-2 accumulator piston.
- Install the 1-2 accumulator inner and outer springs to the 1-2 accumulator cover.
- Install the 1-2 accumulator piston onto the pin in the 1-2 accumulator cover.
- Install the 1-2 accumulator cover and the accumulator cover retaining bolts.
- Remove the J 25025-B from the transmission case.
- Install the control valve body. Refer to Valve Body and Pressure Switch Replacement .
- Install the transmission oil pan and filter. Refer to Automatic Transmission Fluid and Filter Replacement .
- Reset the TAP values. Refer to Adapt Function .


Ensure that the 3-4 accumulator piston legs face away from the transmission case.

| • | The case gasket is identified by a C. |
| • | Be sure to place the case gasket on the transmission case side of the spacer plate. |
| • | The valve body gasket is identified by a V. |
| • | Be sure to place the valve body gasket on the valve body side of the spacer plate. |

Tighten
Tighten the spacer plate support retaining bolts to 11 N·m (97 lb in).

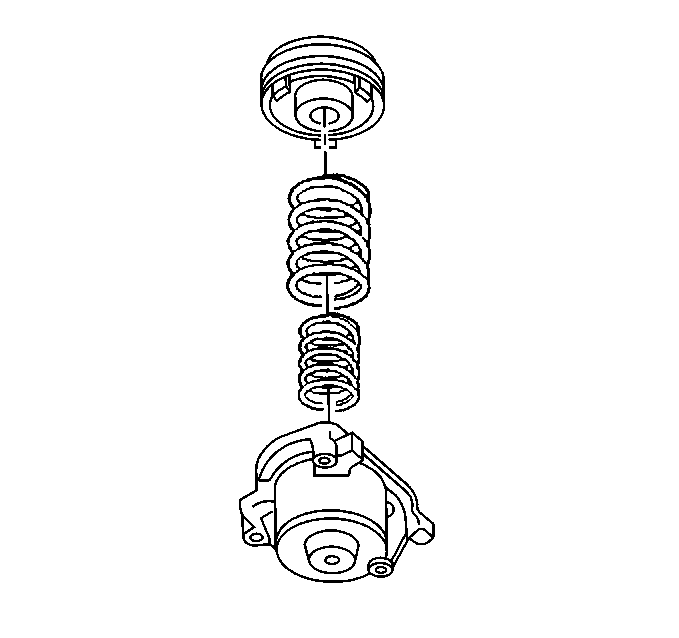
Ensure that the piston legs face the accumulator cover.

Tighten
Tighten the accumulator cover retaining bolts to 11 N·m (97 lb in).
Important: It is recommended that the transmission adaptive pressure (TAP) information be reset.
Resetting the TAP values using a scan tool will erase all learned values in all cells. As a result, the ECM, PCM or TCM will need to relearn the TAP values. Transmission performance may be affected as new TAP values are learned,