For 1990-2009 cars only
Removal Procedure
- Remove the engine front cover. Refer to Engine Front Cover Replacement .
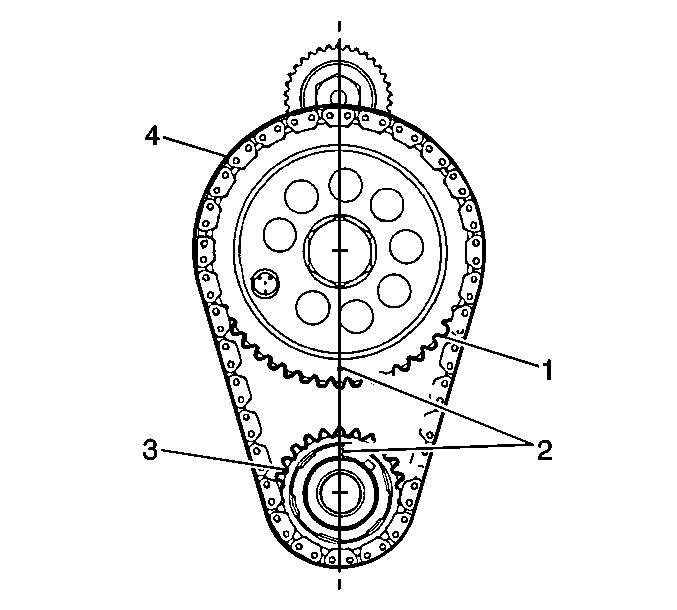
- Align the timing marks (2) on the sprockets (1, 3) so that they are as close together as possible.
- Remove the timing chain dampener.
- Remove the camshaft sprocket bolt.
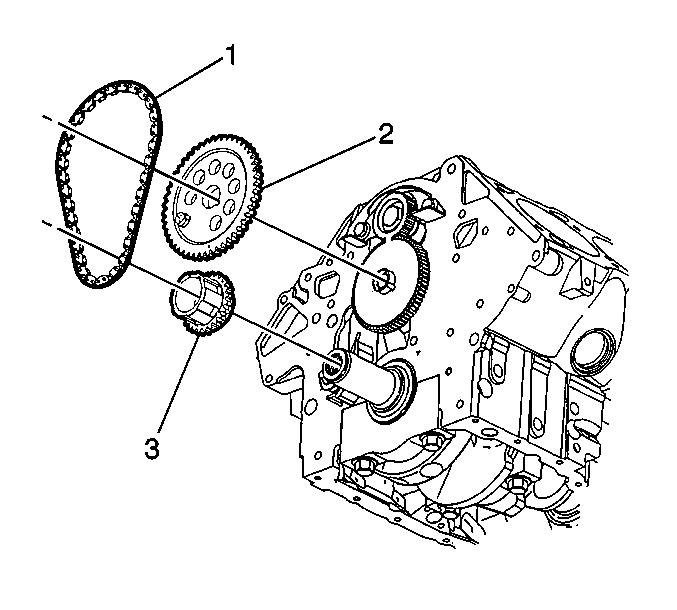
- Remove the timing chain (1) and camshaft sprocket (2).
- Remove the crankshaft sprocket (3).
- Clean the timing chain.
- Clean the sprockets.
- Inspect all the components for wear or damage.
- If the balance shaft timing has been disturbed. Refer to Balance Shaft Removal and Balance Shaft Installation .
- Use the following steps if the pistons have been moved in the engine:


Important: If the crankshaft sprocket does not come off easily, a light blow on the edge of the sprocket (with a plastic mallet) should dislodge the sprocket.
| 11.1. | Turn the crankshaft in order to set the number one piston is at top dead center. |
| 11.2. | With the sprocket installed, turn the camshaft in order to have the timing mark straight down. |
Installation Procedure
Tools Required
J 36660-A Torque Angle Meter
- Install the timing chain (1) onto the sprockets (2, 3) with the timing marks in their closest together position.
- Install the timing chain (1) and sprockets (2, 3).
- Install the camshaft sprocket bolt.
- Install the timing chain dampener.
- Install the timing chain dampener bolt.
- Install the engine front cover. Refer to Engine Front Cover Replacement .

Tighten
Tighten the camshaft sprocket bolt to 100 N·m (74 lb ft).
Use the J 36660-A
to torque
the camshaft sprocket bolt an additional 90 degrees.
Tighten
Tighten the dampener bolt to 22 N·m (16 lb ft).
Important: Rotate the engine two revolutions and check the timing marks. Ensure the marks are aligned.
