Removal Procedure
Tools Required
| • | J 37088-A Fuel Line Disconnect Tool Set |
| • | J 39549 Ball Joint/Tie Rod Separator |
| • | J 39580 Universal Engine Support Table |
| • | J 21366 Converter Holding Strap |
- Remove the starter motor. Refer to Starter Motor Replacement in Engine Electrical.
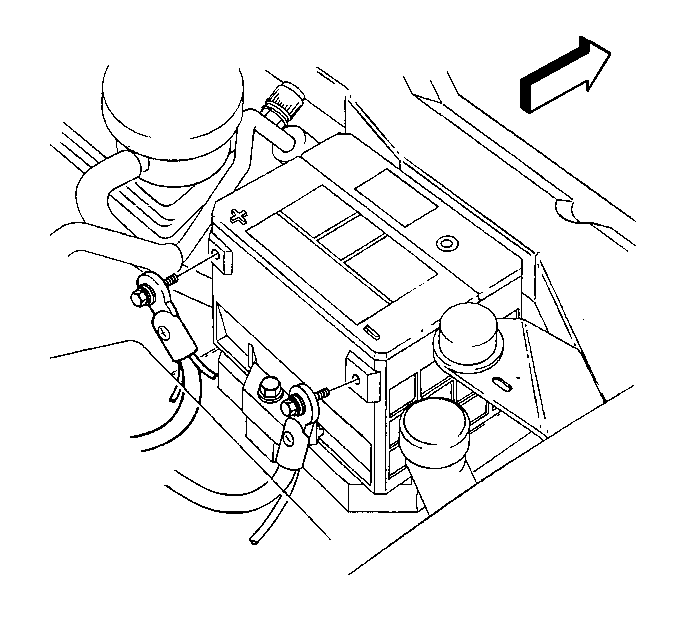
- Disconnect the positive battery cable.
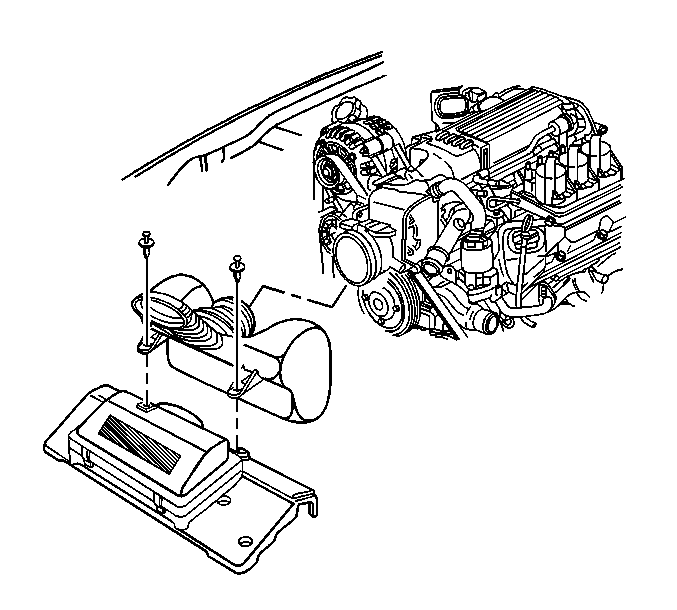
- Disconnect the intake air temperature (IAT) sensor electrical connector.
- Remove the air intake duct.
- Recover the refrigerant. Refer to Refrigerant Recovery and Recharging in Heating, Ventilation and Air Conditioning.
- Relieve the fuel pressure. Refer to Fuel Pressure Relief in Engine Controls - 3.8 L.
- Raise and suitably support the vehicle. Refer to Lifting and Jacking the Vehicle in General Information.
- Drain the engine oil.
- Remove the front wheels. Refer to Tire and Wheel Removal and Installation in Tires and Wheels.
- Drain the engine coolant. Refer to Cooling System Draining and Filling in Engine Cooling.
- Remove the 3-way catalytic converter. Refer to Catalytic Converter Replacement in Engine Exhaust.
- Drain the transmission fluid, if equipped with a manual transmission.
- Remove the propeller shaft. Refer to One-Piece Propeller Shaft Replacement or Two-Piece Propeller Shaft Replacement in Propeller Shaft.
- Remove the torque arm. Refer to Torque Arm Replacement in Rear Suspension.
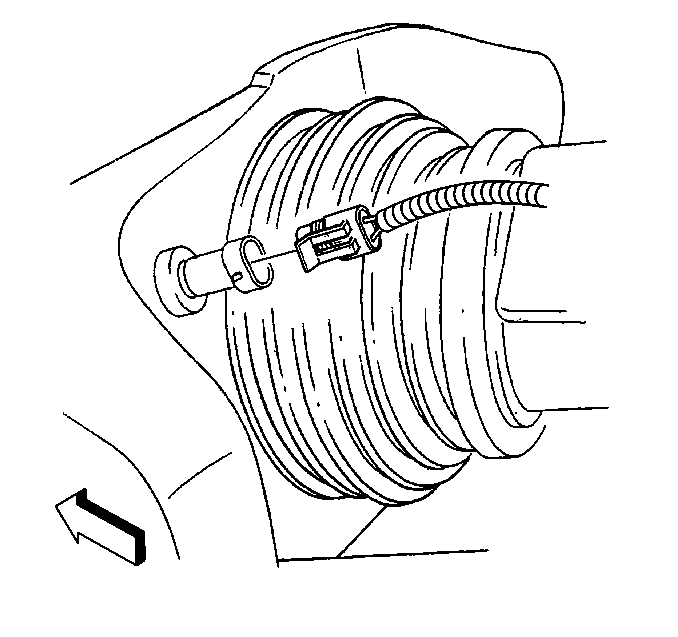
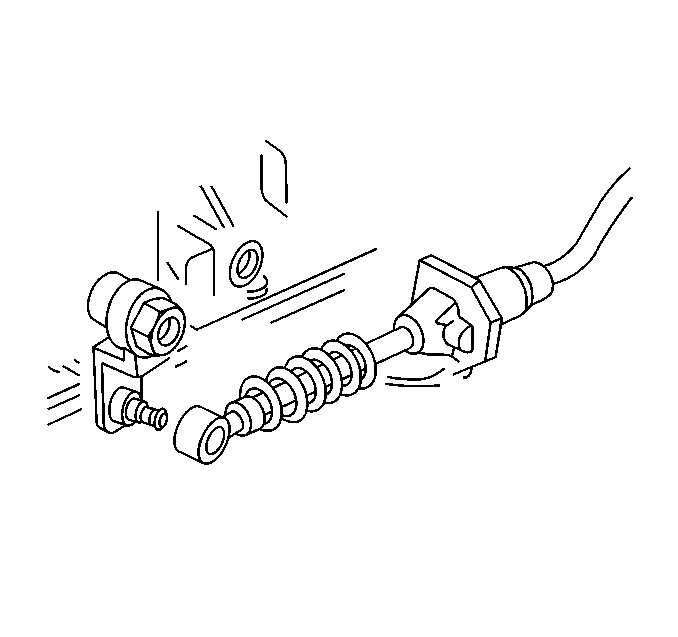
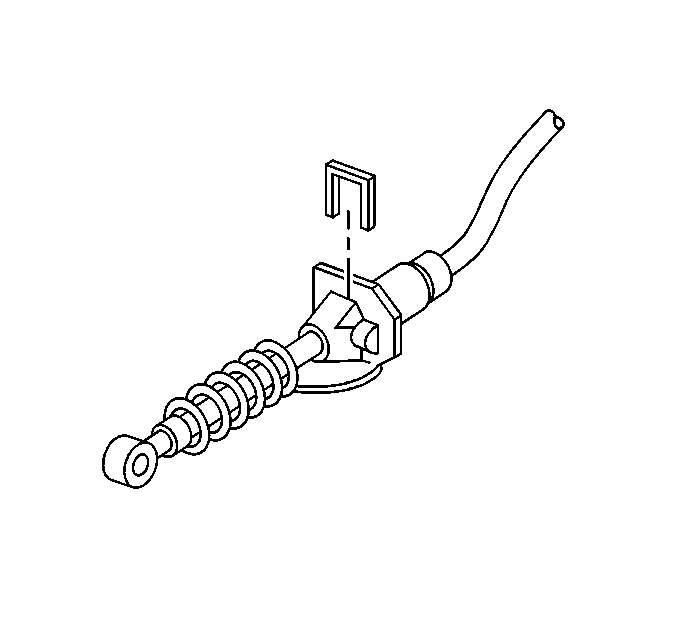
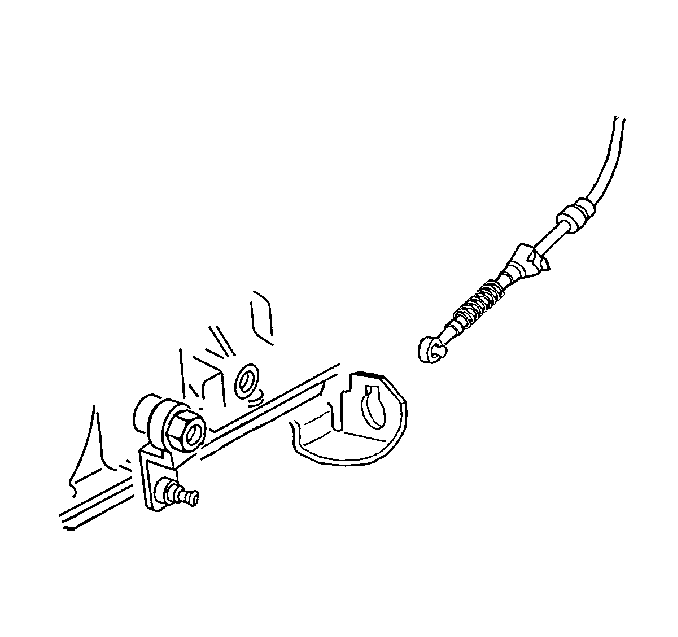
- On vehicles equipped with a automatic transmission, unsnap the transmission range selector lever cable from the range selector lever at the transmission.
- Remove the retainer from the range selector lever cable.
- Remove the range selector lever cable from the cable bracket.
- On vehicles equipped with a manual transmission, disconnect the clutch actuator cylinder line from the actuator cylinder using J 36221 .
- Remove the left side front air deflector. Refer to Front Bumper Fascia Air Deflector Replacement in Bumpers.
- Remove the stabilizer bar bracket bolts.
- Remove the stabilizer bar brackets.
- Remove the steering gear coupling shield.
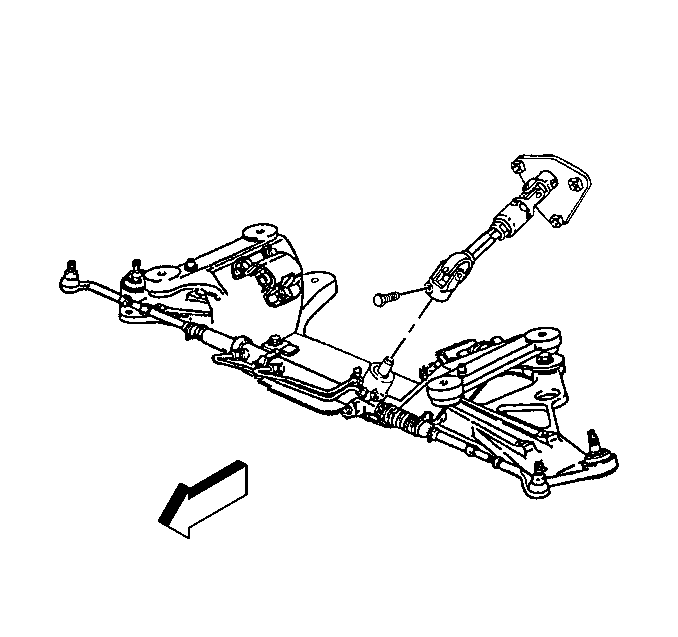
- Remove the intermediate steering shaft bolt and shaft from the rack.
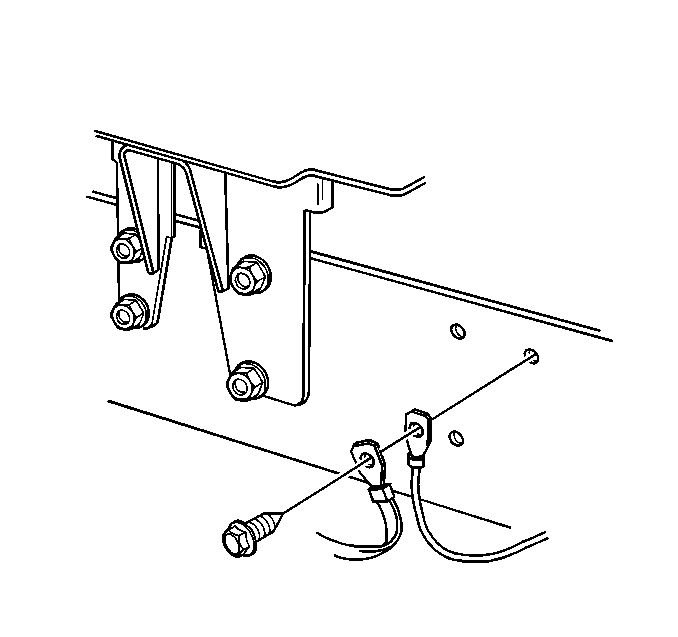
- Remove the wiring harness ground bolt and RF (Radio Frequency) ground strap and cruise control ground lead from the front rail.
- Disconnect the knock sensor electrical connectors.
- Disconnect the wheel speed sensors electrical connectors.
- Remove the air conditioning (A/C) compressor and condenser hose nut at the condenser.
- Discard the O-ring.
- Remove the front fuel pipe heat shield nuts (1).
- Remove the front fuel pipe heat shield (2).
- Disconnect the brake lines from the brake pipe clip.
- Lower the vehicle.
- Remove the engine wiring harness ground bolt (1).
- Remove the engine ground.
- Remove the A/C compressor and condenser hose bolt at the accumulator.
- Discard the O-ring.
- Remove the heater hoses from the drive belt tensioner.
- Using J 37088-A disconnect the following pipes:
- Disconnect the EVAP pipe (6) at the engine.
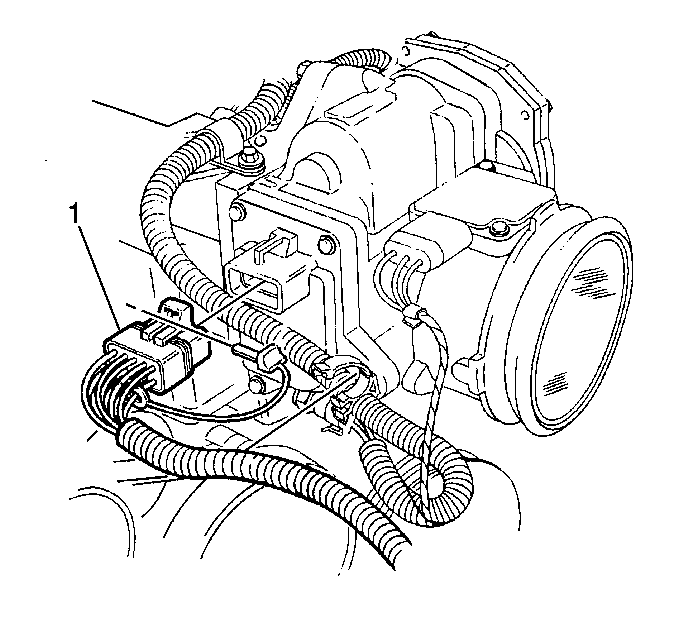
- Remove the capture secondary lock from the electrical connector.
- Disconnect the electronic throttle control (ETC) electrical connector (1).
- Remove the forward lamp harness branch from the wire harness clip.
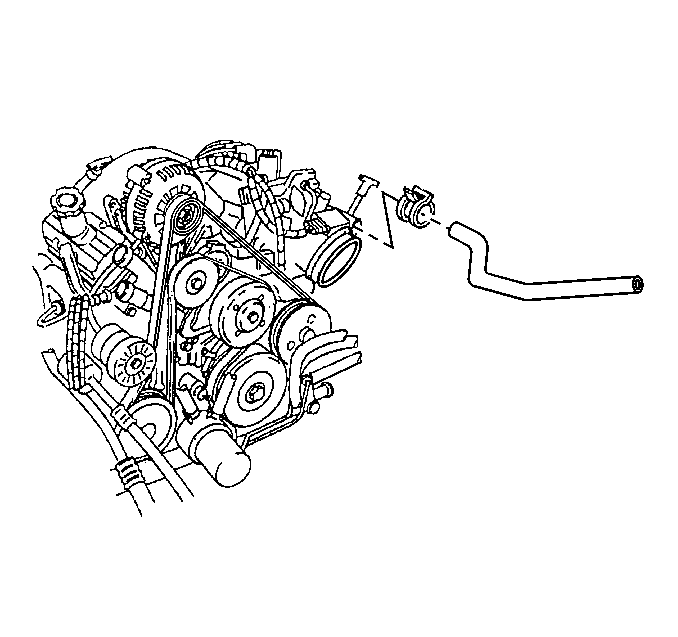
- Remove the inlet hose from the water outlet.
- Remove the outlet hose from the water pump.
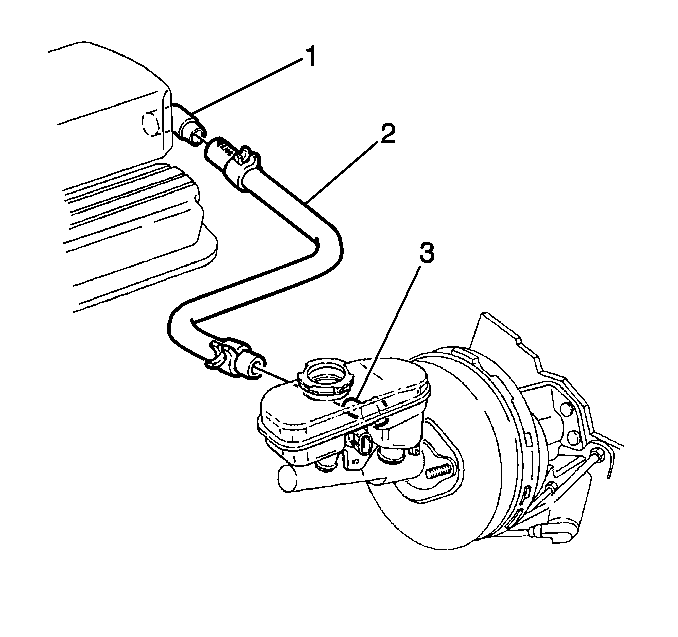
- Remove the brake booster vacuum hose (2) from the intake manifold fitting (1).
- Remove the front two brake pipes from the brake modulator.
- Disconnect the captured secondary locks.
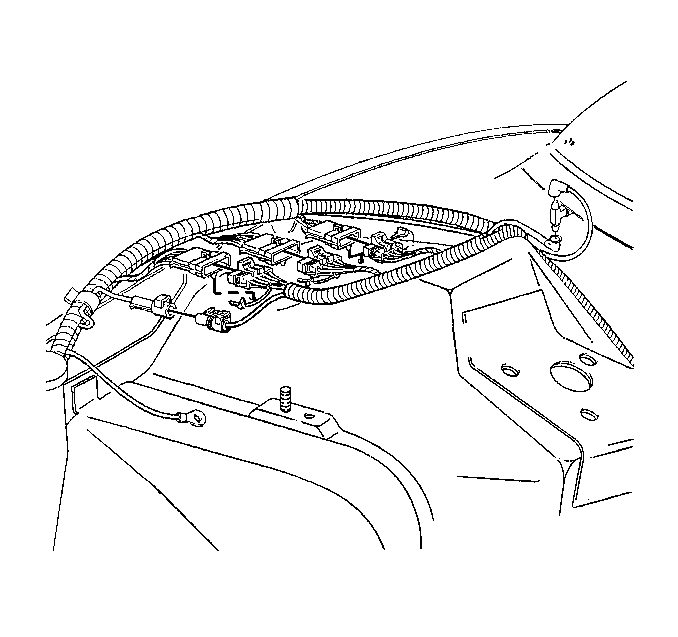
- Disconnect the forward lamp harness from the engine harness.
- Disconnect the engine harness vacuum tube from the bottom of the vacuum check valve.
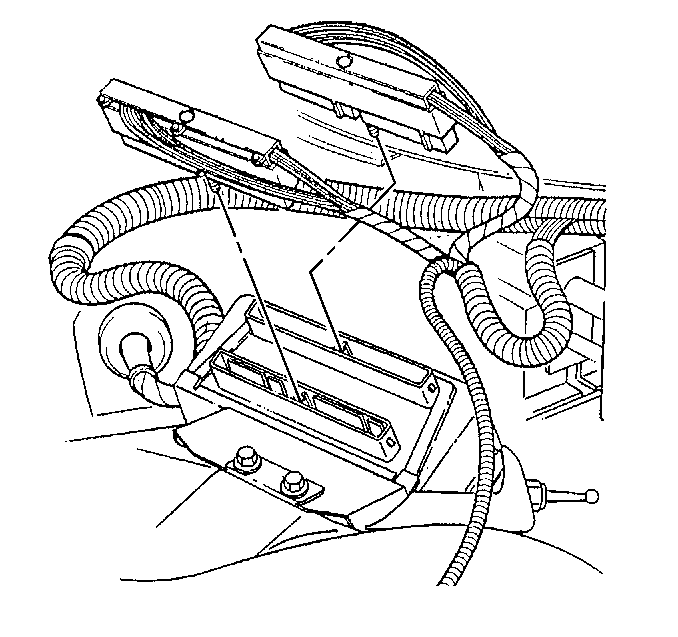
- Disconnect the powertrain control module (PCM) connectors.
- Remove the PCM from the vehicle.
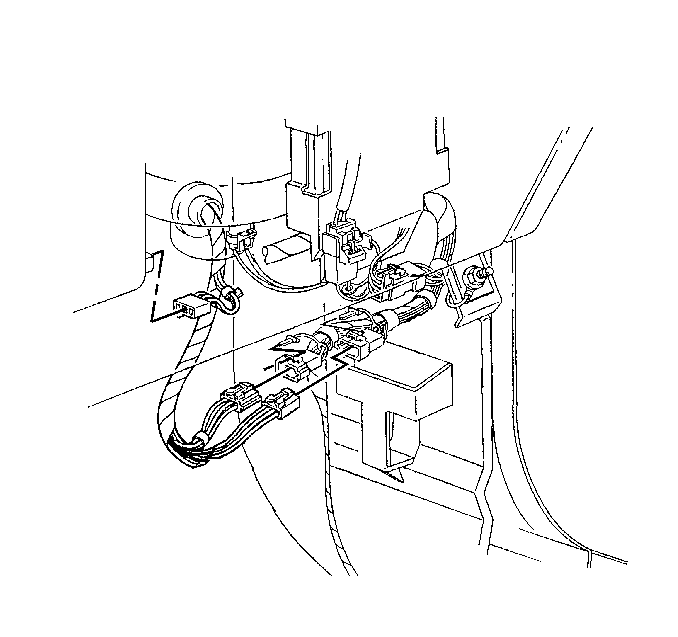
- Remove the right side insulator panel. Refer to Instrument Panel Insulator Panel Replacement - Right Side in Instrument Panel, Gauges and Console.
- Remove the hinge pillar trim panel. Refer to Body Hinge Pillar Trim Panel Replacement in Interior Trim.
- Disconnect the engine wiring harness from the instrument panel wiring harness.
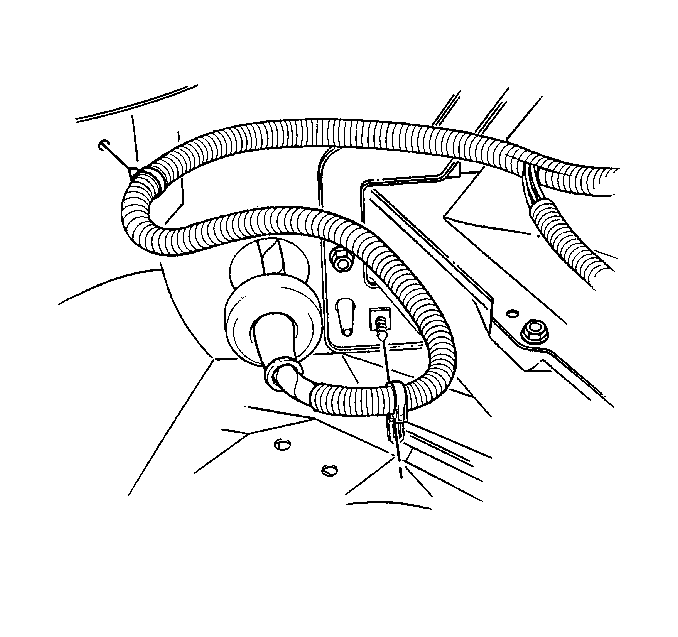
- Remove the engine wire harness through the front of dash. Place the harness on top of the engine.
- Remove the floor shift control, if equipped. Refer to Transmission Control Replacement in Automatic Transmission - 4L60-E.
- Remove the transmission control, if equipped. Refer to Shift Control Assembly Replacement in Manual Transmission - M49.
- Raise and suitably support the vehicle. Refer to Lifting and Jacking the Vehicle in General Information.
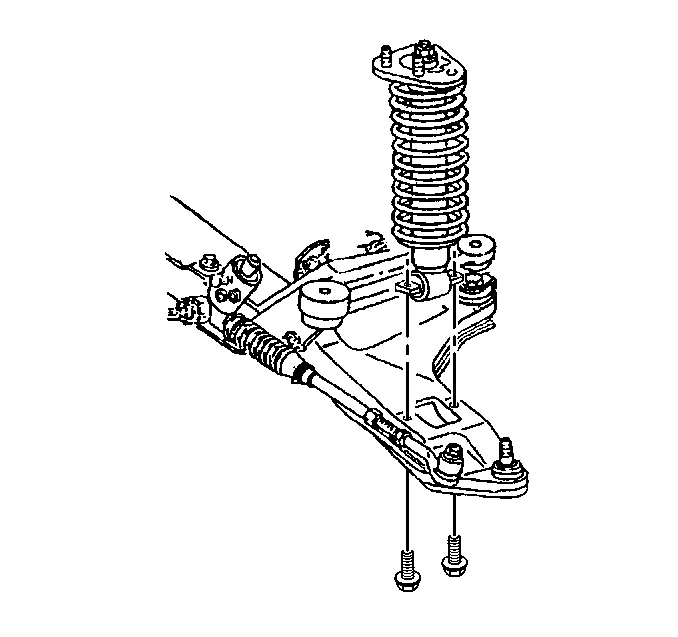
- Remove the right and left side shock absorber lower mounting bolts.
- Remove the cotter pins and nuts from the left and right upper ball joints.
- Using J 39549 separate the upper control arms from the steering knuckles.
- Support both steering knuckles.
- Position J 39580 below the engine.
- Lower the vehicle.
- Lay the engine wire harness on top of the engine.
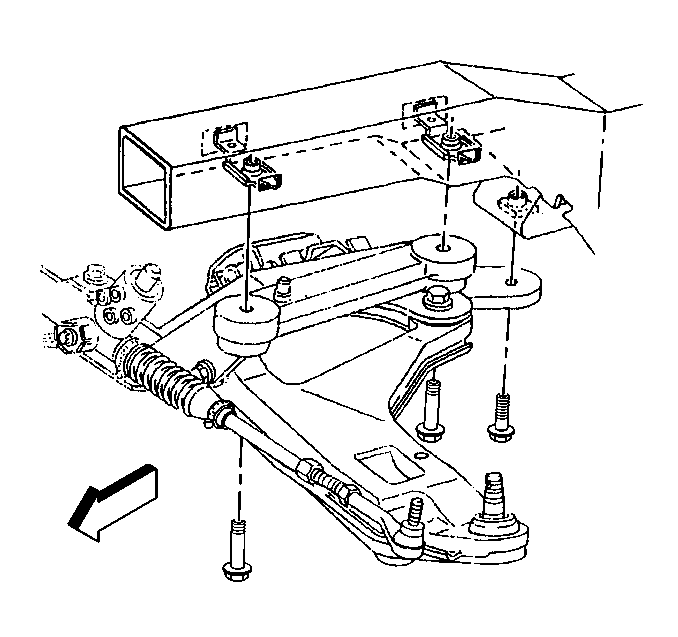
- Remove the front crossmember bolts.
- Remove the transmission support bolts.
- Raise the vehicle and remove the engine and transmission from the vehicle.
- Secure the crossmember to the J 39580 .
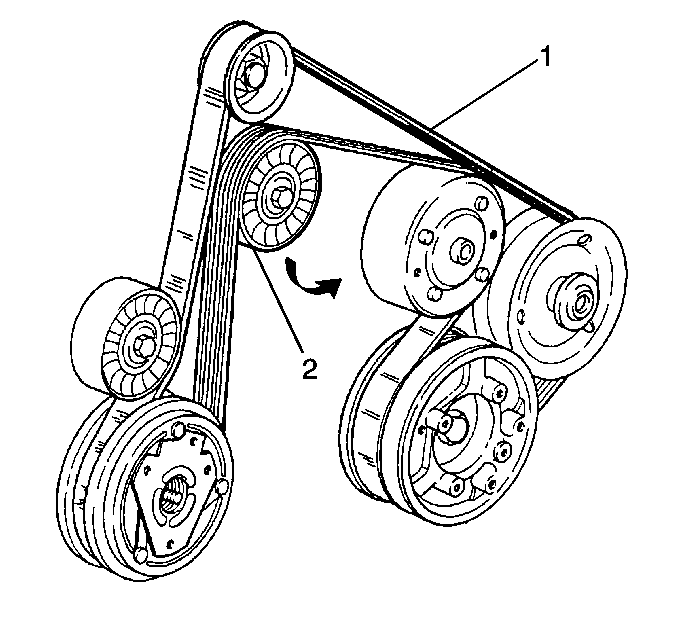
- Position a hex-head socket on the belt tensioner pulley bolt.
- Rotate the drive belt tensioner (2) clockwise to relieve the tension on the drive belt (1).
- Remove the drive belt (1) from the tensioner (2) and pulleys.
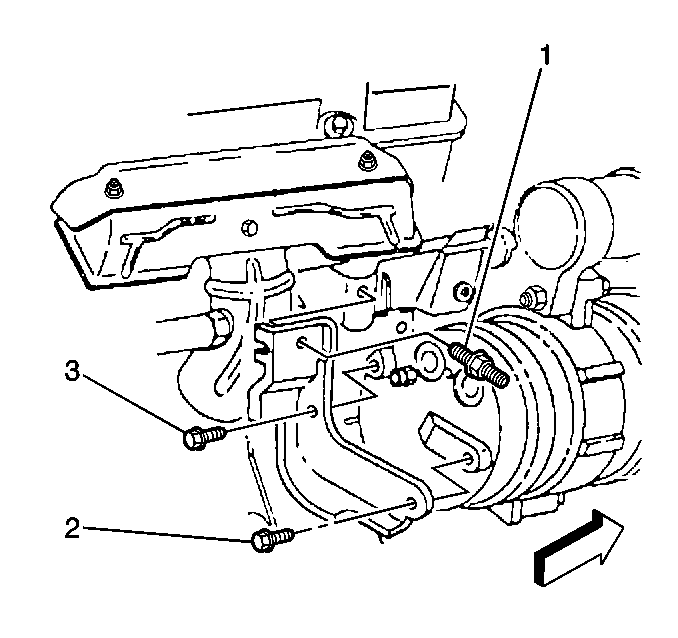
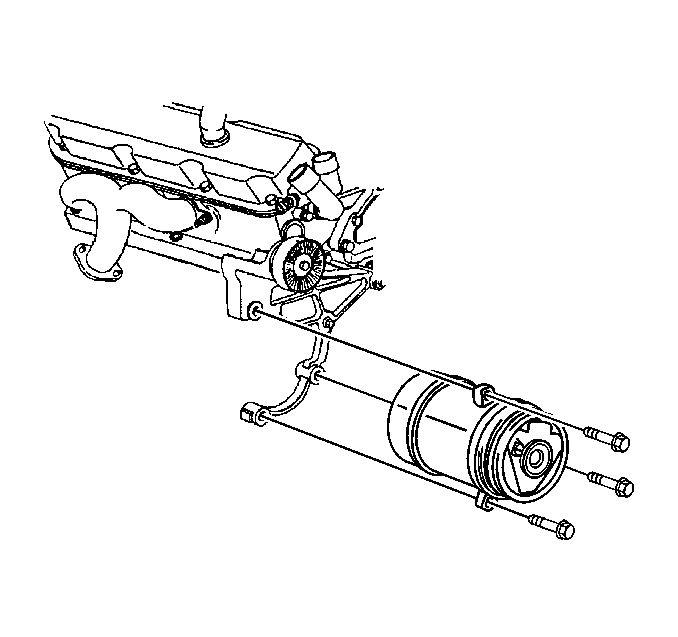
- Remove the A/C compressor rear bolts (2, 3).
- Remove the A/C compressor rear bracket stud (1).
- Remove the A/C compressor rear bracket.
- Remove the A/C compressor bolts.
- Remove the A/C compressor.
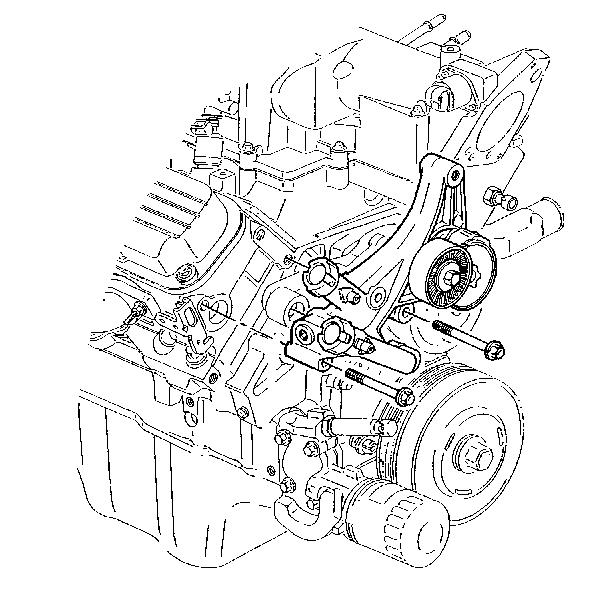
- Remove the drive belt tensioner bolts.
- Remove the drive belt tensioner.
- Remove the power steering pump nuts (3).
- Reposition the power steering pump to crossmember.
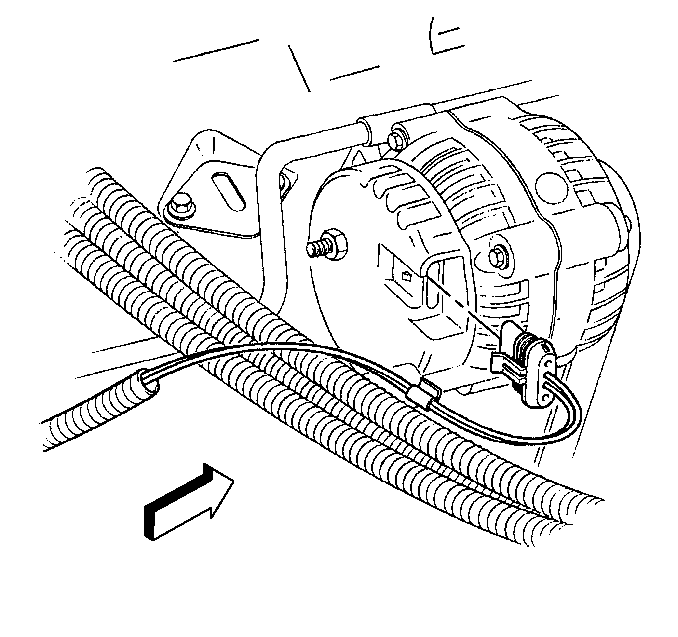
- Disconnect the generator electrical connector.
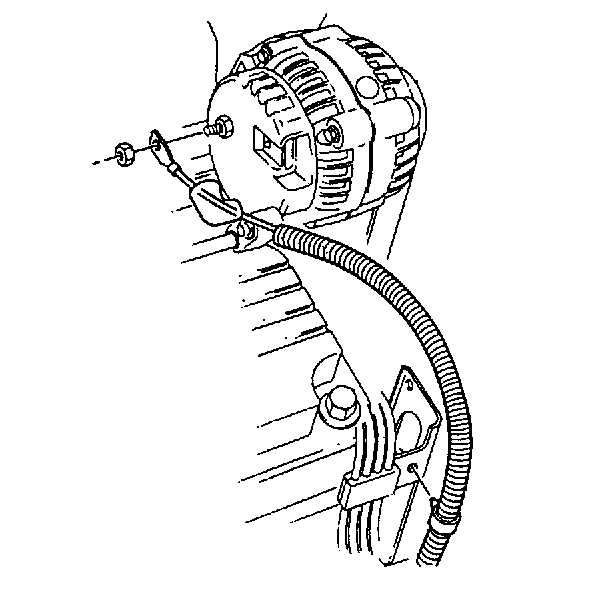
- Remove the positive cable nut from the generator terminal.
- Remove the generator from the engine.
- Install a lifting devise to the engine.
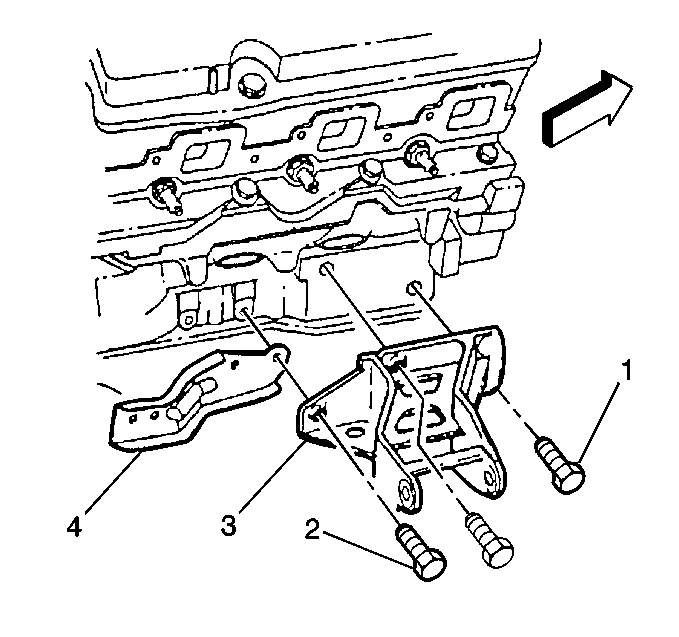
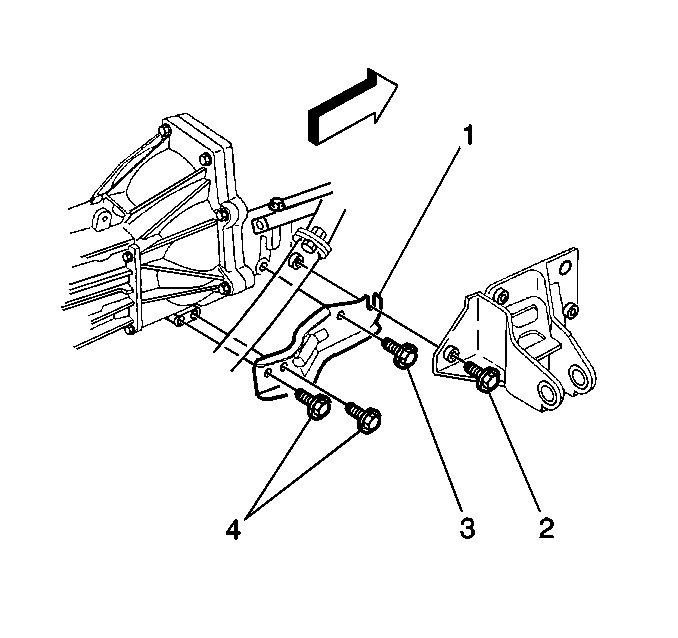
- Remove the right engine mount bracket bolts (1, 2) and the right engine mount bracket (3).
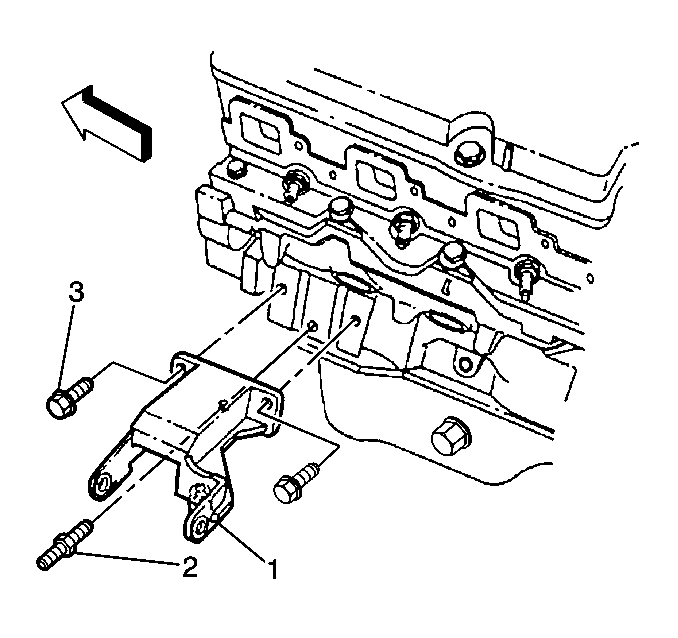
- Remove the left engine mount bracket bolts (3).
- Remove the left engine mount bracket stud (2) and the left engine mount bracket (1).
- With the aide of an assistant, raise the engine and transmission from the crossmember.
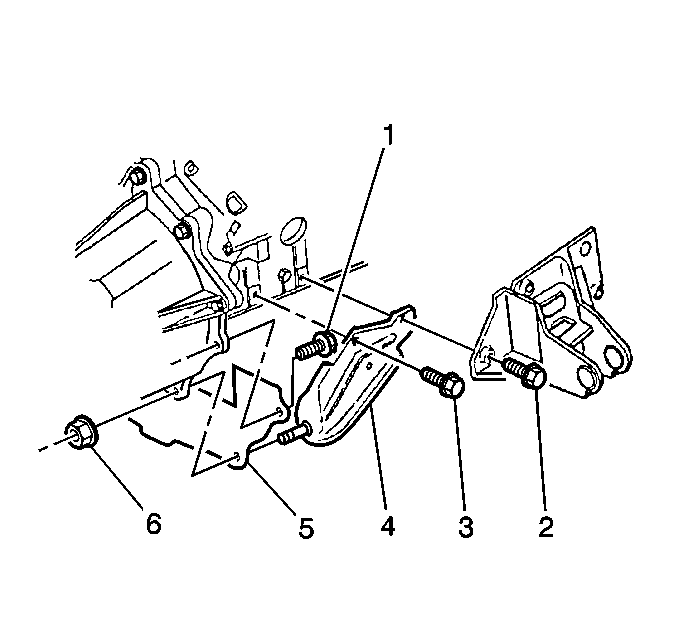
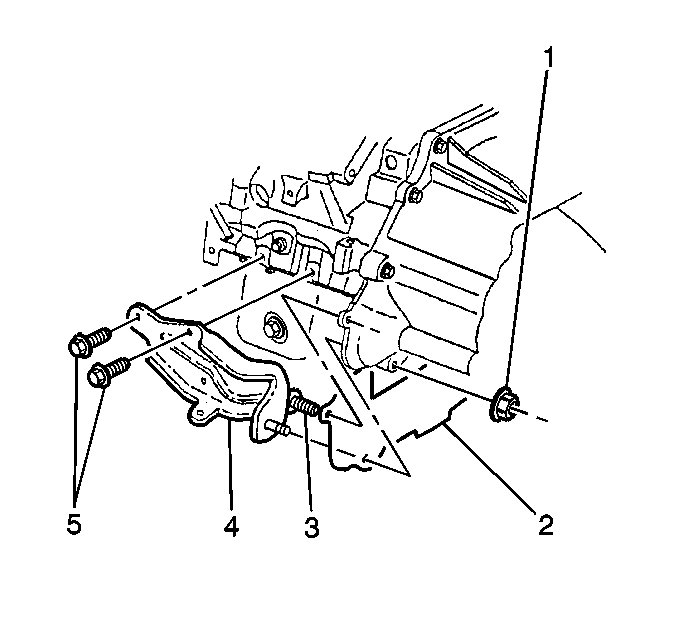
- If equipped with the automatic transmission remove the following:
- Right side transmission support brace bolts (1, 2, 3).
- Right side transmission support but (6).
- Right side transmission support (4).
- Left side transmission support brace bolts (3, 5).
- Left side transmission support nut (1).
- Left side transmission support (4).
- Remove the torque converter cover (2).
- Remove the flywheel to torque converter bolts.
- If equipped with the manual transmission remove the following:
- Right side transmission support bolts (3, 4).
- Right side transmission support (1).
- Left side transmission support bolts (2, 3).
- Left side transmission support (1).
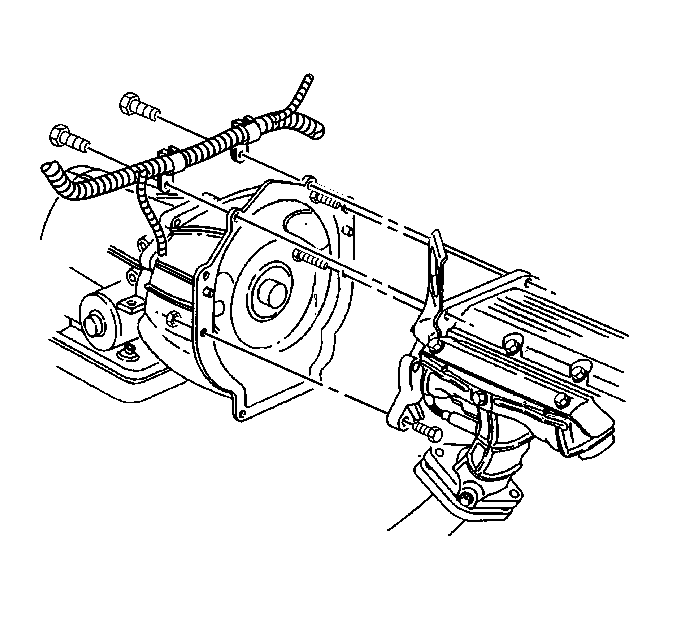
- Disconnect the electrical connectors from the transmission.
- For the automatic transmission, remove the transmission to engine bolts and nut.
- Separate the transmission from the engine.
- Attach the J 21366 to the transmission.
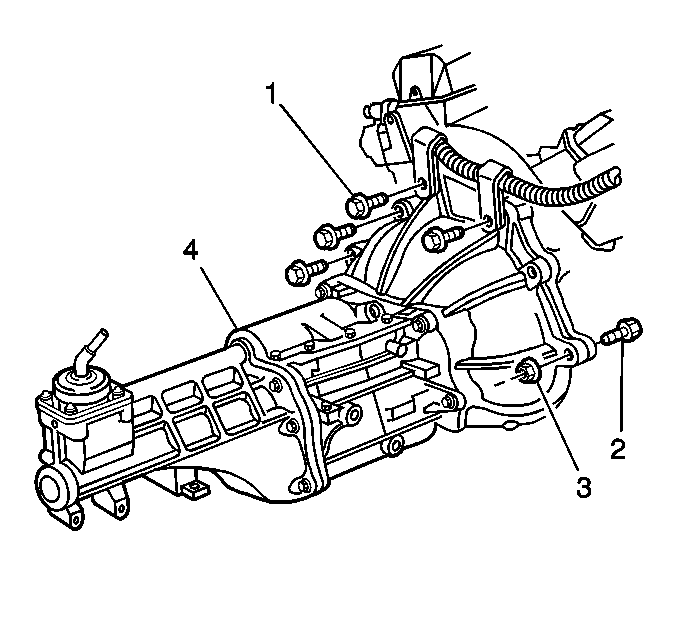
- For the manual transmission, remove the flywheel housing to engine bolts (1, 2) and nuts (3).
- Separate the flywheel housing from the engine.
- For the manual transmission, remove the pressure plate bolts (1).
- Remove the pressure plate (2) and the clutch disc (6) from the flywheel (5).
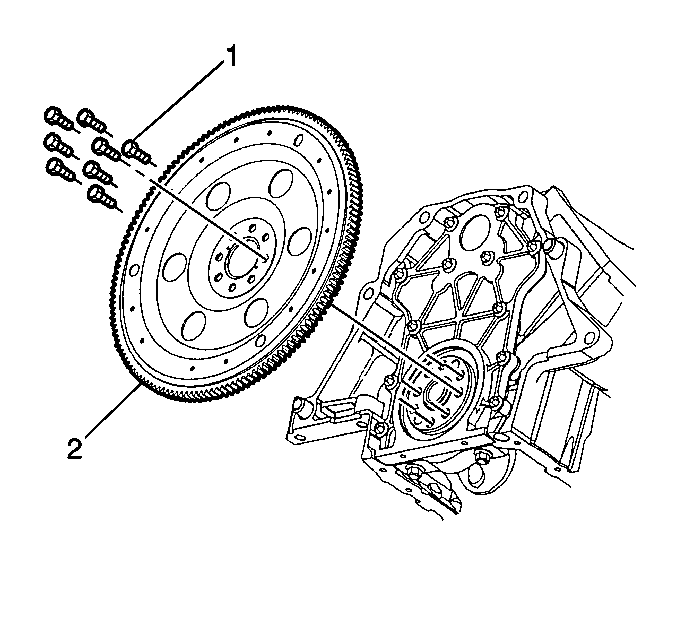
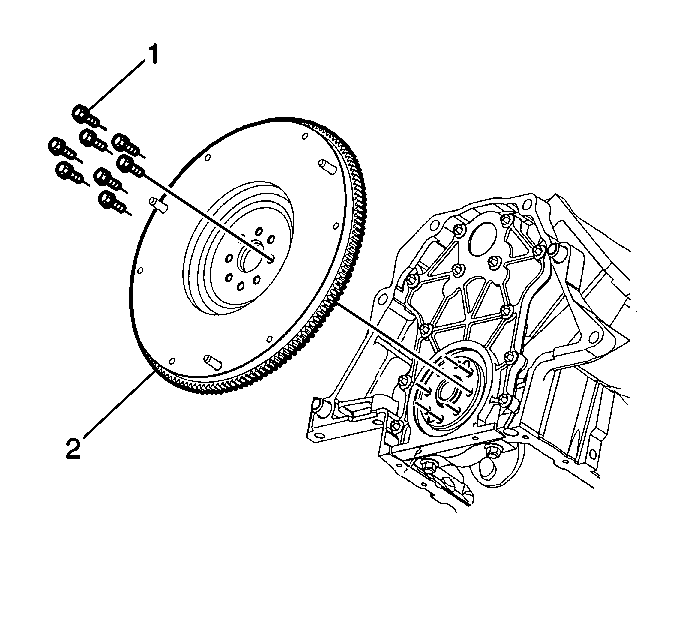
- For the automatic transmission, remove the flywheel bolts (1) and flywheel (2).
- For the manual transmission, remove the flywheel bolts (1) and flywheel (2).
- Install the engine to a engine stand.

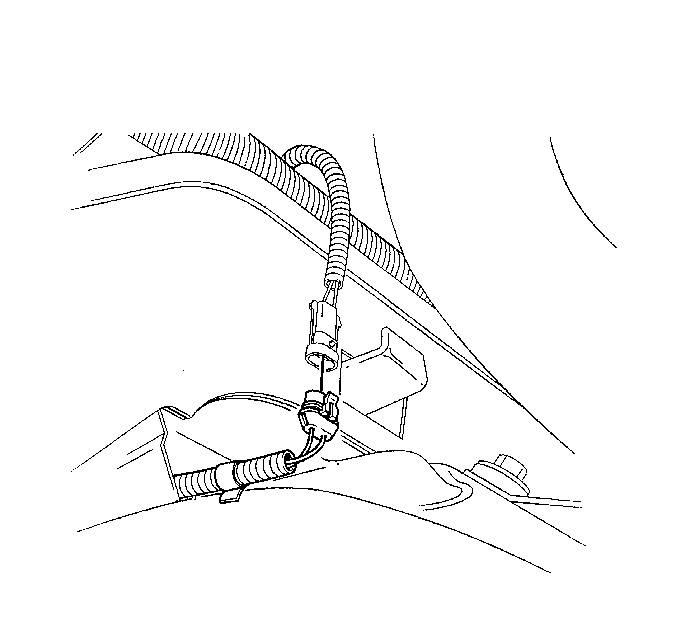
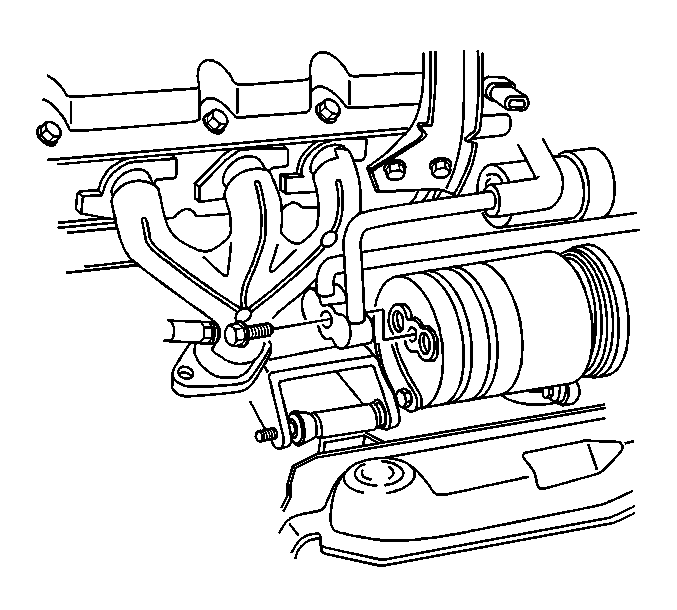
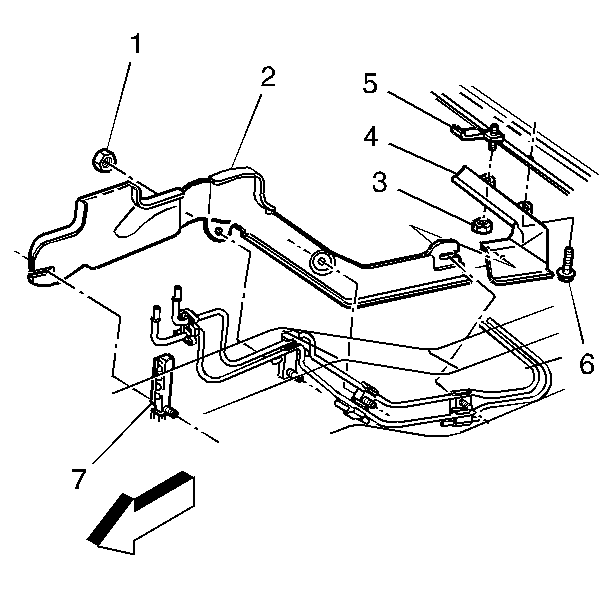


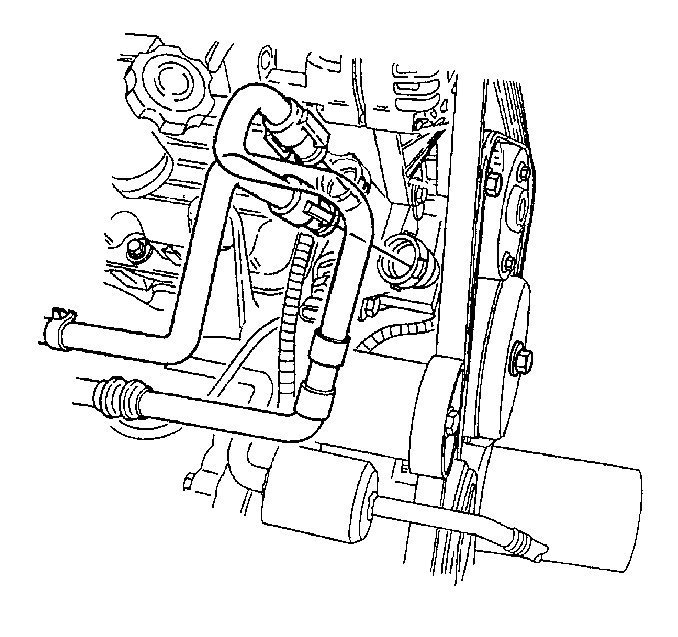
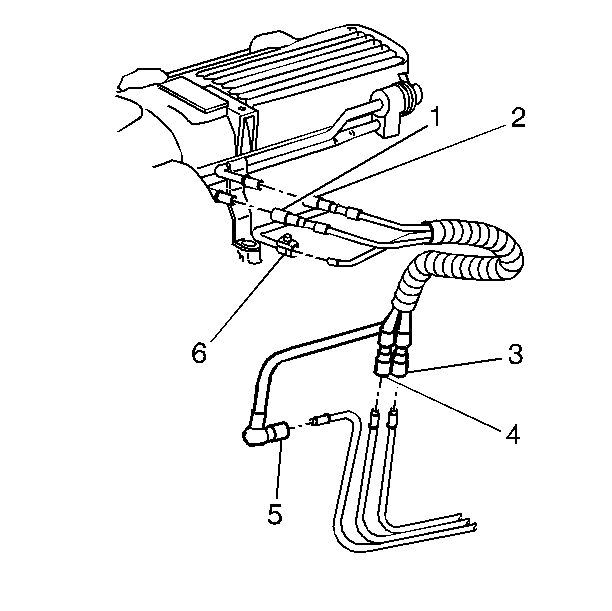
| • | The fuel feed (1) from the fuel rail |
| • | The fuel return (2) from the fuel rail |






Installation Procedure
Tools Required
| • | J 36660-A Torque Angle Meter |
| • | J 39580 Universal Engine Support Table |
| • | J 21366 Converter Holding Strap |
- Install engine lifting devise and remove engine from the stand.
- For the manual transmission, install the flywheel (2) and flywheel bolts (1).
- For the automatic transmission, install the flywheel (2) and flywheel bolts (1).
- For the manual transmission, install the clutch disc (6) and pressure plate (2) to the flywheel (5).
- Install the pressure plate bolts (1).
- Align the flywheel housing to the engine.
- For the manual transmission, install the flywheel housing to engine bolts (1, 2) and nuts (3).
- If equipped with a automatic transmission remove the J 21366 from the transmission.
- For the automatic transmission, install the transmission to engine bolts and nut.
- Connect the electrical connectors to the transmission.
- If equipped with the manual transmission install the following:
- Left side transmission support (1).
- Left side transmission support brace bolts (2, 3).
- Right side transmission support (1).
- Right side transmission support brace bolts (3, 4).
- If equipped with the automatic transmission install the following:
- Install the torque converter to flywheel bolts.
- Install the torque converter cover (2).
- Left side transmission support (4).
- Left side transmission support bolts (3, 5).
- Left side transmission support nut (1).
- Right side transmission support (4).
- Right side transmission support brace bolts (1, 2, 3).
- Right side transmission support nut (6).
- With the aide of an assistant, lower the engine and transmission to the crossmember.
- Install the left engine mount bracket (1) and mount bracket stud (2).
- Install the left engine mount bracket bolts (3).
- Install the right engine mount bracket (3) and the engine mount bracket bolts (1, 2).
- Remove the lifting devise from the engine.
- Install the generator to the engine.
- Install the positive cable nut to the generator terminal.
- Connect the generator electrical connector.
- Install the power steering pump.
- Install the power steering pump nuts (3).
- Install the drive belt tensioner.
- Install the drive belt tensioner bolts.
- Install the A/C compressor.
- Install the A/C compressor bolts.
- Install the A/C compressor rear bracket.
- Install the A/C compressor rear bracket stud (1).
- Install the A/C compressor rear bolts (2, 3).
- Route the drive belt (1) around the pulleys.
- Position a hex-head socket on the belt tensioner pulley bolts.
- Rotate the drive belt tensioner (2) clockwise to relieve the tension on the drive belt (1).
- Install the drive belt (1) onto the tensioner (2).
- Remove the crossmember to J 39580 security straps.
- Lower the vehicle and install the engine and transmission to the vehicle.
- Align the crossmember to the vehicle body.
- Install the front crossmember bolts
- Install the transmission support bolts.
- Raise and suitably support the vehicle. Refer to Lifting and Jacking the Vehicle in General Information.
- Remove the J 39580 from below the vehicle.
- Remove the supports from both steering knuckles.
- Connect the ball stud to the steering knuckle.
- Install the nuts and cotter pins to the left and right upper ball joints.
- Instal the right and left side shock absorber lower mounting bolts.
- Lower the vehicle.
- Install the transmission control, if equipped. Refer to Shift Control Assembly Replacement in Manual Transmission - M49.
- Install the floor shift control, if equipped. Refer to Transmission Control Replacement in Automatic Transmission - 4L60-E.
- Install the engine wire harness through the front of dash.
- Connect the engine wiring harness to the instrument panel wiring harness.
- Install the hinge pillar trim panel. Refer to Body Hinge Pillar Trim Panel Replacement in Interior Trim.
- Install the right side insulator panel. Refer to Instrument Panel Insulator Panel Replacement - Right Side in Instrument Panel, Gauges and Console.
- Install the PCM to the vehicle.
- Connect the PCM connectors.
- Connect the engine harness vacuum tube to the bottom of the vacuum check valve.
- Connect the forward lamp harness to the engine harness.
- Connect the captured secondary locks.
- Install the front two brake pipes to the brake modulator.
- Install the brake booster vacuum hose (2) to the intake manifold fitting (1).
- Install the outlet hose to the water pump.
- Install the inlet hose to the water outlet.
- Install the forward lamp harness branch to the wire harness clip.
- Connect the electronic throttle control (ETC) electrical connector (1).
- Install the capture secondary lock to the electrical connector.
- Connect the EVAP pipe (6) at the engine.
- Connect the fuel return pipe (2) to the fuel rail.
- Connect the fuel feed pipe (1) to the fuel rail.
- Install the heater hoses to the drive belt tensioner.
- Install a new O-ring.
- Install the A/C compressor and condenser hose bolt at the accumulator
- Install the engine ground.
- Install the engine wiring harness ground bolt (1) to 25 N·m (18 lb ft).
- Raise and suitably support the vehicle. Refer to Lifting and Jacking the Vehicle in General Information.
- Connect the brake lines to the brake pipe clip.
- Install the front fuel pipe heat shield (2).
- Install the front fuel pipe heat shield nuts (1).
- Install a new O-ring.
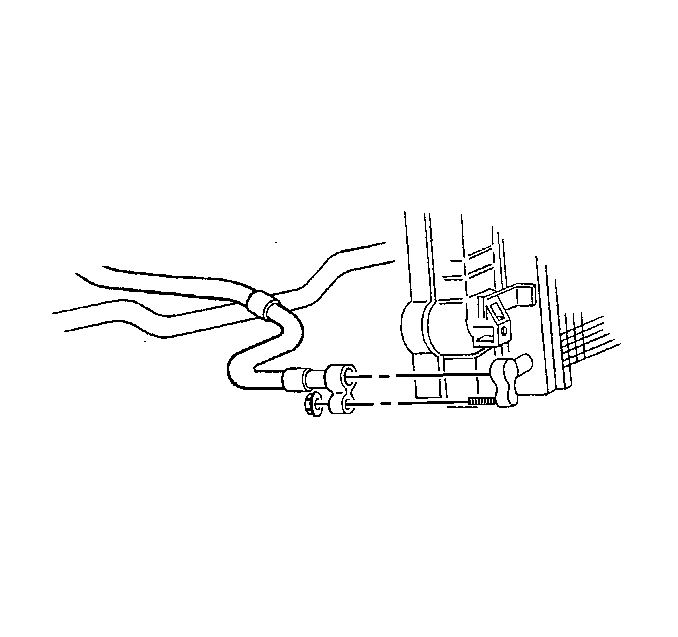
- Install the A/C compressor and condenser hose nut at the condenser.
- Install a new O-ring.
- Install the A/C compressor and condenser hose bolt.
- Connect the wheel speed sensors electrical connectors.
- Connect the knock sensors electrical connectors.
- Install the RF ground strap, cruise control lead and wiring harness ground bolt to the front rail.
- Install the intermediate steering shaft and bolt to the rack.
- Install the steering gear coupling shield.
- Install the stabilizer bar brackets.
- Install the stabilizer bar bracket bolts.
- Install the left side front air deflector. Refer to Front Bumper Fascia Air Deflector Replacement in Bumpers.
- On vehicles equipped with a manual transmission, connect the clutch actuator cylinder line to the actuator cylinder.
- On vehicles equipped with a automatic transmission, install the range selector lever cable to the cable bracket.
- Install the retainer to the range selector lever cable.
- Snap the transmission range selector lever cable to the range selector lever at the transmission.
- Install the torque arm. Refer to Torque Arm Replacement in Rear Suspension.
- Install the propeller shaft. Refer to One-Piece Propeller Shaft Replacement or Two-Piece Propeller Shaft Replacement in Propeller Shaft.
- Install the 3-way catalytic converter. Refer to Catalytic Converter Replacement in Engine Exhaust.
- Install the front wheels. Refer to Tire and Wheel Removal and Installation in Tires and Wheels.
- Lower the vehicle.
- Install the air intake duct.
- Connect the intake air temperature (IAT) sensor electrical connector.
- Connect the positive battery cable.
- Install the starter motor. Refer to Starter Motor Replacement in Engine Electrical.
- Refill the engine oil.
- Refill the transmission fluid.
- Refill the engine coolant. Refer to Cooling System Draining and Filling in Engine Cooling.
- Recharge the refrigerant. Refer to Refrigerant Recovery and Recharging in Heating, Ventilation and Air Conditioning.
- Bleed the brakes. Refer to Hydraulic Brake System Bleeding or Hydraulic Brake System Bleeding in Hydraulic Brakes.
- Bleed the clutch hydraulic system. Refer to Hydraulic Clutch Bleeding in Clutch.
- Perform the crankshaft postion (CKP) system variation learn procedure. Refer to Crankshaft Position System Variation Learn in Engine Controls - 3.8 L.

Tighten
Tighten the flywheel bolts (1) to 15 N·m (11 lb ft).
Use the J 36660-A
to torque
the flywheel bolts an additional 50 degrees.

Tighten
Tighten the flywheel bolts (1) to 15 N·m (11 lb ft).
Use J 36660-A
to torque
the flywheel bolts an additional 50 degrees.

Tighten
Tighten the pressure plate bolts (1) to 20 N·m (15 lb ft).
Use J 36660-A
to torque
the pressure plate bolts (1) an additional 45 degrees.

Tighten
Tighten the flywheel housing to engine bolts (1, 2) and nuts (3) to
95 N·m (70 lb ft).

Tighten
Tighten the transmission to engine bolts and nut to 95 N·m
(70 lb ft).

Tighten
| • | Tighten the left side transmission support brace bolts (2) to 50 N·m (37 lb ft). |
| • | Tighten the left side transmission support brace bolts (3) to 28 N·m (21 lb ft). |

Tighten
Tighten the right side transmission support brace bolts (3, 4) to 50 N·m
(37 lb ft).

Tighten
Tighten the torque converter to flywheel bolts to 63 N·m
(47 lb ft).

Tighten
| • | Tighten the left side transmission support bolts (3) to 8.5 N·m (75 lb in). |
| • | Tighten the left side transmission support bolts (5) to 28 N·m (21 lb ft). |
| • | Tighten the left side transmission support nut (1) to 80 N·m (59 lb ft). |

Tighten
| • | Tighten the right side transmission support brace bolts (1) to 8.5 N·m (75 lb in). |
| • | Tighten the right side transmission support bolts (2, 3) to 50 N·m (37 lb ft). |
| • | Tighten the right side transmission support nut (6) to 80 N·m (59 lb ft). |

Tighten
| • | Tighten the left engine mount bracket bolt (3) to 100 N·m (74 lb ft). |
| • | Tighten the left engine mount bracket stud (2) to 87 N·m (64 lb ft). |

Tighten
| • | Tighten the two right engine mount bracket bolts (1) to 100 N·m (74 lb ft). |
| • | Tighten the right engine mount bracket bolt (2) to 50 N·m (37 lb ft). |

Tighten
Tighten the positive cable nut to generator terminal to 22 N·m
(16 lb ft).


Tighten
Tighten the power steering nuts (3) to 30 N·m
(22 lb ft).

Tighten
Tighten the drive belt tensioner bolts to 50 N·m (37 lb ft).

Tighten
Tighten the A/C compressor bolts to 50 N·m (37 lb ft).

Tighten
| • | Tighten the A/C compressor rear bracket stud (1) to 50 N·m (37 lb ft). |
| • | Tighten the A/C compressor rear bolts (2, 3) to 30 N·m (22 lb ft). |


Tighten
| • | Tighten the upper four cradle bolts to 125 N·m (92 lb ft). |
| • | Tighten the lower two cradle bolts to 145 N·m (107 lb ft). |

Tighten
Tighten the transmission support bolts to 57 N·m (42 lb ft).

Tighten
Tighten the upper ball joint nuts to 53 N·m (39 lb ft).
Tighten
Tighten the shock bolts to 65 N·m (48 lb ft).


Tighten
Tighten A/C compressor and condenser hose bolt at the accumulator to
48 N·m (36 lb ft).


Tighten
Tighten the front fuel pipe heat shield nuts (1) to 5 N·m
(44 lb in).
Tighten
Tighten the A/C compressor and condenser hose nut at the condenser to
16 N·m (12 lb ft).

Tighten
Tighten the A/C compressor and condenser hose bolt to 33 N·m
(24 lb ft).


Tighten
Tighten the wiring harness ground bolt to 12 N·m (106 lb in).

Tighten
Tighten the intermediate shaft bolt to 47 N·m (35 lb ft).
Tighten
Tighten the stabilizer bar bracket bolts to 55 N·m (41 lb ft).


