Front Bumper Lower Fascia Replacement Aztek
Tools Required
J 38778 Door Trim Pad and Garnish Clip Remover
Removal Procedure
- Remove the front fender liners. Refer to Front Fender Liner Replacement in Body Front End.
- Remove the headlamps. Refer to Headlamp Assembly or Headlamp Bulb Replacement in Lighting Systems.
- Remove the fog lamps. Refer to Front Fog Lamp Replacement in Lighting Systems.
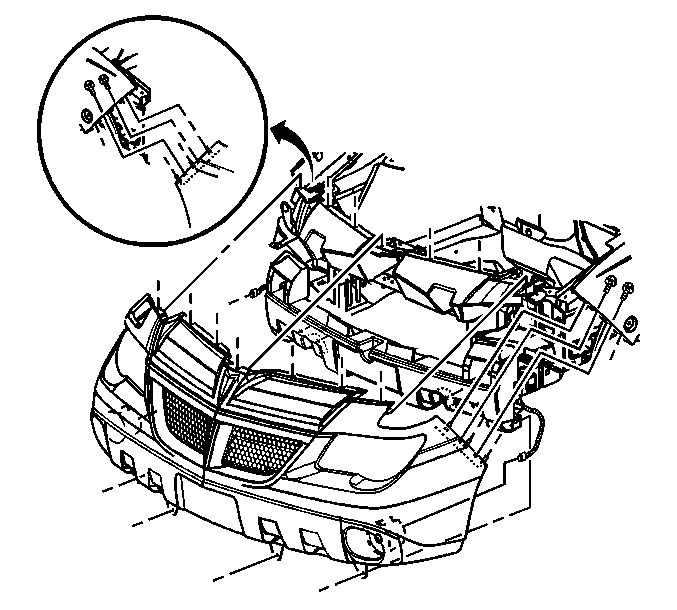
- Remove the bolts from the front bumper fascia at the fender.
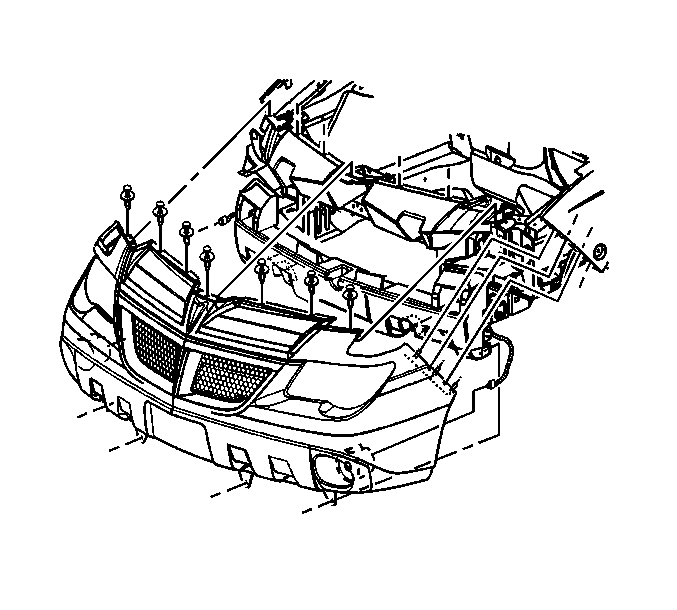
- Remove the push-in retainers from the upper bumper fascia support using J 38778 .
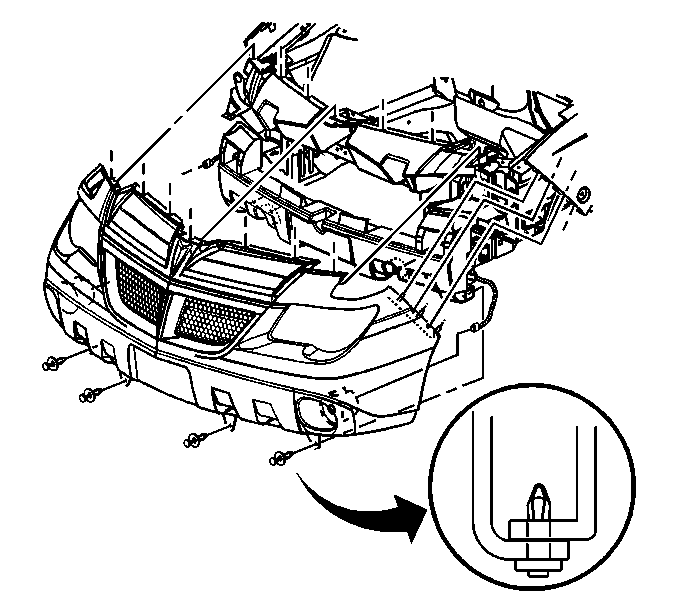
- Remove the push-in retainers to the fascia at the front bumper energy absorber using J 38778 .
- Remove the fascia from the vehicle.
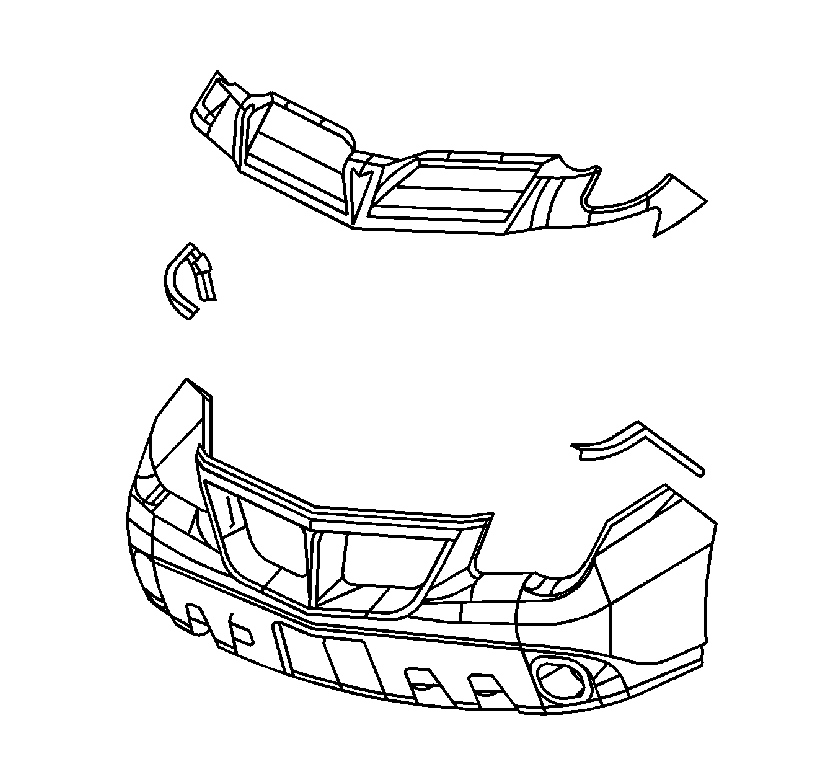
- Remove the grilles from the fascia. Refer to Fascia Grille Replacement .
- Remove the fascia outer support from the fascia.
- Remove the upper fascia from the lower fascia.
Installation Procedure
- Install the upper fascia to the lower fascia.
- Install the fascia outer support to the fascia.
- Install the grilles. Refer to Fascia Grille Replacement .
- Position the fascia to the vehicle.
- Align the alignment pins of the fascia to the front fenders and moldings.
- Install the push-in the retainers starting at the center, to the front upper bumper fascia support.
- Install the bolts to the front fascia at the front fenders.
- Install the push-in retainers to the fascia at the energy absorber.
- Install the fog lamps. Refer to Front Fog Lamp Replacement in Lighting Systems.
- Install the headlamps. Refer to Headlamp Assembly or Headlamp Bulb Replacement in Lighting Systems.
- Install the front fender liners. Refer to Front Fender Liner Replacement in Body Front End.


Notice: Use the correct fastener in the correct location. Replacement fasteners must be the correct part number for that application. Fasteners requiring replacement or fasteners requiring the use of thread locking compound or sealant are identified in the service procedure. Do not use paints, lubricants, or corrosion inhibitors on fasteners or fastener joint surfaces unless specified. These coatings affect fastener torque and joint clamping force and may damage the fastener. Use the correct tightening sequence and specifications when installing fasteners in order to avoid damage to parts and systems.

Tighten
Tighten the front fascia bolts to 10 N·m (89 lb in).
Important: Push the retainer tabs up and against the front bumper energy absorber.

Front Bumper Lower Fascia Replacement Rendezvous
Tools Required
J 38778 Door Trim Pad and Garnish Clip Remover
Removal Procedure
- Remove the front fender liners. Refer to Front Fender Liner Replacement in Body Front End.
- Remove the headlamps. Refer to Headlamp Assembly or Headlamp Bulb Replacement in Lighting Systems.
- Remove the fog lamps. Refer to Front Fog Lamp Replacement in Lighting Systems.
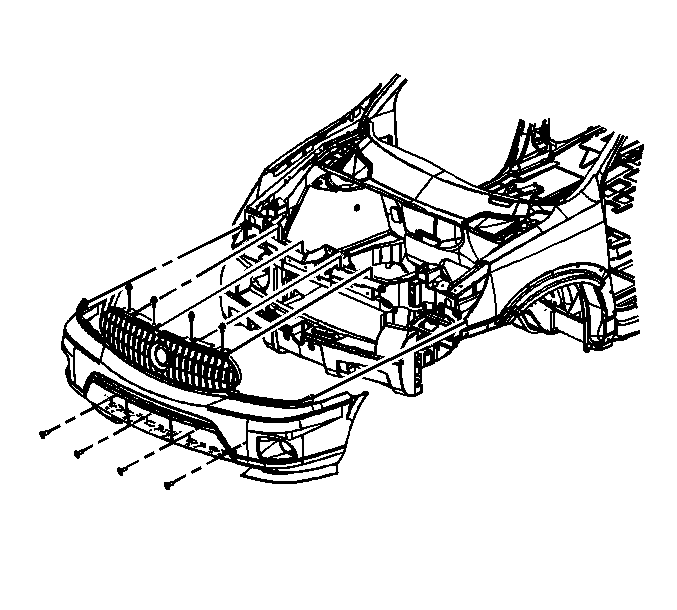
- Remove the bolts from the front bumper fascia at the fender.
- Remove the push-in retainers from the upper bumper fascia support using J 38778 .
- Remove the push-in retainers from the fascia at the front bumper energy absorber using J 38778 .
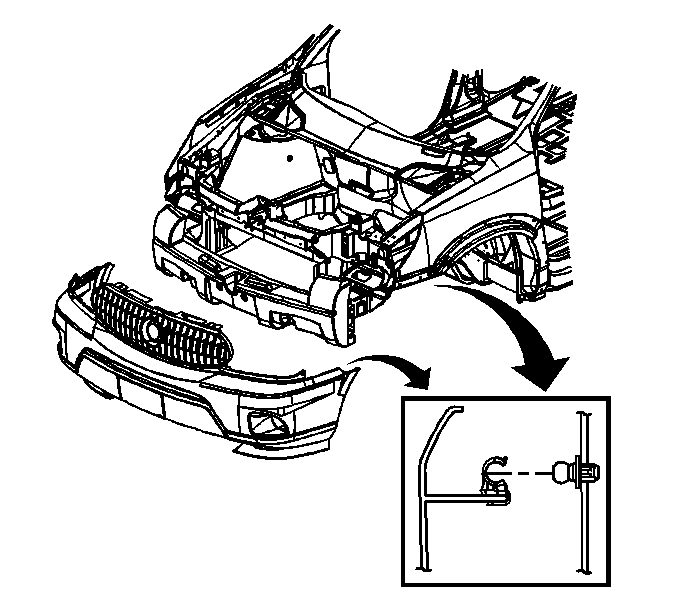
- Disengage the ball socket retainer from the ball on the front fender.
- Remove the fascia from the vehicle.
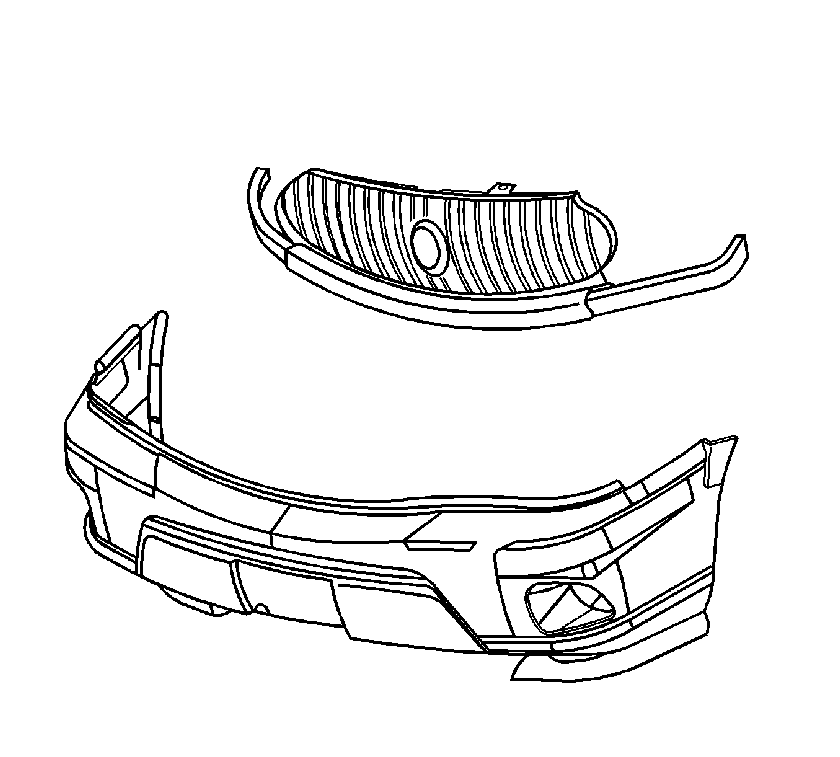
- Remove the grille from the fascia. Refer to Fascia Grille Replacement .
- Remove the fascia outer support.
- Remove the upper fascia from the lower fascia.
Installation Procedure
- Install the upper fascia to the lower fascia.
- Install the fascia outer support.
- Install the grille to the fascia. Refer to Fascia Grille Replacement .
- Position the fascia to the vehicle.
- Align the alignment pins of the fascia to the front fenders and moldings.
- Engage the ball socket to the ball on the front fender
- Install the push-in the retainers starting at the center, to the front upper bumper fascia support.
- Install the bolts to the front fascia at the front fenders.
- Install the push-in retainers to the fascia at the energy absorber.
- Install the fog lamps. Refer to Front Fog Lamp Replacement in Lighting Systems.
- Install the headlamps. Refer to Headlamp Assembly or Headlamp Bulb Replacement in Lighting Systems.
- Install the front fender liners. Refer to Front Fender Liner Replacement in Body Front End.


Notice: Use the correct fastener in the correct location. Replacement fasteners must be the correct part number for that application. Fasteners requiring replacement or fasteners requiring the use of thread locking compound or sealant are identified in the service procedure. Do not use paints, lubricants, or corrosion inhibitors on fasteners or fastener joint surfaces unless specified. These coatings affect fastener torque and joint clamping force and may damage the fastener. Use the correct tightening sequence and specifications when installing fasteners in order to avoid damage to parts and systems.
Tighten
Tighten the front fascia bolts to 10 N·m (89 lb in).
Important: Push the retainer tabs up and against the front bumper energy absorber.
