CHILD SEAT WITH TOP STRAP INSTALLATION PROCEDURE

MODELS/YEARS: 1985 NINETY-EIGHT
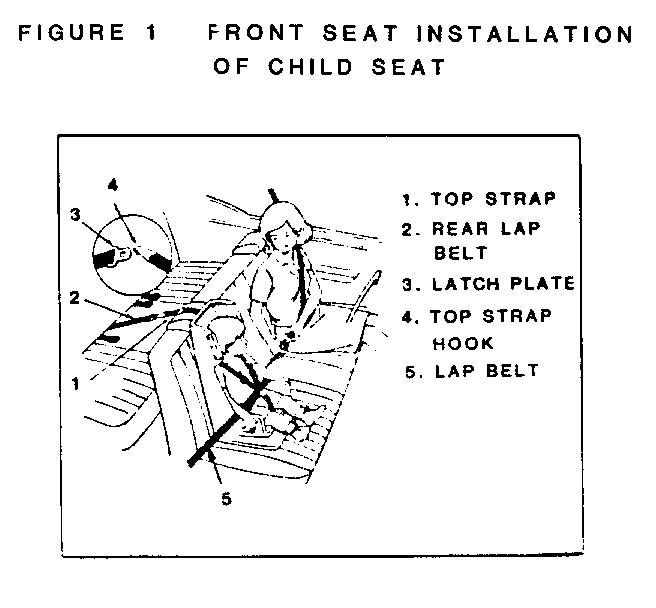
Be sure the child seat position does not conflict with any additional requirements provided by the child restraint manufacturer. When the child seat is used in the front seat location, it is easily installed by connecting the child seat top, strap to any rear lap belt latch. See Figure 1. Before attaching top strap to an outboard rear lap belt, pull webbing from retractor until no more webbing can be extended. An occupant should not be allowed to sit where the belt is being used for the child seat.
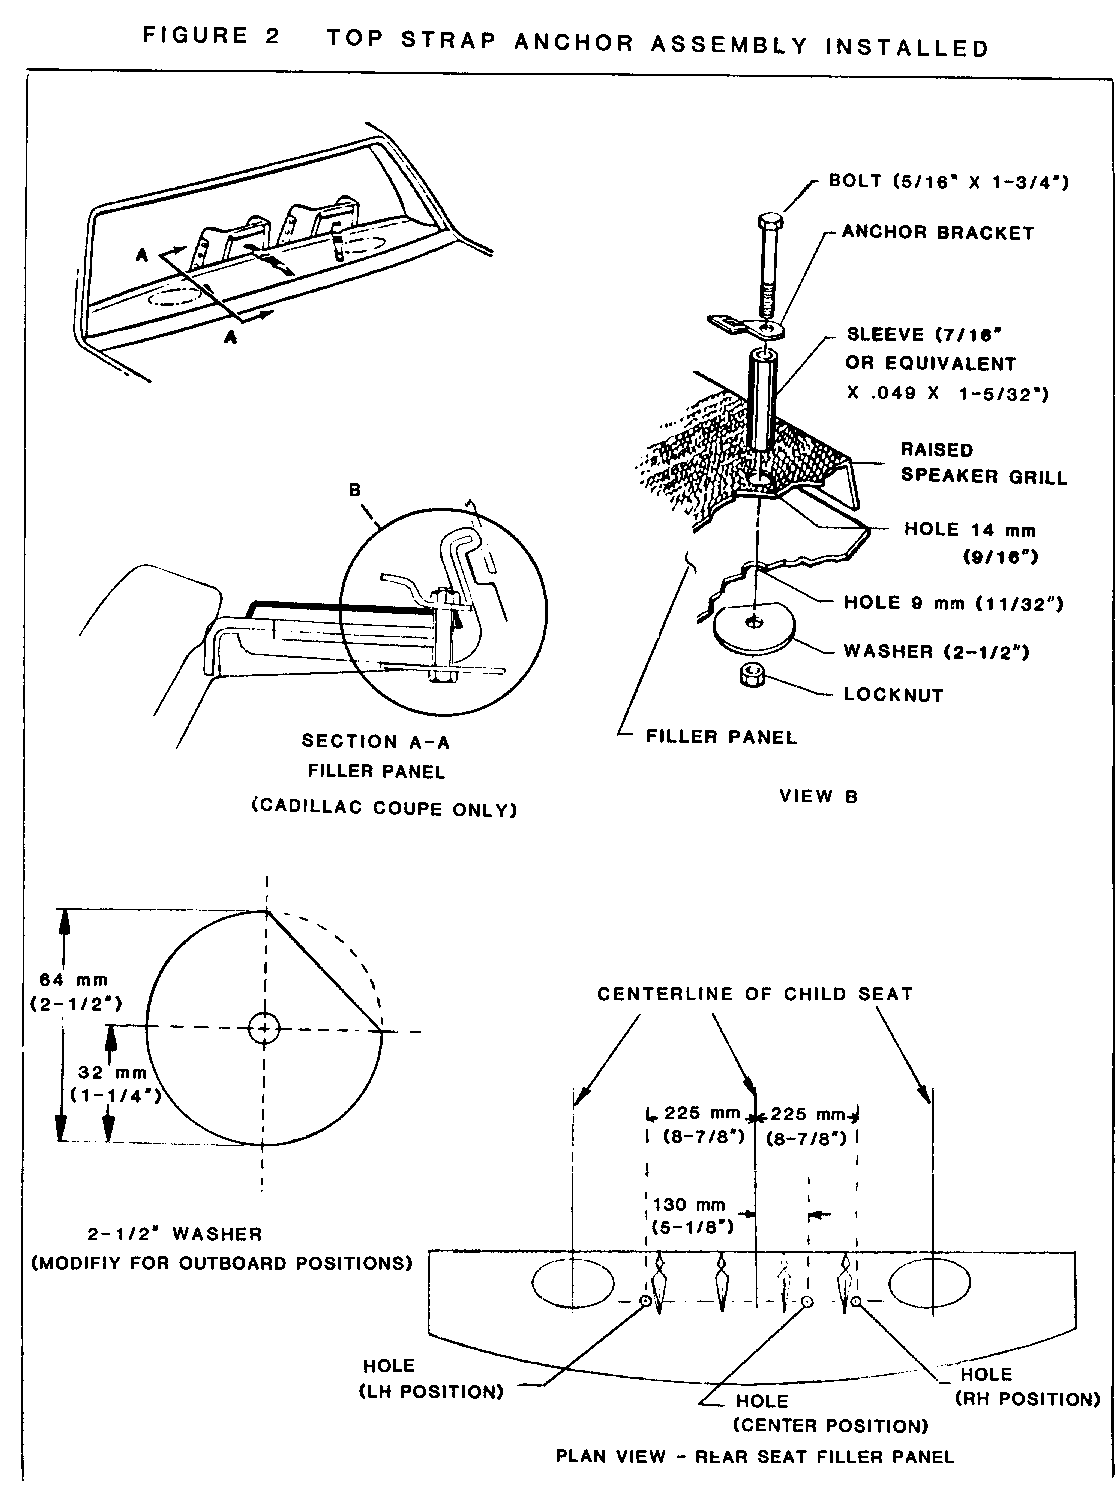
If a child seat is to be used in the rear seat, a special anchor must be installed to anchor the child seat top strap. Is in order to assure the correct top strap angle, the child seat is only to be used at the seating position for which the top strap anchor is installed. The following general instructions explain how to install the anchor for the child seat top strap. All hardware discussed in this bulletin should be supplied or is available from the child seat manufacturer, with the exception of a longer (1-3/4") bolt (Figure 2) and a tubular sleeve. Both may be procured locally. The sleeve is cut from bulk stock.
1. Select the desired rear seat installation position and the appropriate seating position anchor hole location (Figure 2 - Plan View).
2. From the trunk area, remove the spare tire and appropriate speaker cover and locate the hole dimple in the rear seat filler panel referenced in Figure 2.
NOTE: A dimple is not provided for the center seating position Locate the hole using the dimensions provided.
3. Drill a 9 mm (11/32") hole as located in Step 2 through the underside of the rear seat filler panel sheet metal.
4. Using a punch or other sharp tool, make a locating hole through the center of the trim covering the 9 mm (11/32") hole and scribe a mark on the underside of the speaker grille.
5. From inside the car, lift off the speaker grille by flexing it upward in the center.
6. From inside the vehicle, cut a 14 mm (9/16") hole in the trim material, using the location hole as a guide. Remove trim material from around hole and push insulation away from hole.
7. Drill a 14 mm (9/16") hole in the speaker grille located as scribed in Step 4.
8. Modify 2-1/2" washer as shown in Figure 2.
9. Reinstall the speaker grille and install the top strap anchor and sleeve assembly as shown and tighten nut securely.
10. Reinstall speaker cover and spare tire.
11. Install the child seat and secure according to manufacturer's instructions.


General Motors bulletins are intended for use by professional technicians, not a "do-it-yourselfer". They are written to inform those technicians of conditions that may occur on some vehicles, or to provide information that could assist in the proper service of a vehicle. Properly trained technicians have the equipment, tools, safety instructions and know-how to do a job properly and safely. If a condition is described, do not assume that the bulletin applies to your vehicle, or that your vehicle will have that condition. See a General Motors dealer servicing your brand of General Motors vehicle for information on whether your vehicle may benefit from the information.
