For 1990-2009 cars only
SMU - Revised Defroster Actuator Replacement Procedure

| Subject: | Revised Defroster Actuator Replacement Procedure |
| Models: | 1998-2002 Oldsmobile Intrigue |
This bulletin is being issued to revise the Defroster Actuator Replacement procedure in the HVAC-Manual and HVAC-Automatic sub-sections of the Service Manual. Please replace the current information in the Service Manual with the following information.
The following information has been updated within SI2000. If you are using a paper version of this Service Manual, please make a reference to this bulletin on the affected page.
Removal Procedure
- Remove the right instrument panel (IP) insulator panel. Refer to Closeout/Insulator Panel Replacement - Right in Instrument Panel, Gages and Console.
- Remove the IP compartment. Refer to Compartment Replacement - IP in Instrument Panel, Gages and Console.
- Remove the screws and push pin from the rear IP compartment cover.
- Remove the rear IP compartment cover from the IP.
- Remove the two bolts from the relay pack.
- Position the relay pack aside.
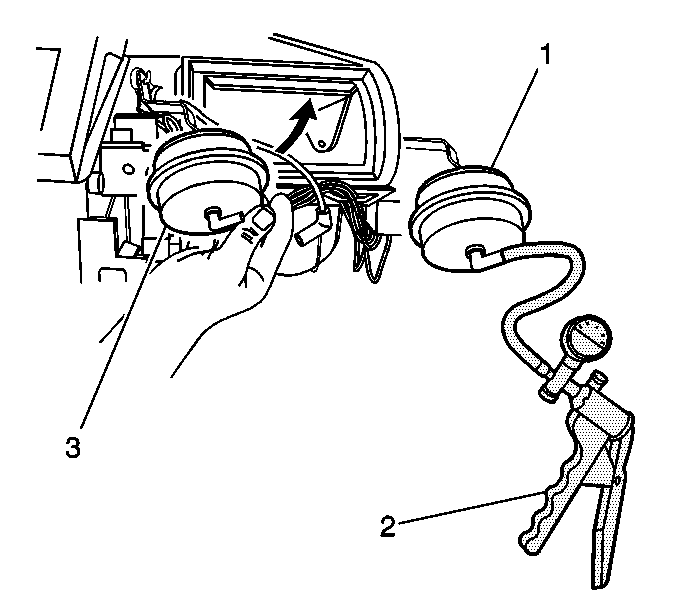
- Disconnect the two vacuum lines from the defroster actuator (3).
- Disconnect the orange vacuum line from the recirculation actuator and install a hand vacuum pump (2).
- Remove the defroster actuator from its attachment to the HVAC module case.
- Using the hand vacuum pump (2), open the recirculation actuator door.
- Rotate the defroster actuator to the right and up into the opening between the back of the dash and the opening into the HVAC module. The opening results when the recirculation actuator door is in the full open position.
- Disconnect the defroster actuator from the defroster door arm.

Installation Procedure
- Install the defroster actuator to the defroster door arm and snap into place on the HVAC module.
- Connect the vacuum line to the actuator.
- Remove the hand vacuum pump (2) and reinstall the vacuum line to the recirculation actuator.
- Reposition the relay pack.
- Install the relay pack bolts.
- Install the rear IP compartment cover to the IP.
- Install the screws and push pin to the rear IP compartment cover.
- Install the IP compartment. Refer to Compartment Replacement - IP in Instrument Panel, Gages and Console.
- Install the right IP insulator. Refer to Closeout/Insulator Panel Replacement - Right in Instrument Panel, Gages and Console.

Notice: Refer to Fastener Notice in Cautions and Notices.
Tighten
Tighten the bolts to 2 N·m (18 lb in).
