Tools Required
Disassembly Procedure

Notice: Do not cut through the wheel drive shaft inboard or outboard boot during service. Cutting through the boot may damage the sealing surface of the housing and the tripot or the constant velocity joint bushing. Damage
to the sealing surface may lead to water and dirt intrusion and premature wear of the constant velocity joint.
- Disconnect the swage ring from the halfshaft bar using
a hand grinder to cut through the ring, taking care not to damage the halfshaft
bar.
- Remove the large seal retaining clamp (2) from the tripot
joint with side cutters. Discard the large seal retaining clamp (2).
- Separate the inboard seal from the trilobal tripot bushing (3)
at the large diameter.
- Slide the seal away from the joint along the halfshaft bar.

- Remove the housing (1)
from the tripot joint spider and the halfshaft bar (2).
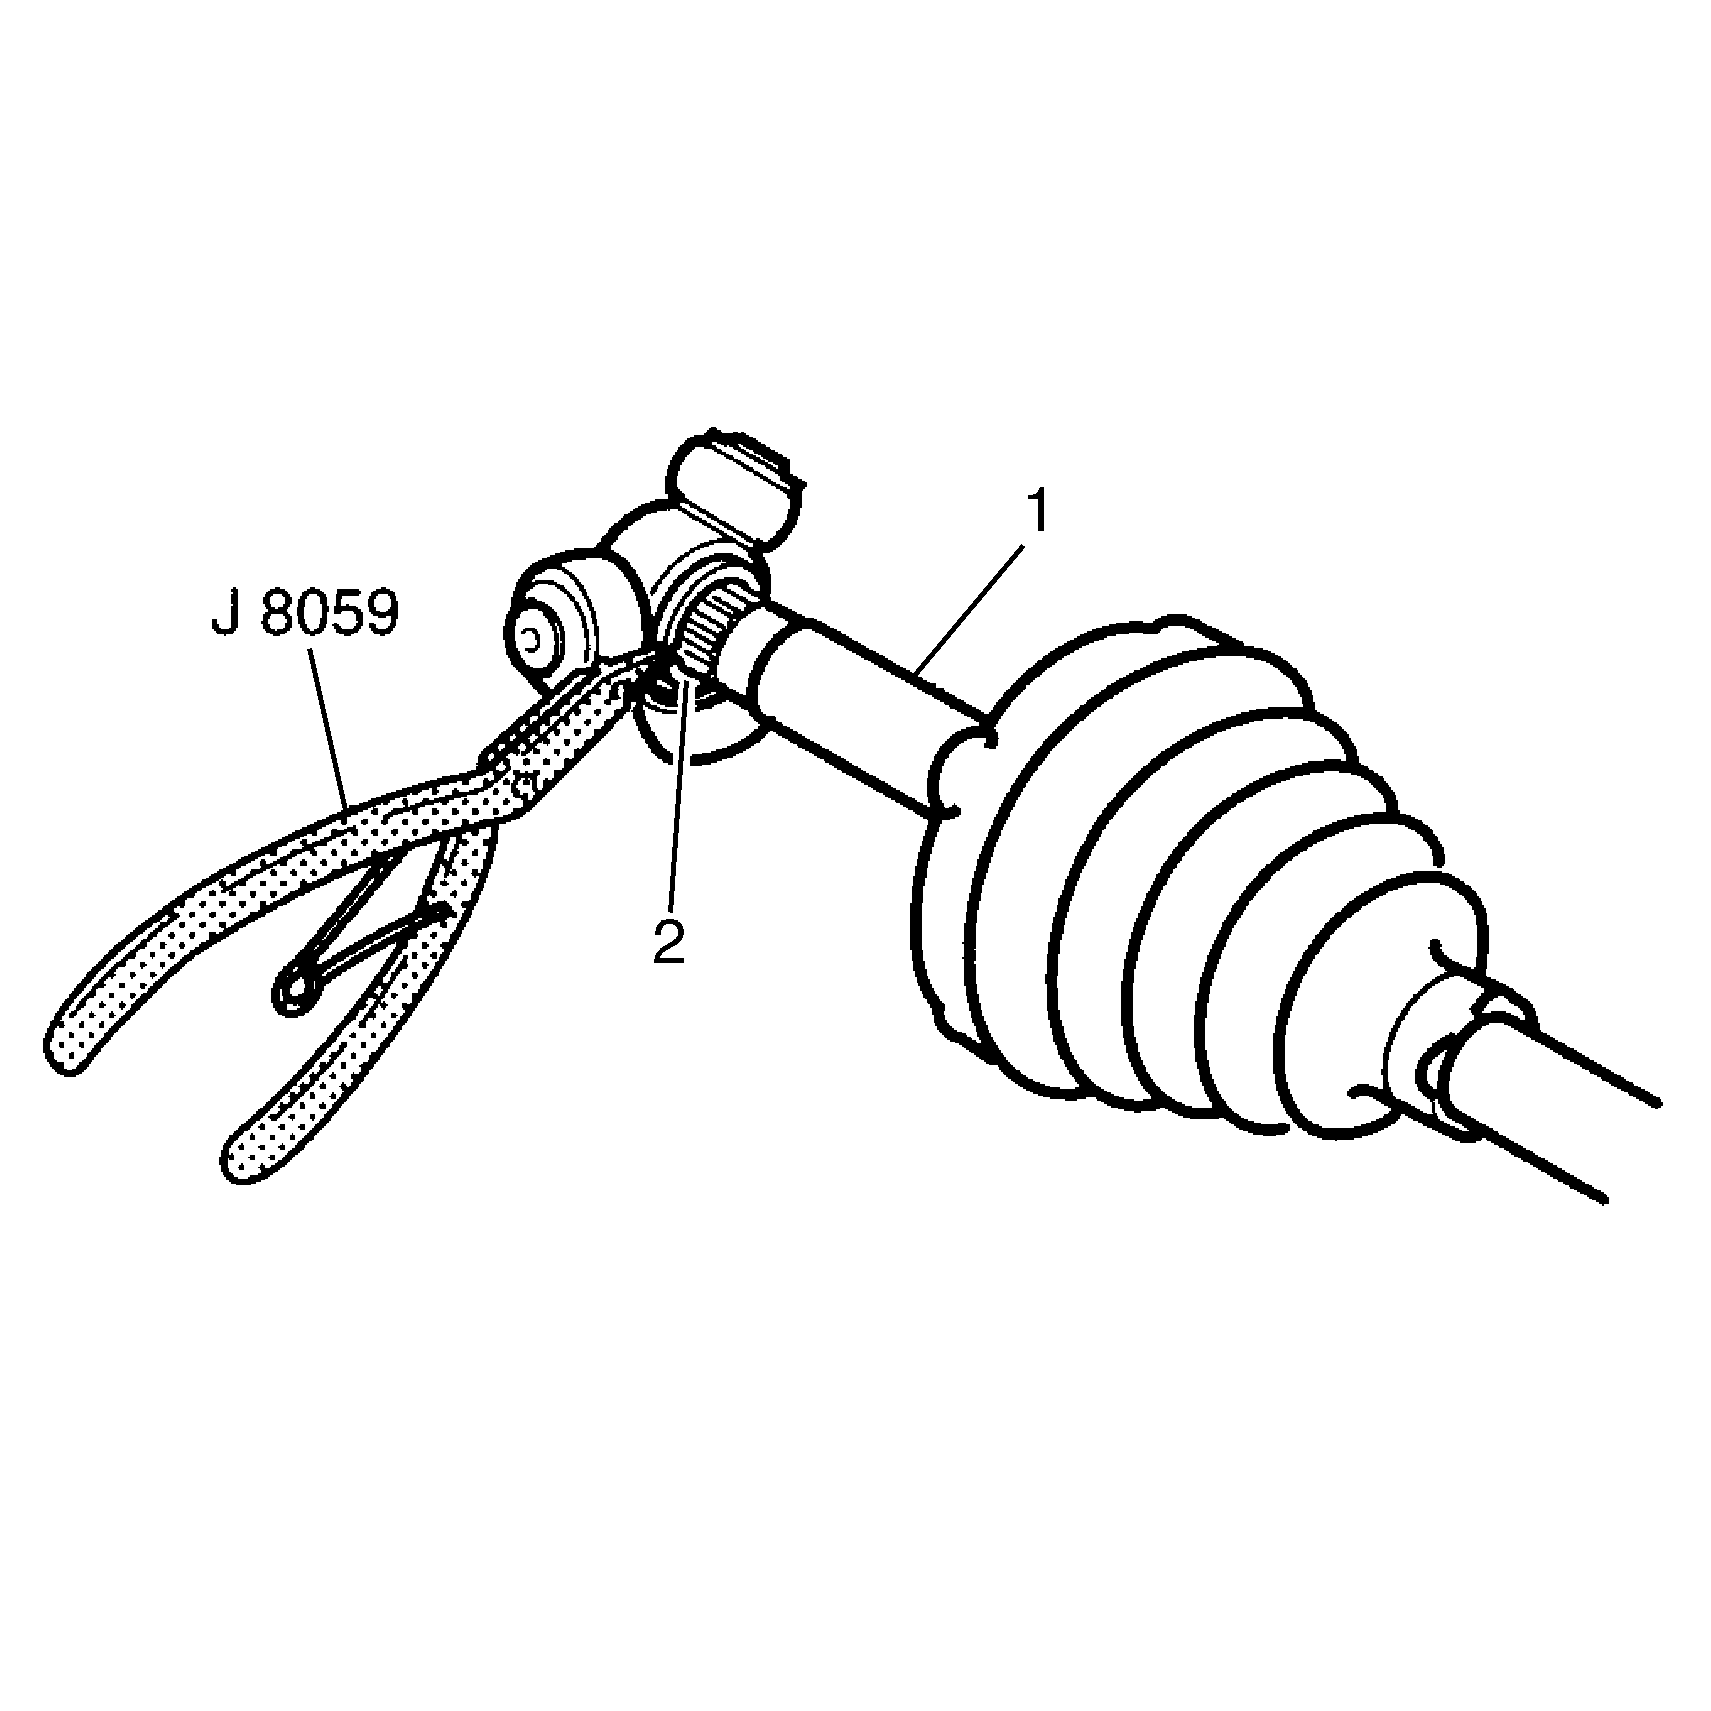
- Spread spacer ring (2)
using
J 8059
.
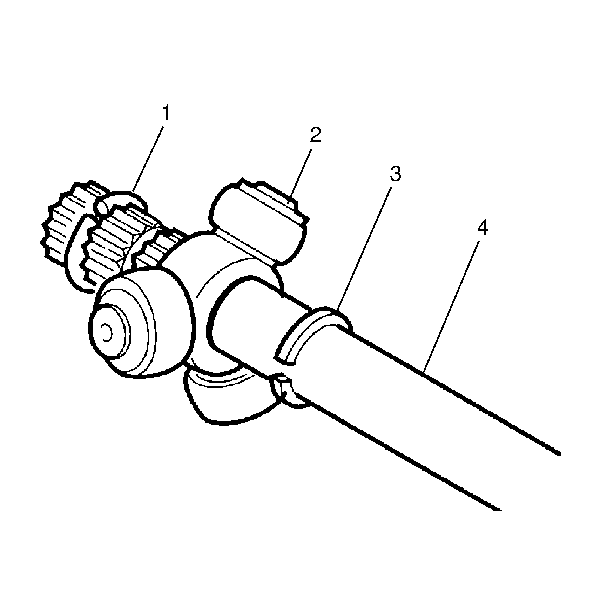
- Slide the spacer ring (3)
and the tripot joint spider (2) back on the halfshaft bar (4).
- Remove the halfshaft bar retaining ring (1) from the groove
on the halfshaft bar and discard the ring.
- Slide tripot joint spider assembly (2) off of the halfshaft
bar (4).
- Clean the tripot joint spider assembly (2) and the housing
thoroughly with cleaning solvent.
- Remove all traces of old grease and any contaminates. Dry all
the parts.
- Remove the trilobal tripot bushing from the housing and discard
the bushing.
- Remove the spacer ring (3) and the seal from the halfshaft
bar (4) and discard the ring and seal.
- Inspect the following parts for damage or wear:
| • | The tripot joint spider assembly (2) |
Assembly Procedure
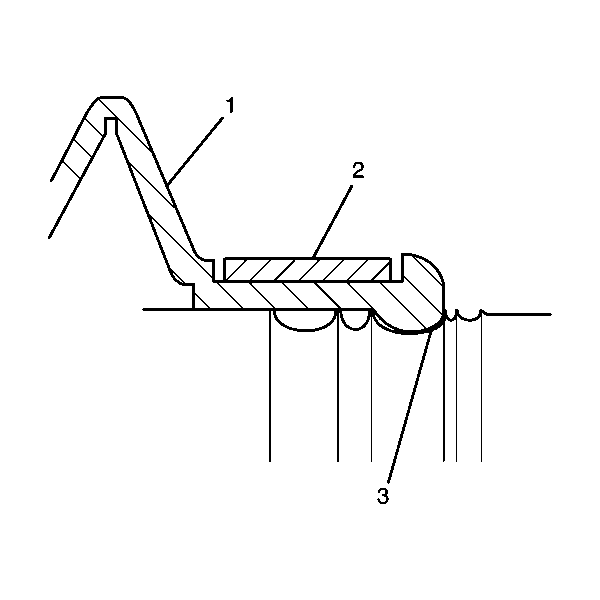
- Install the new swage
ring (2) on the neck of the inboard seal (1). Do not swage.
- Slide the halfshaft inboard seal (1) onto the halfshaft
bar.
- Position the neck of the halfshaft inboard seal (1) in
the seal groove (3) on the halfshaft bar.
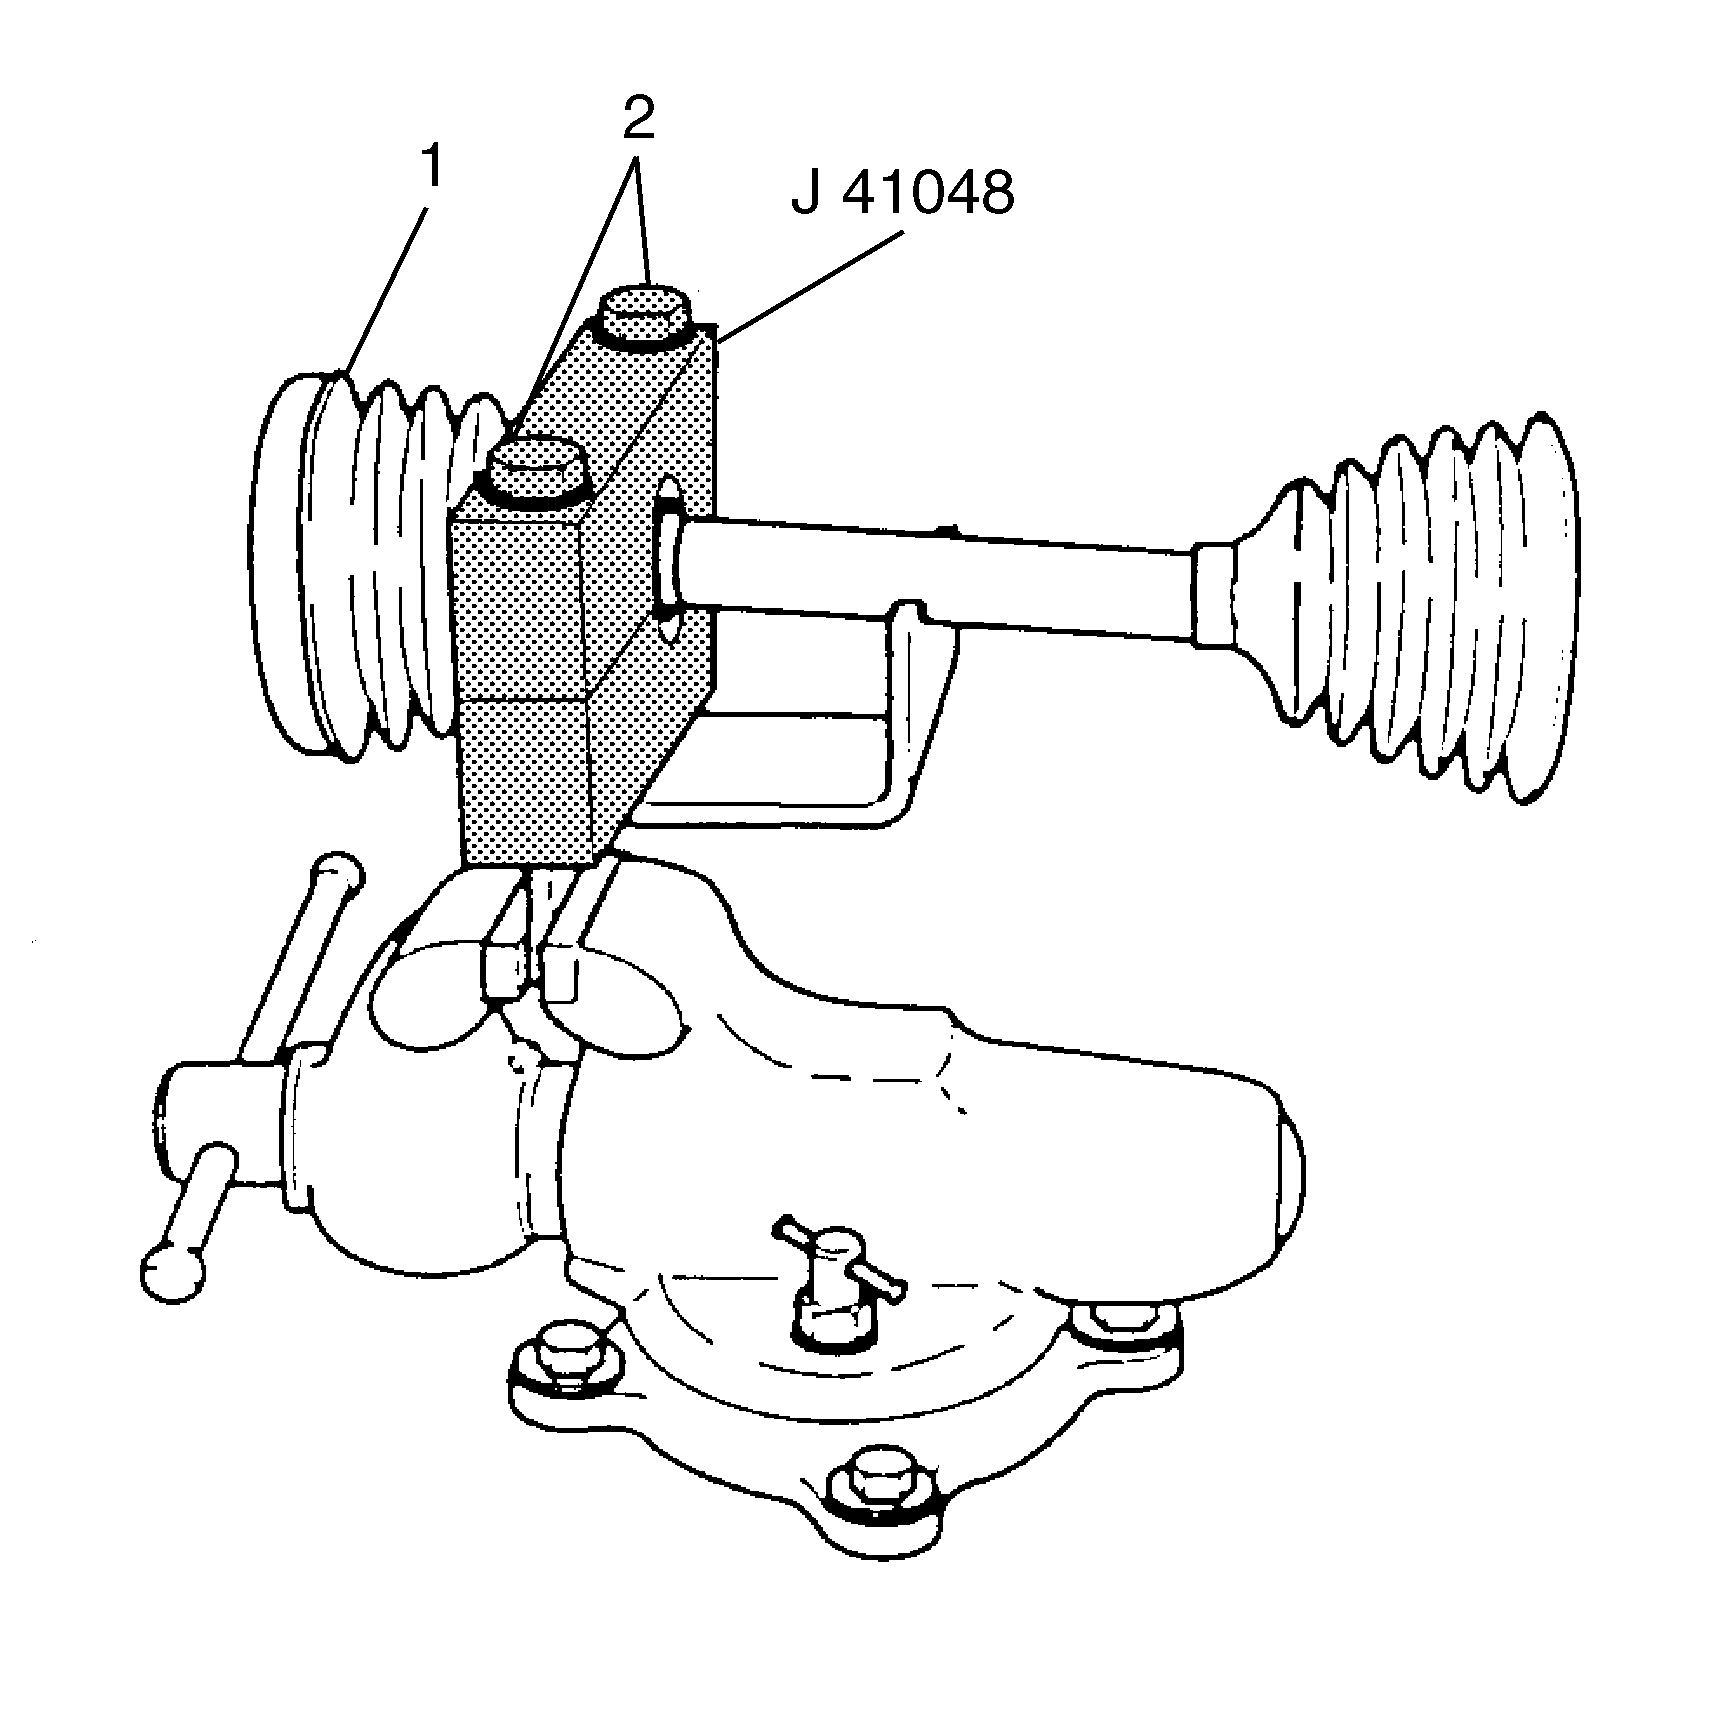
- Position the inboard end
of the halfshaft assembly (1) using
J 41048
.
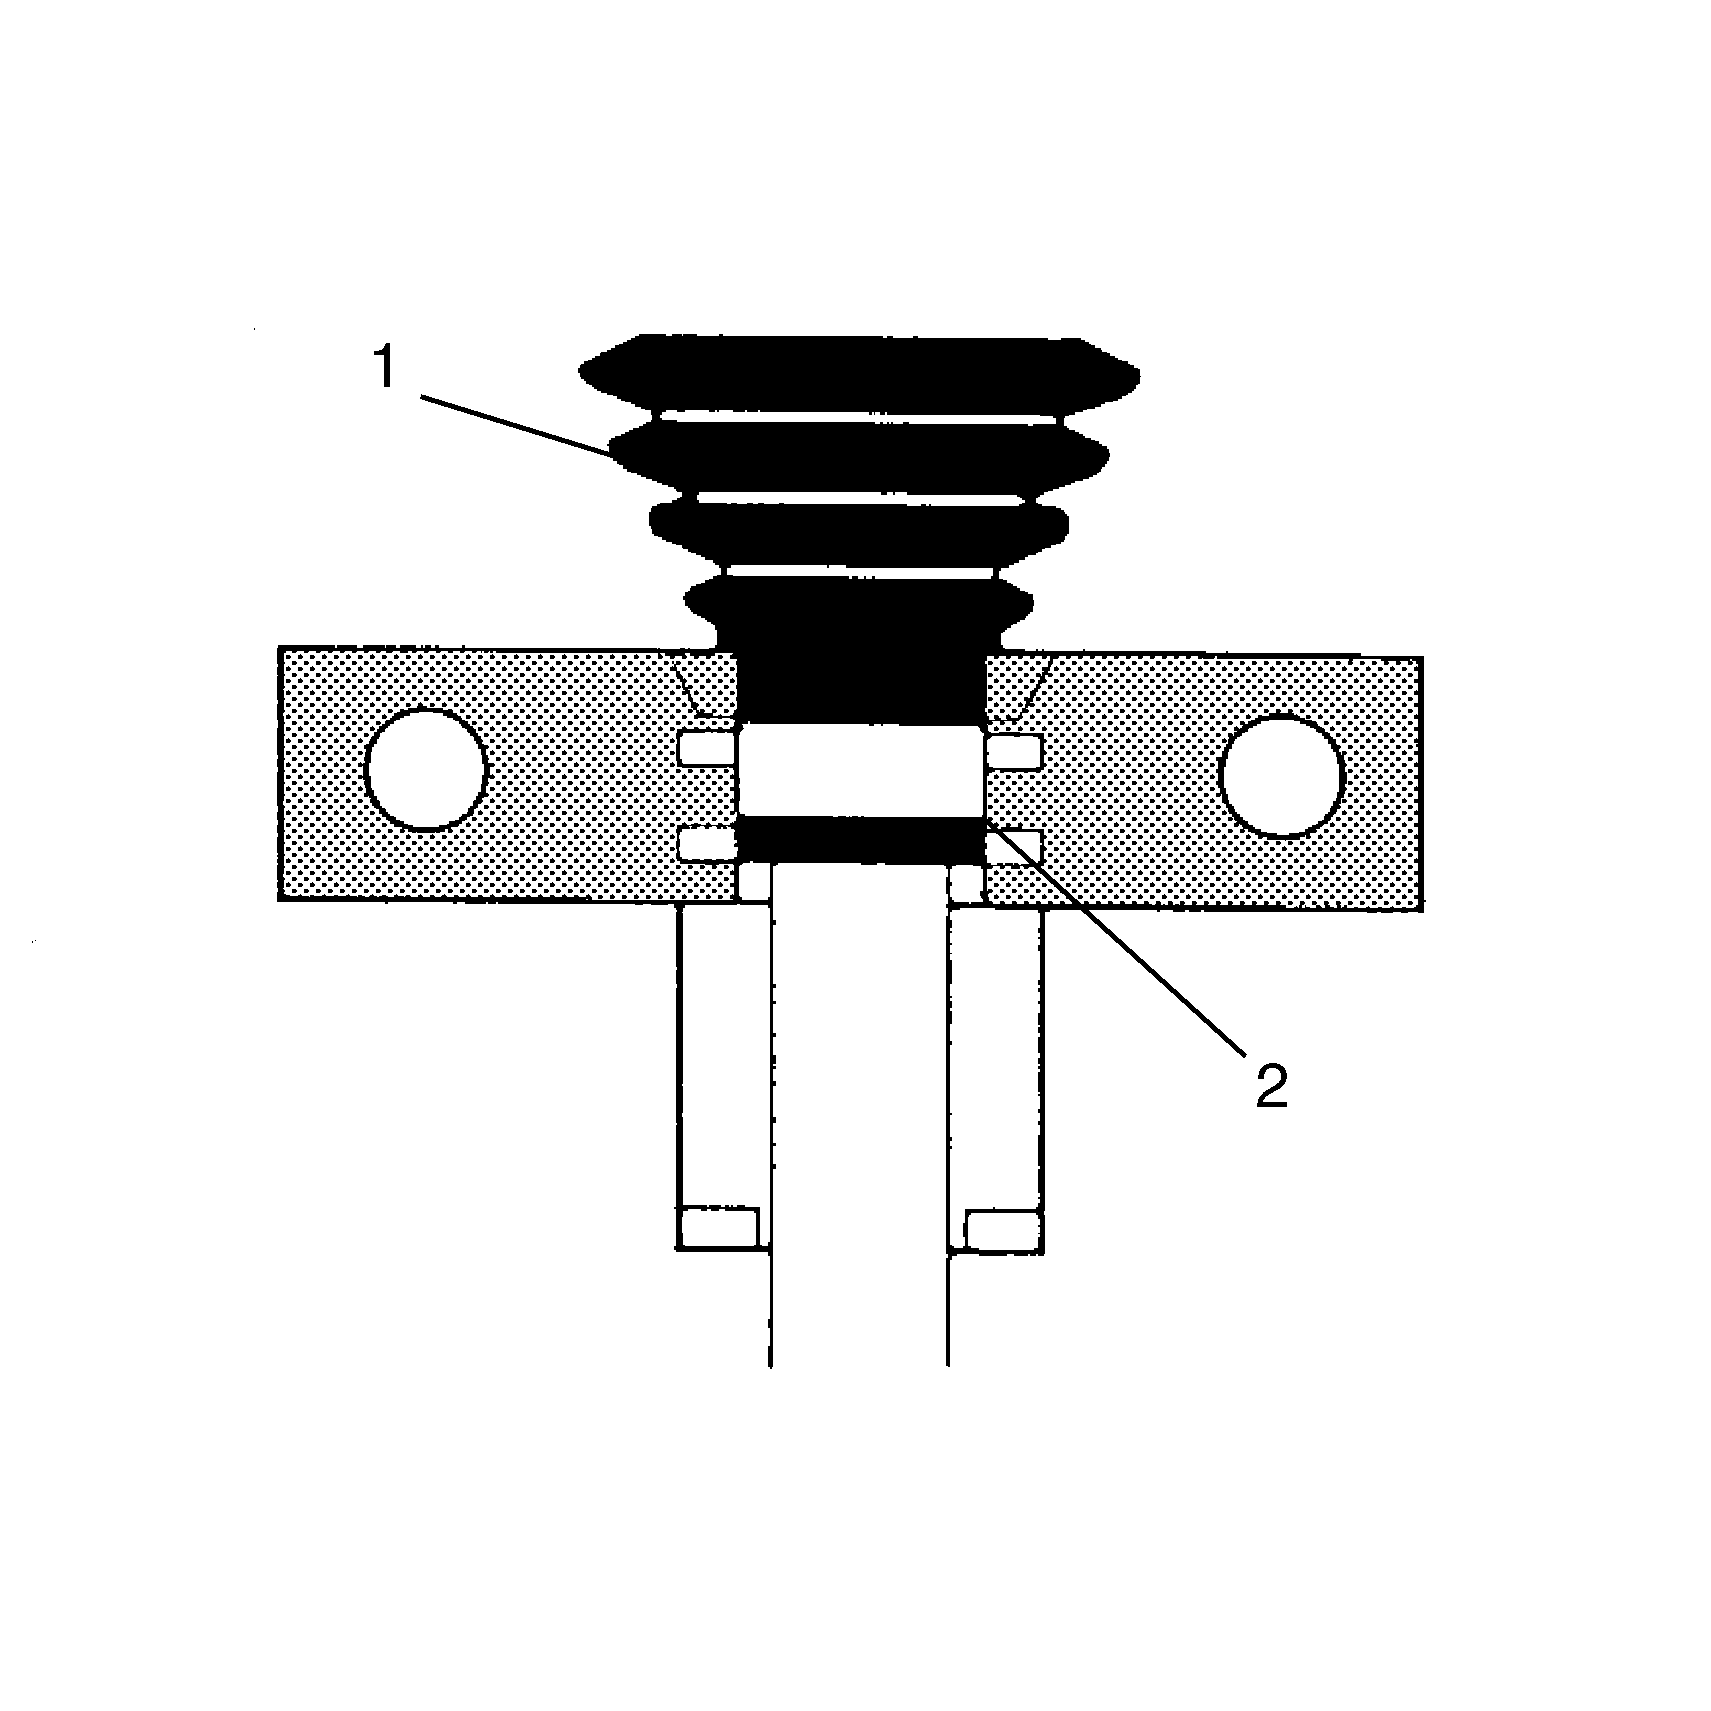
- Align the swage ring (2)
by performing the following steps:
| | Notice: Do not cut through the wheel drive shaft inboard or outboard boot during service. Cutting through the boot may damage the sealing surface of the housing and the tripot or the constant velocity joint bushing. Damage
to the sealing surface may lead to water and dirt intrusion and premature wear of the constant velocity joint.
|
| 5.3. | Tighten the bolts by hand until snug. |
Notice: Refer to Fastener Notice in the Preface section.
| | Important: Align the following items:
Tighten
Each bolt 180 degrees at a time using a ratchet wrench. Alternate
between each bolt until both sides are bottomed.
|
| 5.6. | Check the swage ring (2) for any lip deformities. If present,
place the ring (2) back into the
J 41048
ensuring the swage ring (2) covers the whole swaging
area. |
| 5.7. | Re-swage the swage ring (2). |

- Install the spacer ring (3)
on the halfshaft bar (4) and beyond the second groove.
- Slide the tripot joint spider assembly (2) toward the spacer
ring (3) as far as it will go on the halfshaft bar (4).
- Install the halfshaft bar retaining ring (1) in the groove
of the halfshaft bar (4) using
J 8059
.
- Slide the tripot joint spider assembly (2) towards the
end of the halfshaft bar (4).
- Reseat the spacer ring (1) in the groove on the halfshaft
bar (4).
- Place approximately half of the grease from the service kit in
the inboard seal. Use the remainder of the grease to repack the housing.
- Install the trilobal tripot bushing to housing. Ensure the trilobal
tripot bushing is flush with the face of the housing.
- Position the larger new clamp on the inboard seal.
- Slide the housing over the tripot joint spider assembly on the
halfshaft bar.
- Slide the large diameter of the inboard seal, with the larger
clamp in place, over the outside of the trilobal tripot bushing and locate
the lip of the seal in the groove.
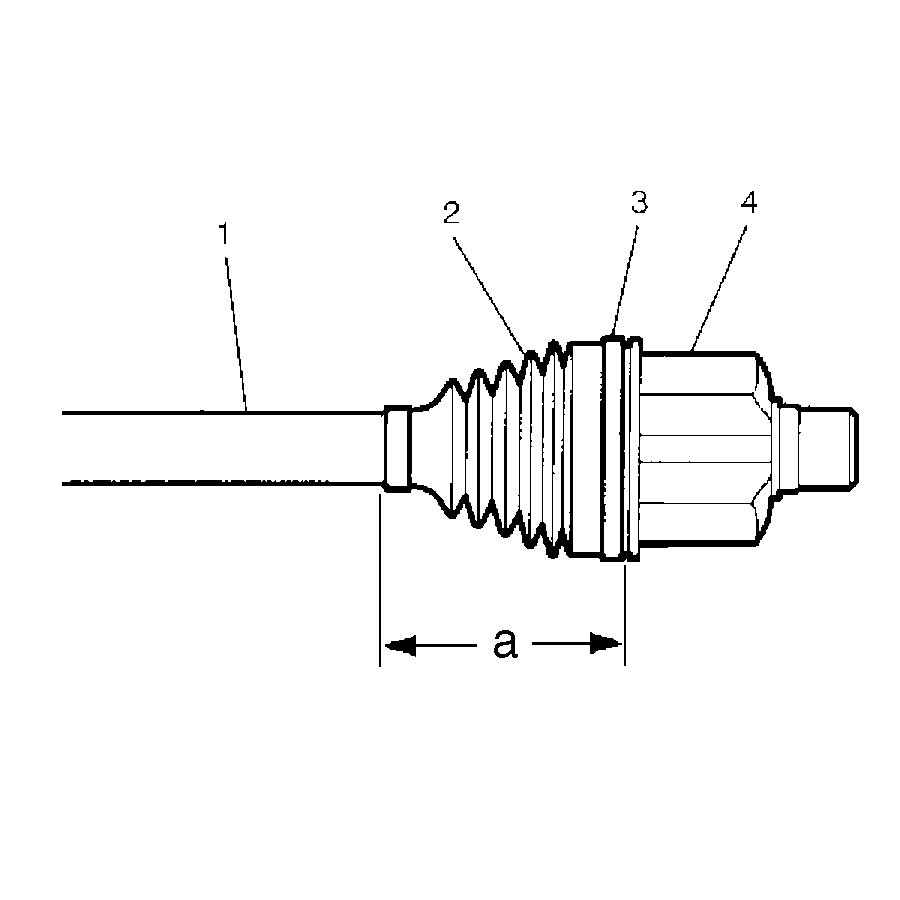
Important: The inboard seal (2) must not be dimpled, stretched out or out
of shape in any way. If the inboard seal (2) is not shaped correctly,
carefully insert a thin flat blunt tool (no sharp edges) between the large
seal opening and the trilobal tripot bushing to equalize the pressure. Shape
the inboard seal properly by hand. Remove the tool.
- Position the joint assembly at the proper vehicle dimension.
Dimension a = 125.7 mm (5 in)
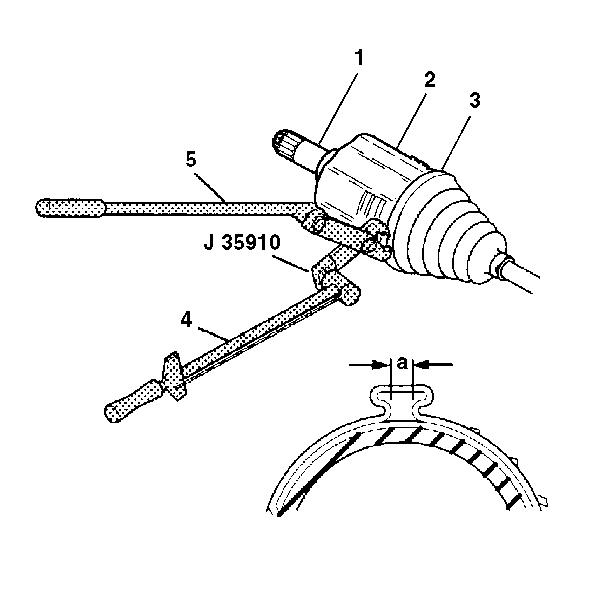
Important: Align the following items while latching:
| • | The large seal retaining clamp (3) |
- Crimp the seal retaining clamp (3) with
J 35910
.
Tighten
Crimp the clamp (3) to 174 N·m (130 lb ft).
- Check the gap dimension on the clamp ear. Continue tightening
until the gap dimension is reached.
Dimension a = 2.3 mm (3/32
in)


