Tools Required
| • | J 43032 Crankshaft
Rotation Socket |
Removal Procedure
- Remove the camshaft covers. Refer to
Camshaft Cover Replacement - Left Side
and
Camshaft Cover Replacement - Right Side
.
- Rotate the crankshaft to TDC of the # 1 cylinders compression
stroke using the J 43032
,
the flats machined into the rear of the camshafts should be parallel and
facing the cylinder head.

Caution: The camshaft holding tools must be installed on the camshafts to prevent
camshaft rotation. When performing service to the valve train and/or timing
components, valve spring pressure can cause the camshafts to rotate unexpectedly
and can cause personal injury.
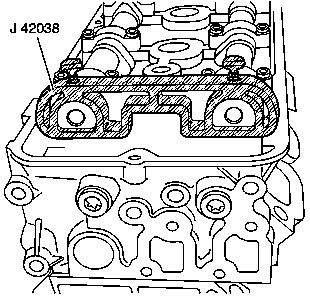
- Install the J 42038
to the rear of the camshafts on the left and right cylinder
heads.
- Remove the engine front cover. Refer to
Engine Front Cover Replacement
.

- Loosen both primary timing
chain tensioner bolts.
- Remove the lower primary timing chain tensioner bolt allowing
the tensioner to swing downward and expand. This will release tension on the
primary drive chain.
- Remove the upper tensioner bolt.
- Remove the primary drive chain tensioner (1).
Installation Procedure

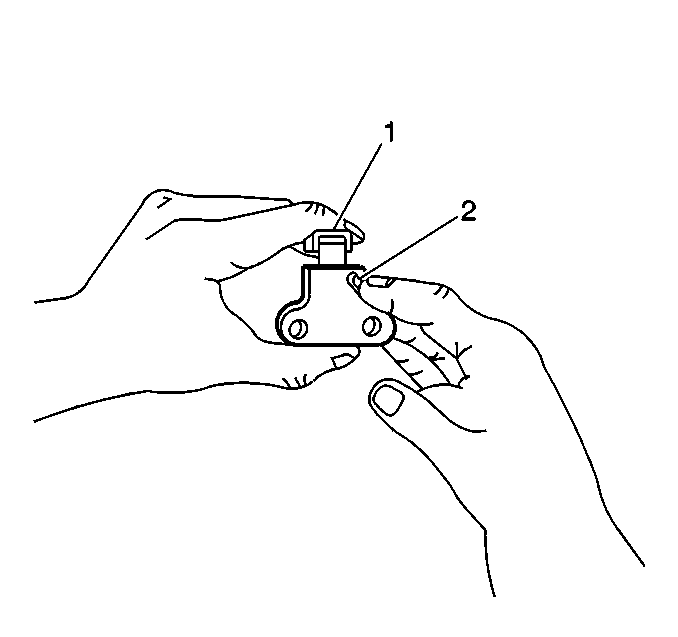
- Collapse the primary timing
chain tensioner using the following procedure:
| 1.1. | Rotate the ratchet release lever (2) counterclockwise and
hold. |
| 1.2. | Collapse the tensioner shoe (1) and hold. |
| 1.3. | Release the ratchet lever and slowly release the pressure on the
shoe. |
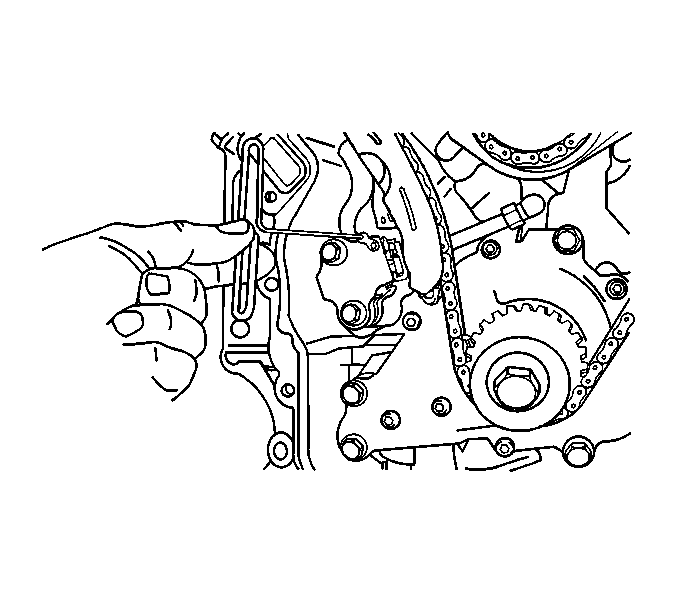
- As the ratchet lever moves to its first click, hold the tensioner
shoe inward. Insert a pin through the hole in the release lever.
- The locked ratchet mechanism should hold the shoe in a collapsed
position.

Notice: Use the correct fastener in the correct location. Replacement fasteners
must be the correct part number for that application. Fasteners requiring
replacement or fasteners requiring the use of thread locking compound or sealant
are identified in the service procedure. Do not use paints, lubricants, or
corrosion inhibitors on fasteners or fastener joint surfaces unless specified.
These coatings affect fastener torque and joint clamping force and may damage
the fastener. Use the correct tightening sequence and specifications when
installing fasteners in order to avoid damage to parts and systems.
Important: Ensure the tensioner release lever is facing outward before tightening.
- Install the primary timing chain tensioner (1) and retaining
bolts.
Tighten
Tighten the primary timing chain tensioner bolts to 25 N·m (18 lb ft).
- Ensure the crankshaft is at TDC of the # 1 cylinders compression
stroke.

- Remove the pin holding
the tensioner to tighten any slack in the timing chain.
- Verify correct timing chain and timing mark alignments. Refer
to
Setting Camshaft Timing
.
- Install the engine front cover. Refer to
Engine Front Cover Replacement
.

- Remove the J 42038
from the camshafts on the left and right
cylinder heads.
- Install the camshaft covers. Refer to
Camshaft Cover Replacement - Left Side
and
Camshaft Cover Replacement - Right Side
.


