For 1990-2009 cars only
Removal Procedure
Notice: Use of harsh chemicals when cleaning can damage exterior lamps. Suggested cleaners are a mild soap and water, or Varnish Makers and Painters (VM&P) Naptha. VM&P Naptha is a specific type of naptha and should not be substituted by any other naptha.
- Open the rear compartment deck lid.
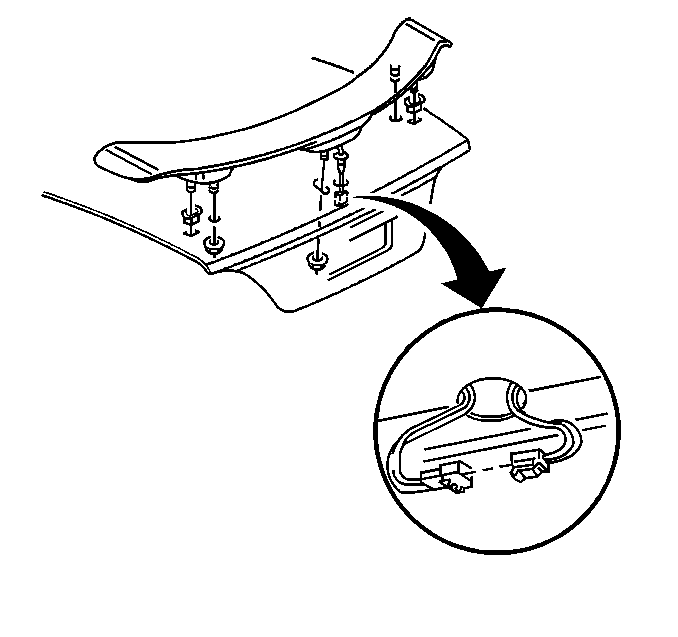
- Disconnect the high mounted stoplamp electrical connector from the rear compartment lid harness.
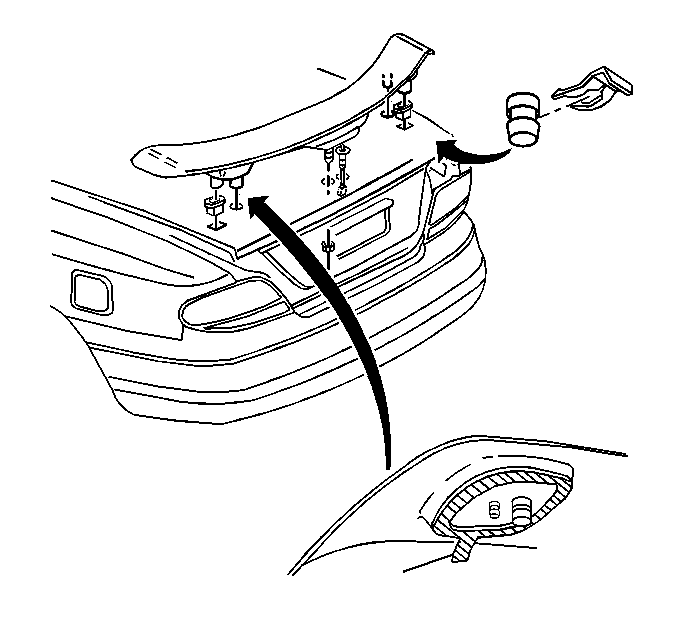
- Remove the clip retainers from the rear end spoiler studs.
- Remove the spoiler nuts.
- Heat the spoiler mounting points, using a heat gun 152 mm (6 in) from the surface.
- Lift the spoiler from the rear compartment lid using a small flat-bladed tool, being careful not to damage paint.
- Remove the high-mounted stoplamp harness and grommet from the rear compartment lid using a small flat-bladed tool.
- Remove the spoiler from the rear compartment lid.
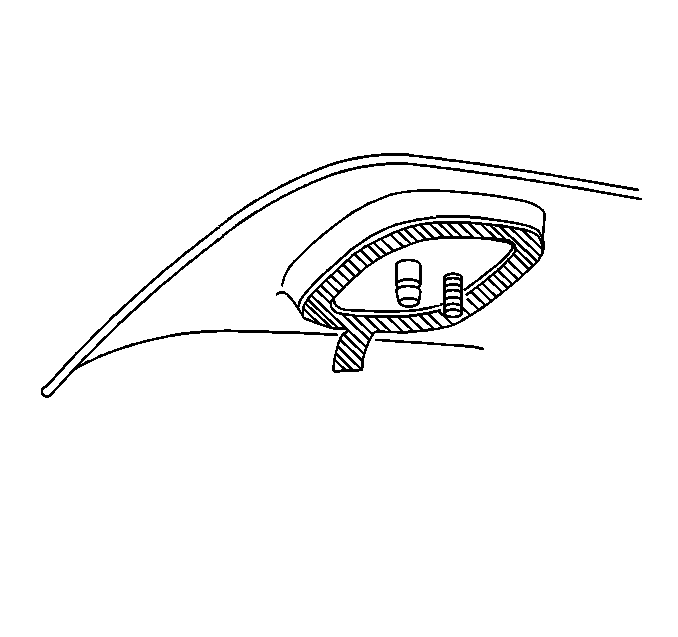
- Remove the snap inserts in the slots in the rear compartment lid.
- Clean the spoiler adhesive from the rear compartment lid and/or the rear end spoiler using 3M™ scotch brite molding adhesive remover disk 3M™ P/N 07501 (or equivalent).
- Clean the body panel using Varnish Makers and Painters (VMP) naphtha or equivalent.


Apply heat using a circular motion for about 3 seconds.
Installation Procedure
- Install the snap inserts into the slots in the rear compartment lid.
- Install the high-mounted stoplamp harness and grommet to the rear compartment lid.
- Position forward studs of the rear end spoiler into the clearance holes of the rear compartment lid.
- Warm compartment lid with a heat lamp or heat gun to a minimum of 21°C (70°F).
- Peel backing from the mounting surfaces of the rear end spoiler.
- Press spoiler to the rear compartment lid.
- Slide the retainers onto the studs.
- Install the spoiler nuts.
- Connect the high mounted stoplamp electrical connector to rear compartment lid harness.
- Close the rear compartment.


Important: Do not touch the adhesive backing.

Tighten
Tighten the spoiler nuts to 6 N·m (53 lb in).
