Front Seat Adjuster Replacement Two-Way Manual
Removal Procedure
- Remove the front seat. Refer to Front Seat Replacement - Bucket .
- Place the seat upside down on a clean, protected surface.
- Remove the trim finish panels. Refer to Seat Cushion Outer Trim Panel Replacement .
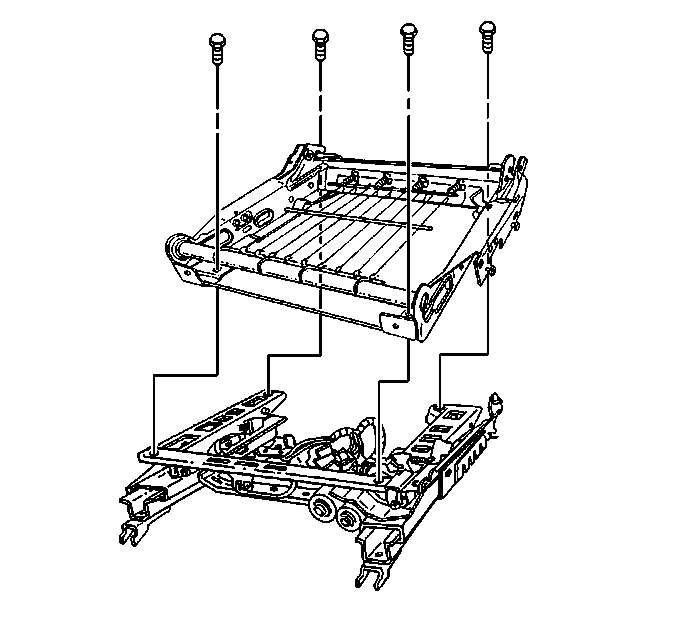
- Remove the seat adjuster to seat cushion frame bolts.
- Remove the seat adjuster from the seat cushion frame.
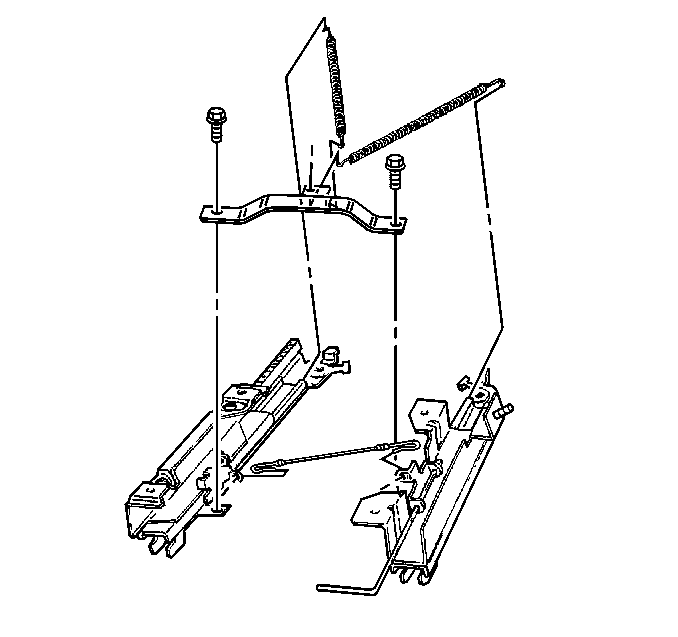
- Remove the cross-wire and assist springs from the seat adjuster.
- Remove the cross-brace bolts.
- Separate the left and right seat adjusters.

Installation Procedure
Important: Before assembling the seat adjusters, make sure the tab bending downward at the center of the cross-brace faces towards the rear of the adjusters.
- Attach the cross-brace to the seat adjusters.
- Install the cross-brace bolts.
- Install the cross-wire and assist springs to the seat adjuster.
- Install the seat adjuster to the floor pan.
- Install the seat adjuster to floor pan bolts.
- Install the seat assembly to the seat adjuster.
- Install the seat adjuster to cushion frame bolts.
- Install the trim finish panels. Refer to Seat Cushion Outer Trim Panel Replacement .
- Install the front seat. Refer to Front Seat Replacement - Bucket .
- Connect any electrical connectors, if removed.

Tighten
Tighten the cross-brace bolts to 6 N·m (18 lb ft).
Important: To ensure proper two-way seat adjuster alignment, install the adjuster assembly to the floor pan before attaching the adjuster to the seat cushion frame. The floor pan will act as an alignment fixture.
Tighten
Tighten the seat adjuster bolts to 42 N·m (31 lb ft).
Tighten
Tighten the seat adjuster to cushion frame bolts to 24 N·m
(18 lb ft).
Front Seat Adjuster Replacement Six-Way Power
Removal Procedure
- Remove the front seat. Refer to Front Seat Replacement - Bucket .
- Place the front seat upside down on a clean, protected surface.
- Note the location of the power seat adjuster electrical wiring harness.
- Disconnect and remove the electrical wiring harness from the adjuster assembly.
- Remove the trim finish panels. Refer to Seat Cushion Outer Trim Panel Replacement .
- Remove the seat adjuster to cushion frame bolts.
- Remove the seat adjuster from the seat cushion frame.
- Remove the drive cables. Refer to Seat Horizontal and Vertical Drive Cable Replacement .
- Remove the cross-brace bolts.
- Remove the cross-brace and separate the adjusters.

Installation Procedure
- Attach the cross-brace to the power seat adjusters.
- Install the cross-brace bolts.
- Install the drive cables. Refer to Seat Horizontal and Vertical Drive Cable Replacement .
- Install the seat adjuster to the seat cushion frame.
- Install the seat adjuster to the cushion frame bolts.
- Install the trim finish panels. Refer to Seat Cushion Outer Trim Panel Replacement .
- Install and connect the electrical wiring harness to the adjuster assembly.
- Install the front seat. Refer to Front Seat Replacement - Bucket .

Important: Make sure both power seat adjusters are in phase with each other before attaching the cross-brace.
Tighten
Tighten the cross-brace bolts to 6 N·m (53 lb in).
Tighten
Tighten the seat adjuster to cushion frame bolts to 24 N·m
(18 lb ft).
