For 1990-2009 cars only
Removal Procedure
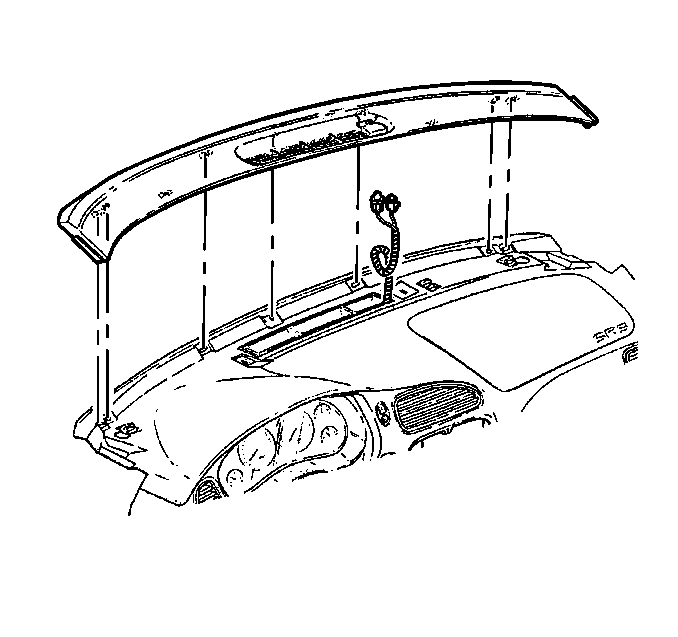
- Remove the windshield side garnish moldings. Refer to Windshield Pillar Garnish Molding Replacement in Interior Trim.
- Raise the rear of the instrument panel (IP) upper trim panel approximately 51 mm (2 in), then pull rearward to release the IP upper trim panel retainers.
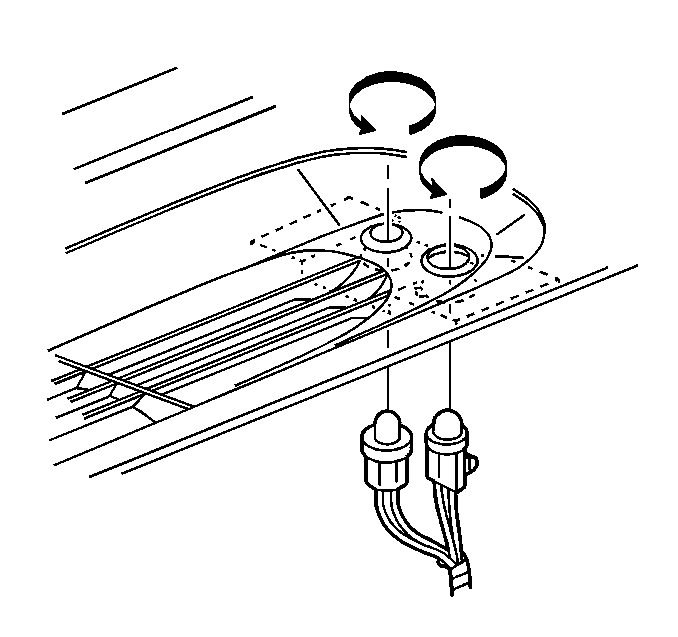
- Rotate the sun load sensor ¼ turn counterclockwise to release from the IP upper trim panel.
- Rotate the ambient light sensor ¼ turn counterclockwise to release from the IP upper trim panel.
- Remove the IP upper trim panel.

Important: Use care when removing the instrument panel (IP) upper trim panel, the retaining clips could possibly come loose and fall into the IP.

Installation Procedure
- Position the IP upper trim panel to the IP.
- Install the ambient light sensor to the IP upper trim panel, then rotate the sensor ¼ turn clockwise to secure.
- Install the sun load sensor to the IP upper trim panel, then rotate the sensor ¼ turn clockwise to secure.
- Align the retainers along the forward edge of the IP upper trim panel to the slots along the IP.
- Insert the forward retainers into the slots and lower the rear edge of the upper trim pad into place.
- Carefully press the IP upper trim pad forward and down to secure the retainers in place.
- Install the windshield side garnish moldings. Refer to Windshield Pillar Garnish Molding Replacement in Interior Trim.


